Posts Tagged ‘type’

Log rsyslog script incoming tagged string message to separate external file to prevent /var/log/message from string flood

Wednesday, December 22nd, 2021

rsyslog_logo-log-external-tag-scripped-messages-to-external-file-linux-howto

If you're using some external bash script to log messages via rsyslogd to some of the multiple rsyslog understood data tubes (called in rsyslog language facility levels) and you want Rsyslog to move message string to external log file, then you had the same task as me few days ago.

For example you have a bash shell script that is writting a message to rsyslog daemon to some of the predefined facility levels be it:
 

kern,user,cron, auth etc. or some local

and your logged script data ends under the wrong file location /var/log/messages , /var/log/secure , var/log/cron etc. However  you need to log everything coming from that service to a separate file based on the localX (fac. level) the usual way to do it is via some config like, as you would usually do it with rsyslog variables as:
 

local1.info                                            /var/log/custom-log.log

# Don't log private authentication messages!
*.info;mail.none;authpriv.none;cron.none;local0.none;local1.none        /var/log/messages


Note the local1.none is instructing the rsyslog not to log anything from local1 facility towards /var/log/message. 
But what if this due to some weirdness in configuration of rsyslog on the server or even due to some weird misconfiguration in

/etc/systemd/journald.conf such as:

[Journal]
Storage=persistent
RateLimitInterval=0s
RateLimitBurst=0
SystemMaxUse=128M
SystemMaxFileSize=32M
MaxRetentionSec=1month
MaxFileSec=1week
ForwardToSyslog=yes
SplitFiles=none

Due to that config and especially the FowardToSyslog=yes, the messages sent via the logger tool to local1 still end up inside /var/log/messages, not nice huh ..

The result out of that is anything being sent with a predefined TAGGED string via the whatever.sh script which uses the logger command  (if you never use it check man logger) to enter message into rsyslog with cmd like:
 

# logger -p local1.info -t TAG_STRING

# logger -p local2.warn test
# tail -2 /var/log/messages
Dec 22 18:58:23 pcfreak rsyslogd: — MARK —
Dec 22 19:07:12 pcfreak hipo: test


was nevertheless logged to /var/log/message.
Of course /var/log/message becomes so overfilled with "junk" shell script data not related to real basic Operating system adminsitration, so this prevented any critical or important messages that usually should come under /var/log/message / /var/log/syslog to be lost among the big quantities of other tagged tata reaching the log.

After many attempts to resolve the issue by modifying /etc/rsyslog.conf as well as the messed /etc/systemd/journald.conf (which by the way was generated with this strange values with an OS install time automation ansible stuff). It took me a while until I found the solution on how to tell rsyslog to log the tagged message strings into an external separate file. From my 20 minutes of research online I have seen multitudes of people in different Linux OS versions to experience the same or similar issues due to whatever, thus this triggered me to write this small article on the solution to rsyslog.

The solution turned to be pretty easy but requires some further digging into rsyslog, Redhat's basic configuration on rsyslog documentation is a very nice reading for starters, in my case I've used one of the Propery-based compare-operations variable contains used to select my tagged message string.
 

1. Add msg contains compare-operations to output log file and discard the messages

[root@centos bin]# vi /etc/rsyslog.conf

# config to log everything logged to rsyslog to a separate file
:msg, contains, "tag_string:/"         /var/log/custom-script-log.log
:msg, contains, "tag_string:/"    ~

Substitute quoted tag_string:/ to whatever your tag is and mind that it is better this config is better to be placed somewhere near the beginning of /etc/rsyslog.conf and touch the file /var/log/custom-script-log.log and give it some decent permissions such as 755, i.e.
 

1.1 Discarding a message


The tilda sign –  

as placed to the end of the msg, contains is the actual one to tell the string to be discarded so it did not end in /var/log/messages.

Alternative rsyslog config to do discard the unwanted message once you have it logged is with the
rawmsg variable, like so:


# config to log everything logged to rsyslog to a separate file
:msg, contains, "tag_string:/"         /var/log/custom-script-log.log
:rawmsg, isequal, "tag_string:/" stop

Other way to stop logging immediately after log is written to custom file across some older versions of rsyslog is via the &stop

:msg, contains, "tag_string:/"         /var/log/custom-script-log.log
& stop

I don't know about other versions but Unfortunately the &stop does not work on RHEL 7.9 with installed rpm package rsyslog-8.24.0-57.el7_9.1.x86_64.

1.2 More with property based filters basic exclusion of string 

Property based filters can do much more, you can for example, do regular expression based matches of strings coming to rsyslog and forward to somewhere.

To select syslog messages which do not contain any mention of the words fatal and error with any or no text between them (for example, fatal lib error), type:

:msg, !regex, "fatal .* error"


2. Create file where tagged data should be logged and set proper permissions
 

[root@centos bin]# touch /var/log/custom-script-log.log
[root@centos bin]# chmod 755 /var/log/custom-script-log.log


3. Test rsyslogd configuration for errors and reload rsyslog

[root@centos ]# rsyslogd -N1
rsyslogd: version 8.24.0-57.el7_9.1, config validation run (level 1), master config /etc/rsyslog.conf
rsyslogd: End of config validation run. Bye.

[root@centos ]# systemctl restart rsyslog
[root@centos ]#  systemctl status rsyslog 
● rsyslog.service – System Logging Service
   Loaded: loaded (/usr/lib/systemd/system/rsyslog.service; enabled; vendor preset: enabled)
   Active: active (running) since Wed 2021-12-22 13:40:11 CET; 3h 5min ago
     Docs: man:rsyslogd(8)
           http://www.rsyslog.com/doc/
 Main PID: 108600 (rsyslogd)
   CGroup: /system.slice/rsyslog.service
           └─108600 /usr/sbin/rsyslogd -n


4. Property-based compare-operations supported by rsyslog table
 

Compare-operation Description
contains Checks whether the provided string matches any part of the text provided by the property. To perform case-insensitive comparisons, use  contains_i .
isequal Compares the provided string against all of the text provided by the property. These two values must be exactly equal to match.
startswith Checks whether the provided string is found exactly at the beginning of the text provided by the property. To perform case-insensitive comparisons, use  startswith_i .
regex Compares the provided POSIX BRE (Basic Regular Expression) against the text provided by the property.
ereregex Compares the provided POSIX ERE (Extended Regular Expression) regular expression against the text provided by the property.
isempty Checks if the property is empty. The value is discarded. This is especially useful when working with normalized data, where some fields may be populated based on normalization result.


5. Rsyslog understanding Facility levels

Here is a list of facility levels that can be used.

Note: The mapping between Facility Number and Keyword is not uniform over different operating systems and different syslog implementations, so among separate Linuxes there might be diference in the naming and numbering.

Facility Number Keyword Facility Description
0 kern kernel messages
1 user user-level messages
2 mail mail system
3 daemon system daemons
4 auth security/authorization messages
5 syslog messages generated internally by syslogd
6 lpr line printer subsystem
7 news network news subsystem
8 uucp UUCP subsystem
9   clock daemon
10 authpriv security/authorization messages
11 ftp FTP daemon
12 NTP subsystem
13 log audit
14 log alert
15 cron clock daemon
16 local0 local use 0 (local0)
17 local1 local use 1 (local1)
18 local2 local use 2 (local2)
19 local3 local use 3 (local3)
20 local4 local use 4 (local4)
21 local5 local use 5 (local5)
22 local6 local use 6 (local6)
23 local7 local use 7 (local7)


6. rsyslog Severity levels (sublevels) accepted by facility level

As defined in RFC 5424, there are eight severity levels as of year 2021:

Code Severity Keyword Description General Description
0 Emergency emerg (panic) System is unusable. A "panic" condition usually affecting multiple apps/servers/sites. At this level it would usually notify all tech staff on call.
1 Alert alert Action must be taken immediately. Should be corrected immediately, therefore notify staff who can fix the problem. An example would be the loss of a primary ISP connection.
2 Critical crit Critical conditions. Should be corrected immediately, but indicates failure in a primary system, an example is a loss of a backup ISP connection.
3 Error err (error) Error conditions. Non-urgent failures, these should be relayed to developers or admins; each item must be resolved within a given time.
4 Warning warning (warn) Warning conditions. Warning messages, not an error, but indication that an error will occur if action is not taken, e.g. file system 85% full – each item must be resolved within a given time.
5 Notice notice Normal but significant condition. Events that are unusual but not error conditions – might be summarized in an email to developers or admins to spot potential problems – no immediate action required.
6 Informational info Informational messages. Normal operational messages – may be harvested for reporting, measuring throughput, etc. – no action required.
7 Debug debug Debug-level messages. Info useful to developers for debugging the application, not useful during operations.


7. Sample well tuned configuration using severity and facility levels and immark, imuxsock, impstats
 

Below is sample config using severity and facility levels
 

# Don't log private authentication messages!
*.info;mail.none;authpriv.none;cron.none;local0.none;local1.none        /var/log/messages


Note the local0.none; local1.none tells rsyslog to not log from that facility level to /var/log/messages.

If you need a complete set of rsyslog configuration fine tuned to have a proper logging with increased queues and included configuration for loggint to remote log aggegator service as well as other measures to prevent the system disk from being filled in case if something goes wild with a logging service leading to a repeatedly messages you might always contact me and I can help 🙂
 Other from that sysadmins might benefit from a sample set of configuration prepared with the Automated rsyslog config builder  or use some fine tuned config  for rsyslog-8.24.0-57.el7_9.1.x86_64 on Redhat 7.9 (Maipo)   rsyslog_config_redhat-2021.tar.gz.

To sum it up rsyslog though looks simple and not an important thing to pre
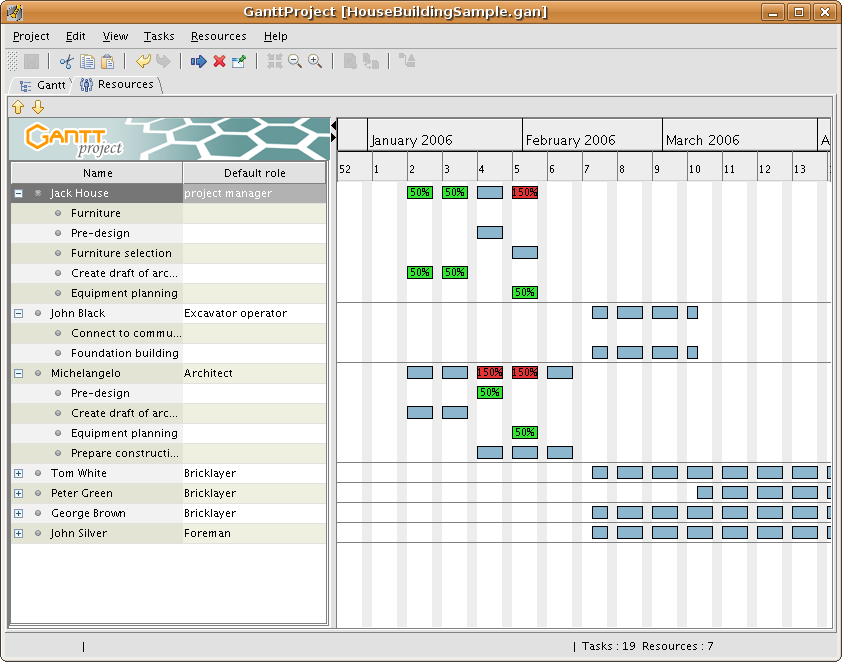
How to test RAM Memory for errors in Linux / UNIX OS servers. Find broken memory RAM banks

Friday, December 3rd, 2021

test-ram-memory-for-errors-linux-unix-find-broken-memory-logo


1. Testing the memory with motherboard integrated tools
 

Memory testing has been integral part of Computers for the last 50 years. In the dawn of computers those older perhaps remember memory testing was part of the computer initialization boot. And this memory testing was delaying the boot with some seconds and the user could see the memory numbers being counted up to the amount of memory. With the increased memory modern computers started to have and the annoyance to wait for a memory check program to check the computer hardware memory on modern computers this check has been mitigated or completely removed on some hardware.
Thus under some circumstances sysadmins or advanced computer users might need to check the memory, especially if there is some suspicion for memory damages or if for example a home PC starts crashing with Blue screens of Death on Windows without reason or simply the PC or some old arcane Linux / UNIX servers gets restarted every now and then for now apparent reason. When such circumstances occur it is an idea to start debugging the hardware issue with a simple memory check.

There are multiple ways to test installed memory banks on a server laptop or local home PC both integrated and using external programs.
On servers that is usually easily done from ILO or IPMI or IDRAC access (usually web) interface of the vendor, on laptops and home usage from BIOS or UEFI (Unified Extensible Firmware Interface) acces interface on system boot that is possible as well.

memtest-hp
HP BIOS Setup

An old but gold TIP, more younger people might not know is the


Prolonged SHIFT key press which once held with the user instructs the machine to initiate a memory test before the computer starts reading what is written in the boot loader.

So before anything else from below article it might be a good idea to just try HOLD SHIFT for 15-20 seconds after a complete Shut and ON from the POWER button.

If this test does not triggered or it is triggered and you end up with some corrupted memory but you're not sure which exact Memory bank is really crashing and want to know more on what memory Bank and segments are breaking up you might want to do a more thorough testing. In below article I'll try to explain shortly how this can be done.


2. Test the memory using a boot USB Flash Drive / DVD / CD 
 

Say hello to memtest86+. It is a Linux GRUB boot loader bootable utility that tests physical memory by writing various patterns to it and reading them back. Since memtest86+ runs directly off the hardware it does not require any operating system support for execution. Perhaps it is important to mention that memtest86 (is PassMark memtest86)and memtest86+ (An Advanced Memory diagnostic tool) are different tools, the first is freeware and second one is FOSS software.

To use it all you'll need is some version of Linux. If you don't already have some burned in somewhere at your closet, you might want to burn one.
For Linux / Mac users this is as downloading a Linux distribution ISO file and burning it with

# dd if=/path/to/iso of=/dev/sdbX bs=80M status=progress


Windows users can burn a Live USB with whatever Linux distro or download and burn the latest versionof memtest86+ from https://www.memtest.org/  on Windows Desktop with some proggie like lets say UnetBootIn.
 

2.1. Run memtest86+ on Ubuntu

Many Linux distributions such as Ubuntu 20.0 comes together with memtest86+, which can be easily invoked from GRUB / GRUB2 Kernel boot loader.
Ubuntu has a separate menu pointer for a Memtest.

ubuntu-grub-2-04-boot-loader-memtest86-menu-screenshot

Other distributions RPM based distributions such as CentOS, Fedora Linux, Redhat things differ.

2.2. memtest86+ on Fedora


Fedora used to have the memtest86+ menu at the GRUB boot selection prompt, but for some reason removed it and in newest Fedora releases as of time such as Fedora 35 memtest86+ is preinstalled and available but not visible, to start on  already and to start a memtest memory test tool:

  •   Boot a Fedora installation or Rescue CD / USB. At the prompt, type "memtest86".

boot: memtest86

2.3 memtest86+ on RHEL Linux

The memtest86+tool is available as an RPM package from Red Hat Network (RHN) as well as a boot option from the Red Hat Enterprise Linux rescue disk.
And nowadays Red Hat Enterprise Linux ships by default with the tool.

Prior redhat (now legacy) releases such as on RHEL 5.0 it has to be installed and configure it with below 3 commands.

[root@rhel ~]# yum install memtest86+
[root@rhel ~]# memtest-setup
[root@rhel ~]# grub2-mkconfig -o /boot/grub2/grub.cfg


    Again as with CentOS to boot memtest86+ from the rescue disk, you will need to boot your system from CD 1 of the Red Hat Enterprise Linux installation media, and type the following at the boot prompt (before the Linux kernel is started):

boot: memtest86

memtestx86-8gigabytes-of-memory-boot-screenshot
memtest86+ testing 5 memory slots

As you see all on above screenshot the Memory banks are listed as Slots. There are a number of Tests to be completed until
it can be said for sure memory does not have any faulty cells. 
The

Pass: 0
Errors: 0 

Indicates no errors, so in the end if memtest86 does not find anything this values should stay at zero.
memtest86+ is also usable to detecting issues with temperature of CPU. Just recently I've tested a PC thinking that some memory has defects but it turned out the issue on the Computer was at the CPU's temperature which was topping up at 80 – 82 Celsius.

If you're unfortunate and happen to get some corrupted memory segments you will get some red fields with the memory addresses found to have corrupted on Read / Write test operations:

memtest86-returning-memory-address-errors-screenshot


2.4. Install and use memtest and memtest86+ on Debian / Mint Linux

You can install either memtest86+ or just for the fun put both of them and play around with both of them as they have a .deb package provided out of debian non-free /etc/apt/sources.list repositories.


root@jeremiah:/home/hipo# apt-cache show memtest86 memtest86+
Package: memtest86
Version: 4.3.7-3
Installed-Size: 302
Maintainer: Yann Dirson <dirson@debian.org>
Architecture: amd64
Depends: debconf (>= 0.5) | debconf-2.0
Recommends: memtest86+
Suggests: hwtools, memtester, kernel-patch-badram, grub2 (>= 1.96+20090523-1) | grub (>= 0.95+cvs20040624), mtools
Description-en: thorough real-mode memory tester
 Memtest86 scans your RAM for errors.
 .
 This tester runs independently of any OS – it is run at computer
 boot-up, so that it can test *all* of your memory.  You may want to
 look at `memtester', which allows testing your memory within Linux,
 but this one won't be able to test your whole RAM.
 .
 It can output a list of bad RAM regions usable by the BadRAM kernel
 patch, so that you can still use you old RAM with one or two bad bits.
 .
 This is the last DFSG-compliant version of this software, upstream
 has opted for a proprietary development model starting with 5.0.  You
 may want to consider using memtest86+, which has been forked from an
 earlier version of memtest86, and provides a different set of
 features.  It is available in the memtest86+ package.
 .
 A convenience script is also provided to make a grub-legacy-based
 floppy or image.

Description-md5: 0ad381a54d59a7d7f012972f613d7759
Homepage: http://www.memtest86.com/
Section: misc
Priority: optional
Filename: pool/main/m/memtest86/memtest86_4.3.7-3_amd64.deb
Size: 45470
MD5sum: 8dd2a4c52910498d711fbf6b5753bca9
SHA256: 09178eca21f8fd562806ccaa759d0261a2d3bb23190aaebc8cd99071d431aeb6

Package: memtest86+
Version: 5.01-3
Installed-Size: 2391
Maintainer: Yann Dirson <dirson@debian.org>
Architecture: amd64
Depends: debconf (>= 0.5) | debconf-2.0
Suggests: hwtools, memtester, kernel-patch-badram, memtest86, grub-pc | grub-legacy, mtools
Description-en: thorough real-mode memory tester
 Memtest86+ scans your RAM for errors.
 .
 This tester runs independently of any OS – it is run at computer
 boot-up, so that it can test *all* of your memory.  You may want to
 look at `memtester', which allows to test your memory within Linux,
 but this one won't be able to test your whole RAM.
 .
 It can output a list of bad RAM regions usable by the BadRAM kernel
 patch, so that you can still use your old RAM with one or two bad bits.
 .
 Memtest86+ is based on memtest86 3.0, and adds support for recent
 hardware, as well as a number of general-purpose improvements,
 including many patches to memtest86 available from various sources.
 .
 Both memtest86 and memtest86+ are being worked on in parallel.
Description-md5: aa685f84801773ef97fdaba8eb26436a
Homepage: http://www.memtest.org/

Tag: admin::benchmarking, admin::boot, hardware::storage:floppy,
 interface::text-mode, role::program, scope::utility, use::checking
Section: misc
Priority: optional
Filename: pool/main/m/memtest86+/memtest86+_5.01-3_amd64.deb
Size: 75142
MD5sum: 4f06523532ddfca0222ba6c55a80c433
SHA256: ad42816e0b17e882713cc6f699b988e73e580e38876cebe975891f5904828005


root@jeremiah:/home/hipo# apt-get install –yes memtest86+

root@jeremiah:/home/hipo# apt-get install –yes memtest86

Reading package lists… Done
Building dependency tree       
Reading state information… Done
Suggested packages:
  hwtools kernel-patch-badram grub2 | grub
The following NEW packages will be installed:
  memtest86
0 upgraded, 1 newly installed, 0 to remove and 21 not upgraded.
Need to get 45.5 kB of archives.
After this operation, 309 kB of additional disk space will be used.
Get:1 http://ftp.de.debian.org/debian buster/main amd64 memtest86 amd64 4.3.7-3 [45.5 kB]
Fetched 45.5 kB in 0s (181 kB/s)     
Preconfiguring packages …
Selecting previously unselected package memtest86.
(Reading database … 519985 files and directories currently installed.)
Preparing to unpack …/memtest86_4.3.7-3_amd64.deb …
Unpacking memtest86 (4.3.7-3) …
Setting up memtest86 (4.3.7-3) …
Generating grub configuration file …
Found background image: saint-John-of-Rila-grub.jpg
Found linux image: /boot/vmlinuz-4.19.0-18-amd64
Found initrd image: /boot/initrd.img-4.19.0-18-amd64
Found linux image: /boot/vmlinuz-4.19.0-17-amd64
Found initrd image: /boot/initrd.img-4.19.0-17-amd64
Found linux image: /boot/vmlinuz-4.19.0-8-amd64
Found initrd image: /boot/initrd.img-4.19.0-8-amd64
Found linux image: /boot/vmlinuz-4.19.0-6-amd64
Found initrd image: /boot/initrd.img-4.19.0-6-amd64
Found linux image: /boot/vmlinuz-4.19.0-5-amd64
Found initrd image: /boot/initrd.img-4.19.0-5-amd64
Found linux image: /boot/vmlinuz-4.9.0-8-amd64
Found initrd image: /boot/initrd.img-4.9.0-8-amd64
Found memtest86 image: /boot/memtest86.bin
Found memtest86+ image: /boot/memtest86+.bin
Found memtest86+ multiboot image: /boot/memtest86+_multiboot.bin
File descriptor 3 (pipe:[66049]) leaked on lvs invocation. Parent PID 22581: /bin/sh
done
Processing triggers for man-db (2.8.5-2) …


After this both memory testers memtest86+ and memtest86 will appear next to the option of booting a different version kernels and the Advanced recovery kernels, that you usually get in the GRUB boot prompt.

2.5. Use memtest embedded tool on any Linux by adding a kernel variable

Edit-Grub-Parameters-add-memtest-4-to-kernel-boot

2.4.1. Reboot your computer

# reboot

2.4.2. At the GRUB boot screen (with UEFI, press Esc).

2.4.3 For 4 passes add temporarily the memtest=4 kernel parameter.
 

memtest=        [KNL,X86,ARM,PPC,RISCV] Enable memtest
                Format: <integer>
                default : 0 <disable>
                Specifies the number of memtest passes to be
                performed. Each pass selects another test
                pattern from a given set of patterns. Memtest
                fills the memory with this pattern, validates
                memory contents and reserves bad memory
                regions that are detected.


3. Install and use memtester Linux tool
 

At some condition, memory is the one of the suspcious part, or you just want have a quick test. memtester  is an effective userspace tester for stress-testing the memory subsystem.  It is very effective at finding intermittent and non-deterministic faults.

The advantage of memtester "live system check tool is", you can check your system for errors while it's still running. No need for a restart, just run that application, the downside is that some segments of memory cannot be thoroughfully tested as you already have much preloaded data in it to have the Operating Sytstem running, thus always when possible try to stick to rule to test the memory using memtest86+  from OS Boot Loader, after a clean Machine restart in order to clean up whole memory heap.

Anyhow for a general memory test on a Critical Legacy Server  (if you lets say don't have access to Remote Console Board, or don't trust the ILO / IPMI Hardware reported integrity statistics), running memtester from already booted is still a good idea.


3.1. Install memtester on any Linux distribution from source

wget http://pyropus.ca/software/memtester/old-versions/memtester-4.2.2.tar.gz
# tar zxvf memtester-4.2.2.tar.gz
# cd memtester-4.2.2
# make && make install

3.2 Install on RPM based distros


On Fedora memtester is available from repositories however on many other RPM based distros it is not so you have to install it from source.

[root@fedora ]# yum install -y memtester


3.3. Install memtester on Deb based Linux distributions from source
 

To install it on Debian / Ubuntu / Mint etc. , open a terminal and type:
 

root@linux:/ #  apt install –yes memtester

The general run syntax is:

memtester [-p PHYSADDR] [ITERATIONS]


You can hence use it like so:

hipo@linux:/ $ sudo memtester 1024 5

This should allocate 1024MB of memory, and repeat the test 5 times. The more repeats you run the better, but as a memtester run places a great overall load on the system you either don't increment the runs too much or at least run it with  lowered process importance e.g. by nicing the PID:

hipo@linux:/ $ nice -n 15 sudo memtester 1024 5


  • If you have more RAM like 4GB or 8GB, it is upto you how much memory you want to allocate for testing.
  • As your operating system, current running process might take some amount of RAM, Please check available Free RAM and assign that too memtester.
  • If you are using a 32 Bit System, you cant test more than 4 GB even though you have more RAM( 32 bit systems doesnt support more than 3.5 GB RAM as you all know).
  • If your system is very busy and you still assigned higher than available amount of RAM, then the test might get your system into a deadlock, leads to system to halt, be aware of this.
  • Run the memtester as root user, so that memtester process can malloc the memory, once its gets hold on that memory it will try to apply lock. if specified memory is not available, it will try to reduce required RAM automatically and try to lock it with mlock.
  • if you run it as a regular user, it cant auto reduce the required amount of RAM, so it cant lock it, so it tries to get hold on that specified memory and starts exhausting all system resources.


If you have 8 Gigas of RAM plugged into the PC motherboard you have to multiple 1024*8 this is easily done with bc (An arbitrary precision calculator language) tool:

root@linux:/ # bc -l
bc 1.07.1
Copyright 1991-1994, 1997, 1998, 2000, 2004, 2006, 2008, 2012-2017 Free Software Foundation, Inc.
This is free software with ABSOLUTELY NO WARRANTY.
For details type `warranty'. 
8*1024
8192


 for example you should run:

root@linux:/ # memtester 8192 5

memtester version 4.3.0 (64-bit)
Copyright (C) 2001-2012 Charles Cazabon.
Licensed under the GNU General Public License version 2 (only).

pagesize is 4096
pagesizemask is 0xfffffffffffff000
want 8192MB (2083520512 bytes)
got  8192MB (2083520512 bytes), trying mlock …Loop 1/1:
  Stuck Address       : ok        
  Random Value        : ok
  Compare XOR         : ok
  Compare SUB         : ok
  Compare MUL         : ok
  Compare DIV         : ok
  Compare OR          : ok
  Compare AND         : ok
  Sequential Increment: ok
  Solid Bits          : ok        
  Block Sequential    : ok        
  Checkerboard        : ok        
  Bit Spread          : ok        
  Bit Flip            : ok        
  Walking Ones        : ok        
  Walking Zeroes      : ok        
  8-bit Writes        : ok
  16-bit Writes       : ok

Done.


4. Shell Script to test server memory for corruptions
 

If for some reason the machine you want to run a memory test doesn't have connection to the external network such as the internet and therefore you cannot configure a package repository server and install memtester, the other approach is to use a simple memory test script such as memtestlinux.sh
 

#!/bin/bash
# Downloaded from https://www.srv24x7.com/memtest-linux/
echo "ByteOnSite Memory Test"
cpus=`cat /proc/cpuinfo | grep processor | wc -l`
if [ $cpus -lt 6 ]; then
threads=2
else
threads=$(($cpus / 2))
fi
echo "Detected $cpus CPUs, using $threads threads.."
memory=`free | grep 'Mem:' | awk {'print $2'}`
memoryper=$(($memory / $threads))
echo "Detected ${memory}K of RAM ($memoryper per thread).."
freespace=`df -B1024 . | tail -n1 | awk {'print $4'}`
if [ $freespace -le $memory ]; then
echo You do not have enough free space on the current partition. Minimum: $memory bytes
exit 1
fi
echo "Clearing RAM Cache.."
sync; echo 3 > /proc/sys/vm/drop_cachesfile
echo > dump.memtest.img
echo "Writing to dump file (dump.memtest.img).."
for i in `seq 1 $threads`;
do
# 1044 is used in place of 1024 to ensure full RAM usage (2% over allocation)
dd if=/dev/urandom bs=$memoryper count=1044 >> dump.memtest.img 2>/dev/null &
pids[$i]=$!
echo $i
done
for pid in "${pids[@]}"
do
wait $pid
done

echo "Reading and analyzing dump file…"
echo "Pass 1.."
md51=`md5sum dump.memtest.img | awk {'print $1'}`
echo "Pass 2.."
md52=`md5sum dump.memtest.img | awk {'print $1'}`
echo "Pass 3.."
md53=`md5sum dump.memtest.img | awk {'print $1'}`
if [ “$md51” != “$md52” ]; then
fail=1
elif [ “$md51” != “$md53” ]; then
fail=1
elif [ “$md52” != “$md53” ]; then
fail=1
else
fail=0
fi
if [ $fail -eq 0 ]; then
echo "Memory test PASSED."
else
echo "Memory test FAILED. Bad memory detected."
fi
rm -f dump.memtest.img
exit $fail

Nota Bene !: Again consider the restults might not always be 100% trustable if possible restart the server and test with memtest86+

Consider also its important to make sure prior to script run,  you''ll have enough disk space to produce the dump.memtest.img file – file is created as a test bed for the memory tests and if not scaled properly you might end up with a full ( / ) root directory!


4.1 Other memory test script with dd and md5sum checksum

I found this solution on the well known sysadmin site nixCraft cyberciti.biz, I think it makes sense and quicker.

First find out memory site using free command.
 

# free
             total       used       free     shared    buffers     cached
Mem:      32867436   32574160     293276          0      16652   31194340
-/+ buffers/cache:    1363168   31504268
Swap:            0          0          0


It shows that this server has 32GB memory,
 

# dd if=/dev/urandom bs=32867436 count=1050 of=/home/memtest


free reports by k and use 1050 is to make sure file memtest is bigger than physical memory.  To get better performance, use proper bs size, for example 2048 or 4096, depends on your local disk i/o,  the rule is to make bs * count > 32 GB.
run

# md5sum /home/memtest; md5sum /home/memtest; md5sum /home/memtest


If you see md5sum mismatch in different run, you have faulty memory guaranteed.
The theory is simple, the file /home/memtest will cache data in memory by filling up all available memory during read operation. Using md5sum command you are reading same data from memory.


5. Other ways to test memory / do a machine stress test

Other good tools you might want to check for memory testing is mprime – ftp://mersenne.org/gimps/ 
(https://www.mersenne.org/ftp_root/gimps/)

  •  (mprime can also be used to stress test your CPU)

Alternatively, use the package stress-ng to run all kind of stress tests (including memory test) on your machine.
Perhaps there are other interesting tools for a diagnosis of memory if you know other ones I miss, let me know in the comment section.

VIM Project (VI Improvied IDE Editor extension to facilitate web development with vi enhanced editor

Wednesday, August 25th, 2010

I use VIM as an editor of choice for many years already.
Yet it's until recently I use it for a PHP ZF (Zend Framework) web development.

Few days ago I've blogged How to configure vimrc for a php syntax highlightning (A Nicely pre-configured vimrc to imrpove the daily text editing experience

This enhancements significantly improves the overall PHP code editing with VIM. However I felt something is yet missing because I didn't have the power and functunality of a complete IDE like for instance The Eclipse IDE

I was pretty sure that VIM has to have a way to be used in a similar fashion to a fully functional IDE and looked around the net to find for any VIM plugins that will add vim an IDE like coding interface.

I then come accross a vim plugin called VIM Prokject : Organize/Navigate projects of files (like IDE/buffer explorer)

The latest VIM Project as of time of writting is 1.4.1 and I've mirrored it here

The installation of the VIM Project VIM extension is pretty straight forward to install it and start using it on your PC issue commands:

1. Install the project VIM add-on

debian:~$ wget https://www.pc-freak.net/files/project-1.4.1.tar.gz
debian:~$ mv project-1.4.1.tar.gz ~/.vim/
debian:~$ cd ~/.vim/
debian:~$ tar -zxvvf project-1.4.1.tar.gz

2. Load the plugin

Launch your vim editor and type : Project(without the space between : and P)
You will further see a screen like:

vim project entry screen

3. You will have to press C within the Project window to load a new project

Then you will have to type a directory to use to load a project sources files from:

vim project enter file source directory screen

You will be prompted with to type a project name like in the screenshot below:

vim project load test project

4. Next you will have to type a CD (Current Dir) parameter
To see more about the CD parameter consult vim project documentation by typing in main vim pane :help project

The appearing screen will be something like:

vim project extension cd parameter screen

5. Thereafter you will have to type a file filter

File filter is necessary and will instruct the vim project plugin to load all files with the specified extension within vim project pane window

You will experience a screen like:


vim project plugin file filter screen

Following will be a short interval in which all specified files by the filter type will get loaded in VIM project pane and your Zend Framework, PHP or any other source files will be listed in a directory tree structure like in the picture shown below:

vim project successful loaded project screen

6. Saving loaded project hierarchy state

In order to save a state of a loaded project within the VIM project window pane you will have to type in vim, let's say:

:saveas .projects/someproject

Later on to load back the saved project state you will have to type in vim :r .projects/someproject

You will now have almost fully functional development IDE on top of your simple vim text editor.

You can navigate within the Project files loaded with the Project extension pane easily and select a file you would like to open up, whenever a source file is opened and you work on it to switch in between the Project file listing pane and the opened source code file you will have to type twice CTRL+w or in vim language C-w

To even further sophisticate your web development in PHP with vim you can add within your ~/.vimrc file the following two lines:

" run file with PHP CLI (CTRL-M)
:autocmd FileType php noremap <C-M> :w!<CR>:!/usr/bin/php %<CR>
" PHP parser check (CTRL-L)
:autocmd FileType php noremap <C-L> :!/usr/bin/php -l %>CR>

In the above vim configuration directovies the " character is a comment line and the autocmd is actually vim declarations.
The first :autocmd … declaration will instruct vim to execute your current opened php source file with the php cli interpreter whenever a key press of CTRL+M (C-m) occurs.

The second :autocmd … will add to your vim a shortcut, so whenever a CTRL+L (C-l) key combination is pressed VIM editor will check your current edited source file for syntax errors.
Therefore this will enable you to very easily periodically check if your file syntax is correct.

Well this things were really helpful to me, so I hope they will be profitable for you as well.
Cheers 🙂

Skype remove word completion / Howto Disable spellcheck autocorrect on Mac OS X, Android Phones Tablets and IPhone iOS

Tuesday, March 14th, 2017

How-to-disable-auto-correct-on-MacOS-X-android-and-iphone

I've recently upgraded my wife's Mac Book Air Mac OS X release from Mountain Lion to latest available OS X release Yosemite and after upgrade the old version of Skype used for about 3 years without any problems (except camera issues due to mac OS X bug the old post is here) stopped working (did crashed) on Skype launch so I took few minutes to upgrade Skype as well from Skype.com Skype for Mac official download page after the quick and unproblematic Skype re-install, Skype client was back to normal with a shiny new outlook and on a first glimpse all worked like a charm but …

On the next day when I took use of temporary the upgraded Mac Book Air with the fresh new OS X Yosemite and Skype's latest app to to do a quick login with my Skype credentials noticed a very annoying autocorrect (auto spelling)  Skype behavior on any new input text message.

I have to admit the idea of autocorrect feature on a system wide scale is great however quick keyboard typers like me who are used to type more than a letter per second use to type so quickly that occasinally you do errors which you're quick to fix but anyhow errors are automatically corrected in a way that you have to retype the whole word quite often which makes your typing a hellish experience. Then the same auto-correct feature becomes a terrible experience and on any device I notice this behavior I tend to remove it immediately.

I remember  the same dictionary auto-spell check / corect behavior was present on my Android run ZTE blade 3 mobile after first Mobile boot and also present on my current iPhone 5 iOS and thus the first thing I did once I start using it is to remove autocorrect (auto spelling) feature and relax the irritation of it.

Just in case if you need to disable Spellcheck auto-correct on Android Phone or Tablet do it from

Settings -> Language & input

android-phone-tablet-disable-autocorrect-spell-check

If you happen to be using also IPhone 5 as me or  Iphone 6 / 7 to disable AutoCorrect feature on SMSes / Skype / Viber and other applications do it from Phone's:

Settings -> General

disable_Turn_off_AutoCorrect_in_IPhone_iOS

Shortly I've noticed that the auto-correct feature does not only mess up your typing in Skype but also in Mail and TweetDeck and generally any open application where you can type on Yosemite.


I've took the time to investigate quickly what was causing the new feature that bugged me so much online and came to this nice little article How to turnoff autocorrect on Mac OS X 10.11 El Captain

As the article revealed to Turn off the autocorrect Mac OS X feature you I have to go:

Finder -> System Preferences


stop-skype-autocorrect-annoying-macosx-yosemite-system-preferences-menu-screenshot

Click on Keyboard -> Text
and turn  Autocorrect off by unchecking Correct spelling automatically

stop-skype-autocorrect-annoying-macosx-yosemite-system-preferences-keyboard-menu-screenshot

By doing this autocorrect spelling is disabled for all applications, however for some people it might be handy to leave the correct feature for Mail app or Microsoft Office (Microsoft Word / Excel) etc. and only turn off (disable) the autorrect feature per application side.

You can  do this in the separate Applications (of choise where you need auto spelling) from  Edit Menu under Spelling and Grammer and enable / disableCheck Spelling While Typing

stop-skype-autocorrect-annoying-macosx-yosemite-spelling-and-grammar-menu-screenshot


Tadam Enjoy ! 🙂


Drawing GANTT Charts and Project Management on Linux, (Microsoft Project substitute for Unix)

Tuesday, October 12th, 2010

I'm studying Project Management, right now. In that spirit of thoughts I and a couple of other guys are building a Project Plan.
As it Project Plan it's necessary to put a GANTT Chart in it to show visually the project timeline (the phases), the duration and the inter-relation between the different tasks which leads the project to an actual completion.

After a bit of thorough research online on available software to deal with project management and particularly, ones that are capable to build a GANTT charts on Linux / BSD.

I've come with the following list of software capable to be a substitute for the Microsoft Project software.
Redmine GANTT Chart

GANTT chart Redmine

1. Gantt Project
GANTTProject chart GANTTProject Chart

2. Gnome Planner
Planner GANTT Gnome Chart 
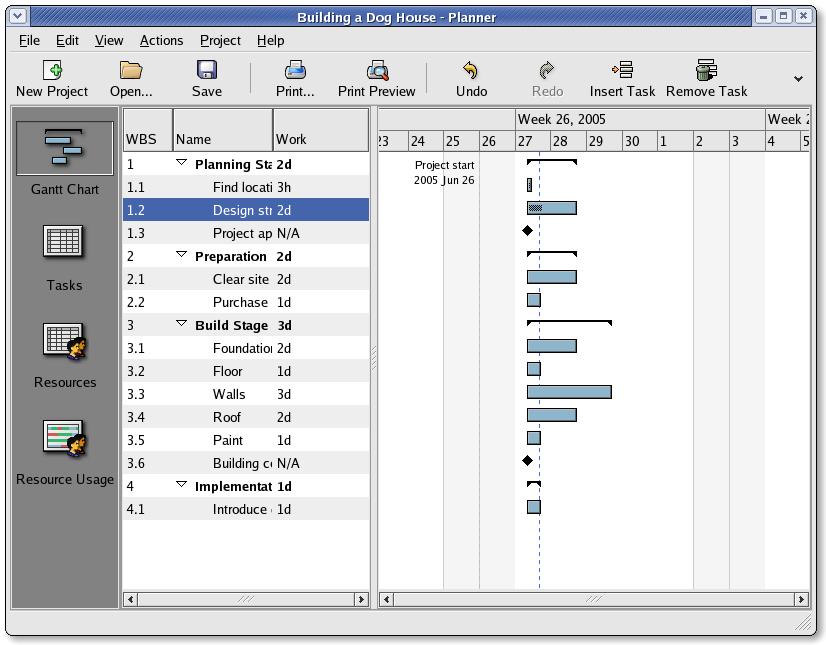
Planner GANTT Chone Chart
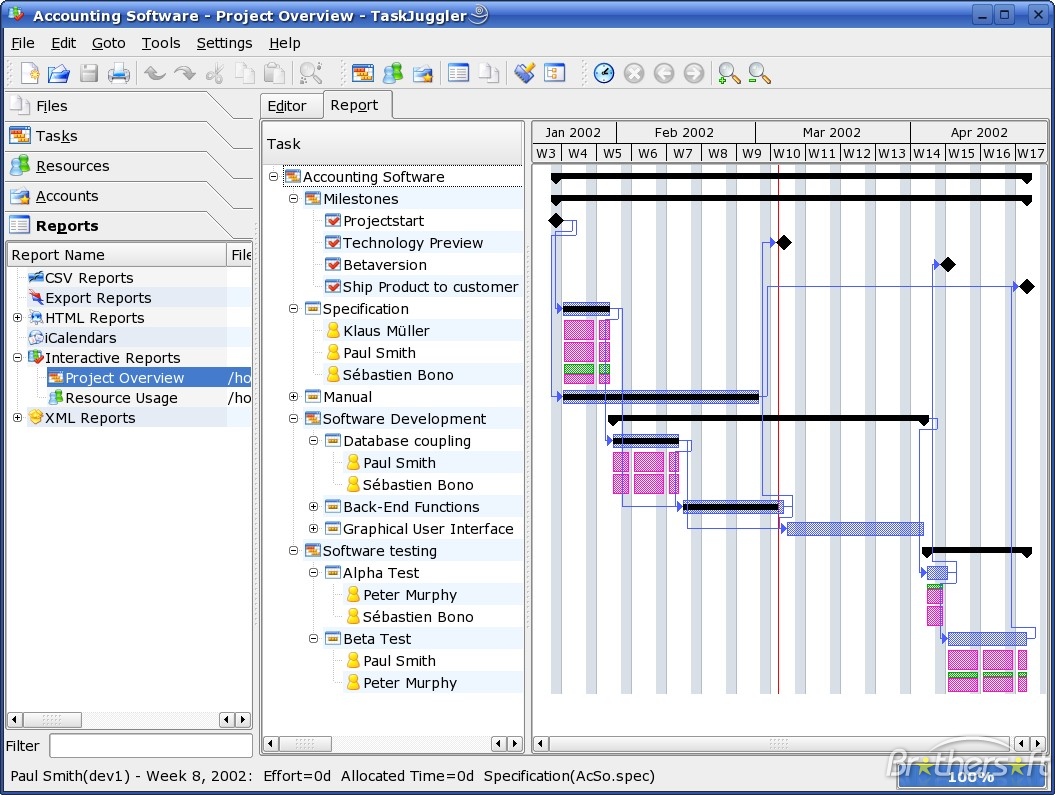
3. Task Juggler Project Manager with GANTT Capability for (KDE)
Task Juggler

4. JxProject – This software is not free, though it can be considered almost free
Take a look also at:
5. Trac , though it doesn't really support GANTT charts it's a lovely software to be used for PM.
Trac Project Management

Another option you have is to try out:
6. PHProjekt

Update 20.09.2016 – PHPProject Old download link is no longer active

It is this link http://www.phprojekt.com/, but the page doesn’t seem to be active any more. I thought you might want to update.

If you are looking for an alternative please check out http://wiht.link/PHProjekt-PM, it may make a suitable replacement.

Kind Regards,
Tom Wilcox


That piece of softwre really looks promising, especially if we consider that it's web based and how much essential is today to have an anline tools for doing the ordinary desktop jobs.

You can even check an online demo of the PHPProjekt software here

If you're a type of KDE user you definitely has to try out Kplato

As I've tested the software the software is easy to be used, however it still is missing some essential parts that Microsoft Project includes so it's not 100% substitute.
Also it's not able to open Microsoft Project (MPP) files, neither able to save the charts in the .mpp format.

Moving ahead I've came across DotProject DotProject Gantt Chart
DottProject Gantt Chart

I haven't took the time to test it myself but however, as I go through the software website the project looked quite good.
Lastly you can take a look at: 7. PStricks as a mean of project management, however I think it doesn't support GANTT chart building.
>

Thursday, July 14th, 2016

use-remote-dns-on-mozilla-firefox-howto-windows-linux-logo.svg

If you're using Mozilla Firefox browser to browse the Web with Traffic Tunneling via SSH Tunnel to your own Linux server like I do in order to prevent yourself traffic to be sniffed from your Work corporate computer (as most of the corporations such as IBM / Hewlett Packard / Concentrix etc. are forcing all employee PC traffic to be  to be transported via default set Windows Corporate Proxy active for all browsers.

Then you will certainly also want to prevent the DNS requests to be not logged somewhere in your Corporate IT department thus the question arises:

How to force DNS requests to be made through the Proxy server (SSH host)?

Nomatter where you're using Firefox browser with advanced proxying plugin such as FoxyProxy FF add-on or the default Proxy FF features the DNS lookups might end up in Corporate set DNS servers often forced for the computer / notebook and impossible to be changed to a custom ones as many of the Corporation internal Sharepoints and domains are only visible from their internal networks.

Thanksfully in newer versions there is an easy way to do it directly from Visual menus via:

Tools -> Options -> Advanced -> Network -> Settings

You will get a screen like below:
 

firefox-use-proxy-remote-dns-howto-screenshot

Just tick the Remote DNS and that will force Firefox to query remote Proxy server proxy DNS


If you happen to be running older Firefox which doesn't have the Remote DNS tick you can also try to set the setting manually:


  1. In firefox type this in your address bar:

    about:config

  2. Click I'll be careful I  promise.

  3. In the filter textbox, type: proxy

  4. Find the preference name called *network.proxy.socks_remote_dns*. Double click it to set it to true.

    i-will-be-careful-i-promise-firefox-windows-screenshot-warranty


network-proxy-socks-remote_dns-firefox-screenshot

Enjoy ! 🙂

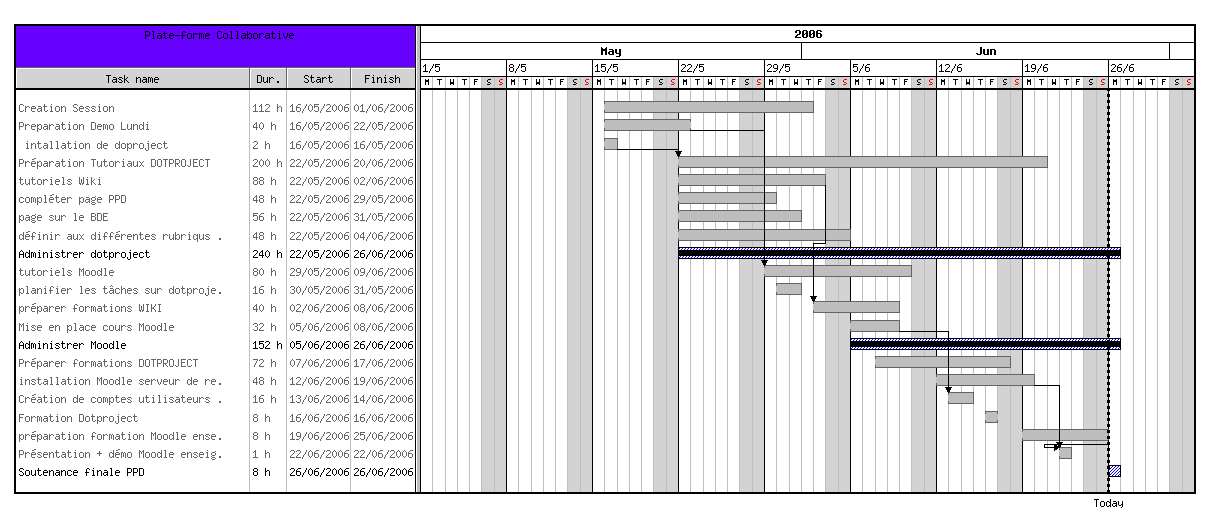
How to show country flag, web browser type and Operating System in WordPress Comments

Wednesday, February 15th, 2012

!!! IMPORTANT UPDATE COMMENT INFO DETECTOR IS NO LONGER SUPPORTED (IS OBSOLETE) AND THE COUNTRY FLAGS AND OPERATING SYSTEM WILL BE NOT SHOWING INSTEAD,

!!!! TO MAKE THE COUNTRY FLAGS AND OS WP FUNCTIONALITY WORK AGAIN YOU WILL NEED TO INSTALL WP-USERAGENT !!!

I've come across a nice WordPress plugin that displays country flag, operating system and web browser used in each of posted comments blog comments.
Its really nice plugin, since it adds some transperancy and colorfulness to each of blog comments 😉
here is a screenshot of my blog with Comments Info Detector "in action":

Example of Comments Info Detector in Action on wordpress blog comments

Comments Info Detector as of time of writting is at stable ver 1.0.5.
The plugin installation and configuration is very easy as with most other WP plugins. To install the plugin;

1. Download and unzip Comments Info Detector

linux:/var/www/blog:# cd wp-content/plugins
linux:/var/www/blog/wp-content/plugins:# wget http://downloads.wordpress.org/plugin/comment-info-detector.zip
...
linux:/var/www/blog/wp-content/plugins:# unzip comment-info-detector.zip
...

Just for the sake of preservation of history, I've made a mirror of comments-info-detector 1.0.5 wp plugin for download here
2. Activate Comment-Info-Detector

To enable the plugin Navigate to;
Plugins -> Inactive -> Comment Info Detector (Activate)

After having enabled the plugin as a last 3rd step it has to be configured.

3. Configure comment-info-detector wp plugin

By default the plugin is disabled. To change it to enabled (configure it) by navigating to:

Settings -> Comments Info Detector

Next a a page will appear with variout fields and web forms, where stuff can be changed. Here almost all of it should be left as it is the only change should be in the drop down menus near the end of the page:

Display Country Flags Automatically (Change No to Yes)
Display Web Browsers and OS Automatically (Change No to Yes

Comments Info Detector WordPress plugin configuration Screenshot

After the two menus are set to "Yes" and pressing on Save Changes the plugin is enabled it will immediately start showing information inside each comment the GeoIP country location flag of the person who commented as well as OS type and Web Browser 🙂