Posts Tagged ‘tool’

iSH, the best free SSH / Telnet client for iOS iPhone, iPad equivallent of MobaXterm and fully functional Alpine Linux emulator

Wednesday, February 8th, 2023

ish-linux-terminal-emulator-for-iphone-ipad-ios-logo-screenshoticon

Since few months I've switched my old BLU r1 HD Phone (a great old low budget phone for its price) to a friend's iPhone 10 ( X ) who gifted it for me. Coming from Android world, everyone who has experience with it is a pain in the ass as some of the Apps, which are into Google's play store does not have the same equivalent into Apple's install Package manager tool AppStore. Some of the crucial tools which I was interested as a freshly new migrated user from Android to iPhone was to have a decent SSH / Telnet client and Terminal, with which I can easily connect to my Linux servers both home and work. 

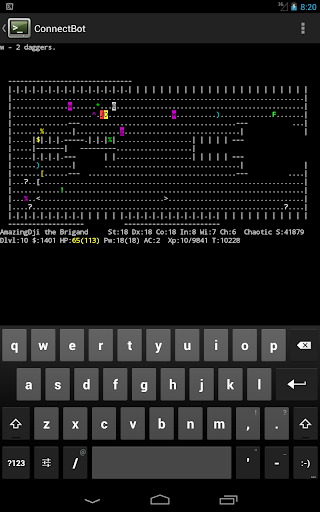
As Android Phone user, to connect and manage my SSH sessions I used most often some of the most popular Connectbot / SSHDroid / JuiceSSH.
On Android I've usually installed all of these tools but most frequently used Connectbot, which quickly become my favourite SSH client for Android over time.

The reasons why I really loved Connectbot and used it on Android OS in short:

  • It is Completely free
  • Ad-free
  • Open-source (too bad not Free software but still step better)
  • Copy and paste text between Applications
  • Customizable interface (i.e. font size, keyboard layout, SSH auth agent, etc.)


connectbot-android-ssh-remote-connect-client-screenshot

I've seen some people used and preferred Termius but never myself really liked this client, as it was including some Advertisements or for don't remember why reason.
Switching to iOS mobile operating system, of course was quite a shock especially the moment I found out the standard loved SSH Remote Client programs are used are not available or have only a paid version. Thus it took me quite a while of a research and googling until I found some decent stuff.

termius-ssh-telnet-client-ios-screenshot

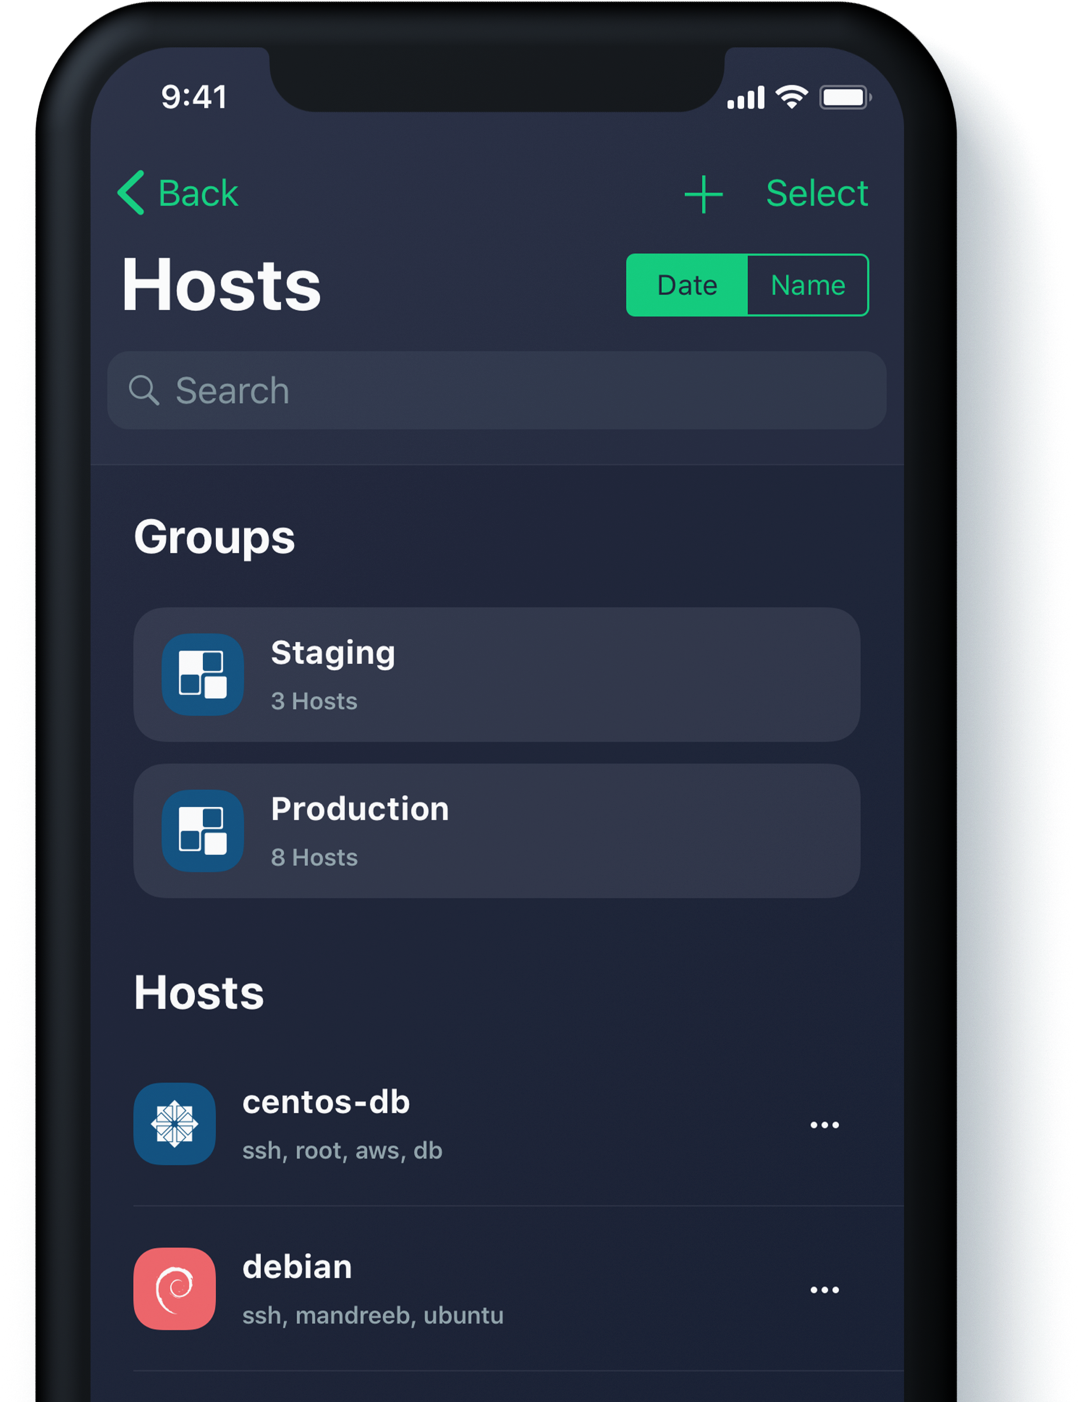
Tried for a time with Termius as well but again, its Ads and lack of some functionality pissed me off, so I've moved on to Shelly.

shelly-iphone-ssh-telnet-client-ios-screenshot

Shelly is really not a bad tool but has limitation over the SSH sessions you can add and other limitations, which can only be unlocked with an "Upgrade", to its paid version, thus I decided after few weeks of attempts to make it my remote server management mobile tool for iPhone, I've dropped it off as well.

Then I found the Blink Shell App – Blink Shell is a professional, desktop grade terminal for iOS. As overall the tool is really great and is easy to use but again to have it used in its full power you need the paid version and until you pay for it every now and then you got interruption of your shell for some really annoying ads.
Thus even though I used it for a times this few tools with whom basicly you can do basic remote ssh / telnet session operations eventually,  started looking for a better SSH Client Free alternative for iPhone Users.

Then came a friend at home for a dinner my dear friend Milen (Static) and he show me iOS.
The moment I saw this tool I totally loved it, for its simplicity and its resemblance to a classical TTY Physical old Linux console I used back in the days and its ability to resemble easily any improved functionaltiy through simple screen (multiple session management) command tool or tmux.

Wait, what's iSH ? And why it is the Best SSH / Telnet client to manage your servers remotely on iOS Mobiles (iPhone and IPads) ? 

iSH is a project to get a Linux shell environment running locally on your iOS device, using a usermode x86 emulator.


In other wors iSH is Linux emulator with busybox and a package ports for many of the standard Linux tools you get by simple apt-get / yum or if I have to compare you get via the MobaXterm's advanced apt-cyg (Cygwin packages) tool capabilities.

Once iSH is installed it comes with pre-installed apk command line package management tool, with which you can install stuff like openssh-client / screen / tmux / mc (midnight commander) etc. apk, is an apt like command like tool which uses as a basis for installing its packages Alpine Linux repositories.
Alpine Linux is perhaps little known as it is not one of these main stream disributions, such as Fedora or Ubuntu, but for those more concerned about security  Alpine Linux is well known as it is a security-oriented, lightweight Linux distribution based on musl libc and busybox. What makes the Linux even more attractive and perhaps the reason why the iSH developers decided to use it as a basis for their iSH emulator is it being actively developed and its tightened security makes it a good compliment to the quite closed and security focused mobile platform iOS.

iSH is available straight from AppStore , so to use it install it and run it (it is really a great news that iOS does not require iphone to be jailbreak – ed, and it is an ordinary installable software straight from AppStore):
iSH, already comes with some of the standard programs you would expect in a Linux environment such as Vi, wget, zip / unzip, and tar.
However to fit it better for my use over ssh and improve its capabilities, as well as support and use multiple Virtual windows ssh, just like you do on a Linux xterm
run from ish shell: 

# apk add openssh-client
# apk add screen
# apk add vim
# apk add mc


ish-screenshot-terminal3-linux-emulator-iphone-alpine

ish-screenshot-terminal2-linux-emulator-iphone-alpine

ish-screenshot-terminal1-linux-emulator-iphone-alpine-linux

I also like to have a Midnight Commander and VIM Text editor installed out of the box to be able to move around in Ncurses interface through my iPhone.

ish-iphone-keyboard-key-shortcuts

Note that, just like most GNU / Linux distributions, iOS shell will run a normal bash shell.
From there on to use iSH as my default SSH client and enable my just installed GNU screen some Windowing beauty for readability whence I use the screen with multiple ssh logins to different servers as well make the screen Virtual consoles to have ability for scroll back and scroll up of console text to work, I do set up the following .screenrc inside my /home/iPhoneuser

The .screenrc to setup on the iSH to easify your work with screen is as follows:
 

# An alternative hardstatus to display a bar at the bottom listing the
# windownames and highlighting the current windowname in blue. (This is only
# enabled if there is no hardstatus setting for your terminal)
hardstatus on
hardstatus alwayslastline
hardstatus string "%{.bW}%-w%{.rW}%n %t%{-}%+w %=%{..G} %H %{..Y} %m/%d %C%a "
# Enable scrolling fix the annoying screen scrolling problem
termcapinfo xterm* ti@:te@
# Scroll up
bindkey -d "^[[5S" eval copy "stuff 5\025"
bindkey -m "^[[5S" stuff 5\025

# Scroll down
bindkey -d "^[[5T" eval copy "stuff 5\004"
bindkey -m "^[[5T" stuff 5\004

# Scroll up more
bindkey -d "^[[25S" eval copy "stuff \025"
bindkey -m "^[[25S" stuff \025

# Scroll down more
bindkey -d "^[[25T" eval copy "stuff \004"
bindkey -m "^[[25T" stuff \004

You can download the same .screenrc file from here straight with wget from the console:

# wget https://www.pc-freak.net/files/.screenrc


Run GNU screen manager


 # screen

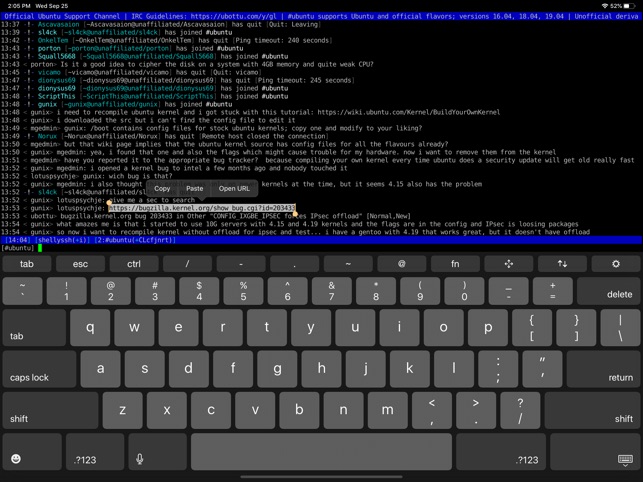
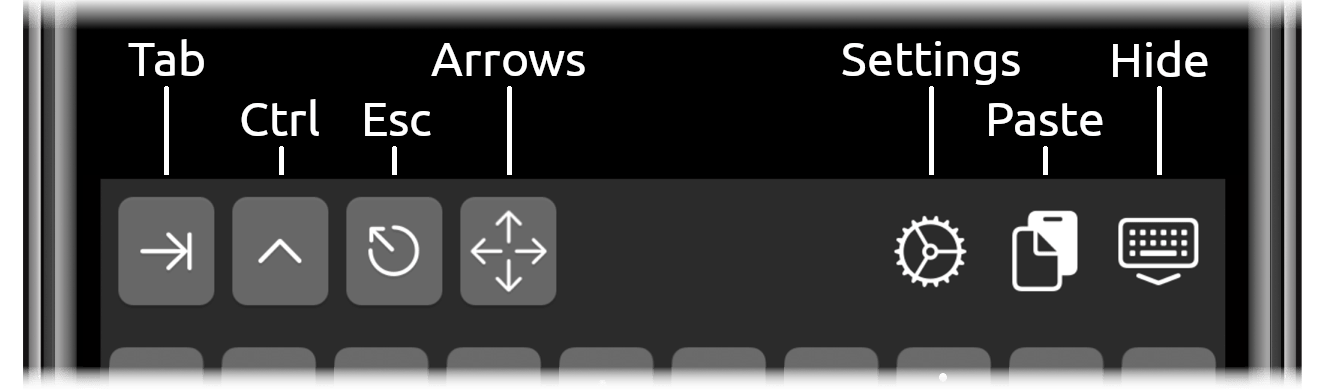
You will end up with a screen session, to open a new session for Virtual Terminal use virtual keyboard from ISH and Press

CTRL + A + C

To open other Virtual Windows inside screen just press CTRL + A + C as many times as you need it, each session will appear ina small window on the down corner as you can see in screenshot

ish-terminal-with-screen-multiple-virtual-terminals-screenshot-iphone-ios

To move across the Screen unnamed 3 Virtual Windows 0 ash 1 ash and 2 ash use the Virtual keyboard

for next WIndow use key combination:
 

CTRL + A + N (where + is just to indicate you have to press them once after another and not actually press the + 🙂 )


For Previous Window use:

CTRL + A + P

Or use CTRL + A and type 

:number 3 (where number is the number of window)

The available iSH commands without adding any further packages which are part of the busybox install are as follows:

Available /bin/ directory commands:

arch  ash  base64  bbconfig  busybox  cat  chgrp  chmod  chown  conspy  cp  date  dd  df  dmesg  dnsdomainname  dumpkmap  echo  ed  egrep  false  fatattr  fdflush  fgrep  fsync  getopt  grep  gunzip  gzip  hostname  ionice  iostat  ipcalc  kbd_mode  kill  link  linux32  linux64  ln  login  ls  lzop  makemime  mkdir  mknod  mktemp  more  mount  mountpoint  mpstat  mv  netstat  nice  pidof  ping  ping6  pipe_progress  printenv  ps  pwd  reformime  rev  rm  rmdir  run-parts  sed  setpriv  setserial  sh  sleep  stty  su  sync  tar  touch  true  umount  uname  usleep  watch  zcat  


Available /usr/bin/ commands:    

awk  basename  beep  blkdiscard  bunzip2  bzcat  bzip2  cal  chvt  cksum  clear  cmp  comm  cpio  crontab  cryptpw  cut  dc  deallocvt  diff  dirname  dos2unix  du  dumpleases  eject  env  expand  expr  factor  fallocate  find  flock  fold  free  fuser  getconf  getent  groups  hd  head  hexdump  hostid  iconv  id  install  ipcrm  ipcs  killall  ldd  less  logger  lsof  lsusb  lzcat  lzma  lzopcat  md5sum  mesg  microcom  mkfifo  mkpasswd  nc  nl  nmeter  nohup  nproc  nsenter  nslookup  od  passwd  paste  patch  pgrep  pkill  pmap  printf  pscan  pstree  pwdx  readlink  realpath  renice  reset  resize  scanelf  seq  setkeycodes  setsid  sha1sum  sha256sum  sha3sum  sha512sum  showkey  shred  shuf  smemcap  sort  split  ssl_client  strings  sum  tac  tail  tee  test  time  timeout  top  tr  traceroute  traceroute6  truncate  tty  ttysize  udhcpc6  unexpand  uniq  unix2dos  unlink  unlzma  unlzop  unshare  unxz  unzip  uptime  uudecode  uuencode  vi  vlock  volname  wc  wget  which  whoami  whois  xargs  xxd  xzcat  yes  


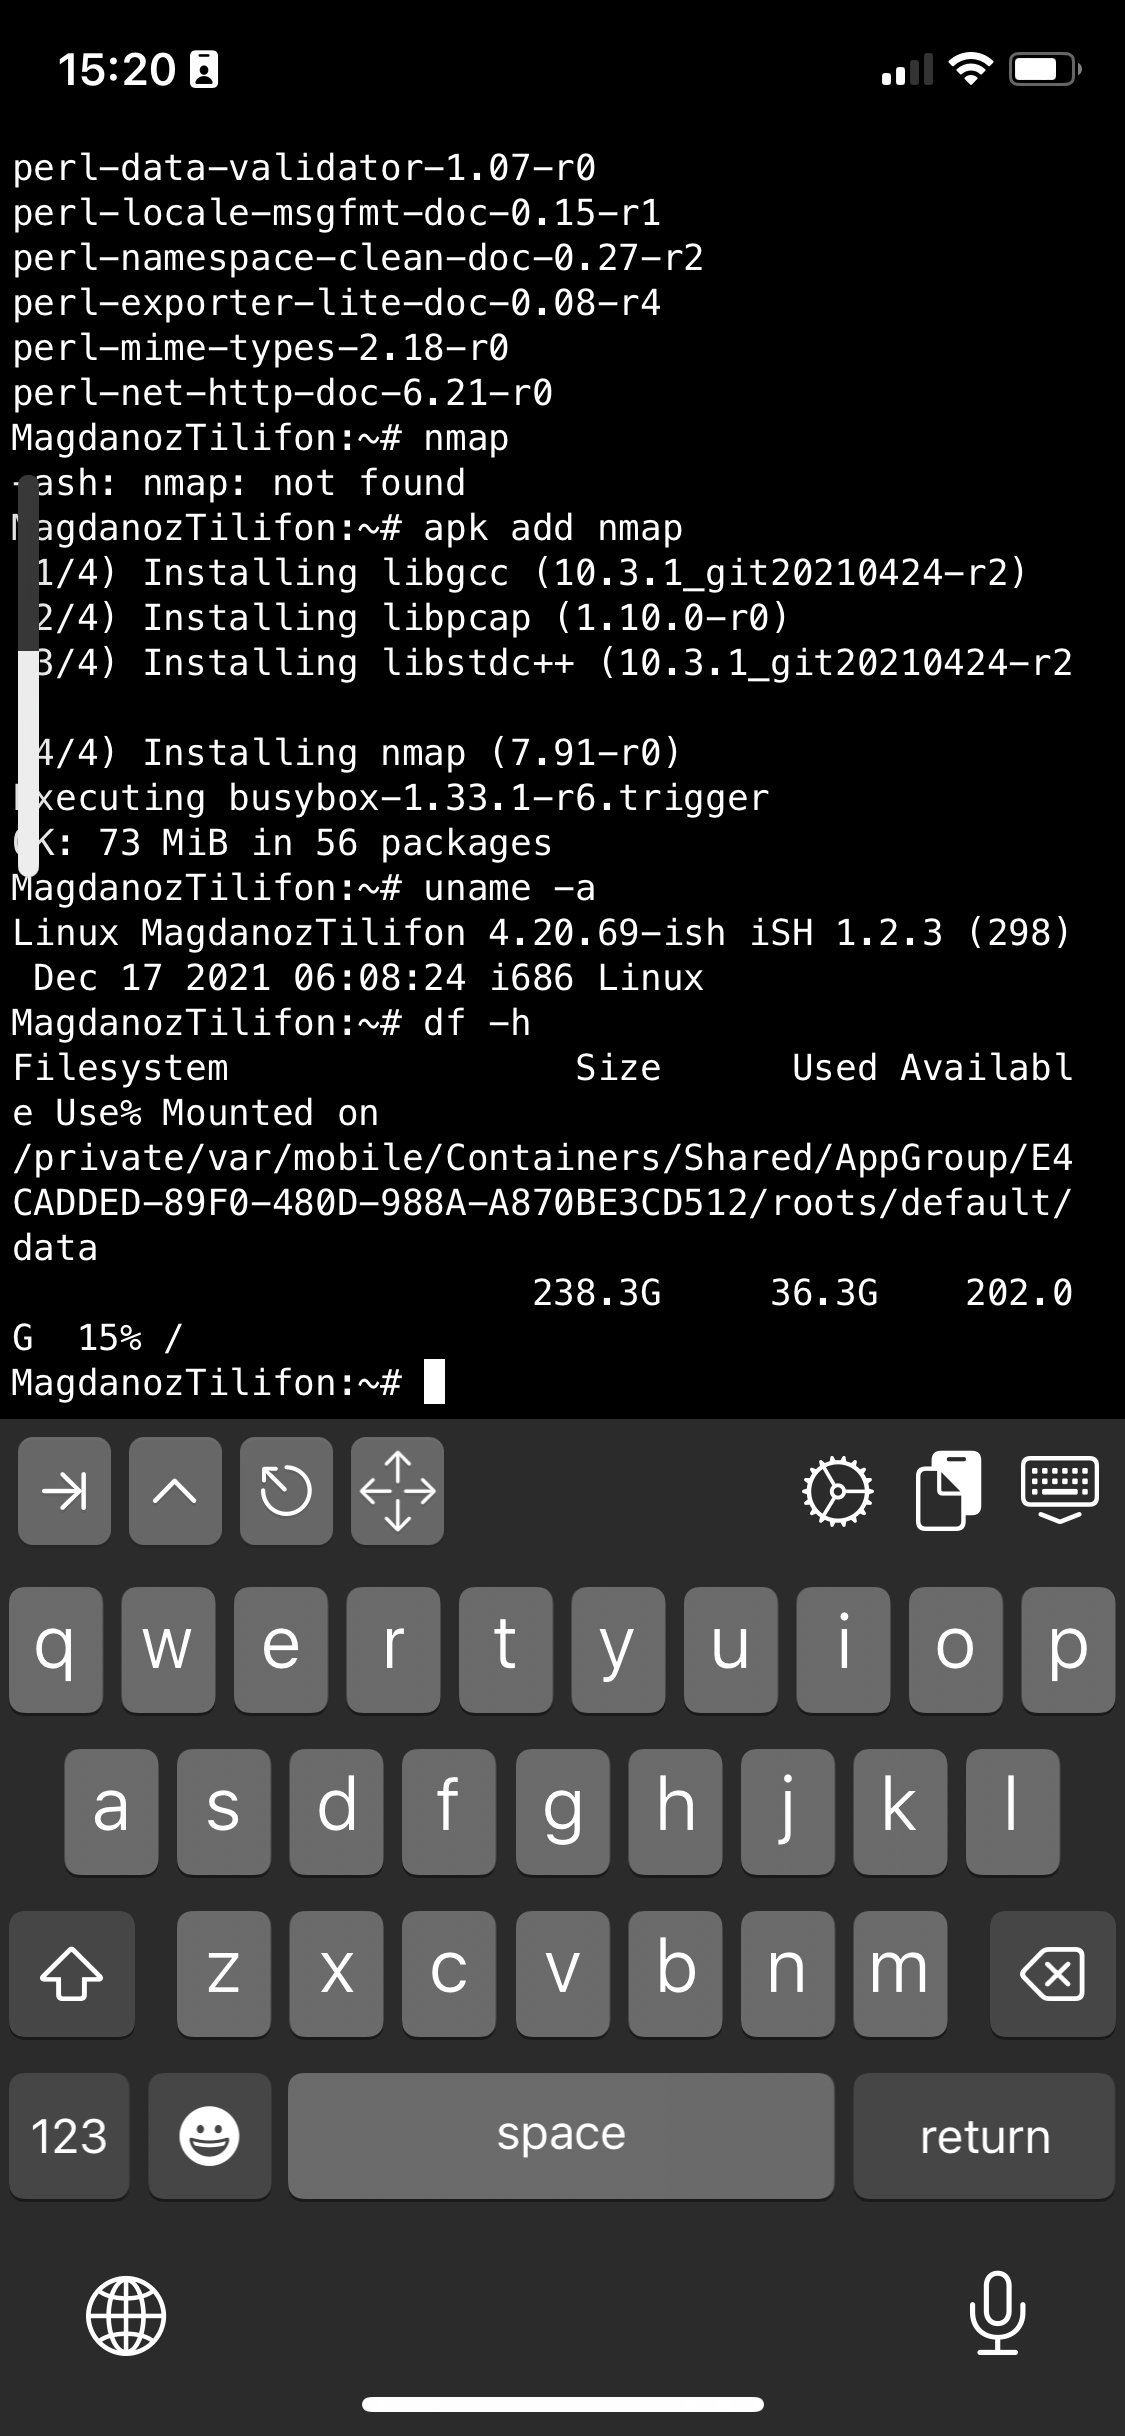
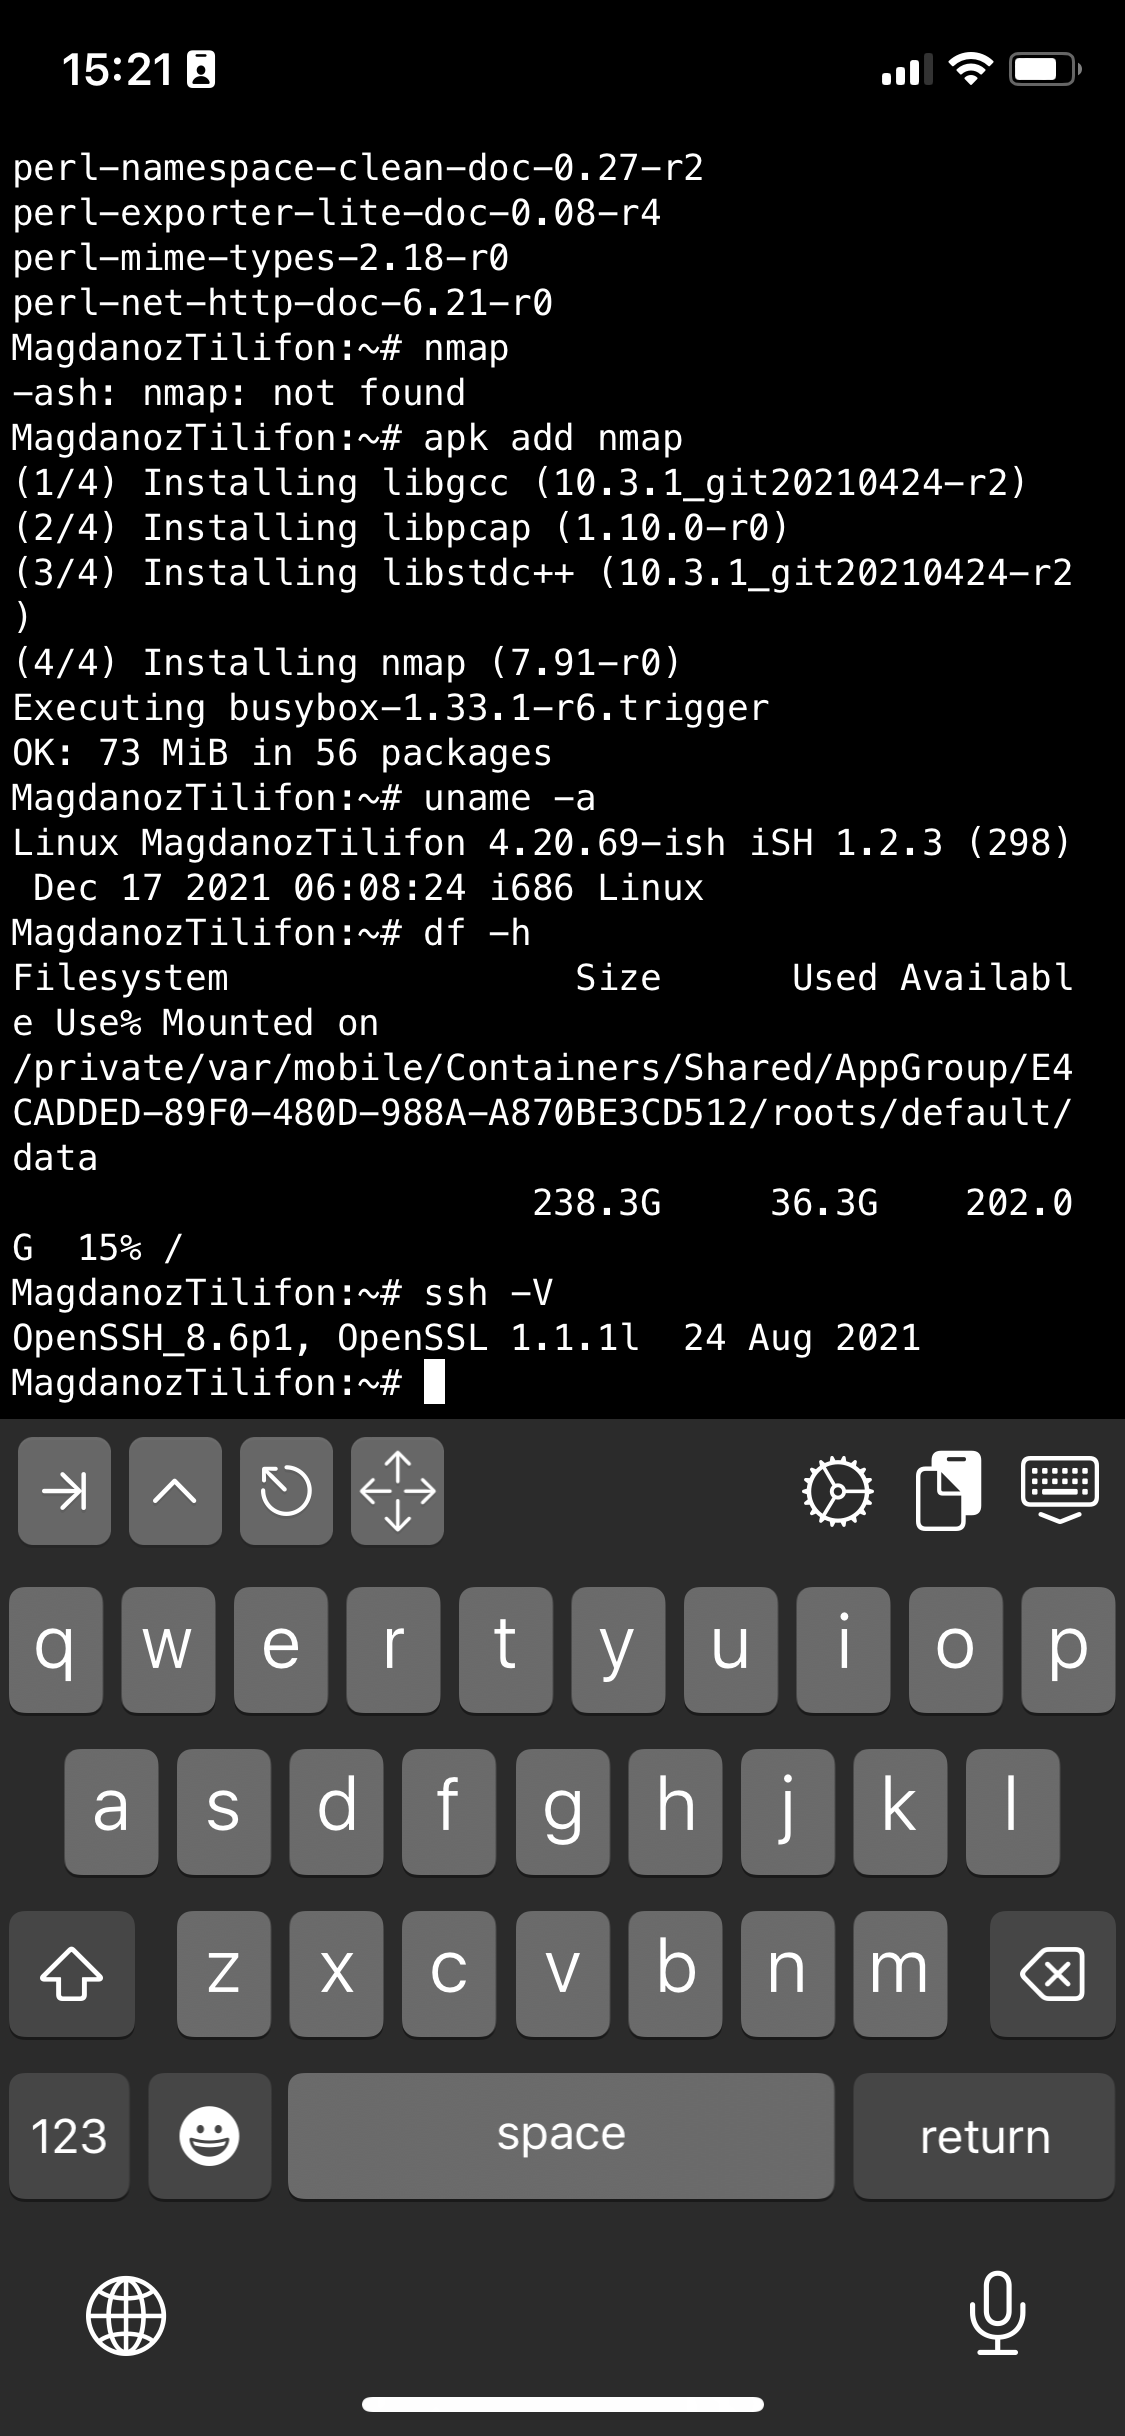
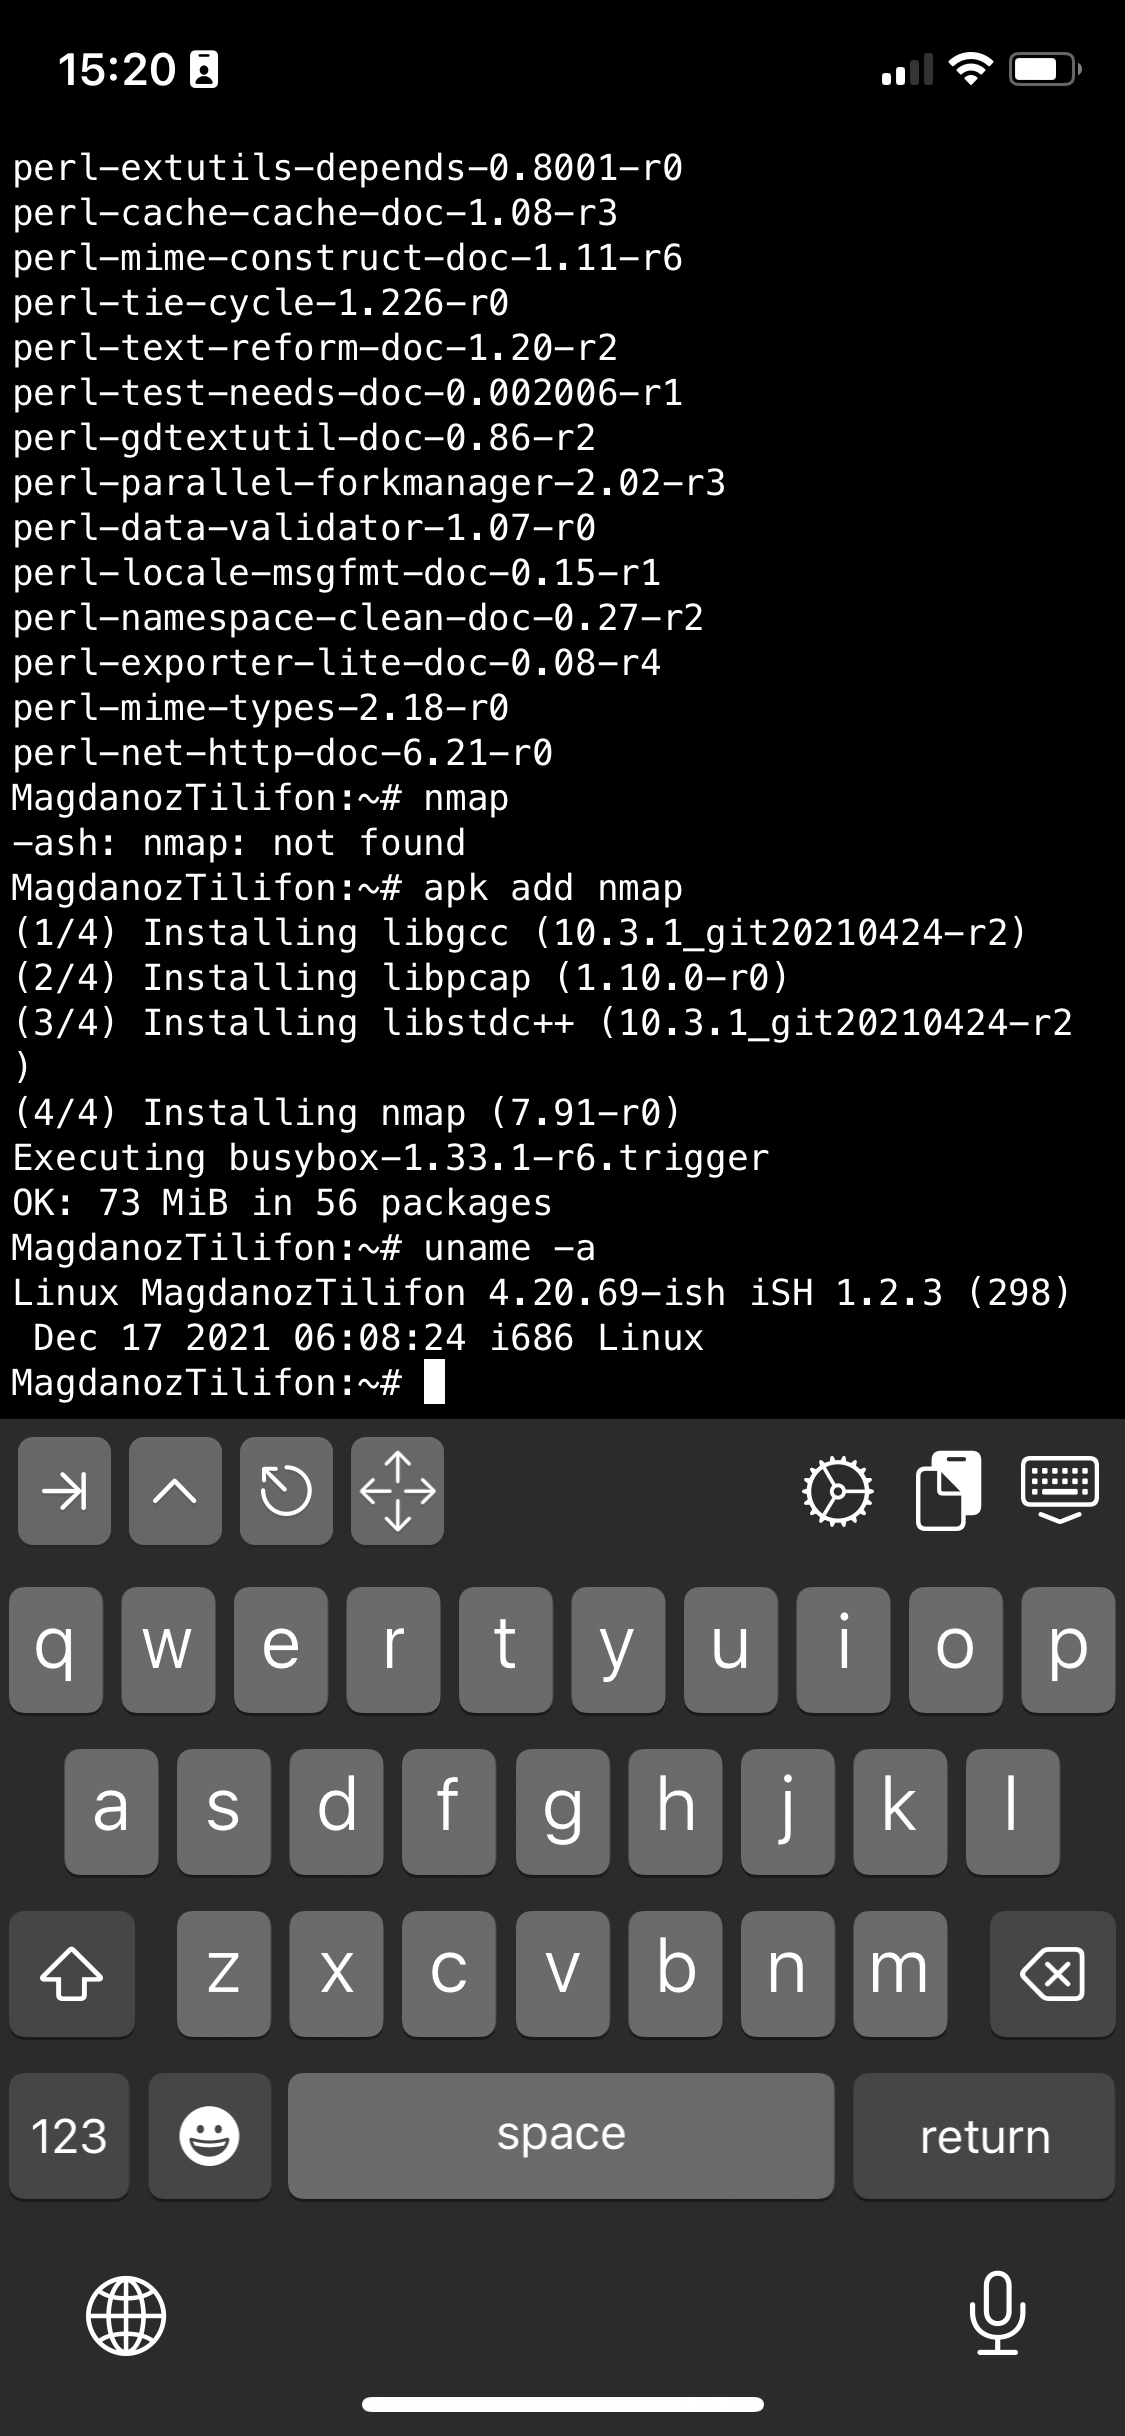
If you're a maniac developer you can even use iSH, to do some programs development with vim with Python / Perl or PHP as these are available from the Alpine repositories and installable via a simple apk add packagename for security experts nmap and some security tools are also available but unfortunately not everything is still working as this project is in active development and iOS has some security limitations if OS is not ROOTED 🙂

Hence some of the packages you can install via apk manager will be failing actually.
There is a list of What works and what doesn't still on iSH on the project github wiki check it out here.

There is much more funny stuff you can do with it, and actually my quick research on how people use iSH on their phones lead me to some Videos talking about iOS and Ethical hacking etc, but I'll stop here as I dont have the time to dig deeper to it. 
If you know or have some good use of iSH or some other goody you are using as a hack please share in comments.

Enjoy ! 🙂

Install certbot on Debian, Ubuntu, CentOS, Fedora Linux 10 / Generate and use Apache / Nginx SSL Letsencrypt certificates

Monday, December 21st, 2020

letsencrypt certbot install on any linux distribution with apache or nginx webserver howto</a><p> Let's Encrypt is a free, automated, and open certificate authority brought to you by the nonprofit <a data-cke-saved-href=
Internet Security Research Group (ISRG). ISRG group gave initiative with the goal to "encrypt the internet", i.e. offer free alternative to the overpriced domani registrer sold certificates with the goal to make more people offer SSL / TSL Free secured connection line on their websites. 
ISRG group supported Letsencrypt non-profit certificate authority actrively by Internet industry standard giants such as Mozilla, Cisco, EFF (Electronic Frontier Foundation),  Facebook, Google Chrome, Amazon AWS, OVH Cloud, Redhat, VMWare, Github and many many of the leading companies in IT.

Letsencrpyt is aimed at automating the process designed to overcome manual creation, validation, signing, installation, and renewal of certificates for secure websites. I.e. you don't have to manually write on console complicated openssl command lines with passing on Certificate CSR /  KEY / PEM files etc and generate Self-Signed Untrusted Authority Certificates (noted in my previous article How to generate Self-Signed SSL Certificates with openssl or use similar process to pay money generate secret key and submit the key to third party authority through a their website webadmin  interface in order to Generate SSL brought by Godaddy or Other Certificate Authority.

But of course as you can guess there are downsides as you submit your private key automatically via letsencrypt set of SSL certificate automation domain scripts to a third party Certificate Authority which is at Letsencrypt.org. A security intrusion in their private key store servers might mean a catastrophy for your data as malicious stealer might be able to decrypt your data with some additional effort and see in plain text what is talking to your Apache / Nginx or Mail Server nevertheless the cert. Hence for a high standards such as PCI environments Letsencrypt as well as for the paranoid security freak admins,  who don't trust the mainstream letsencrypt is definitely not a choice. Anyways for most small and midsized businesses who doesn't hold too much of a top secret data and want a moderate level of security Letsencrypt is a great opportunity to try. But enough talk, lets get down to business.

How to install and use certbot on Debian GNU / Linux 10 Buster?
Certbot is not available from the Debian software repositories by default, but it’s possible to configure the buster-backports repository in your /etc/apt/sources.list file to allow you to install a backport of the Certbot software with APT tool.
 

1. Install certbot on Debian / Ubuntu Linux


root@webserver:/etc/apt# tail -n 1 /etc/apt/sources.list
deb http://ftp.debian.org/debian buster-backports main


If not there append the repositories to file:


  • Install certbot-nginx certbot-apache deb packages

root@webserver:/ # echo 'deb http://ftp.debian.org/debian buster-backports main' >> /etc/apt/sources.list


  • Install certbot-nginx certbot-apache deb packages

root@webserver:/ # apt update
root@webserver:/ # apt install certbot python-certbot-nginx python3-certbot-apache python-certbot-nginx-doc


This will install the /usr/bin/certbot python executable script which is used to register / renew / revoke / delete your domains certificates.
 

2. Install letsencrypt certbot client on CentOS / RHEL / Fedora and other Linux Distributions


For RPM based distributions and other Linux distributions you will have to install snap package (if not already installed) and use snap command :


[root@centos ~ :] # yum install snapd
systemctl enable –now snapd.socket

To enable classic snap support, enter the following to create a symbolic link between

[root@centos ~ :] # ln -s /var/lib/snapd/snap /snap

snap command lets you install, configure, refresh and remove snaps.  Snaps are packages that work across many different Linux distributions, enabling secure delivery and operation of the latest apps and utilities.

[root@centos ~ :] # snap install core; sudo snap refresh core

Logout from console or Xsession to make the snap update its $PATH definitions.

Then use snap universal distro certbot classic package

 [root@centos ~ :] # snap install –classic certbot
[root@centos ~ :] # ln -s /snap/bin/certbot /usr/bin/certbot


If you're having an XOrg server access on the RHEL / CentOS via Xming or other type of Xemulator you might check out also the snap-store as it contains a multitude of packages installable which are not usually available in RPM distros.

 [root@centos ~ :] # snap install snap-store


how-to-install-snap-applications-on-centos-rhel-linux-snap-store

snap-store is a powerful and via it you can install many non easily installable stuff on Linux such as eclipse famous development IDE, notepad++ , Discord, the so favourite for the Quality Assurance guy Protocol tester Postman etc.

  • Installing certbot to any distribution via acme.sh script

Another often preferred solution to Universally deploy  and upgrade an existing LetsEncrypt program to any Linux distribution (e.g. RHEL / CentOS / Fedora etc.) is the acme.sh script. To install acme you have to clone the repository and run the script with –install

P.S. If you don't have git installed yet do

root@webserver:/ # apt-get install –yes git


and then the usual git clone to fetch it at your side

# cd /root
# git clone https://github.com/acmesh-official/acme.sh
Cloning into 'acme.sh'…
remote: Enumerating objects: 71, done.
remote: Counting objects: 100% (71/71), done.
remote: Compressing objects: 100% (53/53), done.
remote: Total 12475 (delta 39), reused 38 (delta 18), pack-reused 12404
Receiving objects: 100% (12475/12475), 4.79 MiB | 6.66 MiB/s, done.
Resolving deltas: 100% (7444/7444), done.

# sh acme.sh –install


To later upgrade acme.sh to latest you can do

# sh acme.sh –upgrade


In order to renew a concrete existing letsencrypt certificiate

# sh acme.sh –renew domainname.com


To renew all certificates using acme.sh script

# ./acme.sh –renew-all


3. Generate Apache or NGINX Free SSL / TLS Certificate with certbot tool

Now lets generate a certificate for a domain running on Apache Webserver with a Website WebRoot directory /home/phpdev/public/www


root@webserver:/ # certbot –apache –webroot -w /home/phpdev/public/www/ -d your-domain-name.com -d your-domain-name.com

root@webserver:/ # certbot certonly –webroot -w /home/phpdev/public/www/ -d your-domain-name.com -d other-domain-name.com


As you see all the domains for which you will need to generate are passed on with -d option.

Once certificates are properly generated you can test it in a browser and once you're sure they work as expected usually you can sleep safe for the next 3 months ( 90 days) which is the default for TSL / SSL Letsencrypt certificates the reason behind of course is security.


4. Enable freshly generated letsencrypt SSL certificate in Nginx VirtualHost config

Go to your nginx VirtualHost configuration (i.e. /etc/nginx/sites-enabled/phpmyadmin.adzone.pro ) and inside chunk of config add after location { … } – 443 TCP Port SSL listener (as in shown in bolded configuration)
 

server {

….
   location ~ \.php$ {
      include /etc/nginx/fastcgi_params;
##      fastcgi_pass 127.0.0.1:9000;
      fastcgi_pass unix:/run/php/php7.3-fpm.sock;
      fastcgi_index index.php;
      fastcgi_param SCRIPT_FILENAME /usr/share/phpmyadmin$fastcgi_script_name;
   }


    listen 443 ssl; # managed by Certbot
    ssl_certificate /etc/letsencrypt/live/phpmyadmin.adzone.pro/fullchain.pem; # managed by Certbot
    ssl_certificate_key /etc/letsencrypt/live/phpmyadmin.adzone.pro/privkey.pem; # managed by Certbot
    include /etc/letsencrypt/options-ssl-nginx.conf; # managed by Certbot
    ssl_dhparam /etc/letsencrypt/ssl-dhparams.pem; # managed by Certbot


5. Enable new generated letsencrypt SSL certificate in Apache VirtualHost


In /etc/apache2/{sites-available,sites-enabled}/your-domain.com-ssl.conf you should have as a minimum a configuration setup like below:


NameVirtualHost *:443 <VirtualHost 123.123.123.12:443>
    ServerAdmin hipo@domain.com
    ServerName www.pc-freak.net
    ServerAlias www.your-domain.com wwww.your-domain.com your-domain.com
 
    HostnameLookups off
    DocumentRoot /var/www
    DirectoryIndex index.html index.htm index.php index.html.var


CheckSpelling on
SSLEngine on

    <Directory />
        Options FollowSymLinks
        AllowOverride All
        ##Order allow,deny
        ##allow from all
        Require all granted
    </Directory>
    <Directory /var/www>
        Options Indexes FollowSymLinks MultiViews
        AllowOverride All
##      Order allow,deny
##      allow from all
Require all granted
    </Directory>

Include /etc/letsencrypt/options-ssl-apache.conf
SSLCertificateFile /etc/letsencrypt/live/your-domain.com/fullchain.pem
SSLCertificateKeyFile /etc/letsencrypt/live/your-domain.com/privkey.pem
</VirtualHost>


6. Simulate a certificate regenerate with –dry-run

Soon before the 90 days period expiry approaches, it is a good idea to test how all installed Nginx webserver certficiates will be renewed and whether any issues are expected this can be done with the –dry-run option.

root@webserver:/ # certbot renew –dry-run


– – – – – – – – – – – – – – – – – – – – – – – – – – – – – – – – – – – – – – – –
** DRY RUN: simulating 'certbot renew' close to cert expiry
**          (The test certificates below have not been saved.)

Congratulations, all renewals succeeded. The following certs have been renewed:
  /etc/letsencrypt/live/adzone.pro/fullchain.pem (success)
  /etc/letsencrypt/live/cdn.natsr.pro/fullchain.pem (success)
  /etc/letsencrypt/live/mail.adzone.pro/fullchain.pem (success)
  /etc/letsencrypt/live/natsr.pro-0001/fullchain.pem (success)
  /etc/letsencrypt/live/natsr.pro/fullchain.pem (success)
  /etc/letsencrypt/live/phpmyadmin.adzone.pro/fullchain.pem (success)
  /etc/letsencrypt/live/www.adzone.pro/fullchain.pem (success)
  /etc/letsencrypt/live/www.natsr.pro/fullchain.pem (success)
** DRY RUN: simulating 'certbot renew' close to cert expiry
**          (The test certificates above have not been saved.)
– – – – – – – – – – – – – – – – – – – – – – – – – – – – – – – – – – – – – – – –


7. Renew a certificate from a multiple installed certificate list

In some time when you need to renew letsencrypt domain certificates you can list them and choose manually which one you want to renew.

root@webserver:/ # certbot –force-renewal
Saving debug log to /var/log/letsencrypt/letsencrypt.log

How would you like to authenticate and install certificates?
– – – – – – – – – – – – – – – – – – – – – – – – – – – – – – – – – – – – – – – –
1: Apache Web Server plugin (apache)
2: Nginx Web Server plugin (nginx)
– – – – – – – – – – – – – – – – – – – – – – – – – – – – – – – – – – – – – – – –
Select the appropriate number [1-2] then [enter] (press 'c' to cancel): 2
Plugins selected: Authenticator nginx, Installer nginx

Which names would you like to activate HTTPS for?
– – – – – – – – – – – – – – – – – – – – – – – – – – – – – – – – – – – – – – – –
1: adzone.pro
2: mail.adzone.pro
3: phpmyadmin.adzone.pro
4: www.adzone.pro
5: natsr.pro
6: cdn.natsr.pro
7: www.natsr.pro
– – – – – – – – – – – – – – – – – – – – – – – – – – – – – – – – – – – – – – – –
Select the appropriate numbers separated by commas and/or spaces, or leave input
blank to select all options shown (Enter 'c' to cancel): 3
Renewing an existing certificate
Deploying Certificate to VirtualHost /etc/nginx/sites-enabled/phpmyadmin.adzone.pro

Please choose whether or not to redirect HTTP traffic to HTTPS, removing HTTP access.
– – – – – – – – – – – – – – – – – – – – – – – – – – – – – – – – – – – – – – – –
1: No redirect – Make no further changes to the webserver configuration.
2: Redirect – Make all requests redirect to secure HTTPS access. Choose this for
new sites, or if you're confident your site works on HTTPS. You can undo this
change by editing your web server's configuration.
– – – – – – – – – – – – – – – – – – – – – – – – – – – – – – – – – – – – – – – –
Select the appropriate number [1-2] then [enter] (press 'c' to cancel): 2
Redirecting all traffic on port 80 to ssl in /etc/nginx/sites-enabled/phpmyadmin.adzone.pro

– – – – – – – – – – – – – – – – – – – – – – – – – – – – – – – – – – – – – – – –
Your existing certificate has been successfully renewed, and the new certificate
has been installed.

The new certificate covers the following domains: https://phpmyadmin.adzone.pro

You should test your configuration at:
https://www.ssllabs.com/ssltest/analyze.html?d=phpmyadmin.adzone.pro
– – – – – – – – – – – – – – – – – – – – – – – – – – – – – – – – – – – – – – – –

IMPORTANT NOTES:
 – Congratulations! Your certificate and chain have been saved at:
   /etc/letsencrypt/live/phpmyadmin.adzone.pro/fullchain.pem

   Your key file has been saved at:
   /etc/letsencrypt/live/phpmyadmin.adzone.pro/privkey.pem
   Your cert will expire on 2021-03-21. To obtain a new or tweaked
   version of this certificate in the future, simply run certbot again
   with the "certonly" option. To non-interactively renew *all* of
   your certificates, run "certbot renew"
 – If you like Certbot, please consider supporting our work by:

   Donating to ISRG / Let's Encrypt:   https://letsencrypt.org/donate
   Donating to EFF:                    https://eff.org/donate-le


8. Renew all present SSL certificates

root@webserver:/ # certbot renew

Processing /etc/letsencrypt/renewal/www.natsr.pro.conf
– – – – – – – – – – – – – – – – – – – – – – – – – – – – – – – – – – – – – – – –
Cert not yet due for renewal


– – – – – – – – – – – – – – – – – – – – – – – – – – – – – – – – – – – – – – – –

The following certs are not due for renewal yet:
  /etc/letsencrypt/live/adzone.pro/fullchain.pem expires on 2021-03-01 (skipped)
  /etc/letsencrypt/live/cdn.natsr.pro/fullchain.pem expires on 2021-02-28 (skipped)
  /etc/letsencrypt/live/mail.adzone.pro/fullchain.pem expires on 2021-02-28 (skipped)
  /etc/letsencrypt/live/natsr.pro-0001/fullchain.pem expires on 2021-03-01 (skipped)
  /etc/letsencrypt/live/natsr.pro/fullchain.pem expires on 2021-02-25 (skipped)
  /etc/letsencrypt/live/phpmyadmin.adzone.pro/fullchain.pem expires on 2021-03-21 (skipped)
  /etc/letsencrypt/live/www.adzone.pro/fullchain.pem expires on 2021-02-28 (skipped)
  /etc/letsencrypt/live/www.natsr.pro/fullchain.pem expires on 2021-03-01 (skipped)
No renewals were attempted.
– – – – – – – – – – – – – – – – – – – – – – – – – – – – – – – – – – – – – – – –


9. Renew all existing server certificates from a cron job


The certbot package will install a script under /etc/cron.d/certbot to be run that will attempt every 12 hours however from my experience
often this script is not going to work, the script looks similar to below:

# Upgrade all existing SSL certbot machine certificates


0 */12 * * * root test -x /usr/bin/certbot -a \! -d /run/systemd/system && perl -e 'sleep int(rand(43200))' && certbot -q renew

Another approach to renew all installed certificates if you want to have a specific options and keep log of what happened is using a tiny shell script like this:


10. Auto renew installed SSL / TSL Certbot certificates with a bash loop over all present certificates

#!/bin/sh
# update SSL certificates
# prints from 1 to 104 (according to each certbot generated certificate and triggers rewew and logs what happened to log file
# an ugly hack for certbot certificate renew
for i in $(seq 1 104); do echo "Updating $i SSL Cert" | tee -a /root/certificate-update.log; yes "$i" | certbot –force-renewal | tee -a /root/certificate-update.log 2>&1; sleep 5; done

Note: The seq 1 104 is the range depends on the count of installed SSL certificates you have installed on the machine, that can be seen and set the proper value according to your case when you run one time certbot –force-renewal.
 

Getting Console and Graphical hardware system information on Linux with cpuinfo, neofetch, CPU-X (CPU-Z Unix alternative), I-nex and inxi

Tuesday, September 17th, 2019

getting-console-information-and-graphical-hardware-system-information-Linux-cpuinfo-neofetch-cpu-x-i-nex-1

Earlier I've wrote extensive article on how to get hardware information on Linux using tools such as dmidecode, hardinfo, lshw, hwinfo, x86info and biosdecode but there are few other hardware reporting tools for Linux worthy to mention that has been there for historical reasons such as cpuinfo as we as some new shiny ones such as neofetch (a terminal / console hardware report tool as well the CPU-X and I-Nex  which is Linux equivalent to the all known almost standard for Windows hardware detection CPU-Z worthy to say few words about.
 

1. cpuinfo


Perhaps the most basic tool to give you a brief information about your Processor type (model) number of Cores and Logical Processors is cpuinfo

I remember cpuinfo has been there since the very beginning on almost all Linux distributions's repository, nowadays its popularity of the days when the kings on the Linux OS server scenes were Slackware, Caldera OpenLinux and Redhat 6.0 Linux and Debian 3.0  declined but still for scripting purposes it is handy small proggie.

To install and run it in Debian  / Ubuntu / Mint Linux etc.:


aptitude install -y cpuinfo

/usr/bin/cpu-info


Linux-get-processor-system-info-in-console-cpu-info


2. neofetch


The next one worthy to install and check is neofetch (a cross-platform and easy-to-use system information
 command line script that collects your Linux system information and display it on the terminal next to an image, it could be your distributions logo or any ascii art of your choice.)

The cool thing about neofetch is besides being able to identify the System server / desktop hardware parameters, it gives some basic info about number of packages installed on the system, memory free and in use, used kernel and exact type of System (be it Dell PowerEdge Model XX, IBM eSeries Model / HP Proliant Model etc.

neofetch-OS-hardware-information-Linux-ascii-system-info-desktop-notebook

neofetch info generated on my home used Lenovo Thikpad T420

neofetch-OS-hardware-information-Linux-ascii-system-info-pcfreak-home-server
neofetch info from www.pc-freak.net running current machine

neofetch even supports Mac OS X and Windows OS ! 🙂

To install neofetch on Mac OS X:
 

/usr/bin/ruby -e "$(curl -fsSL https://raw.githubusercontent.com/Homebrew/install/master/install)"


or via Mac ported packages using brew

brew install neofetch


neofetch-screenshot-from-Mac-OS-X

neofetch is even installable on Windows OS that has the scoop command line installer tool installer manager with below PowerShell code in cmd.exe (Command line):

powershell Set-ExecutionPolicy RemoteSigned -scope CurrentUser
iex (new-object net.webclient).downloadstring('https://get.scoop.sh')
scoop install git
scoop install neofetch

neofetch-microsoft-windows-hardware-command-line-report-tool-screenshot


By the way Scoop was quite a finding for me and it is pretty handy to install plenty of useful command line Linux / UNIX tools, such as curl, wget, git etc. in the same easy straight forward way as a standard yum or apt-get on Windows (without explicitly installing things as GnuWin and CygWin).
 

3. CPU-X graphical user interface hardware report Linux GUI alternative to Windows CPU-Z


The packages for CPU-X are a bit outdated and even though there are rpm packages for Fedora, OpenSuSE and .deb package for Debian for Debian, Ubuntu and ArchLinux (pacman), there is no up to date version for Debian 10 and the package builds distributed for different Linux distros are a bit outdated.

Thus to install CPU-X on any Linux distribution it is perhaps best to use the portable version (static binary) of CPU-X.
It is currently available on https://github.com/X0rg/CPU-X/releases

To install latest portable version of CPU-X

wget https://github.com/X0rg/CPU-X/releases/download/v3.2.4/CPU-X_v3.2.4_portable.tar.gz

mkdir CPU-X
cd CPU-X

tar -zxvvf CPU-X_v3.2.4_portable.tar.gz
-rwxr-xr-x yohan/users 4563032 2019-01-13 22:15 CPU-X_v3.2.4_portable.bsd64
-rwxr-xr-x yohan/users 5484968 2019-01-13 22:15 CPU-X_v3.2.4_portable.linux64


cp -rpf CPU-X_v3.2.4_portable.linux64 /usr/local/bin/
ln -sf /usr/local/bin/CPU-X_v3.2.4_portable.linux64 /usr/local/bin/cpu-x


Next run as superuser (root)
 

hipo@jeremiah:~$ su -c 'cpu-x'


As seen from below screenshots cpu-x reports a lot of concrete specific hardware data on:

  • Processor
  • Motherboard
  • Memory
  • System
  • Graphic card
  • Performance

cpu-x-cpu-cpu-z-alternative-linux-screenshot-CPU-info

cpu-x-cpu-cpu-z-alternative-linux-screenshot-caches-info

cpu-x-cpu-cpu-z-alternative-linux-screenshot-Motherboard-info

cpu-x-cpu-cpu-z-alternative-linux-screenshot-memory-info

cpu-x-cpu-cpu-z-alternative-linux-screenshot-system-info

cpu-x-cpu-cpu-z-alternative-linux-screenshot-graphics-info

CPU-X can be installed also on FreeBSD very easily by just installing from BSD port tree sysutils/cpu-x/
It is also said to work on other *BSDs, NetBSD, OpenBSD Unixes but I guess this will require a manual compilation based on FreeBSD's port Makefile.

4. I-Nex another GUI alternative to CPU-Z for UNIX / Linux

I-Nex is even more useful for general hardware reporting as it reports many hardware specifications not reported by CPU-X such as Battery type and Model Name  (if the hardware report is on a laptop), info on USB devices slots or plugged USB devices brand and specifications, the available Network devices on the system (MAC Addresses) of each of it, Installed and used drivers on Hard Disk (ATA / SATA / SCSI / SSD), HW Sector size, Logical Block size, HDD Sectors count and other specific Hard Drive data as well as information on available Audio (Sound Blaster) devices (HDA-Intel), used Codecs, loaded kernel ALSA driver, Video card used and most importantly indicators on Processor reported CPU (temperature).


To install I-nex

Go to https://launchpad.net/i-nex or any of the mirror links where it resides and install the respective package, in my case, I was doing the installation on Debian Linux, so fetched current latest amd64 package which as of moment of writting this article is i-nex_7.6.0-0-bzr977-20161012-ubuntu16.10.1_amd64.deb , next installed it with dpkg
 

dpkg -i i-nex_7.6.0-0-bzr977-20161012-ubuntu16.10.1_amd64.deb


As the package was depending on some other .deb packages, which failed to install to install the missing ones I had to further run
 

apt –fix-broken install

i-nex-cpu-info-linux-hardware-info-program


hre

I-Nex thermal indicators about CPU temperature on a Linux Desktop notebook

i-nex-gpu-info-linux-hardware-info-program

i-nex-mobo-info-linux-hardware-info-program

i-nex-audio-info-linux-hardware-info-program

i-nex-drivers-info-linux-hardware-info-program

i-nex-system-info-linux-hardware-info-program

i-nex-battery-info-linux-hardware-info-program


There are other Hardware identification report tools such as CUDA-Z that are useful to check if you have Nvidia Video Card hardware Installed on the PC to check the status of CUDA enabled GPUs, useful if working with nVidia Geforce, Quadro, Tesla cards and ION chipsets.

If you use it however be aware that CUDA-Z is not compatible with 3rd-party linux drivers for NVidia so make sure you have the current official Nvidia version.


5. Inxi full featured system information script


Inxi is a 10000 lines mega bash script that fetches hardware details from multiple different sources in /proc /sys and from commands on the system, and generates a beautiful looking console report that non technical users can read easily.

inxi-10-k-mega-bash-shell-script-reporting-on-installed-system-computer-hardware


inxi -Fx


inxi-report-on-installed-hardware-on-my-lenovo-thinkpad-home-laptop

Each of the pointed above tools has different method of collection of Hardware information from various resources e.g. – kernel loaded modules, dmesg, files like /proc/meminfo /proc/version /proc/scsi/scsi /proc/partitions.
Hence some of the tools are likely to report more info than otheres, so in case if some information you need regarding the system plugged in hardware is missing you can perhaps obtain it from another program. Most Linux distribution desktop provided GNOME package are including Hardinfo gui tool, but in many cases above mentioned tools are likely to add even more on info on what is inside your PC Box.
If you're aware of others tools that are useful not mentioned here please share it.

Scanning ports with netcat “nc” command on Linux and UNIX / Checking for firewall filtering between source and destination with nc

Friday, September 6th, 2019

scanning-ports-with-netcat-nc-command-on-Linux-and-UNIX-checking-for-firewall-filtering-between-source-destination-host-with-netcat

Netcat ( nc ) is one of that tools, that is well known in the hacker (script kiddie) communities, but little underestimated in the sysadmin world, due to the fact nmap (network mapper) – the network exploratoin and security auditing tool has become like the standard penetration testing TCP / UDP port tool
 

nc is feature-rich network debugging and investigation tool with tons of built-in capabilities for reading from and writing to network connections using TCP or UDP.

Its Plethora of features includes port listening, port scanning & Transferring files due to which it is often used by Hackers and PenTesters as Backdoor. Netcat was written by a guy we know as the Hobbit <hobbit@avian.org>.

For a start-up and middle sized companies if nmap is missing on server usually it is okay to install it without risking to open a huge security hole, however in Corporate world, due to security policies often nmap is not found on the servers but netcat (nc) is present on the servers so you have to learn, if you haven't so to use netcat for the usual IP range port scans, if you're so used to nmap.

There are different implementations of Netcat, whether historically netcat was UNIX (BSD) program with a latest release of March 1996. The Linux version of NC is GNU Netcat (official source here) and is POSIX compatible. The other netcat in Free Software OS-es is OpenBSD's netcat whose ported version is also used in FreeBSD. Mac OS X also comes with default prebundled netcat on its Mac OS X from OS X version (10.13) onwards, on older OS X-es it is installable via MacPorts package repo, even FreeDOS has a port of it called NTOOL.

The (Swiss Army Knife of Embedded Linux) busybox includes a default leightweight version of netcat and Solaris has the OpenBSD netcat version bundled.

A cryptography enabled version fork exists that supports that supports integrated transport encryption capabilities called Cryptcat.

The Nmap suite also has included rewritten version of GNU Netcat named Ncat, featuring new possibilities such as "Connection Brokering", TCP/UDP Redirection, SOCKS4 client and server support, ability to "Chain" Ncat processes, HTTP CONNECT proxying (and proxy chaining), SSL connect/listen support and IP address/connection filtering. Just like Nmap, Ncat is cross-platform.

In this small article I'll very briefly explain on basic netcat – known as the TCP Army knife tool port scanning for an IP range of UDP / TCP ports.


1. Scanning for TCP opened / filtered ports remote Linux / Windows server


Everyone knows scanning of a port is possible with a simple telnet request towards the host, e.g.:

telnet SMTP.EMAIL-HOST.COM 25


The most basic netcat use that does the same is achiavable with:


$ nc SMTP.EMAIL-HOST.COM 25
220 jeremiah ESMTP Exim 4.92 Thu, 05 Sep 2019 20:39:41 +0300


Beside scanning the remote port, using netcat interactively as pointing in above example, if connecting to HTTP Web services, you can request remote side to return a webpage by sending a false referer, source host and headers, this is also easy doable with curl / wget and lynx but doing it with netcat just like with telnet could be fun, here is for example how to request an INDEX page with spoofed HTTP headers.
 

nc Web-Host.COM 25
GET / HTTP/1.1
Host: spoofedhost.com
Referrer: mypage.com
User-Agent: my-spoofed-browser


2. Performing a standard HTTP request with netcat


To do so just pype the content with a standard bash integrated printf function with the included end of line (the unix one is \n but to be OS independent it is better to use r\n  – the end of line complition character for Windows.


printf "GET /index.html HTTP/1.0\r\nHost: www.pc-freak.net\r\n\r\n" | nc www.pc-freak.net 80


3. Scanning a range of opened / filtered UDP ports


To scan for lets say opened remote system services on the very common important ports opened from UDP port 25 till, 1195 – more specifically for:

  • UDP Bind Port 53
  • Time protocol Port (37)
  • TFTP (69)
  • Kerberos (88)
  • NTP 123
  • Netbios (137,138,139)
  • SNMP (161)
  • LDAP 389
  • Microsoft-DS (Samba 445)
  • Route BGP (52)
  • LDAPS (639)
  • openvpn (1194)


nc -vzu 192.168.0.1 25 1195


UDP tests will show opened, if no some kind of firewall blocking, the -z flag is given to scan only for remote listening daemons without sending any data to them.


4. Port Scanning TCP listening ports with Netcat


As prior said using netcat to scan for remote opened HTTP Web Server on port 80 an FTP on Port 23 or a Socks Proxy or MySQL Database on 3306 / PostgreSQL DB on TCP 5432 is very rare case scenario.

Below is example to scan a Local network situated IP for TCP open ports from port 1 till 7000.


# nc -v -n -z -w 5 192.168.1.2 1-7000

           nc: connect to host.example.com 80 (tcp) failed: Connection refused
           nc: connect to host.example.com 20 (tcp) failed: Connection refused
           Connection to host.example.com port [tcp/ssh] succeeded!
           nc: connect to host.example.com 23 (tcp) failed: Connection refused


Be informed that scanning with netcat is much more slower, than nmap, so specifying smaller range of ports is always a good idea to reduce annoying waiting …


The -w flag is used to set a timeout to remote connection, usually on a local network situated machines the timeout could be low -w 1 but for machines across different Data Centers (let say one in Berlin and one in Seattle), use as a minimum -w 5.

If you expect remote service to be responsive (as it should always be), it is a nice idea to use netcat with a low timeout (-w) value of 1 below is example:
 

netcat -v -z -n -w 1 scanned-hosts 1-1023


5. Port scanning range of IP addresses with netcat


If you have used Nmap you know scanning for a network range is as simple as running something like nmap -sP -P0 192.168.0.* (to scan from IP range 1-255 map -sP -P0 192.168.0.1-150 (to scan from local IPs ending in 1-150) or giving the network mask of the scanned network, e.g. nmap -sF 192.168.0.1/24 – for more examples please check my previous article Checking port security on Linux with nmap (examples).

But what if nmap is not there and want to check a bunch 10 Splunk servers (software for searching, monitoring, and analyzing machine-generated big data, via a Web-style interface.), with netcat to find, whether the default Splunk connection port 9997 is opened or not:


for i in `seq 1 10`; do nc -z -w 5 -vv splunk0$i.server-domain.com 9997; done


6. Checking whether UDP port traffic is allowed to destination server


Assuring you have access on Source traffic (service) Host A  and Host B (remote destination server where a daemon will be set-upped to listen on UDP port and no firewall in the middle Network router or no traffic control and filtering software HUB is preventing the sent UDP proto traffic, lets say an ntpd will be running on its standard 123 port there is done so:

– On host B (the remote machine which will be running ntpd and should be listening on port 123), run netcat to listen for connections


# nc -l -u -p 123
Listening on [0.0.0.0] (family 2, port 123)


Make sure there is no ntpd service actively running on the server, if so stop it with /etc/init.d/ntpd stop
and run above command. The command should run as superuser as UDP port 123 is from the so called low ports from 1-1024 and binding services on such requires root privileges.

– On Host A (UDP traffic send host


nc -uv remote-server-host 123


netcat-linux-udp-connection-succeeded

If the remote port is not reachable due to some kind of network filtering, you will get "connection refused".
An important note to make is on some newer Linux distributions netcat might be silently trying to connect by default using IPV6, bringing false positives of filtered ports due to that. Thus it is generally a good idea, to make sure you're connecting to IPV6


$ nc -uv -4 remote-server-host 123


Another note to make here is netcat's UDP connection takes 2-3 seconds, so make sure you wait at least 4-8 seconds for a very distant located hosts that are accessed over a multitude of routers.
 

7. Checking whether TCP port traffic allowed to DST remote server


To listen for TCP connections on a specified location (external Internet IP or hostname), it is analogous to listening for UDP connections.

Here is for example how to bind and listen for TCP connections on all available Interface IPs (localhost, eth0, eth1, eth2 etc.)
 

nc -lv 0.0.0.0 12345


Then on client host test the connection with


nc -vv 192.168.0.103 12345
Connection to 192.168.0.103 12345 port [tcp/*] succeeded!


8. Proxying traffic with netcat


Another famous hackers use of Netcat is its proxying possibility, to proxy anything towards a third party application with UNIX so any content returned be printed out on the listening nc spawned daemon like process.
For example one application is traffic SMTP (Mail traffic) with netcat, below is example of how to proxy traffic from Host B -> Host C (in that case the yandex current mail server mx.yandex.ru)

linux-srv:~# nc -l 12543 | nc mx.yandex.ru 25


Now go to Host A or any host that has TCP/IP protocol access to port 12543 on proxy-host Host B (linux-srv) and connect to it on 12543 with another netcat or telnet.

to make netcat keep connecting to yandex.ru MX (Mail Exchange) server you can run it in a small never ending bash shell while loop, like so:


linux-srv:~# while :; do nc -l 12543 | nc mx.yandex.ru 25; done


 Below are screenshots of a connection handshake between Host B (linux-srv) proxy host and Host A (the end client connecting) and Host C (mx.yandex.ru).

host-B-running-as-a-proxy-daemon-towards-Host-C-yandex-mail-exchange-server


Host B netcat as a (Proxy)

Host-A-Linux-client-connection-handshake-to-proxy-server-with-netcat
that is possible in combination of UNIX and named pipes (for more on Named pipes check my previous article simple linux logging with named pipes), here is how to run a single netcat version to proxy any traffic in a similar way as the good old tinyproxy.

On Proxy host create the pipe and pass the incoming traffic towards google.com and write back any output received back in the named pipe.
 

# mkfifo backpipe
# nc -l 8080 0<backpipe | nc www.google.com 80 1>backpipe

Other useful netcat proxy set-up is to simulate a network connectivity failures.

For instance, if server:port on TCP 1080 is the normal host application would connect to, you can to set up a forward proxy from port 2080 with

    nc -L server:1080 2080

then set-up and run the application to connect to localhost:2080 (nc proxy port)

    /path/to/application_bin –server=localhost –port=2080

Now application is connected to localhost:2080, which is forwarded to server:1080 through netcat. To simulate a network connectivity failure, just kill the netcat proxy and check the logs of application_bin.

Using netcat as a bind shell (make any local program / process listen and deliver via nc)


netcat can be used to make any local program that can receive input and send output to a server, this use is perhaps little known by the junior sysadmin, but a favourite use of l337 h4x0rs who use it to spawn shells on remote servers or to make connect back shell. The option to do so is -e

-e – option spawns the executable with its input and output redirected via network socket.

One of the most famous use of binding a local OS program to listen and receive / send content is by
making netcat as a bind server for local /bin/bash shell.

Here is how

nc -l -p 4321 -e /bin/sh


If necessery specify the bind hostname after -l. Then from any client connect to 4321 (and if it is opened) you will gain a shell with the user with which above netcat command was run. Note that many modern distribution versions such as Debian / Fedora / SuSE Linux's netcat binary is compiled without the -e option (this works only when compiled with -DGAPING_SECURITY_HOLE), removal in this distros is because option is potentially opening a security hole on the system.

If you're interested further on few of the methods how modern hackers bind new backdoor shell or connect back shell, check out Spawning real tty shells article.


For more complex things you might want to check also socat (SOcket CAT) – multipurpose relay for bidirectional data transfer under Linux.
socat is a great Linux Linux / UNIX TCP port forwarder tool similar holding the same spirit and functionality of netcat plus many, many more.
 

On some of the many other UNIX operating systems that are lacking netcat or nc / netcat commands can't be invoked a similar utilitiesthat should be checked for and used instead are:

ncat, pnetcat, socat, sock, socket, sbd

To use nmap's ncat to spawn a shell for example that allows up to 3 connections and listens for connects only from 192.168.0.0/24 network on port 8081:

ncat –exec "/bin/bash" –max-conns 3 –allow 192.168.0.0/24 -l 8081 –keep-open


9. Copying files over network with netcat


Another good hack often used by hackers to copy files between 2 servers Server1 and Server2 who doesn't have any kind of FTP / SCP / SFTP / SSH / SVN / GIT or any kind of Web copy support service – i.e. servers only used as a Database systems that are behind a paranoid sysadmin firewall is copying files between two servers with netcat.

On Server2 (the Machine on which you want to store the file)
 

nc -lp 2323 > files-archive-to-copy.tar.gz


On server1 (the Machine from where file is copied) run:
 

nc -w 5 server2.example.com 2323 < files-archive-to-copy.tar.gz


Note that the downside of such transfers with netcat is data transferred is unencrypted so any one with even a simple network sniffer or packet analyzier such as iptraf or tcpdump could capture the file, so make sure the file doesn't contain sensitive data such as passwords.

Copying partition images like that is perhaps best way to get disk images from a big server onto a NAS (when you can't plug the NAS into the server).
 

10. Copying piped archived directory files with netcat


On computer A:

export ARIBTRARY_PORT=3232
nc -l $ARBITRARY_PORT | tar vzxf –

On Computer B:

tar vzcf – files_or_directories | nc computer_a $ARBITRARY_PORT


11. Creating a one page webserver with netcat and ncat


As netcat could listen to port and print content of a file, it can be set-up with a bit of bash shell scripting to serve
as a one page webserver, or even combined with some perl scripting and bash to create a multi-serve page webserver if needed.

To make netact serve a page to any connected client run in a screen / tmux session following code:


while true; do nc -l -p 80 -q 1 < somepage.html; done


Another interesting fun example if you have installed ncat (is a small web server that connects current time on server on connect).
 

ncat -lkp 8080 –sh-exec 'echo -ne "HTTP/1.0 200 OK\r\n\r\nThe date is "; date;'


12. Cloning Hard disk partitions with netcat


rsync is a common tool used to clone hard disk partitions over network. However if rsync is not installed on a server and netcat is there you can use it instead, lets say we want to clone /dev/sdb
from Server1 to Server2 assuming (Server1 has a configured working Local or Internet connection).


On Server2 run:
 

nc -l -p 4321 | dd of=/dev/sdb


Following on Server2 to start the Partition / HDD cloning process run


dd if=/dev/sdb | nc 192.168.0.88 4321


Where 192.168.0.88 is the IP address listen configured on Server2 (in case you don't know it, check the listening IP to access with /sbin/ifconfig).

Next you have to wait for some short or long time depending on the partiiton or Hard drive, number of files / directories and allocated disk / partition size.

To clone /dev/sda (a main partiiton) from Server1 to Server2 first requirement is that it is not mounted, thus to have it unmounted on a system assuming you have physical access to the host, you can boot some LiveCD Linux distribution such as Knoppix Live CD on Server1, manually set-up networking with ifconfig or grab an IP via DHCP from the central DHCP server and repeat above example.


Happy netcating 🙂

Remove pre-installed HP, Dell, Asus, Acer, Toshiba not needed default vendor software on a new bought PC notebook quickly with Decrap My Computer

Thursday, April 14th, 2016

remove-default-unneded-software-from-manufacturer-hp-asus-acer-dell-toshiba
While browsing today and looking for software to clean up all the spy software from my corporate HP laptop, I've come across an interesting tool called Decrap which aims at removing Bloatware from a Windows PC / notebook (mirrored here because original software site was down)

So what is Bloatware ?

The term Bloatware (also called jokingly crapware) is term is the one that was coined to describe, the default pre-installed software that comes to you together with Windows pre-installed OS by the hardware manufacturer.
I'm sure anyone who bought brand new branded PC or laptop over the last 10 years have already suffered the unwanted and unnecessery
bunch of software that comes pre-installed freeware programs aiming to help you in your daily work but in reality just slowing down your PC
and showing annoying popups or at best keeping useless in Windows system apptray.

Let me give you an example:

Cleanup (Remove) common ASUS, HP, Dell default  installed unneded (Bloatware) software

Many users may want to uninstall ASUS Crapware software such as ASUS Tutor, ASUS LifeFrame3, ASUS WebStorage and ASUSVibe.

Like Asus, HP computers often come preloaded with useless software from factory, example for this is HP Customer Service enhancements, HP Update, HP Total Care Setup and ProtectSmart.

If you buy Dell PC notebook soon you'll discover that there are several preloaded software (often unnecessery software) such as Dell Stage, Dell Digital Delivery and Dell DataSafe.

Toshiba computers and notebooks contain pre-loeaded "crapware" software from Toshiba.
Just to mention a few of those: Toshiba Disc Creator, Toshiba ReelTime, Service Station, Bulletin Board and Toshiba Assist.

Often there are fingerprint reader programs, Wi-Fi connection managers, Bluetooth managers, Audio Management sofware and other third party vendor software which tend to be not working as good as others softwares from third vendor, so Decrap is to help you to identify and remove these too in a easy GUI manner.

Non-experienced Computer users often leave the bloatware to hang around for even years and only if some relative that is an IT involved person / sysadmin / Even once you're aware that the Bloatware is on the system the ordinary user is hard to remove it as he is scared not to break the system.
Besides that fften this bloatware just soft comes so much integrated into Windows that removing it costs hours of tries and research online on
all the Bloatware components and even then could mislead you so you break the PC. programmer etc. comes home of such users finds out about the happily existing of the useless software on the notebook.


So here is Decrap My Computer coming at place aiming to help to remove the unnecessery Hardware vendor software in few easy (Click, Click, Click Next ..) steps.

decrap-my-computer-clean-up-bloatware-crapware-on-windows-laptop-main-gui

Then decrap does silently all the complex operations and suggestions to make the HP, Dell, Asus, Toshiba manufacturer prebundled software to be stopped and uninstalled.
Decrap My Computer is a freeware, lightweight and easy to use and lets you safely remove crapware and bloatware, or any software, from any Windows PC.

Even for Old computers, Decrap comes handy for the unexperienced avarage user who used his laptop with this useless  default vendors programs silently killing the performance respectively user experience for years.

Using Decrap is quite intuitive PC is scanned for Bloatware and then after a backup Windows Restore Point is offered you're offered to review and Uninstall the unwanted softwares. There is also an automatic mode but those one still could be a bit dangerous, so use the automatic mode only on multiple machines with the same model  / brand notebooks that comes prebundled with same sofware after testing and confirming the automatic mode on 1 initial machine will not break up some needed functionality.

decrap-your-pc-clean-up-windows-from-hp-dell-toshiba-asus-bloatware-unuseful-programs

Here is few screenshots of the tool in action:
decrap-choose-what-default-laptop-manufacturer-software-you-want-to-clean-from-new-bought-pc

decrap-choose-what-default-laptop-manufacturer-software-you-want-to-clean-from-new-bought-pc-1

decrap-choose-what-default-laptop-manufacturer-software-you-want-to-clean-from-new-bought

Another good alternative (since decrap seems to be not maintained anymore) as I just leardned from Natasha Myles (thanks for pointing me about the broken link to decrap website) is SpeedUpPC more on speeding up old PC or laptop is her article 

Install and use personal Own Cloud on Debian Linux for better shared data security – OwnCloud a Free Software replacement for Google Drive

Thursday, August 23rd, 2018

owncloud-self-hosted-cloud-file-sharing-and-storage-service-for-gnu-linux-howto-install-on-debian

Basicly I am against the use of any Cloud type of service but as nowadays Cloud usage is almost inevitable and most of the times you need some kind of service to store and access remotely your Data from multiple devices such as DropBox, Google Drive, iCloud etc. and using some kind of infrastructure to execute high-performance computing is invitable just like the Private Cloud paid services online are booming nowdays, I decided to give a to research and test what is available as a free software in the field of Clouding (your data) 🙂

Undoubfully, it is really nice fact that there are Free Software / Open Source alternatives to run your Own personal Cloud to store your data from multiple locations on a single point.

The most popular and leading Cloud Collaboration service (which is OpenSource but unfortunately not under GPLv2 / GPV3 – e.g. not fully free software) is OwnCloud.

ownCloud is a flexible self-hosted PHP and Javascript based web application used for data synchronization and file sharing (where its remote file access capabilites are realized by Sabre/Dav an open source WebDav server.
OwnCloud allows end user to easily Store / Manage files, Calendars, Contacts, To-Do lists (user and group administration via OpenID and LDAP), public URLs can be easily, created, the users can interact with browser-based ODF (Open Document Format) word processor , there is a Bookmarking, URL Shortening service integrated, Gallery RSS Feed and Document Viewer tools such as PDF viewer etc. which makes it a great alternative to the popular Google Drive, iCloud, DropBox etc.

The main advantage of using a self-hosted Cloud is that Your data is hosted and managed by you (on your server and your hard drives) and not by some God knows who third party provider such as the upmentioned.
In other words by using OwnCloud you manage your own data and you don't share it ot on demand with the Security Agencies with CIA, MI6, Mussad … (as it is very likely most of publicly offered Cloud storage services keeps track on the data stored on them).

The other disadvantage of Cloud Computing is that the stored data on such is usually stored on multiple servers and you can never know for sure where your data is physically located, which in my opinion is way worse than the option with Self Hosted Cloud where you know where your data belongs and you can do whatever you want with your data keep it secret / delete it or share it on your demand.

OwnCloud has its clients for most popular Mobile (Smart Phone) platforms – an Android client is available in Google Play Store as well as in Apple iTunes besides the clients available for FreeBSD OS, the GNOME desktop integration package and Raspberry Pi.

For those who are looking for additional advanced features an Enterprise version of OwnCloud is also available aiming business use and included software support.

Assuming you have a homebrew server or have hired a dedidacted or VPS server (such as the Ones we provide) ,Installing OwnCloud on GNU / Linux is a relatively easy
task and it will take no more than 15 minutes to 2 hours of your life.
In that article I am going to give you a specific instructions on how to install on Debian GNU / Linux 9 but installing on RPM based distros is similar and straightfoward process.
 

1. Install MySQL / MariaDB database server backend
 

By default OwnCloud does use SQLite as a backend data storage but as SQLite stores its data in a file and is becoming quickly slow, is generally speaking slowre than relational databases such as MariaDB server (or the now almost becoming obsolete MySQL Community server).
Hence in this article I will explain how to install OwnCloud with MariaDB as a backend.

If you don't have it installed already, e.g. it is a new dedicated server install MariaDB with:
 

server:~# apt-get install –yes mariadb-server


Assuming you're install on a (brand new fresh Linux install – you might want to install also the following set of tools / services).


server:~# systemctl start mariadb
server:~# systemctl enable mariadb
server:~# mysql_secure_installation


mysql_secure_installation – is to finalize and secure MariaDB installation and set the root password.
 

2. Create necessery database and users for OwnCloud to the database server
 

linux:~# mysql -u root -p
MariaDB [(none)]> CREATE DATABASE owncloud CHARACTER SET utf8;
MariaDB [(none)]> GRANT ALL PRIVILEGES ON owncloud.* TO 'owncloud'@'localhost' IDENTIFIED BY 'owncloud_passwd';
MariaDB [(none)]> FLUSH PRIVILEGES;
MariaDB [(none)]> \q


3. Install Apache + PHP necessery deb packages
 

As of time of writting the article on Debian 9.0 the required packages for a working Apache + PHP install for OwnCloud are as follows.


server:~# apt-get install –yes apache2 mariadb-server libapache2-mod-php7.0 \
openssl php-imagick php7.0-common php7.0-curl php7.0-gd \
php7.0-imap php7.0-intl php7.0-json php7.0-ldap php7.0-mbstring \
php7.0-mcrypt php7.0-mysql php7.0-pgsql php-smbclient php-ssh2 \
php7.0-sqlite3 php7.0-xml php7.0-zip php-redis php-apcu


4. Install Redis to use as a Memory Cache for accelerated / better performance ownCloud service


Redis is an in-memory kept key-value database that is similar to Memcached so OwnCloud could use it to cache stored data files. To install latest redis-server on Debian 9:
 

server:~# apt-get install –yes redis-server

5. Install ownCloud software packages on the server

Unfortunately, default package repositories on Debian 9 does not provide owncloud server packages but only some owncloud-client packages are provided, that's perhaps the packages issued by owncloud does not match debian packages.

As of time of writting this article, the latest available OwnCloud server  version package for Debian is OC 10.

a) Add necessery GPG keys

The repositories to use are provided by owncloud.org, to use them we need to first add the necessery gpg key to verify the binaries have a legit checksum.
 

server:~# wget -qO- https://download.owncloud.org/download/repositories/stable/Debian_9.0/Release.key | sudo apt-key add –


b) Add owncloud.org repositories in separete sources.list file


server:~# echo 'deb https://download.owncloud.org/download/repositories/stable/Debian_9.0/ /' | sudo tee /etc/apt/sources.list.d/owncloud.list


c) Enable https transports for the apt install tool


server:~# apt-get –yes install apt-transport-https


d) Update Debian apt cache list files and install the pack


server:~# apt-get update


server:~# apt-get install –yes owncloud-files


By default owncloud store file location is /var/www/owncloud but on many servers that location is not really appropriate because /var/www might be situated on a hard drive partition whose size is not big enough, if that's the case just move the folder to another partition and create a symbolic link in /var/www/owncloud pointing to it …


6. Create necessery Apache configurations to make your new self-hosted cloud accessible
 

a) Create Apache config file


server:~# vim /etc/apache2/sites-available/owncloud.conf


Alias /owncloud "/var/www/owncloud/"

<Directory /var/www/owncloud/>
Options +FollowSymlinks
AllowOverride All

<IfModule mod_dav.c>
Dav off
</IfModule>

SetEnv HOME /var/www/owncloud
SetEnv HTTP_HOME /var/www/owncloud

</Directory>

b) Enable Mod_Dav (WebDAV) if it is not enabled yet


server:~# ln -sf ../mods-available/dav_fs.conf
server:~# ln -sf ../mods-available/dav_fs.load
server:~# ln -sf ../mods-available/dav.load
server:~# ln -sf ../mods-available/dav_lock.load

c) Set proper permissions for /var/www/owncloud to make upload work properly


chown -R www-data: /var/www/owncloud/


d) Restart Apache WebServer (to make new configuration affective)


server:~# /etc/init.d/apache2 restart


7. Finalize  OwnCloud Install
 

Access OwnCloud Web Interface to finish the database creation and set the administrator password for the New Self-Hosted cloud
 

http://Your_server_ip_address/owncloud/

By default the Web interface is accessible in unencrypted (insecure) http:// it is a recommended practice (if you already don't have an HTTPS SSL certificate install for the IP or the domain to install one either a self-signed certificate or even better to use LetsEncrypt CertBot to easily create a valid SSL for free for your domain


installing-OwnCloud-Web-Config-User-Pass-interface-Owncloud-10-on-Debian-9-Linux-howto

Just fill in in your desired user / pass and pass on the database user / password / db name (if required you can set also a different location for the data directory from the default one /var/www/owncloud/data.

Click Finish Setup and That's all folks!

owncloud-server-web-ui-interface

OwnCloud is successfully installed on the server, you can now go and download a Mobile App or Desktop application for whatever OS you're using and start using it as a Dropbox replacement. In a certain moment you might want to consult also the official UserManual documentation as you would probably need further information on how to manage your owncloud.

Enjoy !

How to fully recover deleted files on ext3 Debian Linux partition – undelete files from ext3 filesystems with ext3grep

Monday, March 7th, 2011

In order to recover fully data by mistake or on purpose deleted on Debian GNU/Linux there is a tool called ext3grep which is able to completely recover data by innodes.

Recovering the deleted files data is very easy and can be done via some livecd after installing the ext3grep tool.

In my case I used the Back Track Linux distribution to recover my data. Recovery is still in process and it appears all or at least most of my data is about to be recovered.

For the recovery procedure all necessary is an external partition in ext3 or ext3 where the recovered data from the ext3 device can be stored.

My partition was about 20GB and since I had no external hard dive to store the data to I used the sshfs to mount remotely a hard drive via the networking using the sshfs program to make the ssh mount for more see my previous post Howto mount remote server ssh filesystem using sshfs

The Backtrack livecd linux security distribution is missing the ext3grep tool thus I had to first install the tool after booting the livecd on the notebook to succeed in that it was necessary to install the e2fslibs-dev package through the command:

debian:~# apt-get install e2fslibs-dev

Further on I've downloaded the latest version of the ext3grep and untarred the archive and compiled it with the commands:

debian:~# ./configure && make && make install
Then I used the simple commands:

debian:~# cd /mnt/res
debian:~# ext3grep --restore-all /dev/sda8

to launch the recovery.
Where in the above commands /mnt/res is the mountpoint location where I wanted to have all my data recovered and the /dev/sda8 is the device from which I wanted to recover my data.

It takes a bit long until the recovery is completed and with 20 gigabytes of data about 5, 6 hours might be necessary for the data to be recovered but the main point is it recovers.

Windows unable to delete file, file locked unlocking with Unlocker tiny tool

Wednesday, April 13th, 2016

Windows-Unlocker-program-show-what-program-or-software-is-locking-your-file-why-file-cant-be-deleted-file-locked

If you want to delete some file on a Windows server or Desktop but you get the a dialog with an error saying:

"This action can't be completed because the folder or a file in it is open in another program"

windows-unable-to-delete-file-file-locked-get-what-is-locking-it-and-unlock-the-file-with-Unlocker-tiny-desktop-graphic-tool-0

Then you need to find out which Program is preventing the file from deletion / locking the file, I've earlier blogged on how to check which process locks file with tasklist or wmic Windows commands

However some users might prefer to not bother with command line check what is locking a file and then killing the Process manually with taskmanager (taskmgr.exe) but do both file unlocking from one single gui interface, that's especially for lazy novice users, gamers and most of Desktop Windows users.

If you're one of those lazy users you will appriace

Unlocker – a useful utility for unlocking files, it will help you figure out which file is using a file what program is using the file you're prevented to delete.
Unlocker is the tool for you if you get any of below error messages, when you try to delete a file:


  • Cannot delete folder: It is being used by another person or program
  • Cannot delete file: Access is denied
  • There has been a sharing violation.
  • The source or destination file may be in use.
  • The file is in use by another program or user.
  • Make sure the disk is not full or write-protected and that the file is not currently in use.
     

windows-unable-to-delete-file-file-locked-get-what-is-locking-it-and-unlock-the-file-with-Unlocker-tiny-desktop-graphic-tool-1

If you stumble unto an locked file once you download and install Unlocker tool and launch the tool ( in case it disappers in future a mirror of Unlocker tool here ).
Once installed if you click properties over the file which is refused to be deleted you will get a new menu such as in below screenshot:

NB! Beware while installing Unlocker you might be offered to install a bunch of malware (make sure you deselect it). Also Unlocker's site is made in a way so the Download button could easily be confused with some Google Adsense

unlocker-windows-menu-added-to-properties-options-screenshot

Click on the file that is being locked and choose the Unlocker button, for example if you have a bunch of Videos installed and the video is being locked by VLC clicking on the file you will be shown VLC like in below screenshot


Unlocker-screenshot-locked-file-because-movie-opened-in-VLC

As you see you're shown the Process PID that is being used by the file the full path to the locking program and you have the option to quickly kill the process or unlock the file. Note that at some cases unlocking a file used by some critical program lets say Microsoft Word / Excel or OneNote could cause you a data loss, so before unlocking a file make sure you know what you're doing.

For more advanced users that still prefer GUI to find out what is Locking a file you can also check out Microsoft Process Explorer (advabced task manager) like tool.
If you haven't tried Process Explorer be sure to take a look at it as its a great tool for Win SysAdmins:

Process Explorer is very handy if you want to explore which .DLL (Windows Libraries) are used by a Process / Program

Windows-process-explorer-an-advanced-task-manager-for-windows-and-handy-tool-to-see-what-external-libraries-and-files-a-program-is-using.png

Windows-process-explorer-an-advanced-task-manager-for-windows-and-handy-tool-to-see-what-external-libraries-and-files-a-program-is-using-1


Apache Benchmarking

Monday, January 14th, 2008

They’re few tools out there which are most common in use to do benchmarking and stess test on webservers. One of them “the most common one”is called “ab” or apache benchmark Check it out here another very common tool is called flood Check it here Flood seems to be the newer and most accurate tool to use for stress testing unfortunately it has one weakness. It only works with configuration file which is in xml format. So every time before you start it you have to generate a new xml file to suite your needs. Also a tool recommended to me in the #apache in the irc.freenode.net network is called “jmeter”, it’s located here . I personally didn’t tested it because it uses Java as a back end. While googling around I also have stucked on this interesting project PHPSPEED although I wasn’t able to test it looks like a promising test suite.END—–

How to check Java JAR JDBC / ODBC version on Linux / Unix and Windows server

Tuesday, March 31st, 2015

how-to-check-java-jar-odbc-jdbc-version-linux-unix-windows-server
If you're forced to update some Java based Web application using Java + Tomcat / WebSphere / Weblogic it is a common thing that the Java App developer handed to you will ask you which version is the Oracle JDBC / ODBC driver on current Java Virtual Machine version installed.


Actually there are few methods to check Java JDBC / ODBC version:

1. Check Java ODBC version greeping it in  WEB-INF/MANIFEST.MF

Usually the .jar file comes archived in a .ZIP – i.e.  application-name5 .zip
 

server:~# unzip application-name5.zip


Then if the .zip file contains the OJDBC as a .JAR extension – (Java Archive), inflate it with jar tool.
 

server:~# jar -xvf ojdbc7.jar META-INF/MANIFEST.MF
inflated: META-INF/MANIFEST.MF

server:~# grep Implementation META-INF/MANIFEST.MF
Implementation-Vendor: Oracle Corporation
Implementation-Title: JDBC
Implementation-Version: 12.1.0.1.0


Alternative way to check the info (if you don't have java or jar installed on the Linux / Unix machine) is simply with unzip + grep like so:


server:~# unzip -p ojdbc14.jar META-INF/MANIFEST.MF | grep -C 1 version

Manifest-Version: 1.0
Implementation-Version: "Oracle JDBC Driver version – 10.1.0.5.0"
Specification-Title: "Oracle JDBC driver classes for use with JDK1.4"
Specification-Version: "Oracle JDBC Driver version – 10.1.0.5.0"
Implementation-Title: "ojdbc14.jar"


If you're on a Windows (and you have Windows server grep.exe installed), use instead:


C:\jar> unzip -p ojdbc14.jar META-INF/MANIFEST.MF | grep -C version


2. Getting some info with Java JRE tool

You can check some useful Java version info also just with Java Runtime Environment (java) tool
 

server:~# java -jar ojdbc5.jar

Oracle 11.1.0.7.0-Production JDBC 3.0 compiled with JDK5