I've noticed some kind of script kiddie gained access somehow on one of the servers, I administrate. A MS-SQL Scanner tool called sslog, was downloaded in tmp and run with root user credentials.
The cracked victim host is running Debian Linux Squeeze and last security update, I've made about few months ago. Inside /tmp/.a/ directory, I've found 0day MS-SQL scanner called mysqljackpot. Maybe the tool is still private exploit scanner because on the Internet I couldn't find it anywhere.:
 # ls -al /tmp/.a

total 52

drwxr-xr-x 5 root root 4096 Oct 29 01:10 ./

drwxrwxrwt 10 root root 36864 Oct 29 14:46 ../

drwxr-xr-x 3 root root 4096 Oct 27 21:46 mysqljackpot/

drwxr-xr-x 3 root root 4096 Oct 28 16:58 new/

drwxr-xr-x 3 root root 4096 Oct 29 12:48 pass-multe/

# ls -al /tmp/.a/new/

total 12

drwxr-xr-x 3 root root 4096 Oct 28 16:58 ./

drwxr-xr-x 5 root root 4096 Oct 29 01:10 ../

drwxr-xr-x 3 root root 4096 Oct 29 00:58 mysqljackpot/
After further investigations, I've realized ./sslog is actually a frontend scanner program (Synscan 5.02):
root@host:/tmp/.a/new/mysqljackpot/scanner# ./sslog
Synscan 5.02 (http://www.digit-labs.org/files/tools/synscan/)
by John Anderson ,
Neil Kettle .
./sslog: getuid(): UID or EUID of 0 required
As you see in order for the scanner to run it requires to be root with superuser privileges.
mysqljackpot is actually a brute force tool which as explained in a file (README.mysql), found in its directory :
Here is content of README.mysql:
MySQL Login Scanner
By Kingcope
REQUIRES A FAST SCANSERVER!!! DONT TRY TO RUN THIS FROM A SLOW CONNECTION! ***
Scans for open mysql servers with the following credentials:
root <nopass>
root mysql
root root
admin <nopass>
admin admin
admin mysql
mysql <nopass>
mysql mysql
Runs on linux.
Requirements: mysql development libraries and headers
Compile (try one of the following depending on your system):
$ ./configure LIBS=-lmysqlclient
OR
$ ./configure LIBS="-L/usr/lib/mysql" -lmysqlclient
OR
$ ./configure LIBS="-L/usr/lib64/mysql" -lmysqlclient
OR
$ ./configure CFLAGS="-lmysqlclient"
afterwards type
$ make linux
Run:
terminal 1:
./sslog -v
terminal 2:
./synscan -b <ip block> -p 3306
Inspect Logfile "mysqljack.pot" for open servers.
There is one other README in /tmp/.a/new/mysqljackpot/README, here is what I found in it:
less README
Oracle MySQL on Windows Remote SYSTEM Level Exploit zeroday
All owned By Kingcope
Installation Instructions
=============================
1. Install mysql client libraries and headers (UNIX)
RedHat based (e.g. CentOS):
yum install mysql mysql-devel
2. Compile the standalone exploit
issue commands:
gcc mysqljackpot.c -o mysqljackpot -L/usr/lib/mysql -lmysqlclient
3. Compile the reverse shell payload (this is required!)
required because the connect back ip and port are hardcoded in the dll:
use mingw on windows or wine
change REVERSEIP and REVERSEPORT to suit your needs. If you change REVERSEPORT you have
to change the port in mysqljackpot.c too (default port: 443).
issue commands:
set PATH=%PATH%;c:\MinGW\bin\
gcc -c payload.c
gcc -shared -o payload.dll payload.o -lws2_32
copy the payload.dll into the mysqljackpot exploit folder
4. Run The Exploit
./mysqljackpot -u root -p "" -t 99.99.99.99
A valid database admin user and his password are required
for the exploit to work properly.
This exploit is especially useful when used in connection
to a MySQL login scanner, see scanner/README.mysql inside this package.
Be sure to have the firewall open on the desired reverse port
on the attacking machine.
5. Enjoy your SYSTEM Shell!!!
Yours Sincerely,
— Kingcope
Here is also the header from mysqljackpot.c mysql username brute force tool:
/* Oracle MySQL on Windows Remote SYSTEM Level Exploit zeroday
* Copyright (C) 2012 Kingcope
*
* Thanks to danny.
*/
After thinking over the security breach I thought of few scenarios on how the attacker entered and run as root superuser. One is;
- Cracker entered directly via SSH after sniffing somehow the root password.
After however, a review of last cmd, I've concluded this case is not very likely, e.g.:
# last |grep -i root
did not found any logs, of unusual root logins, neither there seem to be any unusual activity with logins with other non-root users. Of course it is possible someone logged in as root and used some tool to clean, his tracks with some kind of user log-cleaner tool like the one I've written in past in bash this doesn't seem very likely however because. It seem the /tmp/.a/, directory was created by some amateur script kiddie, a professional one would create some a bit smarter directory like for example just few empty spaces , i.e. would create it with, lets say::
# mkdir " "
instead of the so trivial
# mkdir /tmp/.a/
Also the name of the directory containing the script kiddie tool /tmp/.a is not selected intelligently, but just done in a hurry, hence I even assume /tmp/.a, is created by some automated SK tool writen in hurry by some Romanian SK Cracker 🙂
On the host there was webmin and usermin running. So;
- my second assumption was it could be someone sniffed a login password via encrypted SSL connection, whether the root logged in via webmin, or somehow exploited usermin (though I should say usermin (which listens by default on port number 20000)
TCP port 20000 on which usermin listens by default is filtered by an iptables rules for all hosts incoming connections, whether webmin logins are permitted only from few IP addresses. Thus this scenario, though more possible than a direct SSH login with root sniffed password still seems to me not very probable.
- Therefore as a third scenario (most likely what happened), I assume some of the PHP forms on the server or some other undefined PHP excecutable via Apache variable script was missing definition.
Actually saw in /var/log/apache2/error.log plenty of re-occuring warnings of existing undefined variables:
[Mon Oct 29 16:30:43 2012] [error] [client 213.149.142.73] PHP Notice: Undefined variable: not_assign in /home/site_dir/www/modules/start.mod.php on line 121, referer: http://site-domain-name.com/start?qid=3&answered_id=4
[Mon Oct 29 16:30:43 2012] [error] [client 213.149.142.73] PHP Notice: Undefined variable: counter_cookie in /home/site_dir/www/modules/start.mod.php on line 130, referer: http://site-domain-name.com/start?qid=3&answered_id=4
[Mon Oct 29 16:30:43 2012] [error] [client 213.149.142.73] PHP Notice: Undefined variable: campaign_cukie in /home/site_dir/www/modules/start.mod.php on line 135, referer: http://site-domain-name.com/start?qid=3&answered_id=4
[Mon Oct 29 16:30:43 2012] [error] [client 213.149.142.73] PHP Notice: Undefined index: actions in /home/site_dir/www/counter/count.php on line 11, referer: http://site-domain-name/start?qid=3&answered_id=4
[Mon Oct 29 16:30:43 2012] [error] [client 213.149.142.73] PHP Notice: Undefined variable: flag2 in /home/site_dir/www/counter/count.php on line 52, referer: http://iqtest.bg/start?qid=3&answered_id=4
Taking this in consideration, I assume the attacker, entered the system finding about the undefined variables, defining them and somehow achieving access to the www-data Apache user shell, and through this shell running some 0day Linux kernel exploit to gain root access and download and install mysqljackpot exploit scanner tool.
Logically as it is common in situations like this, I used rkhunter, chkrootkit and unhide tools to check if the server's main binaries and kernel modules are compromised and is there a rootkit installed (earlier written a post on that here)
In short to do checks, installed rkhunter, chkrootkit and unhide with apt-get (as this is a Debian Squeeze server):
apt-get install --yes rkhunter unhide chkrootkit
Afterwards run in a row:
# for i in $(echo proc sys brute); do unhide $i; done

....

......

# chkrootkit

...

.....

# rkhuter --check

...

....
Reports, of the three ones are like so:
Unhide 20100201
http://www.security-projects.com/?Unhide
[*]Searching for Hidden processes through /proc scanning
# for i in $(echo proc sys brute); do unhide $i; done
[*]Starting scanning using brute force against PIDS with fork()
Unhide 20100201
http://www.security-projects.com/?Unhide
[*]Searching for Hidden processes through kill(..,0) scanning
[*]Searching for Hidden processes through comparison of results of system calls
[*]Searching for Hidden processes through getpriority() scanning
[*]Searching for Hidden processes through getpgid() scanning
[*]Searching for Hidden processes through getsid() scanning
[*]Searching for Hidden processes through sched_getaffinity() scanning
[*]Searching for Hidden processes through sched_getparam() scanning
[*]Searching for Hidden processes through sched_getscheduler() scanning
[*]Searching for Hidden processes through sched_rr_get_interval() scanning
[*]Searching for Hidden processes through sysinfo() scanning
HIDDEN Processes Found: 1
Unhide 20100201
http://www.security-projects.com/?Unhide
Found HIDDEN PID: 4994
Found HIDDEN PID: 13374
Found HIDDEN PID: 14931
Found HIDDEN PID: 18292
Found HIDDEN PID: 19199
Found HIDDEN PID: 22651
[*]Starting scanning using brute force against PIDS with Threads
Found HIDDEN PID: 3296
Found HIDDEN PID: 30790
# chkrootkit -q
/usr/lib/pymodules/python2.5/.path /usr/lib/pymodules/python2.6/.path /lib/init/rw/.ramfs
# rkhunter –check
System checks summary
=====================
File properties checks…
Files checked: 137
Suspect files: 0
Rootkit checks…
Rootkits checked : 245
Possible rootkits: 2
Rootkit names : Xzibit Rootkit, Xzibit Rootkit
Applications checks…
All checks skipped
The system checks took: 1 minute and 5 seconds
All results have been written to the log file (/var/log/rkhunter.log)
One or more warnings have been found while checking the system.
Please check the log file (/var/log/rkhunter.log)
Reports from unhide and chkrootkit, not seem troubling, however I was concerned about the report from rkhunter – Rootkit names : Xzibit Rootkit, Xzibit Rootkit.
To get some more info on why chkrootkit, thinks, system is infected with Xzibit (which by the way is an artistic alias of a RAP singer from the 1980's 🙂 I check in /var/log/rkhunter.log
# grep -i xzibit /var/log/rkhunter.log

[16:52:48] Checking for Xzibit Rootkit...

[16:52:48] Xzibit Rootkit                                    [ Not found ]

[16:52:56]          Found string 'hdparm' in file '/etc/init.d/hdparm'. Possible rootkit: Xzibit Rootkit

[16:52:56]          Found string 'hdparm' in file '/etc/init.d/.depend.boot'. Possible rootkit: Xzibit Rootkit

[16:53:01] Rootkit names    : Xzibit Rootkit, Xzibit Rootkit
Onwards I checked content of hdparm and .depend.boot and there I don't see nothing irregular. They both are files from legitimate Debian install, I've checked if they belong to a deb packages as well if they are existing on other Debian Squeeze servers I administer as well as on my Debian Desktop notebook, everywhere they're present, hdparm is part of hdparm deb and .depend.boot is loaded by /etc/init.d/rc script, containing some user string references:
# grep -rli .depend.boot *

rc
# dpkg -S /etc/init.d/hdparm

# hdparm: /etc/init.d/hdparm

  /etc/init.d/.depend.boot

# dpkg -S /etc/init.d/.depend.boot

dpkg: /etc/init.d/.depend.boot not found.
Another troubling thing was unhide's return:
HIDDEN Processes Found: 1
After a close examination of the system as well as research on the internet, I've figured out this is also a false positive. For sake of not distributing, Script Kiddie tools, which might put in danger other system administrators I will not put a download link to mysqljackpot publicly. Anyways if someone is willing to have it for study purposes, just drop me a mail and I will post you temporary download link to it.
Also as webmin and usermin is not frequently used, I've decided to completely stop and disable them to load on boot.
I've done also a clamav scan with (lowered priority) over the whole file system with:
# nice -19 clamscan -r /*
in order to determine, if there is no PHPShell or some kind of other remote admin Script kiddie script in perl / php etc. installed.
Tomorrow, I will continue investigatin what is happening and hopefully once I got, how the abuser entered the server will update this post.
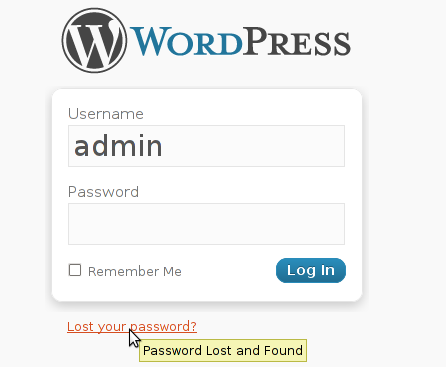 My sister has forgotten the administrator account for her wordpress blog as she did not blogged for a while.