Posts Tagged ‘package’
Saturday, February 4th, 2012 If you're using Debian GNU/Linux wheezy/sid, you have already figured out GNOME3 settings to start GNOME in Classic mode (like in GNOME 2), starts gnome in a mode where the desktop is not showing the usual Computer, Home, Trash etc.
Besides that in that strange back-compitability Classic GNOME mode its impossible to add any program as a link in desktop like in the good old GNOME 2.
Thanksfully this abusive behaviour of the backwards compitability mode is easily fixable by two simple steps, here they are:
1. Install gnome-tweak-tool – (Tool to adjust advanced configuration settings for GNOME
root@debian:~# apt-get install gnome-tweak-tool
2. Start gnome-tweak tool
Press ALT+F2 and run gnome-tweak-tool or run it via xterm / gnome-terminal:
moonman@Moon:~$ gnome-tweak-tool
Change in Desktop, Have file manager handle the desktop the settings to ON
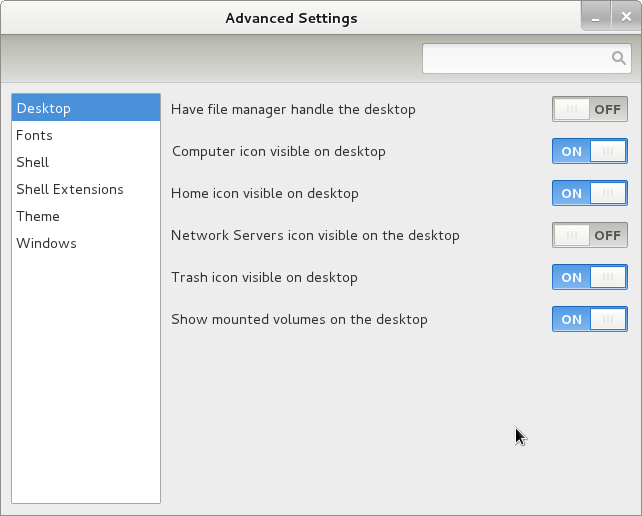
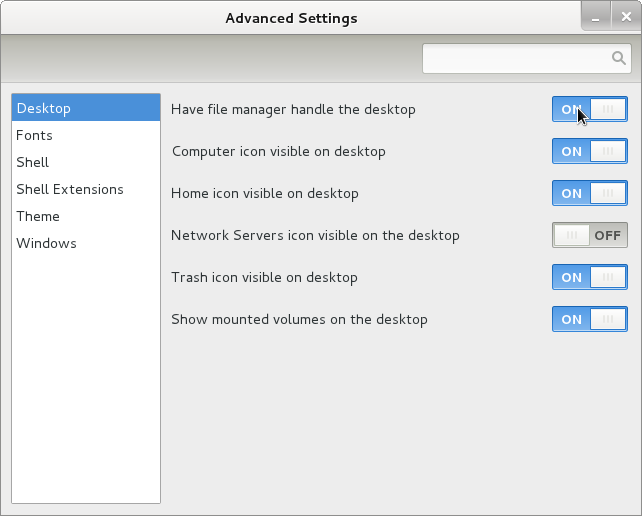
Once the Screenshot Handle Desktop is set to ON, further drag and dropping any application to the Desktop will be working.
Something really irritating is that launching applications in GNOME 3 does not work properly if you just press ALT+F2 and type in lets say gnome-terminal , to work around this weirdity you will have to install gnome-shell package.
Tags: Auto, behaviour, classic mode, compitability, configuration settings, debian gnu, desktop icons, Draft, f2, Gnome, gnu linux, Handle, Install, link, Linux, manager, Mode, moon, moonman, package, Press, root, shell package, sid, simple steps, something, Start, Thanksfully, tool, tool 2, tool change, tool tool, trash, type, weirdity, wheezy, xterm
Posted in Gnome, Linux, Linux and FreeBSD Desktop | 1 Comment »
Saturday, June 18th, 2011 After installing the Tweet Old Post wordpress plugin and giving it, I’ve been returned an error of my PHP code interpreter:
Call to undefined function: curl_init()
As I’ve consulted with uncle Google’s indexed forums 😉 discussing the issues, I’ve found out the whole issues are caused by a missing php curl module
My current PHP installation is installed from the port tree on FreeBSD 7.2. Thus in order to include support for php curl it was necessery to install the port /usr/ports/ftp/php5-curl :
freebsd# cd /usr/ports/ftp/php5-curl

freebsd# make install clean
(note that I’m using the php5 port and it’s surrounding modules).
Fixing the Call to undefined function: curl_init() on Linux hosts I suppose should follow the same logic, e.g. one will have to install php5-curl to resolve the issue.
Fixing the missing curl_init() function support on Debian for example will be as easy as using apt to install the php5-curl package, like so:
debian:~# apt-get install php5-curl

...
Now my tweet-old-post curl requirement is matched and the error is gone, hooray 😉
Tags: call to undefined function, Debian, ERROR, fatal error, freebsd, function, google, hooray, init function, installation, interpreter, issue, Linux, linux hosts, logic, Module, necessery, note, Old, order, package, php code, php installation, plugin, port, ports, post, requirement, support, tree, usr
Posted in FreeBSD, Linux, Wordpress | No Comments »
Friday, May 27th, 2011 
The aim of this small post is to give just a brief idea of how I fix my qmail server after breaking it or in case it is broken after mail bomb attacks, etc.
Most common cases when I break my qmail queue myself, are after I’m implementing some new patches and reinstall parts of the qmail server with a patched version of default qmail binaries.
On other occasions, I simply used the qmailctl to start or stop the server as a part of some routine tasks necessery for the administration of the qmail server.
Everybody who has already experience with qmail should have experienced, that qmail is very fragile and could break even with a simple changes, though if it works once it’s rock solid piece of mail servant.
Below I explain few ways I used through my days as a qmail sys admin to deal with broken or messed queues.
1. Fixing a broken qmail queue using automatic tools There are few handy tools which in most cases are able to solve issues with the queue, one very popular one isqueue-repair – check http://pyropus.ca/software/queue-repair/.
Installation of qmail-repair is dead easy, but it needs to be installed from source as no official debian package is available:
linux:/usr/local/src# wget http://pyropus.ca/software/queue-repair/queue-repair-0.9.0.tar.gz

linux:/usr/local/src# tar -xzvvf queue-repair-0.9.0.tar.gzdrwxr-xr-x charlesc/qcc 0 2003-10-22 16:54 queue-repair-0.9.0/

-rw-r--r-- charlesc/qcc 268 2003-10-22 16:54 queue-repair-0.9.0/TODO

-rw-r--r-- charlesc/qcc 1700 2003-10-22 16:54 queue-repair-0.9.0/CHANGELOG

-rw-r--r-- charlesc/qcc 18007 2003-10-22 16:54 queue-repair-0.9.0/COPYING

-rw-r--r-- charlesc/qcc 1098 2003-10-22 16:54 queue-repair-0.9.0/BLURB

-rwxr-xr-x charlesc/qcc 26286 2003-10-22 16:54 queue-repair-0.9.0/queue_repair.py
To check if there are issues fixable within the qmail queue it’s as easy as:
linux:/usr/local/src# cd queue-repair-0.9.0

linux:/usr/local/src/queue-repair-0.9.0# ./queue-repair -t

...

checking files...

checking queue/mess files...

checking split locations...
The tool will walk through the mail sub-directories containing mail queued files in /var/qmail/queue and will list any issues found.
It’s recommended that the qmail server is stopped before any queue modify operations are issued on the server:
linux:/usr/local/src# qmailctl stop

...
Further on in order to solve any found issues with the queue, there is the “-r”/repair option:
linux:/usr/local/src/queue-repair-0.9.0# ./queue-repair -r

...
Another tool which comes handy whether a repair of a messed qmail queue is needed is qmhandle – http://sourceforge.net/projects/qmhandle/
The use of qmhandle is also pretty easy, all one has to do is to follow the usual classical steps of a download the source & compile:
linux:/usr/local/src# wget https://www.pc-freak.net/files/qmhandle-1.3.2.tar.gz

linux:/usr/local/src# tar -zxvvf qmhandle-1.3.2

...

linux:/usr/local/src# cd qmhandle-1.3.2
Once again it’s necessery that the qmail server is stopped via its init script before qmHandle tool is used, e.g.:
linux:~# qmailctl stop

...
There is a difference between qmail queue repair tool and qmail handle , while qmail queue-repair tool is used to fix improper permissions of queued files with the qmail queue, qmhandle ‘s application is to completely delete the stored mail contents of a broken queue.
Deleting all the qmail queue content is in some cases the only option to fix the queue.
Often such a drastic measure is required after a heavy mail server overload, let’s say a result of spammers or caused by virus infected mail users which send a massive amounts of spam mails.
Thus at many cases when queue-repair was unable to solve a queue mess, I use qmhandble and sacrifice all the queued emails by completely wiping them out like so:
linux:/usr/local/src/qmhandle-1.3.2# ./qmhandle -D

...
Above command would eradicate all queued emails. Hopefully after the qmail server gets launched again with qmailctl start all the mail server operations should be back to normal.
Note that the use of qmhandle’s queue delete capabilities is pretty dangerous, if you forgot to stop the qmail server before issuing the above command!
Note that in order to use both qmHandle and queue-repair tools you will need to install python interpreter as both of the tools are written in python.
To check what is currently in the queue in Qmail, there are also native tools available, as you should probably know if you have dealt with qmail, e.g.:
debian:~# qmail-qstat

debian:~# qmail-qstat

messages in queue: 2

messages in queue but not yet preprocessed: 0
Often when there are problems with Qmail and more specificly with qmail server queue the qmail-qstat command does show messages in queue, however when an attempt to check what kind of messages are in the queue with qmail-qread no messages are shown, for instance below you see an example of that, even though qmail-qstat claims 2 messages are in the queue, qmail-qread is unable to list the messages:
debian:~# qmail-qread

debian:~#
If all is fine with qmail queue above’s qmail-qread command should have returned something similar to:
debian:~# qmail-qread

26 May 2011 07:46:47 GMT #659982 3517 <hipo@www.pc-freak.net>

remote somemail@gmail.nl

26 May 2011 07:46:47 GMT #659983 3517 <hipo@www.pc-freak.net>
2. Fixing qmail queue manually This is very dangerous initiative, so before you try anything, make sure that you know what you’re doing, the possibility that you make the situation worst if you attempt to tamper manually the qmail queue is quite high 🙂
However if you’re still convinced to try fixing it manually, take a look at /var/qmail/queue it’s very likely that there are permission issues with some of the queued files, in order to fix the situation it’s necessery that the following directories:
/var/qmail/queue/mess/

/var/qmail/queue/remote/

/var/qmail/queue/bounce

/var/qmail/queue/info
gets explored with midnight commander / mc or some kind of convenient file explorer.
If there are queued files owned by users different from qmailq and user group qmail , for instance if owned by the root user, a simple chown qmailq:qmail to the wrong permissions file, should be able to resolve the issues.
Apart from all I explain above, there are many other ways suggested online on howto clean a qmail queue, one very popular one is using James’s qfixq shell script.
This script as of this very date is not working on Debian based systems, the script is dedicated initially to run on Fedora and Redhat based Linuces
Moreover myy experience with qfixq was never successful.
One very important note which is often a cause of many problems, is always make sure you stop and start the qmail server with an interval of at least of 10 seconds.
I’ve managed many servers which after an immediate (undelayed) qmailctl stop and qmailctl start was unable to run the whole engine of the qmail server (and either email sending or email receiving was not properly working) afterwards.
In that cases many weird behaviours are common, consider this seriously if you deal with the qmail-queue, it might happen that even if you have fixed your qmail queue, after a restart the qmail might breaks up.
I’ve experienced this kind of oddities numerous times, thus when I do changes to qmail I always make sure I restart the server a couple of times (at least 5 times 😉 ) always with a good delay between the HUPs.
And as always with qmail prayer is always needed, this server is complex, you never know what will happen next 🙂
Tags: aim, automatic tools, binaries, BLURB-rwxr-xr-x, ca software, COPYING-rw-r--r-, debian package, default, download, everybody, handy tools, init, Linux, mail bomb, mess, necessery, new patches, occasions, option, package, piece, python, qcc, qmailctl, queue, queues, quot, repair, rock, routine tasks, script, servant, simple changes, software queue, tar gz, tool, wget, zxvvf
Posted in Linux, Qmail, System Administration | 3 Comments »
Friday, February 10th, 2012

On FreeBSD ntpd , ntpdc , ntpdate , ntpq doesn't need to be installed via a specific package like on GNU/Linux as they're part of the FreeBSD world (binary standardly shipped with FreeBSD basis system).
The FreeBSD handbook has a chapter explaining thoroughfully on ntp on FreeBSD ,however for the lazy ones here is a short few steps tutorial on how to install and configure ntpd on bsd :
1. Copy sample ntp.conf file to /etc/
freebsd# cp -rpf /usr/src/etc/ntp.conf /etc/ntp/
No need for any modifications if you don't want to apply some specific restrictions on whom can access the ntpd server. If you update regularly the FreeBSD system with freebsd-update or directly by rebuilding the FreeBSD kernel / world adding restrictions might be not necessery..
If you check /usr/src/etc/ntp.conf you will notice freebsd project people are running their own ntp servers , by default ntpd will use this servers to fetch timing information. The exact server hosts which as of time of writting are used can be seen in ntp.conf and are:
server 0.freebsd.pool.ntp.org iburst maxpoll 9

server 1.freebsd.pool.ntp.org iburst maxpoll 9

server 2.freebsd.pool.ntp.org iburst maxpoll 9
2. Add ntpd daemon to load on system boot via /etc/rc.conf
By default ntpd is disabled on FreeBSD, you can see if it is disabled or enabled by invoking:
freebsd# /etc/rc.d/ntpd rcvar

# ntpd

ntpd_enable=NO
To Enable ntpd to get loaded each time it boots , following 3 lines has to be added in /etc/rc.conf .
ntpdate_enable="YES"

ntpdate_flags="europe.pool.ntp.org"

ntpd_enable="YES"
Quick way to add them is to use echo :
echo 'ntpdate_enable="YES" >> /etc/rc.conf

echo 'ntpdate_flags="europe.pool.ntp.org" >> /etc/rc.conf

echo 'ntpd_enable="YES" >> /etc/rc.conf
Now as the 3 rc.conf vars are set to "YES", the ntpd can be started. Without having this variables in /etc/rc.conf , "/etc/rc.d/ntpd start" will refuse to start ntpd.
3. Start the ntpd service
freebsd# /etc/rc.d/ntpd start

...
One interesting note to make is ntpd can also operate without specifying any config file (/etc/ntp.conf), the only requirement for the server to start is to have a properly set ntpdate server, like lets say (ntpdate_flags="europe.pool.ntp.org")
4. Permit only certain host or localhost to "talk" to the ntpd server
If you want to imply some ntp server restrictions, the configuration directives are same like on Linux:
To allow only a a host inside a local network with IP 192.168.0.2 as well as localhost, to be able to fetch time information via ntpd server put inside /etc/ntp.conf:
restrict 127.0.0.1

restrict 192.168.0.1 mask 255.255.255.0 nomodify notrap
If you want to prohibit ntpd to serve as a Network Time Server, to any other host except localhost, add in /etc/ntp.conf :
restrict default ignore
Allowing and denying certain hosts can be also done on pf (packet filter) or ipfw firewall level, and in my view is easier (and less confusing), than adding restrictions through ntp.conf. Besides that using directly the server firewall to apply restrictions is more secure. If for instance a remote exploit vulnerability is discovered affecting your ntpd server. this will not affect you externally as access to the UDP port 123 will be disabled on a firewall level.
Something good to mention is NTP servers communicate between each other using the UDP source/destination (port 123). Hence if the NTPD server has to be publicly accessible and there is a firewall already implemented, access to source/dest port 123 should be included in the configured firewall …
5. Check if the ntp server is running properly / ntp server query operations
[root@pcfreak /home/hipo]# ps axuww|grep -i ntp
root 15647 0.0 0.2 4672 1848 ?? Ss 2:49PM 0:00.04 /usr/sbin/ntpd -c /etc/ntp.conf -p /var/run/ntpd.pid -f /var/db/ntpd.drift
To query the now running ntpd server as well as set various configuration options "on the fly" (e.g. without need for ntp.conf edits and init script restart), a tool called ntpdc exists. ntpdc tool could be used to connect to localhost running ntpd as well as to connect and manage remotely a ntpd server.
The most basic use of ntpdc is to check (server peers).:
freebsd# ntpdc localhost

ntpdc> peers

remote local st poll reach delay offset disp

===================================================
kgb.comnet.bg 83.228.93.76 2 64 377 0.00282 -0.050575 0.06059

*billing.easy-la 83.228.93.76 2 64 377 0.01068 -0.057400 0.06770

=ns2.novatelbg.n 83.228.93.76 2 64 377 0.01001 -0.055290 0.06058
ntpdc has also a non-interactive interface, handy if there is a need for requests to a ntpd to be scripted. To check ntpd server peers non-interactively:
freebsd# ntpdc -p localhost

===================================================

kgb.comnet.bg 83.228.93.76 2 64 377 0.00284 -0.043157 0.06184

=billing.easy-la 83.228.93.76 2 64 377 0.01059 -0.042648 0.05811

*ns2.novatelbg.n 83.228.93.76 2 64 377 0.00996 -0.041097 0.06094
ntpdc has plenty of other ntpd query options, e.g. :
ntpdc> help

ntpdc commands:

addpeer controlkey fudge keytype quit timeout

addrefclock ctlstats help listpeers readkeys timerstats

addserver debug host loopinfo requestkey traps

addtrap delay hostnames memstats reset trustedkey

authinfo delrestrict ifreload monlist reslist unconfig

broadcast disable ifstats passwd restrict unrestrict

clkbug dmpeers iostats peers showpeer untrustedkey

clockstat enable kerninfo preset sysinfo version

clrtrap exit keyid pstats sysstats
ntpdc is an advanced query tool for ntpd , servers. Another tool exists called ntpq which syntax is almost identical to ntpdc . The main difference between the two is ntpq is a monitoring tool mostly used just for monitoring purposes, where ntpdc can also change plenty of things in the server configuration.
For people who want to learn more on ntpd the man page is a great reading , containing chapters describing thoroughfully exactly how NTPD time servers operate, etc.
Tags: basis, basis system, boots, comnet, configure, daemon, doesn, echo echo, europe, file, flags, freebsd handbook, freebsd kernel, freebsd system, freebsd world, gnu linux, handbook, iburst, information, level, Linux, localhost, maxpoll, nbsp, necessery, need, ntp servers, ntpd, ntpdate, ntpdc, ntpq, package, pool, quot, root, rpf, server clock, server hosts, system boot, time, timing, tool, variables, writting, YES
Posted in FreeBSD, System Administration | 1 Comment »
Thursday, February 9th, 2012 Every now and then I have to work on servers running CentOS or Fedora Linux. Very typical problem that I observe on many servers which I have to inherit is the previous administrator did not know about the existence of NTP (Network Time Protocol) or forgot to install the ntpd server. As a consequence the many installed server services did not have a correct clock and at some specific cases this caused issues for web applications running on the server or any CMS installed etc.
The NTP Daemon is existing in GNU / linux since the early days of Linux and it served quite well so far. The NTP protocol has been used since the early days of the internet and for centuries is a standard protocol for BSD UNIX.
ntp is available in I believe all Linux distributions directly as a precompiled binary and can be installed on Fedora, CentOS with:
[root@centos ~]# yum install ntp
ntpd synchronizes the server clock with one of the /etc/ntp.conf defined RedHat NTP list
server 0.rhel.pool.ntp.org

server 1.rhel.pool.ntp.org

server 2.rhel.pool.ntp.org
To Synchronize manually the server system clock the ntp CentOS rpm package contains a tool called ntpdate :
Hence its a good practice to use ntpdate to synchronize the local server time with a internet server, the way I prefer to do this is via a government owned ntp server time.nist.gov, e.g.
[root@centos ~]# ntpdate time.nist.gov

8 Feb 14:21:03 ntpdate[9855]: adjust time server 192.43.244.18 offset -0.003770 sec
Alternatively if you prefer to use one of the redhat servers use:
[root@centos ~]# ntpdate 0.rhel.pool.ntp.org

8 Feb 14:20:41 ntpdate[9841]: adjust time server 72.26.198.240 offset 0.005671 sec
Now as the system time is set to a correct time via the ntp server, the ntp server is to be launched:
[root@centos ~]# /etc/init.d/ntpd start

...
To permanently enable the ntpd service to start up in boot time issue also:
[root@centos ~]# chkconfig ntpd on
Using chkconfig and /etc/init.d/ntpd cmds, makes the ntp server to run permanently via the ntpd daemon:
[root@centos ~]# ps ax |grep -i ntp

29861 ? SLs 0:00 ntpd -u ntp:ntp -p /var/run/ntpd.pid -g
If you prefer to synchronize periodically the system clock instead of running permanently a network server listening (for increased security), you should omit the above chkconfig ntpd on and /etc/init.d/ntpd start commands and instead set in root crontab the time to get synchronize lets say every 30 minutes, like so:
[root@centos ~]# echo '30 * * * * root /sbin/ntpd -q -u ntp:ntp' > /etc/cron.d/ntpd
The time synchronization via crontab can be also done using the ntpdate cmd. For example if you want to synchronize the server system clock with a network server every 5 minutes:
[root@centos ~]# crontab -u root -e
And paste inside:
*/5 * * * * /sbin/ntpdate time.nist.gov 2>1 > /dev/null
ntp package is equipped with ntpq – Standard NTP Query Program. To get very basic stats for the running ntpd daemon use:
[root@centos ~]# ntpq -p

remote refid st t when poll reach delay offset jitter

======================================================

B1-66ER.matrix. 192.43.244.18 2 u 47 64 17 149.280 41.455 11.297

*ponderosa.piney 209.51.161.238 2 u 27 64 37 126.933 32.149 8.382

www2.bitvector. 132.163.4.103 2 u 1 64 37 202.433 12.994 13.999

LOCAL(0) .LOCL. 10 l 24 64 37 0.000 0.000 0.001
The remote field shows the servers to which currently the ntpd service is connected. This IPs are the servers which ntp uses to synchronize the local system server clock. when field shows when last the system was synchronized by the remote time server and the rest is statistical info about connection quality etc.
If the ntp server is to be run in daemon mode (ntpd to be running in the background). Its a good idea to allow ntp connections from the local network and filter incoming connections to port num 123 in /etc/sysconfig/iptables :
-A INPUT -s 192.168.1.0/24 -m state --state NEW -p udp --dport 123 -j ACCEPT

-A INPUT -s 127.0.0.1 -m state --state NEW -p udp --dport 123 -j ACCEPT

-A INPUT -s 0.0.0.0 -m state --state NEW -p udp --dport 123 -j DROP
Restrictions on which IPs can be connected to the ntp server can also be implied on a ntpd level through /etc/ntp.conf. For example if you would like to add the local network IPs range 192.168.0.1/24 to access ntpd, in ntpd.conf should be added policy:
# Hosts on local network are less restricted.

restrict 192.168.0.1 mask 255.255.255.0 nomodify notrap
To deny all access to any machine to the ntpd server add in /etc/ntp.conf:
restrict default ignore
After making any changes to ntp.conf , a server restart is required to load the new config settings, e.g.:
[root@centos ~]# /sbin/service ntpd restart
In most cases I think it is better to imply restrictions on a iptables (firewall) level instead of bothering change the default ntp.conf
Once ntpd is running as daemon, the server listens for UDP connections on udp port 123, to see it use:
[root@centos ~]# netstat -tulpn|grep -i ntp

udp 0 0 10.10.10.123:123 0.0.0.0:* 29861/ntpd

udp 0 0 80.95.28.179:123 0.0.0.0:* 29861/ntpd

udp 0 0 127.0.0.1:123 0.0.0.0:* 29861/ntpd

udp 0 0 0.0.0.0:123 0.0.0.0:* 29861/ntpd
Tags: Auto, boot time, BSD, bsd unix, CentOS, configure, consequence, correct time, dport, Draft, early days of the internet, existence, feb 14, GNU, gnu linux, government, init, INPUT, internet server, level, linux distributions, list server, listserver, network time protocol, ntp daemon, ntp protocol, ntpd, ntpntpd, orgserver, package, Protocol, Redhat, root, rpm, server, server clock, server services, server system, server time, standard protocol, system, system clock, system time, time issue, time server, tool, typical problem, yum
Posted in Linux, System Administration | 1 Comment »
Saturday, January 28th, 2012 I've earlier blogged on playing Apogee's Raptor Shadows of Death arcade on GNU / Linux with dosbox
All the old school raptor addicts will be interested to hear Kazzmir (Jon Rafkind) a free software devotee developer has created a small game resembling many aspects of the original Raptor arcade game.
The game is called Rafkill and is aimed to be a sort of Raptor like fork/clone.
Originally the game was also named Raptor like the DOS game, however in year 2006 it was changed to current Rafkill in order to avoid legal issues with Apogee's Raptor.
The game is not anymore in active development, the latest Rafkill release is from January 2007, anyhow even for the 2012 it is pretty entertaining. The sound and music are on a good level for a Linux / BSD shoot'em'up free software game . The graphics are not of a top quality and are too childish, but this is normal, since the game is just one man masterpiece.

Rafkill is developed in C/C++ programming language, the game music engine it uses is called DUMB (Dynamic Universal Bibliotheque). By the way DUMB library is used for music engine in many Linux arcade games. DUMB allows the Linux game developer to develop his game and play a music files within different game levels in "tracked" formats like mod, s3m, xm etc.
The game is available in compiled form for almost all existent GNU/Linux distributions, as well as one can easily port it as it is open source.
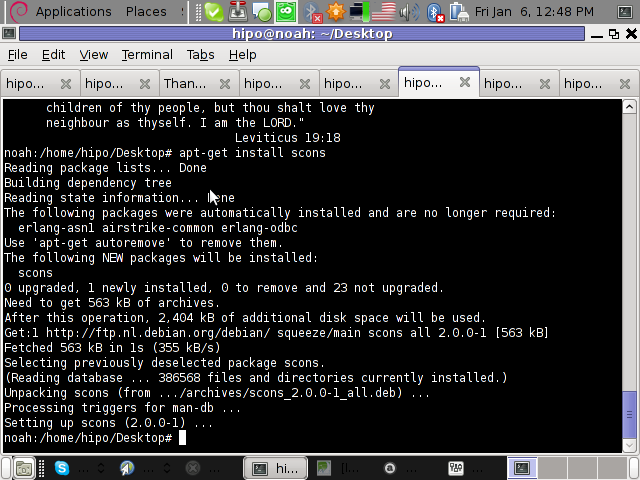
To install Rafkill on Debian, Ubuntu, Xubuntu and Linux Mint en other Debian based distros
root@debian:~# apt-get install rafkill
Installing on Fedora and other rpm based is with yum
debian:~# apt-get install rafkill

...
Once rafkill is installed, in order to start it on Debian the only way is using the rafkill (/usr/bin/rafkill) command. It appears the deb package maintainer did not wrote a gnome launcher file like for example /usr/share/applications/rafkill.desktop
Just to explain for all the GNOME noobs, the .desktop files are a description file GNOME reads in order to understand where exactly to place certain application in the (Gnome Applications, Places, System …) menu panel.
Even though it miss the .desktop, it is launchable via Applications menu under the Debian section e.g. to open it from the GNOME menus you will have to navigate to:
Applications -> Debian -> Games -> Action -> Rafkill
This "shortcut" to launch the game is quite long and hard to remember thus it is handy to directly launch it via xterm:
hipo@debian:~$ rafkill

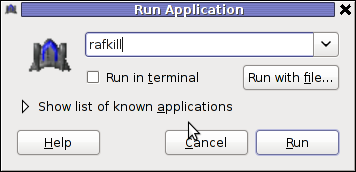
or by pressing ALT+F2 and typing rafkill :

Starting the game I got some really ugly choppy music / sound issues.
My guess was the fizzling sounds were caused by some bug with the sound portions streamed through pulseaudio sound system.
To test if my presume is correct, stopped pulseaudio and launched rafkill once again:
hipo@debian:~$ pulseaudio -k

hipo@debian:~$ rafkill
This way the game was counting on ALSA to process sound en the sound was playing perfectly fine.
I solved this problem through small wrapper shell script. The script did kill pulseaudio before launching rafkill and that way solve gchoppy sound issues, once the game execution is over the script starts pulseaudio again in order to prevent all other applications working with pulseaudio.
Finally, I've placed the executable script in /usr/bin/rafkill :
Here is the script:
#!/bin/bash

pulseaudio --kill

/usr/games/rafkill

pulseaudio --start
You can download rafkill.wrapper.sh here
Or write in root terminal:
debian:~# cd /usr/bin

debian:/usr/bin:# wget https://www.pc-freak.net/bshscr/rafkill.wrapper.sh

debian:/usr/bin:# mv https://www.pc-freak.net/bshscr/rafkill.wrapper.sh rafkill

debian:/usr/bin:# chmod +x rafkill
Interesting in Ubuntu Linux, rafkill music is okay and I suppose the bug is also solved in newer Linux distributions based on Ubuntu. Probably the Debian Squeeze pulseaudio (0.9.21-4) package version has a bug or smth..
After the change the game music will be playing fine and the game experience is cooler. The game is hard to play. Its really nice the game has game Saves, so once you die you don't have to start from level 1.

I've seen rafkill rolling around on freebsd.org ftps under the ubuntu packages pool, which means rafkill could probably be played easily on FreeBSD and other BSDs.
Enjoy the cool game 😉
Tags: active development, arcade game, arcade games, Auto, BSD, c c programming language, c programming language, clone, deb package, Desktop, desktop files, different game, dos game, Draft, Engine, file, form, Free, game developer, game levels, game music, Gnome, hipo, level, Linux, linux distributions, linux game, menu, mod, music engine, Open, open source clone, package, package maintainer, pulseaudio, quot, script, shadows of death, share applications, small game, software, software game, software open source, Ubuntu, Universal, wrapper, year
Posted in Games Linux, Linux, Linux and FreeBSD Desktop | 1 Comment »
Sunday, January 22nd, 2012 If you still have some old dusty CDs left on the CD shelf, its quite cool to give it a ride in a rainy morning.
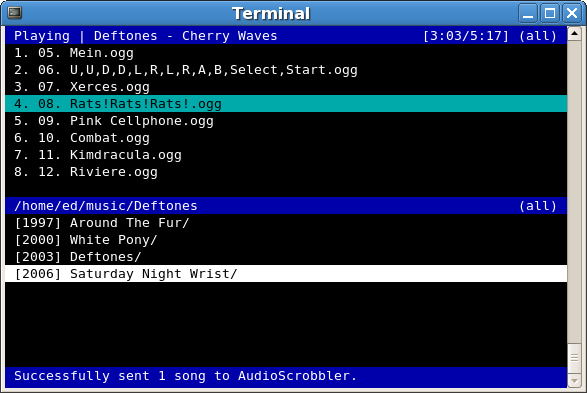
As I enjoy working in console so much, I thought it might be interesting to share how music audio CDs can be listened in plain text mode console.
For all console / terminal geeks Linux and BSDs can be equipped with a number of text/console audio cd console players.
There are plenty of free software console cd audio players on the net, however I found cdplay , cdcd and dcd to be the most popular ones.
On Debian and Ubuntu G*/Linuces cdplay and cdcd are installable via apt. To install cdtool:
root@xubuntu-desktop:~# apt-get install cdtool

...
cdtool package, contains a number of commands enabling you to listen/stop/shuffle/eject/get info about cd audio volumes. cdtool provides the following binaries:
cdeject

cdclose

cdir

cdinfo

cdpause

cdplay

cdstop

cdvolume

cdshuffle
Install cdcd on Debian and alike by typing:
root@xubuntu-desktop:~# apt-get install cdcd

...
cdcd has shell like interface the most basic use of it is with:
root@xubuntu-desktop:~# cdcd

cdcd> play
To play audiocds in console on FreeBSD , a command tool dcd is available and installable through ports.
To install it issue:
root@freebsd# cd /usr/ports/audio/dcd

root@freebsd# make install clean

...
dcd is also available for Linux but on most GNU/Linuxes it has to be built from source.
Lets say you'd like to Play the 5th song from audio CD:
freebsd# dcd 5
dcd has plenty of great arguments, to get some fun with it check the man page.
Another program that can be used to play audio CDs on both Linux and BSDs is the "classical" mplayer .
To play AUDIO CD with mplayer the command line to use is:
root@debian:~# mplayer -cdrom-device /dev/sr0 cdda:// -cache 5000

...
The argument -cache 5000 has to be passed to to work around choppy sound (if for example audio playback interruptions every few milliseconds).
For people who are keen on ncurses (Midnight Commander) like command line interfaces you might enjoy Herrie – a minimalistic music player that supports plenty of sound formats, including audiocds.
Herrie is available for Debian and most deb based modern distros via apt, e.g.:
root@xubuntu-desktop:~# apt-get install herrie

...
To install on FreeBSD:
root@freebsd# cd /usr/ports/audio/herrie

root@freebsd# make install clean
I'll be happy to hear feedback and recommendations on any other console audio cd players I might forgot to mention.
Which is your favourite console text based cd audio player?
Tags: audio cd, audio cds, audio music, audio playback, Auto, binaries, BSDs, cac, cdcd, cdclose, cdeject, cdejectcdclose, cdinfo, cdircdinfocdpausecdplay, cdplay, cdvolume, cdvolumecdshuffleInstall, choppy sound, command tool, dcd, Draft, Free, geeks, gnu linux, herrie, info, Install, interruptions, linuxes, man page, midnight commander, milliseconds, mplayer, music cds, number, Open, package, page, Play, player, playTo, ports, quot, rainy morning, root, shelf, Shell, software, terminal, text, text mode, tool, Ubuntu, usr
Posted in FreeBSD, Linux, Linux and FreeBSD Desktop, Linux Audio & Video | 1 Comment »
Wednesday, January 18th, 2012 I had to make one old Samsung ML-2010P Laser Printer work on Xubuntu Linux . I've had some issues in installing it, I couldn't fine any step by step tutorial online, on how the printer can be made work fine on Linux. Therefore I took the time to experiment and see if I could make it work. Since the printer is old, not much people are interested any more in making the printer operational on Linux, hence I couldn't find too much relevant posts and sites on the net, anyways thanks God after a bit of pondering I finally succeeded to make the Samsung ML-2010P printer to print on Linux.This are the exact steps one has to follow to make this old bunch of hardware to play nice on Linux:
1. use lsusb to list the printer model
root@linux:~# lsusb |grep -i samsung

Bus 001 Device 003: ID 04e8:326c Samsung Electronics Co., Ltd ML-2010P Mono Laser Printer
You see the printer reports as Samsung Electronics Co., Ltd ML-2010P Mono Laser Printer
2. Install cups printing service required packages
root@linux:~# apt-get install cups cups-bsd cups-client cups-common

root@linux:~# apt-get install cups-driver-gutenprint ghostscript-cups

root@linux:~# apt-get install python-cups python-cupshelpers
3. Install foomatic packages
root@linux:~# apt-get install foomatic-db foomatic-db-engine foomatic-db-gutenprint

root@linux:~# apt-get install foomatic-filters python-foomatic
4. Install hpijs hplip printconfand other packages necesssery for proper printer operation
root@linux:~# apt-get install hpijs hplip hplip-data ijsgutenprint

root@linux:~# apt-get install min12xxw openprinting-pdds printconf foo2zjs
P.S. Some of the packages I list might already have been installed as a dependency to another package, as I'm writting this article few days after I've succeeded installing the printer, I don't remember the exact install order.
5. Install splix (SPL Driver for Unix)
Here is a quote taken from Spix's project website:
"SpliX is a set of CUPS printer drivers for SPL (Samsung Printer Language) printers.
If you have a such printer, you need to download and use SpliX. Moreover you will find documentation about this proprietary language.
"
root@linux:~# apt-get install splix
For more information on splix, check on Splix SPL driver for UNIX website http://splix.ap2c.org/
You can check on the projects website the Samsung ML 2010 Printer is marked as Working
Next step is to configure the Printer
6. Go to Cups interface on localhost in browser and Add the Samsung printer.
Use Firefox, SeaMonkey or any browser of choice to configure CUPS:
Type in the browser:
http://localhost:631
Next a password prompt will appear asking for a user/pass. The user/pass you have to use is the same as the password of the user account you're logged on with.
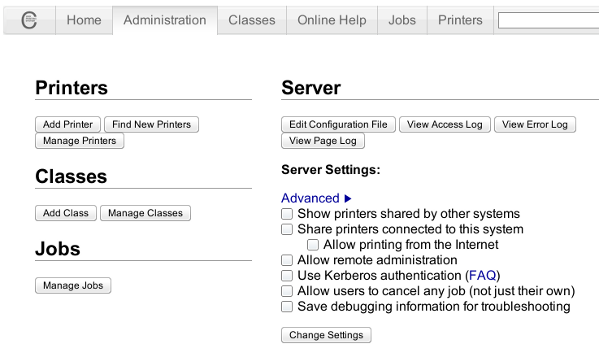
Click on the Add Printer button and choose to add the Samsung ML-2010.
Then restart the CUP Service (cupsd) to make it load the new settings:
root@linux:~# /etc/init.d/cups restart
Now give the printer a try in printing some page in SeaMonkey, Chrome or Firefox (the quickest way is through pressing CTRL + P )
Following this steps, I've managed to run the printer on Xubuntu Linux, though the same steps if followed should most probably make the Samsnung ML 2010 play nice with other Linux distributions with a little or no adjustments.
I'll be glad to hear if someone succeeded in making the printer work on other distributions, if so please drop me a comment.
That's all folks! Enjoy printing 😉
Tags: Auto, Bus, configure, dependency, Draft, Driver, exact steps, experiment, few days, foo, foomatic, GNU, grep, hplip, Install, Laser, Linux, ML, mono laser printer, operation, package, password, printer model, printer operation, printer work, printing, printing service, python, quot, relevant posts, root, root linux, samsung, samsung electronics, samsung electronics co, samsung electronics co ltd, samsung ml, Service, SPL, time, tutorial, work, Xubuntu
Posted in Linux, System Administration, Web and CMS | 2 Comments »
Friday, January 6th, 2012 I'm testing some old school arcade games, available from Debian's package repositories and quitting one of the games ended me up with a GNOME Screen Resolution of 640×480 pixels.
I wanted to revert back to the Classics resolution, so what I would normally do to do that is use >GNOME menus:
System -> Preferences -> Monitors
In that huge screen resolution on my 14 inch lenovo notebook screen, however the System menu cannot fit in 640×480 resolution. You can see the non-screen fitting System on the screenshot below:
Having this situation, I needed a way to change back to my normal daily used 1024x768px screen resolution to continue my daily work by some other way.
One possible solution I thought of was Logging Off Gnome and logging again. Loggig off and log on again would usually restart the initiated GNOME session and therefore will reset the screen resolution to my default 1024×768 / 32 bit color.
Having the unobservable System gnome panel menu on my screen however made using the usual Log off procedure via System -> Log Out myusername impossible…
Another possible way to actually restart my screen and hence revert back to my original resolution is achiavable using the classical restart X server key switch CTRL + ALT + backspace (bckspc) . Though this was a possible approach to the situation, I had a bunch of programs already running on my desktop and I did not wanted to interrupt my desktop session, what I was looking for is simply change the screen resolution size .
With all said I had to look up for alternative way (preferably easy) way, to revert back my screen resolution to my desired 1024×768.
As a console guy, I was interested if there is some kind of possibility to change my GNOME resolution directly using xterm or gnome-terminal , after a bit of check up online, I've found few threads started by people who were looking just like me for a way to change GNOME / KDE screen resolution size on various distributions Linux desktops as well on Free/Net/Open/BSDs. The answer to the question on few places was the command xrandr which I had used some few years ago to initiate remote X server connections via SSH
xrandr is actually a great tool part of the x11-xserver-utils
Actually xrandr is capable of doing a few things besides setting the screen resolution size, just to name a few it supports change the screen orientation, reflection of the output of the screen, adjust brightness, set color gamma etc. etc.
It is good to mention that xrandr changes the resolution not on a GNOME level but on Xorg server level.
Using xrandr to change the screen resolution appeared to be very easy.
1. First I issued xrandr to check all the supported xrandr resolutions by my X server
hipo@noah:~/Desktop$ xrandr Screen 0: minimum 320 x 200, current 1024 x 768, maximum 8192 x 8192VGA1 disconnected (normal left inverted right x axis y axis)LVDS1 connected 1024x768+0+0 (normal left inverted right x axis y axis) 304mm x 228mm 1024x768 60.0*+ 50.0 800x600 60.3 56.2 640x480 60.0 59.9 TV1 disconnected (normal left inverted right x axis y axis)hipo@noah:~/Desktop$
From the output you can see I have 3 basic resolutions configured in my Xorg, I can switch between.
2. To switch to my previous default screen resolution
hipo@noah:~/Desktop$ xrandr -s 1024x768
After using xrandr command to revert back to my default screen size, I realized there is two other (partially command line partially gui) way to change to 1024×768 pixels.3. Through launching gnome Control Center and searching for Monitors menu.
If one prefers this way he can;
i) press ALT+F2 to invoke Gnome's Run Application dialog
ii) issue gnome-control-center command:
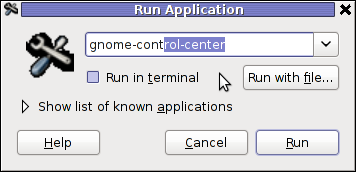
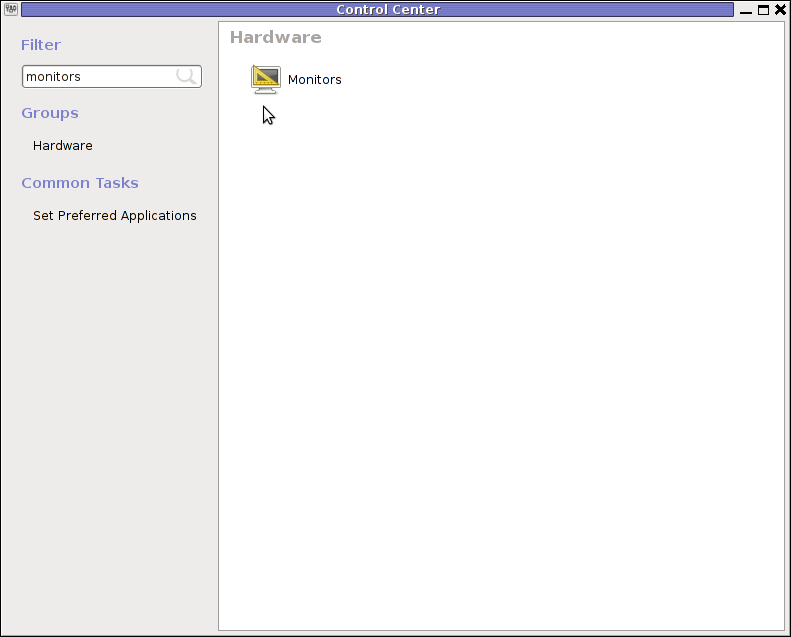
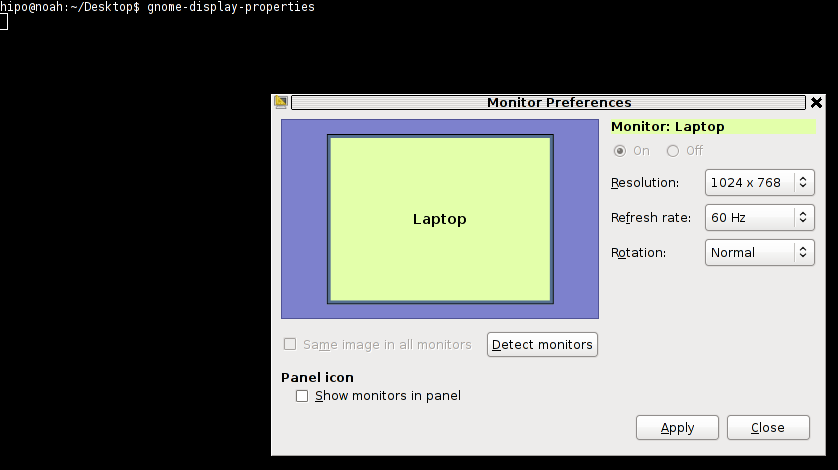
4. By invoking gnome's Control Panel -> Monitors settings window by a command
hipo@noah:~/Desktop$ gnome-display-properties
Tags: Alt, arcade games, Auto, bckspc, change, debian gnu, Desktop, Draft, freebsd, Gnome, gnome panel, gnome resolution, gnu linux, hipo, key switch, level, Linux, menu, menus, Monitors, noah, notebook, old school, package, panel menu, possibility, possible solution, repositories, resolution size, right, screen, screenshot, size, system menu, terminal, threads, work, x server, Xorg, xterm
Posted in FreeBSD, Linux and FreeBSD Desktop | 2 Comments »
Monday, January 2nd, 2012 Some might remember Psychosis Lemmings that we used to enjoy back in the glorious days of DOS 😉 I remember Lemmings used to be among the played game in one line with other top arcades like Dangerous Dave, Commander Keen, Xenon etc.
The game used to be quite unique for the time and it was quite cool that it worked on quite old machines lime my old 8086 XT with 640kb of memory. It even supported two player mode! 😉
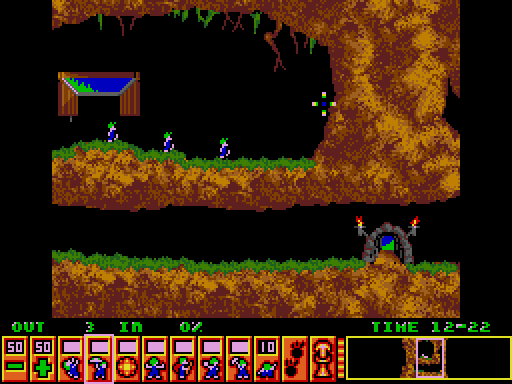
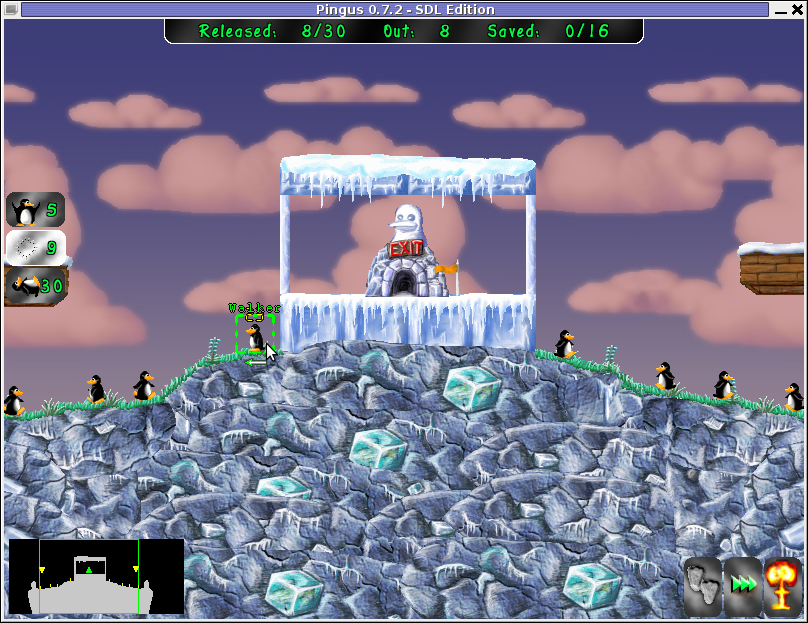
I was happy to find out actually Lemmings remake is available in the Free Software OS realm . These Lemmings clone game is called Pingus
Instead of governing a group of lemmings which had to move to an exit door by making a save path using various tools and combination of team member character skills, the main heroes in Pingus are cute little penguins 😉
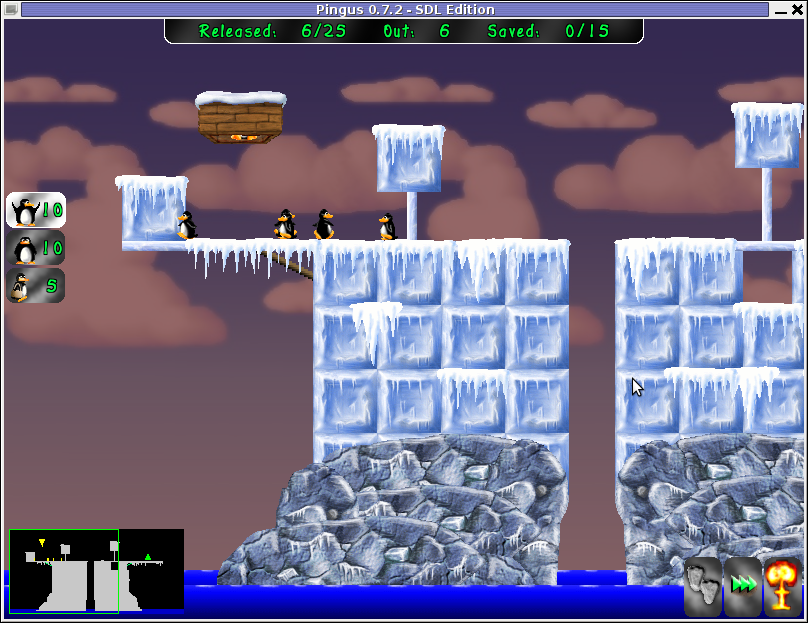
Pingus is built on TOP of SDL libraries and has a combination of awesome graphics and enjoyable music soundtrack and as a game play is a way better than its original predecessor.
If i have to to rank this game I would put it among the best 20 free software games ever produced for Linux / BSD.
pingus is available for almost all kind of Linux distritubions as well as is included in the FreeBSD port tree:
On Debian its available as a package ready to be installed with aptitude or apt by issuing:
debian:~# aptitude install pingus
For FreeBSD pingus is installed via ports tree, by running cmds:
freebsd# cd /usr/ports/games/pingus

freebsd# make install && make install clean
By default pingus will run in a Windowed mode, to run the game in fullscreen you will have to run it with the -f switch via terminal, or by pressing ALT+F2 in GNOME and typing:
$ pingus -f
The game is quite hard to complete in that resembling the lemmings. It has an embedded Mapeditor , by which new levels can be easily constructed and sent to the game developers (in that way helping the game development).
Pingus is also multi-platform, licensed under GPL2 and is also ported for Mac OSX and MS Windows, allowing others non free software users enjoy.
Pingus Windows and MacOS X binary as well as source can be downloaded here
Playing Pingus has few benefits, one is it can be nice to kill some boredom (for sysadmins) or / and bring some good past gaming memories. It's also good for developing some elder people strategic thinking as well as very suitable for little children to help develop their intellectual (thinking) in solving complex consequential tasks. Pingus could also be beneficial for teens to develop organizational and math skills.
Tags: Alt, aptitude, arcade game, arcades, BSD, character skills, dangerous dave, door, enjoyable music, exit, Free, free lemmings, free software games, freebsd port, fullscreen, game developers, game development, game play, glorious days, Gnome, gnu linux, Linux, little penguins, mapeditor, music soundtrack, non, package, pingus, player, player mode, realm, SDL, sdl libraries, software, team, terminal, time, tree, windowed mode, xenon
Posted in Entertainment, Games Linux, Linux and FreeBSD Desktop | 2 Comments »


