Posts Tagged ‘org’

Gnome Appearance modify command in Linux / How to change theme using command line in GNOME

Friday, October 13th, 2017

gnome-apperance-theme-modify-commands-in-linux-how-to-change-theme-using-commands-gnome-desktop-environment


1. Gnome Appearance modify command  in Linux instead – Intro

It is always handy to do stuff in console and as a GNU / Linux long time GNOME user I found it interesting to share here some nice tips on how Theme could be changed using command line.

Why would you ever want to change themes through console / Terminal? Well lets say you have to administrate remotely a bunch of GNU / Linux Desktop machines and you have to change themes simultaneously on a multiple hosts, changing theme using the command line then comes really handy.

Besides that in GNOME 3.X.X branch with Unity (yackes) if you have chosen to use GNOME (Flashback /Fallback) or Mate you might find it difficult to change some specifics of the default theme, that is especially true for GNOME (flashback) Fallback like me.

If you heard GNOME Flashback but you never used i and wonder what it is I think it is worthy to say few words about it:

GNOME Flashback is a session for GNOME 3 which was initially called "GNOME Fallback", and shipped as a stand-alone session in Debian and Ubuntu. It provides a similar user experience to the GNOME 2.x series sessions. The differences to the MATE project is that GNOME Flashback uses GTK+ 3 and tries to follow the current GNOME development by integrating recent changes of the GNOME libraries. The development currently lags behind a little but a lot of progress has been made in bug fixing lately. So in short GNOME Fallback is for anyone who wants to stick to GNOME 2.X interface but doesn't want to stick to Mate and wants still to use some more graphical goodies that comes with GNOME 3.

In MATE nowadays there is possibility to relatively Easy add / change appearance and add new themes, there is also the graphical tool called Appearance accessible via mate-control-center command or menus. Using Appearance you can modify themes and Window Decorations, however there is much more that can be done or tuned missing in the MATE GUI using a couple of GNOME desktop environment native commands.


2. List All Installed GNOME themes on Debian / Ubuntu Linux


$ ls -1 /usr/share/themes/|sed -e 's#/##g'
Adwaita
Adwaita-dark
Albatross
Arc
Arc-Dark
Arc-Darker
Blackbird
BlackMATE
Bluebird
BlueMenta
Blue-Submarine
Breeze
Breeze-Dark
Clearlooks
Clearlooks-Phenix
ClearlooksRe
ContrastHighInverse
Crux
Default
Dopple
Dopple-Left
DustBlue
Emacs
eOS
Flat-Plat
Flat-Plat-compact
Flat-Plat-dark
Flat-Plat-dark-compact
Flat-Plat-light
Flat-Plat-light-compact
GreenLaguna
Green-Submarine
Greybird
Greybird-accessibility
Greybird-bright
Greybird-compact
HighContrast
Industrial
Kiwi
Menta
Mist
MurrinaAquaIsh
MurrinaAzul
MurrinaBlau
MurrinaBleu
MurrinaBlu
MurrinaBlue
MurrinaCandido
MurrinaCandy
MurrinaCappuccino
MurrinaChrome
MurrinaCream
MurrinaCrystal
MurrinaCrystalCurve
MurrinaCrystalHuman
MurrinaCrystalLine
MurrinaDark
MurrinaEalm
MurrinaElement
MurrinaFancyCandy
MurrinaGilouche
MurrinaLoveGray
MurrinaNeoGraphite
MurrinaVerdeOlivo
Murrine-Gray
Murrine-Light
MurrineRounded
MurrineRoundedIcon
MurrineRoundedLessFramed
MurrineRoundedLessFramedIcon
Murrine-Sky
NOX
Orangine
Raleigh
Redmond
shearwater
Shiny
Spidey
Spidey-Left
Splint
Splint-Left
ThinIce
TraditionalGreen
TraditionalOk
WinMe


The All system installed theme location directory /usr/share/themes for RPM Linux-es Fedoras / CentOS etc. are identication


3. Change GTK Theme


Below commands are for GNOME 3 based desktop environments this includes also any other GNOME based Graphical Environments or components of GNOME 3 such as (Ubuntu Unity, GNOME 3 Shell/Classic, Cinnamon), and even the old GNOME 2 desktop.

In GNOME 2 it was possible to set various variables directly from gconf-editor including GTK Themes but in GNOME 3 somehow this is no more … so to do we need to use some cryptic commands or use gnome-tweak-tool or MyUnity (Ubuntu Linux users with Unity) but configuration that can be made with them is unfortunately partial so in any case knowing below commands is a necessity to be able to tune up nicely your Linux Gnome Desktop.

And yes it is crazy why on Earth gnome developers scaped out the configuration from gconf-editor and left us with this user unfriendly method. Could it be that someone (Like the big corporations) has the interest to ruin Free Software?? What do you think…
 

Unity, GNOME 3 Shell/Classic, Cinnamon

In Unity GNOME 3 Shell / Classic and Cinnamon (the default Debian graphical env).

Before we start I recommend you check out what is the current installed and enabled theme, you might want decide to keep it after checking the number of themes available. To check your current installed GNOME theme run:


gsettings get org.gnome.desktop.interface gtk-theme
'Adwaita'


You see I have 'Adwaita' theme as a default.
Next lets change the gnome GTK theme interface.
 

gsettings set org.gnome.desktop.interface gtk-theme "Menta"


MATE (In Linux Mate the current fork of GNOME 2 for hardcore GNOME 2 users)


mateconftool-2 –type=string –set /desktop/mate/interface/gtk_theme "Menta"


GNOME 2 (In native GNOME 2 if you still own some old machines with old Debian / Ubuntu / Fedoras etc.


gconftool-2 –type=string –set /desktop/gnome/interface/gtk_theme "Menta"


4. Change WINDOW THEME (Metacity)
 

Unity, GNOME 3 Classic (Metacity), GNOME 3 Shell (Metacity > Mutter)


gsettings set org.gnome.desktop.wm.preferences theme "Menta"


Cinnamon (Metacity -> Muffin)


gconftool –type=string –set /desktop/cinnamon/windows/theme "Menta"


Note: Cinnamon must be restarted for the change to take effect.


GNOME 2 (In Gnome 2 with Metacity)


gconftool-2 –type=string –set /apps/metacity/general/theme "Menta"


MATE (Metacity)


mateconftool-2 –type=string –set /apps/marco/general/theme "Menta"


Change SHELL THEME (In Gnome Shell and Cinnamon)


GNOME Shell (user-theme extension must be enabled)
 

gsettings set org.gnome.shell.extensions.user-theme name "Menta"


Cinnamon


gsettings set org.cinnamon.theme name "Menta"


5. Change GTK COLOR SCHEME

Unity, GNOME 3 Shell/Classic, Cinnamon (Change GNOME3 Color scheme)


gsettings set org.gnome.desktop.interface gtk-color-scheme "bg_color:#e9efe9;fg_color:#444444;base_color:#ffffff;text_color:#333333;selected_bg_color:#6666cc;selected_fg_color:#eeeeee;tooltip_bg_color:#222222;tooltip_fg_color:#dfcfcf;link_color:#cc0099;"

Reset color (if you don't like it):

gsettings set org.gnome.desktop.interface gtk-color-scheme ""


MATE (Mate set color scheme)


mateconftool-2 –type=string –set /desktop/mate/interface/gtk_color_scheme "bg_color:#e9efe9;fg_color:#444444;base_color:#ffffff;text_color:#333333;selected_bg_color:#6666cc;selected_fg_color:#eeeeee;tooltip_bg_color:#222222;tooltip_fg_color:#dfcfcf;link_color:#cc0099;"


Reset color :


mateconftool-2 –type=string –set /desktop/mate/interface/gtk_color_scheme ""


6. GNOME 2 (Again for the old GNome 2 machines to change the GTK Color scheme)


gconftool-2 –type=string –set /desktop/gnome/interface/gtk_color_scheme "bg_color:#e9efe9;fg_color:#444444;base_color:#ffffff;text_color:#333333;selected_bg_color:#6666cc;selected_fg_color:#eeeeee;tooltip_bg_color:#222222;tooltip_fg_color:#dfcfcf;link_color:#cc0099;"


Reset color:


gconftool-2 –type=string –set /desktop/gnome/interface/gtk_color_scheme ""


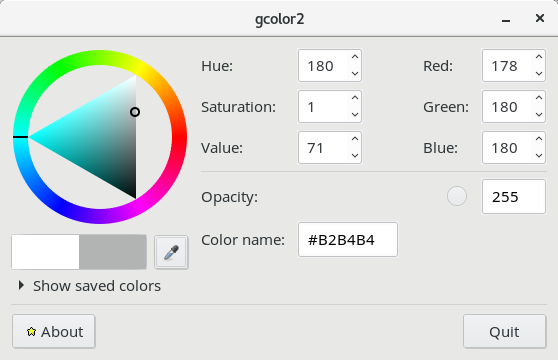
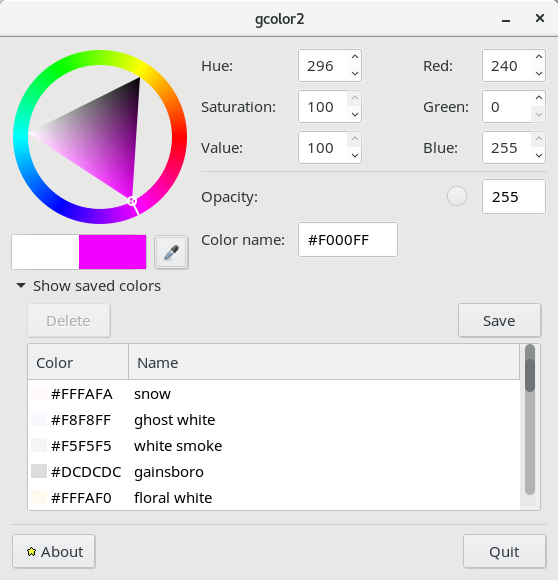
What about colors, well the #444444 and #22222 and #eeeeee, #333333 seen as color codes in above examples can easily decrypted if you don't know them using a tiny tool called gcolor2
The tool is installable on most Linux distributions with a simple apt-get install gcolor2 or yum install gcolor the tool is convenient and a must have for anyone using Linux for basic design or graphic operations with some program as GIMP / Krita / Inkscape / Vectr / Karbon etc.

All gcolor2 does is to make easy for you to get HTML color codes and convert existing ones into colors for you, here is shot:

gcolor2-show-html-color-codes-linux

gcolor2-show-html-color-codes-linux2

http://www.fandigital.com/2012/06/change-theme-command-line-gnome.html

https://ubuntuforums.org/showthread.php?t=1778355

While talking about setting color another interesting Graphical tool related to article, that gives you abilities to change colors in GNOME is gnome-color-choose, the tool is really awesome and allows you to do many of the color tunings shown in above examples

# apt-get install –yes gnome-color-chooser

And finally for the gnome theme hungry people, here is a great bonus. If you need a ton of shiny new themes as possibility to set up on your GNOME download and install The Ultimate Edition Themes deb (Debian / Ubuntu Mint) etc. collection (mirrored):

Debian and other deb based distro users can easily download and install with:
 

linux:~# dpkg -i ultimate-edition-themes-.0.0.7_all.deb


Other Linux users such as Fedora ones and Slackware users (if anyone on Slack uses Gnome since KDE is default by default there), use alien tool to install it or directly open the file with Midnight Commander (mc) and copy the files to the /usr/share/themes dir.


This article is possible thanks to Change Theme Using Command Line in GNOME (Linux) command line examples are taken from there.

How to fix unfixable broken package dependencies on Debian GNU / Linux – Fix package mismatch

Wednesday, September 27th, 2017

how-to-fix-unfixable-broken-package-dependency-on-debian-ubuntu-linux-icon

I just tried to upgrade my Debian Wheezy 7 to the latest stable Debian Stretch 9 by not thinking too much and just changing the word wheezy with stretch in /etc/apt/sources.list so onwards on it looked like so:
 

cat /etc/apt/sources.list


deb http://ftp.bg.debian.org/debian/ stretch main contrib non-free
deb-src http://ftp.bg.debian.org/debian/ stretch main

deb http://security.debian.org/ stretch/updates main
deb-src http://security.debian.org/ stretch/updates main 

# stretch-updates, previously known as 'volatile'
##deb http://deb.debian.org/debian/ stretch-updates main
deb-src http://deb.debian.org/debian/ stretch-updates main


I also make sure all the defined Google Chrome / Opera / Skype and Squeeze Backports repositories existent in /etc/apt/sources.list.d directory files which in my case were like so;


root@noah:/etc/apt/sources.list.d# ls
google-chrome.list  opera-stable.list  squeeze-backports.list
opera.list          skype-stable.list


 were commented out because they were producing extra apt update errors …

And afterwards ran as usual:


apt-get update
apt-get –yes upgrade


The upgrade command executed fine and a lot of packages got downloaded and reinstalled without much issue, so I thought everything would be fine and just proceeded with the attempt to finalize the distribution major release 7 to major release 9 by running:


apt-get –yes dist-upgrade


But guess what now I got some dependency errors with cron and other installed packages that depend on package versions that are not going to be installed as the apt-get tool informed me.

I tried to out-smart the dpkg dependency system and removed all the packages reporting to have a missing dependencies with a short for bash loop after duming all the problematic packages showing dependency issues with commands such as:

apt-get -f dist-upgrade >> out.txt
for i in $(cat out.txt); awk '{ print $1 }' >> to_delete.txt; done


Before proceeding further I had to manually edit few lines in a text editor to remove some of the junk left from apt-get too.

So i was brave and just removed the dependency missing packages with following other for loop:


for i in $(cat to_delete.txt); do dpkg -r –force-all $i; done


Now I was hoping that rerunning:


apt-get autoremove

dpkg --configure -a

apt-get update -f
apt-get dist-upgrade -f


would no longer complain and I would just install the removed packages in another for shell loop once every other packages gets installed.

But guess what I was wrong … the system entered into another bunch of depedency terribly issues and messed up so badly that there were at least 50 packages reporting to have a missing / broken or uninstallable deb version depedency …

I got totally Angry, I knew already from experience that just trying to jump over while skipping a major release e.g. upgrade Debian 7 to Debian 9, instead of first upgrading to Debian 8 Linux and then upgrading Debian 8 to Debian 9 have always produced the same mess but I was lame and stupid again to f**k it up and I was out of mind swearing (a truly bad habid I'm not proud of) …

So as the notebook with Linux so far was perfectly working with Debian 7 and had a tons of old installed software and I was in a state where if I restart the system it was very likely my Thinkpad r61 laptop won't boot at all, I googled around to find a solution unfortunately without any luck, so finally I used the good old and tested method to DO IT MYSELF and Find the Fix without Uncle Google's help and by God's grace I did, after experimenting a while with the aptitude package / install / remove update tool without much success, finally I find the solution to the totally messed up Debian package dependencies and it all came to a simply reverting back my /etc/apt/source.list to look like following:


# deb cdrom:[Debian GNU/Linux 7.0.0 _Wheezy_ – Official amd64 CD Binary-1 20130504-14:44]/ wheezy main

##deb cdrom:[Debian GNU/Linux 7.0.0 _Wheezy_ – Official amd64 CD Binary-1 20130504-14:44]/ wheezy main

deb http://ftp.bg.debian.org/debian/ wheezy main contrib non-free
deb-src http://ftp.bg.debian.org/debian/ wheezy main

deb http://security.debian.org/ wheezy/updates main
deb-src http://security.debian.org/ wheezy/updates main

# wheezy-updates, previously known as 'volatile'
##deb http://deb.debian.org/debian/ wheezy-updates main
deb-src http://deb.debian.org/debian/ wheezy-updates main
##deb http://www.deb-multimedia.org wheezy main non-free
#deb http://ftp.debian.org/debian/ wheezy-backports main
###deb http://ftp.debian.org/debian/ wheezy-backports main contrib non-free
##deb http://dl.google.com/linux/chrome/deb/ wheezy main
#deb http://ftp2.de.debian.org/debian-volatile wheezy/volatile main
###deb http://www.deb-multimedia.org wheezy main non-free


run of the following two depedency fix commands !!!!


aptitude upgrade –full-resolver

aptitude full-upgrade –full-resolver


After a while a Debian LinuxOS system downgrade was initated and the missing packages were found, downloaded from the correct wheezy repositories and all broken and missing dependencies packages were fixed !!! HOORAY IT WORKS AGAIN!!


The Hindenburg disaster took place on Thursday, May 6, 1937, as the German passenger airship LZ 129 Hindenburg caught fire and was destroyed during its attempt to dock with its mooring mast at Naval Air Station Lakehurst, which is located adjacent to the borough of Lakehurst, New Jersey, United States. Of the 97 people on board (36 passengers and 61 crewmen), there were 35 fatalities (13 passengers and 22 crewmen). One worker on the ground was also killed, making a total of 36 dead. The disaster was the subject of spectacular newsreel coverage, photographs, and Herbert Morrison’s recorded radio eyewitness reports from the landing field, which were broadcast the next day. A variety of hypotheses have been put forward for both the cause of ignition and the initial fuel for the ensuing fire. The incident shattered public confidence in the giant, passenger-carrying rigid airship and marked the end of the airship era.

Thursday, March 19th, 2015

zeppelin-explodes-scores-dead

The Hindenburg disaster took place on Thursday, May 6, 1937, as the German passenger airship LZ 129 Hindenburg caught fire and was destroyed during its attempt to dock with its mooring mast at Naval Air Station Lakehurst, which is located adjacent to the borough of Lakehurst, New Jersey, United States. Of the 97 people on board (36 passengers and 61 crewmen), there were 35 fatalities (13 passengers and 22 crewmen). One worker on the ground was also killed, making a total of 36 dead. The disaster was the subject of spectacular newsreel coverage, photographs, and Herbert Morrison's recorded radio eyewitness reports from the landing field, which were broadcast the next day. A variety of hypotheses have been put forward for both the cause of ignition and the initial fuel for the ensuing fire. The incident shattered public confidence in the giant, passenger-carrying rigid airship and marked the end of the airship era.


https://upload.wikimedia.org/wikipedia/commons/e/e4/1937-05-10_Special_Release_-_Zeppelin_Explodes_Scores_Dead.ogv


Install postgresql on Debian Squeeze / How to install PostGreSQL on Obsolete Debian installation

Friday, June 10th, 2016

how-to-install-postgresql-on-obsolete-old-debian-squeeze-tutorial

If you're in position like me to be running an old version of Debian (Squeeze) and you need to install PostgreSQL you will notice that the Debian 6.0 standard repositories are no longer active and apt-get update && apt-get upgrade are returning errors, thus because this Debian release is already too old and even the LTS repositories are inactive it is impossible to install postgresql with the usual.

To get around the situation first thing I did was to try to add followin Debian  repositories. to /etc/apt/sources.list
 

deb http://ftp.debian.net/debian-backports squeeze-backports-sloppy main
deb http://archive.debian.org/debian-archive/debian/ squeeze main contrib non-free
deb http://archive.debian.org/debian-archive/debian/ squeeze-lts main contrib non-free

After adding it I continued getting missing package errors while trying:
 

# apt-get update && apt-get install postgresql postgresql-client
….
…..


E: Some index files failed to download. They have been ignored, or old ones used instead.


Thus I googled a bit and I found the following PostgreSQL instructions working Debian 7.0 Wheeze and decided to try it 1 in 1 just changing the repository package wheezy word with squeeze
in original tutorial postgre's deb repositories are:


deb http://apt.postgresql.org/pub/repos/apt/ wheezy-pgdg main


I've only changed that one with:


deb http://apt.postgresql.org/pub/repos/apt/ squeeze-pgdg main


I guess though this worked for Debian Squeeze installing current versions such as Debian 8.0 Jessis and newer wouldn't be a prolem if you just change the debian version keyword witht he distribution for which you need the postgresql package


Here is all the consequential steps I took to make the PostgreSQL 9.5 running on my old and unsupported Debian 6.0 Squeeze

Create /etc/apt/sources.list.d/pgdg.list. The distributions are called codename-pgdg. In the example, replace wheezy with the actual distribution you are using:

# vim /etc/apt/sources.list.d/pgdg.list


deb http://apt.postgresql.org/pub/repos/apt/ squeeze-pgdg main

debian:~# apt-get –yes install wget ca-certificates debian:~# wget –quiet -O – https://www.postgresql.org/media/keys/ACCC4CF8.asc | sudo apt-key add – debian:~# apt-get update debian:~# apt-get upgrade debian:~# apt-get –yes install postgresql-9.5 pgadmin3

Next step is to connect to PostGreSQL and create database user and a database # su – postgres $ psql

Create a new database user and a database:

postgres=# CREATE USER mypguser WITH PASSWORD 'mypguserpass'; postgres=# CREATE DATABASE mypgdatabase OWNER mypguser;


or

# createuser mypguser #from regular shell # createdb -O mypguser mypgdatabase

Quit from the database

postgres=# q

Connect as user mypguser to new database

# su – mypguser $ psql mypgdatabase

or

# psql -d mypgdatabase -U mypguser

If you get errors like:

psql: FATAL: Ident authentication failed for user "mypguser"

edit pg_hba.conf in /etc/postgresql/9.5.Y/main/pg_hba.conf


local all all trust # replace ident or peer with trust

reload postgresql

/etc/init.d/postgresql reload …


To make sure that PostGreSQL is running on the system check the following processes are present on the server:


root@pcfreak:/var/www/images# ps axu|grep -i post postgres 9893 0.0 0.0 318696 16172 ? S 15:20 0:00 /usr/lib/postgresql/9.5/bin/postgres -D /var/lib/postgresql/9.5/main -c config_file=/etc/postgresql/9.5/main/postgresql.conf postgres 9895 0.0 0.0 318696 1768 ? Ss 15:20 0:00 postgres: checkpointer process postgres 9896 0.0 0.0 318696 2700 ? Ss 15:20 0:00 postgres: writer process postgres 9897 0.0 0.0 318696 1708 ? Ss 15:20 0:00 postgres: wal writer process postgres 9898 0.0 0.0 319132 2564 ? Ss 15:20 0:00 postgres: autovacuum launcher process postgres 9899 0.0 0.0 173680 1652 ? Ss 15:20 0:00 postgres: stats collector process root 14117 0.0 0.0 112404 924 pts/1 S+ 16:09 0:00 grep -i post


Well that's all folks now you will have the postgresql running on its default port 5433:


debian:/etc/postgresql/9.5/main# grep -i port postgresql.conf
port = 5433 # (change requires restart)
# supported by the operating system:
# ERROR REPORTING AND LOGGING # %r = remote host and port


Well that's it folks thanks The Lord Jesus Christ grace by the prayers of John The Baptist and Saint Sergij Radonezhki it works 🙂


Apache Webserver disable hostnamelookups “HostnameLookups off” for minor performance increase

Friday, February 12th, 2016

apache-disable-dns-lookups-for-speed-hostnamelookups-off-directive-building-scalable-php-applications

If you don't much care about logging in logs from which domain / hostnames requests to webserver originate and you want to boost up the Apache Webserver performance a bit especially on a heavy loaded Websites, where no need for stuff like Webalizer, Awstats etc. , e.g. you're using GoogleAnalytics to already track requests (beware as sometimes GoogleAnalytics could be missing requests to your webserver, so having some kind of LogAnalyzer software on server is always a plus). But anyways accepting that many of us already trust GoogleAnalytitcs.


Then a great tuning option to use in default domain configuration or in multiple VirtualHosts config is:

HostnameLookups off

If you want to make the HostnameLookups off as a default behaviour to all your virtualhosts on  Debian / Ubuntu / CentOS / SuSE / RHEL distro virtualhosts add either to default config /etc/apache2/sites-enabled/000-default (on Deb based Linuxes) or (on RPM based ones), add directive to /etc/httpd/httpd.conf

For self-hosted websites (if run your own small hosting) or for a home situated webservers with up to 20-50 websites it is also a useful optimization tip to include in /etc/hosts file all the IPs of sites with respective domain names following the normal syntax of /etc/hosts, e.g. in my own /etc/hosts, I have stuff like:
 

pcfreak:~$ cat /etc/hosts
127.0.0.1 localhost localhost.localdomain
127.0.1.1 pcfreak.www.pc-freak.net pcfreak mail.www.pc-freak.net
192.168.0.14 new-pcfreak
219.22.88.70 fw
212.36.0.70 ftp.bg.debian.org
212.211.132.32 security.debian.org
83.228.93.76 pcfreak.biz www.pc-freak.net www.pc-freak.net
# for wordpress plugins
216.58.209.3 gstatic.com
91.225.248.129 www.linkedin.com
74.50.119.198 www.blogtopsites.com
94.31.29.40 static.addtoany.com
216.58.209.202 fonts.googleapis.com
216.58.209.14 www.google-analytics.com
216.58.209.14 feeds.feedburner.com
93.184.220.241 wprp.zemanta.com
199.30.80.32 stumbleupon.com
156.154.168.17 stumbleupon.com
2.18.89.251 platform.linkedin.com
# The following lines are desirable for IPv6 capable hosts

# … etc. put IPs and hostnames following above syntax


As you see from above commented section for wordpress plugins, I've included some common websites used by WordPress enabled plugins to prevent my own hosting server to query DNS server every time. The normal way the Linux / Unix works is it first checks in /etc/hosts and only if the hostname is not defined there then it queries the DNS caching server in my case this is a local DJBDNS cache server, however defining the hosts in /etc/hosts saves a lot of milisecons on every request and often if multiple hosts are defined could save (decrease site opening for end users) with seconds.


Well now use some website speed testing plugin like Yslow, Firebug Fiddler or HTTPWatch


Fix “FAIL – Application at context path /application-name could not be started” deployment error in Tomcat manager

Thursday, October 1st, 2015

tomcat-manager-FAIL-Application-at-context-path-application-name-could-not-be-started-fix-solution-error

While deploying an environment called "Interim" which is pretty much like a testing Java application deployed from a Java EAR (Enterprise Archive) file from within a Tomcat Manager GUI web interface after stopping the application and trying to start it, the developers come across the error:


FAIL – Application at context path /application-name could not be started


The error puzzled me for a while until I checked the catalina.out I've seen a number of thrown Java Eceptions errors like:

Okt 01, 2015 10:48:46 AM org.springframework.web.context.ContextLoader initWebApplicationContext

Schwerwiegend: Context initialization failed

org.springframework.beans.factory.BeanCreationException: Error creating bean with name 'com.sun.xml.ws.transport.http.servlet.SpringBinding#2' defined in ServletContex

t resource [/WEB-INF/pp-server-beans.xml]: Cannot create inner bean ‘(inner bean)’ of type [org.jvnet.jax_ws_commons.spring.SpringService] while setting bean property

'service'; nested exception is org.springframework.beans.factory.BeanCreationException: Error creating bean with name '(inner bean)#33': FactoryBean threw exception on

 object creation; nested exception is java.lang.OutOfMemoryError: PermGen space

I've googled a bit about the error:

"FAIL – Application at context path /application-name could not be started"

and come across this Stackoverflow thread and followed suggested solution to fix web.xml tag closing error but it seems there was no such error in my case, I then also tried solution suggested by this thread (e.g. adding in logging.properties) file:
 

org.apache.catalina.core.ContainerBase.[Catalina].level = INFO
org.apache.catalina.core.ContainerBase.[Catalina].handlers = java.util.logging.ConsoleHandler

unfortunately this helped neither to solve the error when it is tried to be started from tomcat manager.

After asking for help a colleague Kostadin, he pointed me to take a closer look in the error (which is a clear indication) that the reserved space is not enough (see below err):
 

java.lang.OutOfMemoryError: PermGen space

And he pointed me then to Solution (which is to modify the present tomcat setenv.sh) settings which looked like this:

# Heap size settings

export JAVA_OPTS="-Xms2048M -Xmx2048M"


# SSCO test page parameter

export JAVA_OPTS="$JAVA_OPTS -DTS1A_TESTSEITE_CONFIG_PATH=test-myapplication.com"

# Default garbage collector settings

export JAVA_OPTS="$JAVA_OPTS -XX:MaxPermSize=128M"


# Aggressive garbage collector settings.

# Do not use! For testing purposes only!

#export JAVA_OPTS="$JAVA_OPTS -Xss128k -XX:ParallelGCThreads=20 -XX:+UseConcMarkSweepGC -XX:+UseParNewGC -XX:SurvivorRatio=8 -XX:TargetSurvivorRatio=90 -XX:MaxTenuringThreshold=31 -XX:+AggressiveOpts -XX:MaxPermSize=128M"


####### DO NOT CHANGE BELOW HERE #######

# Disable X11 usage

unset DISPLAY

export JAVA_OPTS="$JAVA_OPTS -Djava.awt.headless=true"


# Garbage collection log settings

export JAVA_OPTS="$JAVA_OPTS -verbose:gc -XX:+PrintGCTimeStamps -XX:+PrintGCDetails -Xloggc:/web/tomcat/current/logs/gc.log -XX:-TraceClassUnloading"


# Enable JMX console

export JAVA_OPTS="$JAVA_OPTS -Dcom.sun.management.jmxremote"


The solution is to to add following two options to export JAVA_OPTS (above options):

-XX:PermSize=512m -XX:MaxPermSize=512m


After modifications, my new line within setenv.sh looked like so:


JAVA_OPTS="-Xms2048M -Xmx2048M -XX:PermSize=512m -XX:MaxPermSize=512m"


Finally to make new JAVA_OPTS settings, I've restarted Tomcat with:


cd /web/tomcat/bin/
./shutdown.sh
sleep 5; ./startup.sh


And hooray it works fine thanks God! 🙂

How to Remove Firefox TABS all time Moving Backward / Forward (Waiting) Wheel cursor – Browser and OS Wheel Ring cursor might affect hypnotically

Monday, September 7th, 2015

remove-firefox-tabs-all-time-annoying-moving-back-forward-waiting-wheel-cursor-browser-and-ring-cursor-might-affect-you-hypnotically

I've been annoying for quite a long time by the the Clockwise moving backward and Forward Wheel (Ring) on Top of browser Tabs everytime I navigate to a new Internet domain or request a resource on the Net.

I'm aware that seeing the wheel all the time move back and forward is a very bad manipulation technique that is often used in advertisements in old movies and some advertisements in the start of the video . I'm talking about the infamous backward counting technique in a Circle (it was moer commonly used in the dawn of Television) aiming to induce watchers mind into hypnotic state …

back-counting-10-9-8-7-manipulation-technique-to-make-your-mind-susceptible

Those who have a degree in psychology or have been into marketing or human resources fields or any field involved where you have to influence the masses are already aware of the backward counting methology which has been practiced heavily by hypnosis practisioners such as Sigmund Freud, to induce any kind of hypnotic state the hypnotist always asks the object of hypnotism to watch closely into a moving back and forwards clock, often accompanied by counting backwards …

Well my Theory here is that the same techniques is well aware of those who planned Windows OS in which if you remember the Sand Clock has been substituted in Windows 7 / 8 and Windows 10 with the rotating back and foward Wheel for the reason that this aims to influence people mind to go into Alpha state from Beta state and thus make them feel more relaxed while doing stuff on the PC.

One thing to mention here is Back and Forward wheel is not only into OS level it has been heavily adopted by leading Software as a Service (SAS) UIs such as Google's and probably more importantly Youtube (have you noticed the Cycling Wheel when waiting for a Youtube movie to Load), the Wheel is also heavily incoruprated in most if not all biggest Websites on the Net. Even If you have noticed these days Google's Cycling (Waiting) Wheel is not only Cycling but has the colorful programming incorporated.

google-wheel-color-programming-example

Well probably many people who use computers daily did not really realize that the Computer OS and Programs GUI Interface they're using is influencing their mind and some famous psychological methods such as color programming and hypnotic tricks could be used more or less.

In that regard as a Firefox user I decided to change tne Back and Forward Wheel with another one which will not trigger my subconsciousness / mind all the time while browing on the Net into Alpha State. As I'm not a Firefox expert and my quick research on search Engines on how to achieve changing or removing the Browser Tabs all time turning wheel did not led me to nothing positive, I've consulted the experts in irc.freenode.net #firefox.

As always the guys were helpful and pointed me out to UserStyles.org website's Static-Throbbler CSS. I've mirrored the CSS script under a name remove-firefox-tab-wheel-script.css in case if UserSpace.org disappears in future, below is also a paste of the script:

@namespace url(https://www.mozilla.org/keymaster/gatekeeper/there.is.only.xul); @-moz-document url(chrome://browser/content/browser.xul) { .tab-throbber { list-style-image: url('data:image/png;base64,iVBORw0KGgoAAAANSUhEUgAAABAAAAAQCAMAAAAoLQ9TAAAABGdBTUEAALGPC/xhBQAAACBjSFJNAAB6JgAAgIQAAPoAAACA6AAAdTAAAOpgAAA6mAAAF3CculE8AAAB5lBMVEUAAADMzMzr6+v////t7e1paWmYmJiampqPj4+IiIiQkJCgoKCPj49qamqQkJB2dnacnJyAgIBfX19aWlpZWVlgYGB/f399fX2Hh4eFhYWZmZlycnJaWlpjY2Nubm56enp6enptbW1XV1dxcXGbm5uAgIBiYmKenp5ra2taWlpxcXGLi4uXl5eKioqPj4+NjY1wcHBZWVlra2uYmJhiYmKBgYFbW1t1dXWSkpKEhIR6enpsbGyBgYFubm6CgoKZmZlzc3NYWFiPj4+YmJhmZmaLi4uGhoagoKC4uLi0tLSnp6eIiIhmZmafn5+RkZFcXFx1dXWZmZl8fHzt7e3////r6+uUlJRycnJbW1uQkJCHh4d4eHiKioqxsbFubm6NjY15eXlYWFiHh4dXV1d4eHiGhoZycnKvr6+JiYl4eHiGhoaOjo6MjIxxcXHq6uqjo6N5eXmVlZVzc3OcnJxfX1+JiYl7e3tra2upqamIiIiNjY1kZGReXl6YmJiOjo59fX1YWFiSkpKAgIB2dnaYmJh0dHRoaGhqamqSkpKSkpKLi4uWlpaPj49wcHBpaWlhYWGCgoKamppwcHBjY2Nubm57e3tiYmKYmJiZmZl9fX1ZWVl+fn6bm5t1dXWOjo6GhoaNjY3///+wXn5TAAAAoXRSTlMAAAAAAAYLIzM6MiENBgEII0ZzeXtzRgcBByZhe29iWFlhe2ElBwYiY3pgRzMwNkZfemIkBUZ7XzktHyAdICs3X3sMI29KLgkJCApFbSAxe2E2IAQBAzVgeTE7WjUIHTFZejp8WzIiBy5YOzM1IwMKIDVgInRKMSALKUducyINSHw6LRo2XwZjMi0vNUhgYwYHJWFuYVhuJiNGeUUjCDI6MyoACaoAAAABYktHRAMRDEzyAAABFklEQVQY02NgYGBkZWPn4OTk4ubhZWIAAj5+AUEhYRERYVExdnEJZgZGSSlpGVk5eQVFWSVlFVUmBjV1DU0tbR1dXT19A0MjYxMGNlMzcwtLK2sbWzt7B0cxJwZnURdXNxt3D08vaztvH1FfBj//gMAg92DmkFAv27DwiEiGKLPoGJtYZgaGkNi4+ITEJIao5JTUNA+gAHO6dUamYRZDtpl0Tq5XXghzaH5BYZGmH0NxiUtpWXlFuqdXXGVVdU0tQ119g3Rjk5V1c0FlS6uIIBtDm3G7iFZVR2dXd0+vYZ96PwPLhImTlCZPUZg6ZZrIpOmSjAzMEuIzZorOcnScVTN7zlw+kHeZeJ18582fv6CWjZWRgQEA0vJCZaR0FWsAAAAldEVYdGRhdGU6Y3JlYXRlADIwMTMtMDYtMjhUMDc6NDE6NDItMDY6MDC7fUviAAAAJXRFWHRkYXRlOm1vZGlmeQAyMDEzLTA2LTI4VDA3OjQxOjUxLTA2OjAwN2LpXQAAABN0RVh0U29mdHdhcmUASmFwbmcgcjExOSfos2EAAAAASUVORK5CYII=') !important; animation-name: none !important; } .tab-throbber[progress] { list-style-image: url('data:image/png;base64,iVBORw0KGgoAAAANSUhEUgAAABAAAAAQCAMAAAAoLQ9TAAAABGdBTUEAALGPC/xhBQAAACBjSFJNAAB6JgAAgIQAAPoAAACA6AAAdTAAAOpgAAA6mAAAF3CculE8AAABs1BMVEUAAAAAkwAAnwAAmAAAmQAAnQAAiQAAkgAAkAAEnAQHogcHpwcHpgcGogYEmwQAkAAAkQAAiAAAjAAAkQAEnQQMqwwhwiEhxyEiyCIgwiAMrAwEnQQAkQAEnAQauRohyCEdxh0SwRIRvxEPvw8ZxRkjyCMFnQUEnAQVuhUhyCESwRIFuAUBsAEArQABrwEBsAEMuQwRwREjyCMVuRUEnAQNrQ0TwRMBsAEAqwAAqAABsAERwREiyCIQrhAexh4CuAIDtwMbxhsgwiAEmwQGogYjxiMTwhMBrwETwRMhxiEGoQYMqAwhxyEOvg4ArQAArwAPvg8kyCQMpwwnyCcPvg8AqgAArAAOvg4hxyEMqAwGoQYkxyQVwhUBrgEBrwEjxiMGogYEmwQhwiEcxhwMuQwArQAAqwAGuAYexh4gwiAEnAQRrhEjyCMRwREBrwEBrwETwRMixyINrQ0EnAQVuRUjyCMSwRIDuAMBrgEArAAKuAohyCEEmwQFnAUauRoZxRkSwRIRvxERwREcxRwhyCEEnAQAkAAMqwwhxiEixyIgwiAMqwwHpQcHpgcHoQcEmwT////fHmrrAAAAkHRSTlMAAAAAAAAHIzBXbHZ1bFMxJAcNJ1iAo6amooBZJl2Zpp6Ui4mep11WmKWSZygXFylmk6aYWYCRMQkKL5Kngp1iZ52jVG6nkyeUpm53qo0WF4uodqqMExOMqXZwp5UmJKhvVaSfag0MaZ6kWISplC4wk6iCWpqolWklEmanV1+boJeNlqCoXyeDqKmlgnh5blghd7i+AAAAAWJLR0SQeAqODAAAAPRJREFUGNNjYGBgY+fg5OLm4eXjFxBkAAIhYRFRMXEJCXFJKWkZIaC8jKycvIKikrKiiqqcmrAgg4C6hqaWto6unr6BoZGxiQADh6mEmbkFIwMDk6WVtY0tPwOnmJ29BQMYWDo4OjkzuLi6uTNCBJj1PTy9GLx9fP0YoMA/IDCIwTs4JBQmEBYeEckQFR0TywLhs8Z5xCcwJCYlp6RCBNLSMzKzGPizc3LzUkHWpuUXFBbxMwgUl5SWlVeEVsZVKVaX1AgwCArX1uXUN4Q3NjW31LW2sQE9J1PcntnRWdjR1W0iLAQyS1CAP9Grp7evn58dKA8Ayh0xsydWuvQAAAAldEVYdGRhdGU6Y3JlYXRlADIwMTMtMDYtMjhUMDc6NDE6NTEtMDY6MDBGP1HhAAAAJXRFWHRkYXRlOm1vZGlmeQAyMDEzLTA2LTI4VDA3OjQxOjUyLTA2OjAwBorzwAAAABN0RVh0U29mdHdhcmUASmFwbmcgcjExOSfos2EAAAAASUVORK5CYII=') !important; } }

To use the script you will first need to install the Stylish FF plugin, then:

Stylish-FireFox-plugin-screenshot-Windows-7-OS
 

1. Enable Stylish plugin and Restart firefox when prompted
2. Click on Write New Style
3. Paste above CSS script and click on Save button


stylish-static-throbbler-css-script-change-back-forward-rotating-tab-wheel-on-Firefox-howto

Now instead of the moving wheel you will get just a circle appearing as a static image while the page is loading.

If you want to absolutely remove any circles or images and show nothing when loading, e.g. not have any mean to monitor whether page is loaded or not, but also make it easier for the eye I even finally decided to completely remove the all time moving Wheel from Firefox Tabs even the static picture out using below CSS script with Stylish:
 

@namespace url(https://www.mozilla.org/keymaster/gatekeeper/there.is.only.xul); @-moz-document url(chrome://browser/content/browser.xul) { .tab-throbber { list-style-image: none !important; animation-name: none !important; } .tab-throbber[progress] { list-style-image: none !important; } }

After all even after removing the FF Tabs wheel, there is the Status being printed down the webpage, showing text based the connection status. I find this kind of page loading status much less agressive and preferrable, than the current verions Firefox 4 onwards ..

One other thing I do to prevent the annoying Windows OS default Theme wheel is to change it to the old fashioned sand clock as well as bring back the theme of Windows 7 / 8 to Classic Theme of Win 2000, as I believe this reduced the level of zoombification the PC imposes on self 🙂

Enjoy!

Non-free packages to install to make Ubuntu Linux Multimedia ready / Post install packages for new Ubuntu installations

Monday, January 23rd, 2012

non-free-packages-to-install-make-ubuntu-linux-multimedia-ready

1. Add Medibuntu package repository

root@ubuntu:~# wget --output-document=/etc/apt/sources.list.d/medibuntu.list \
http://www.medibuntu.org/sources.list.d/$(lsb_release -cs).list \
&& apt-get --quiet update \
&& apt-get --yes --quiet --allow-unauthenticated install medibuntu-keyring \
&& apt-get --quiet update

2. Enable Ubuntu to play Restricted DVD
root@ubuntu:~# apt-get install --yes libdvdread4
...
root@ubuntu:~# /usr/share/doc/libdvdread4/install-css.sh

After that VLC will be ready to play DVDs for some programs which was compiled without DVD, source rebuilt is required.

If DVDs hang you might need to set a Region Code with regionset:

# regionset

3. Install non-free codecs

root@ubuntu:~# apt-get install non-free-codecs

4. Install Chromium ffmpeg nonfree codecs

root@ubuntu:~# apt-get install chromium
root@ubuntu:~# apt-get install chromium-codecs-ffmpeg-nonfree

5. Install w32codecs / w64codecs

Depending on the Ubuntu Linux installation architecture 32/64 bit install w32codecs or w64codecs

For 32 bit (x86) Ubuntu install w32codecs:

root@ubuntu:~# apt-get install w32codecs

For 64 bit arch Ubuntu:

root@ubuntu:~# apt-get install w64codecs

6. Install ubuntu-restricted-extras meta package

root@ubuntu:~# apt-get install ubuntu-restricted-extras

7. Install cheese for webcam picture/video snapshotting

root@ubuntu:~# apt-get install cheese

8. Install GIMP, Inkscape, xsane,sane, shotwell etc.

root@ubuntu:~# apt-get --yes install sane xsane gimp inkscape gimp-data-extras gimp-plugin-registry \
blender gcolor2 showtwell bluefish kompozer

9. Install multimedia Sound & Video utilities

Install Subtitle editor, video editiking , sound editing, mp3 player, iso mounters, DVD/CD Burners

root@ubuntu:~# apt-get install rhythmbox banshee smplayer mplayer \
realplayer audacity brasero jokosher istanbuk gtk-recordMyDesktop \acetoneisohexedit furiusisomount winff fala audacious dvdstyler lives hydrogen
subtitleeditor gnome-subtitles electricsheep k3b

10. Install CD / DVD RIP tools

root@ubuntu:~# apt-get install acidrip sound-juicer ogmrip thoggen
11. Install chat messanger programs, Browsers, mail pop3 clients, torrent, emulators, ftp clients etc.

apt-get install seamonkey thunderbird transmission transmission-gtk gbgoffice kbedic \
pidgin openoffice.org gxine mozilla-plugin-vlc wine dosbox samba filezilla amsn ntp \epiphany-browser ntpdate desktop-webmail alltray chmsee gftp xchat-gnome ghex \gnome-genius bleachbit arista

12. Install Non-Free Flash Player

Unfortunately Gnash is not yet production ready and crashes in many websites …

root@ubuntu:~# apt-get install flashplugin-nonfree flashplugin-nonfree-extrasound swfdec-gnome

13. Install Archive / Unarchive management programs

root@ubuntu:~# apt-get install unace unrar zip unzip p7zip-full p7zip-rar sharutils rar uudeview \
mpack lha arj cabextract file-roller

15. Install VirtualBox and QEmu

root@ubuntu:~# apt-get install qemu-launcher qemu-kvm-extras virtualbox virtualbox-ose \
virtualbox-ose-guest-dkms virtualbox-ose-guest-dkms

This should be enough to use Ubuntu normally for multimedia Desktop just as MS Windows for most of the daily activities.
Am I missing some important program?

Websites I view per daily basis

Friday, January 11th, 2008

milw0rm.com linux-bg.org packetstormsecurity.nl securityfocus.com debian-administration.org sciencedaily.com httpd.apache.org lwn.net php.net freebsd.org news.bg That’s most of which I can think right now ..END—–