Posts Tagged ‘Install’

Preparing your Linux to work with the Cloud providers – Installing aws , gcloud, az, oc, cf CLI Cloud access command interfaces

Wednesday, October 10th, 2018

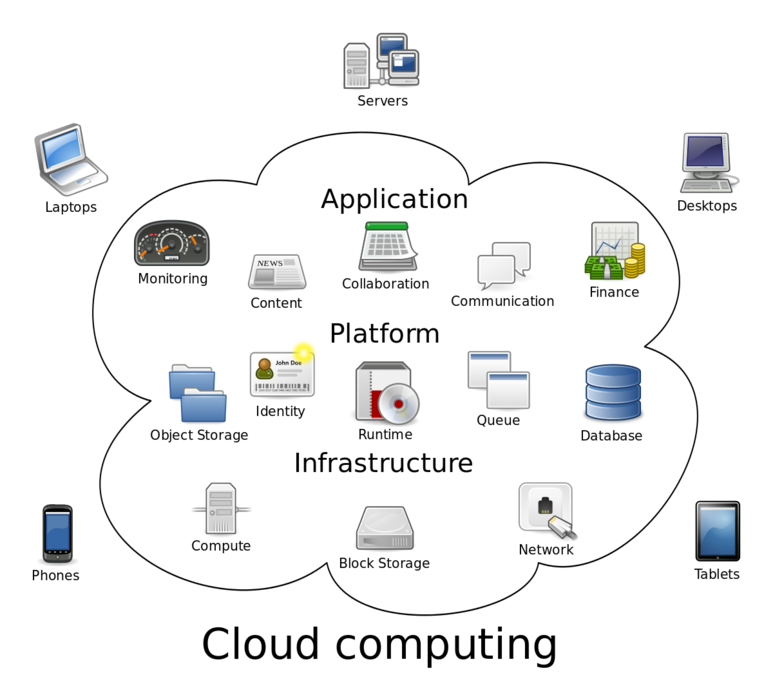
howto Install-Cloud-access-tools-for-google-aws-azure-openshift-cloud-foundryCloud_computing-explained-on-linux.svg

If you're a sysadmin / developer whose boss requires a migration of Stored Data, Database structures or Web Objects to Amazon Web Services / Google Clourd or you happen to be a DevOps Engineer you will certainly need to have installed as a minimumum amazon AWS and Google Clouds clients to do daily routines and script stuff in managing cloud resources without tampering to use the Web GUI interface.

Here is how to install the aws, gcloud, oc, az and cf next to your kubernetes client (kubectl) on your Linux Desktop.
 

1. Install Google Cloud  gcloud (to manage Google Cloud platform resources and developer workflow
 

google-cloud-logo

Here is few cmds to run to install  gcloud, gcloud alpha, gcloud beta, gsutil, and bq commands to manage your Google Cloud from CLI

a.) On Debian / Ubuntu / Mint or any other deb based distro

# Create environment variable for correct distribution
export CLOUD_SDK_REPO="cloud-sdk-$(lsb_release -c -s)"


# Add the Cloud SDK distribution URI as a package source
# echo "deb http://packages.cloud.google.com/apt $CLOUD_SDK_REPO main" | sudo tee -a /etc/apt/sources.list.d/google-cloud-sdk.list


# Import the Google Cloud Platform public key
$ sudo curl https://packages.cloud.google.com/apt/doc/apt-key.gpg | sudo apt-key add –


# Update the package list and install the Cloud SDK
$ sudo apt-get update && sudo apt-get install google-cloud-sdk


b) On CentOS, RHEL, Fedora Linux and other rpm based ones
 

$ sudo tee -a /etc/yum.repos.d/google-cloud-sdk.repo << EOM
[google-cloud-sdk]
name=Google Cloud SDK
baseurl=https://packages.cloud.google.com/yum/repos/cloud-sdk-el7-x86_64
enabled=1
gpgcheck=1
repo_gpgcheck=1
gpgkey=https://packages.cloud.google.com/yum/doc/yum-key.gpg
       https://packages.cloud.google.com/yum/doc/rpm-package-key.gpg
EOM

# yum install google-cloud-sdk


That's all now the text client to talk to Google Cloud's API gcloud is installed under
/usr/bin/gcloud

Latest install instructions of Google Cloud SDK are here.


2. Install AWS Cloud command line interface tool for managing AWS (Amazon Web Services)
 

AmazonWebservices_Logo.svg

AWS client is dependent on Python PIP so before you proceed you will have to install python-pip deb package if on Debian / Ubuntu Linux use apt:


# apt-get install –yes python-pip


It is also possible to install newest version of PIP a tiny shell script provided by Amazon get-pip.py


# curl -O https://bootstrap.pypa.io/get-pip.py
# python get-pip.py –user


# pip install awscli –upgrade –user


3. Install Azure Cloud Console access CLI command interface
 

Microsoft_Azure_Cloud-Logo.svg

On Debian / Ubuntu or any other deb based distro:

# AZ_REPO=$(lsb_release -cs)
# echo "deb [arch=amd64] https://packages.microsoft.com/repos/azure-cli/ $AZ_REPO main" | \
$ sudo tee /etc/apt/sources.list.d/azure-cli.list

# curl -L https://packages.microsoft.com/keys/microsoft.asc | sudo apt-key add –
$ sudo apt-get update
$ sudo apt-get install apt-transport-https azure-cli


Finaly to check that Azure CLI is properly installed run simple login with:


$ az login


$ sudo rpm –import https://packages.microsoft.com/keys/microsoft.asc
$ sudo sh -c 'echo -e "[azure-cli]\nname=Azure CLI\nbaseurl=https://packages.microsoft.com/yumrepos/azure-cli\nenabled=1\ngpgcheck=1\ngpgkey=https://packages.microsoft.com/keys/microsoft.asc" > /etc/yum.repos.d/azure-cli.repo'
$ sudo yum install azure-cli

$ az login


For Latest install instructions check Amazon's documentation here

4. Install OpenShift OC CLI tool to access OpenShift Open Source Cloud


OpenShift-Redhat-cloud-platform

Even thought OpenShift has its original Redhat produced package binaries, if you're not on RPM distro it is probably
best to install using official latest version from openshift github repo.


As of time of writting this article this is done with:


# wget https://github.com/openshift/origin/releases/download/v1.5.1/openshift-origin-client-tools-v1.5.1-7b451fc-linux-64bit.tar.gz
tar –xvf openshift-origin-client-tools-v1.5.1-7b451fc-linux-64bit.tar.gz


# # mv openshift-origin-client-tools-v1.5.1-7b451fc-linux-64bit oc-tool


# cd oc-tool
# echo'export PATH=$HOME/oc-tool:$PATH' >> ~/.bashrc


To test openshift, try to login to OpenShift cloud:


$ oc login
Server [https://localhost:8443]: https://128.XX.XX.XX:8443


Latest install instructions on OC here

5. Install Cloud Foundry cf CLI Cloud access tool

cloud-foundry-cloud-logo

a) On Debian / Ubuntu Linux based distributions, do run:


$ wget -q -O – https://packages.cloudfoundry.org/debian/cli.cloudfoundry.org.key | sudo apt-key add –
$ echo "deb https://packages.cloudfoundry.org/debian stable main" | sudo tee /etc/apt/sources.list.d/cloudfoundry-cli.list
$ sudo apt-get update
$ sudo apt-get install cf-cli


b) On RHEL Enterprise Linux / CentOS and Fedoras


$ sudo wget -O /etc/yum.repos.d/cloudfoundry-cli.repo https://packages.cloudfoundry.org/fedora/cloudfoundry-cli.repo
$ sudo yum install cf-cli


For latest install insructions on cf cli check Cloud Foundry's install site

There plenty of other Cloud providers with the number exponentially growing and most have their own custom cli tools to access but as there use is not so common as the 5 ones mentioned below, I've omited 'em. If you're interested to know the complete list of Cloud Providers providing Cloud Services check here.

6. Install Ruby GEMs RHC tools collection

If you have to work with Redhat Cloud Storage / OpenShift you will perhaps want to install also (RHC) Redhat Collection Tools.

Assuming that the Linux system is running an up2date version of ruby programming language do run:


root@jeremiah:~# gem install rhc
Fetching: net-ssh-5.0.2.gem (100%)
Successfully installed net-ssh-5.0.2
Fetching: net-ssh-gateway-2.0.0.gem (100%)
Successfully installed net-ssh-gateway-2.0.0
Fetching: net-ssh-multi-1.2.1.gem (100%)
Successfully installed net-ssh-multi-1.2.1
Fetching: minitar-0.7.gem (100%)
The `minitar` executable is no longer bundled with `minitar`. If you are
expecting this executable, make sure you also install `minitar-cli`.
Successfully installed minitar-0.7
Fetching: hashie-3.6.0.gem (100%)
Successfully installed hashie-3.6.0
Fetching: powerbar-1.0.18.gem (100%)
Successfully installed powerbar-1.0.18
Fetching: minitar-cli-0.7.gem (100%)
Successfully installed minitar-cli-0.7
Fetching: archive-tar-minitar-0.6.1.gem (100%)
'archive-tar-minitar' has been deprecated; just install 'minitar'.
Successfully installed archive-tar-minitar-0.6.1
Fetching: highline-1.6.21.gem (100%)
Successfully installed highline-1.6.21
Fetching: commander-4.2.1.gem (100%)
Successfully installed commander-4.2.1
Fetching: httpclient-2.6.0.1.gem (100%)
Successfully installed httpclient-2.6.0.1
Fetching: open4-1.3.4.gem (100%)
Successfully installed open4-1.3.4
Fetching: rhc-1.38.7.gem (100%)
===========================================================================


If this is your first time installing the RHC tools, please run 'rhc setup'

===========================================================================
Successfully installed rhc-1.38.7
Parsing documentation for net-ssh-5.0.2
Installing ri documentation for net-ssh-5.0.2
Parsing documentation for net-ssh-gateway-2.0.0
Installing ri documentation for net-ssh-gateway-2.0.0
Parsing documentation for net-ssh-multi-1.2.1
Installing ri documentation for net-ssh-multi-1.2.1
Parsing documentation for minitar-0.7
Installing ri documentation for minitar-0.7
Parsing documentation for hashie-3.6.0
Installing ri documentation for hashie-3.6.0
Parsing documentation for powerbar-1.0.18
Installing ri documentation for powerbar-1.0.18
Parsing documentation for minitar-cli-0.7
Installing ri documentation for minitar-cli-0.7
Parsing documentation for archive-tar-minitar-0.6.1
Installing ri documentation for archive-tar-minitar-0.6.1
Parsing documentation for highline-1.6.21
Installing ri documentation for highline-1.6.21
Parsing documentation for commander-4.2.1
Installing ri documentation for commander-4.2.1
Parsing documentation for httpclient-2.6.0.1
Installing ri documentation for httpclient-2.6.0.1
Parsing documentation for open4-1.3.4
Installing ri documentation for open4-1.3.4
Parsing documentation for rhc-1.38.7
Installing ri documentation for rhc-1.38.7
Done installing documentation for net-ssh, net-ssh-gateway, net-ssh-multi, minitar, hashie, powerbar, minitar-cli, archive-tar-minitar, highline, commander, httpclient, open4, rhc after 10 seconds
13 gems installed
root@jeremiah:~#

To start with rhc next do:
 

rhc setup
rhc app create my-app diy-0.1


and play with it to install software create services on the Redhat cloud.


Closure

This are just of the few of the numerous tools available and I definitely understand there is much more to be said on the topic.
If you can remember other tools tor interesting cloud starting up tips about stuff to do on a fresh installed Linux PC to make life easier with Cloud / PaaS / SaaS / DevOps engineer please drop a comment.
Installing the phpbb forum on Debian (Squeeze/Sid) Linux

Saturday, September 11th, 2010

howto-easily-install-phpbb-on-debian-gnu-linux

I've just installed the phpbb forum on a Debian Linux because we needed a goodquick to install communication media in order to improve our internal communication in a student project in Strategic HR we're developing right now in Arnhem Business School.

Here are the exact steps I followed to have a properly it properly instlled:

1. Install the phpbb3 debian package
This was pretty straight forward:

debian:~# apt-get install phpbb3

At this point of installation I've faced a dpkg-reconfigure phpbb deb package configuration issue:
I was prompted to pass in the credentials for my MySQL password right after I've selected the MySQL as my preferred database back engine.
I've feeded my MySQL root password as well as my preferred forum database name, however the database installation failed because, somehow the configuration procedure tried to connect to my MySQL database with the htcheck user.
I guess this has to be a bug in the package itself or something from my previous installation misconfigured the way the debian database backend configuration was operating.
My assumption is that my previously installed htcheck package or something beforehand I've done right after the htcheck and htcheck-php packages installation.

after the package configuration failed still the package had a status of properly installed when I reviewed it with dpkg
I've thought about trying to manually reconfigure it using the dpkg-reconfigure debian command and I gave it a try like that:

debian:~# dpkg-reconfigure phpbb3

This time along with the other fields I've to fill in the ncurses interface I was prompted for a username before the password prompted appeared.
Logically I tried to fill in the root as it's my global privileges MySQL allowed user.
However that didn't helped at all and again the configuration tried to send the credentials with user htcheck to my MySQL database server.
To deal with the situation I had to approach it in the good old manual way.

2. Manually prepare / create the required phpbb forum database

To completet that connected to the MySQL server with the mysql client and created the proper database like so:

debian:~# mysql -u root -p
mysql>
CREATE database phpbb3forum;

3. Use phpmyadmin or the mysql client command line to create a new user for the phpbb forum

Here since adding up the user using the phpmyadmin was a way easier to do I decided to go that route, anyways using the mysql cli is also an option.

From phpmyadmin It's pretty easy to add a new user and grant privileges to a certain database, to do so navigate to the following database:

Privileges -> -> Add a new user ->

Now type your User name: , Host , Password , Re-type password , also for a Host: you have to choose Local from the drop down menu.

Leave the Database for user field empty as we have already previously created our desired database in step 2 of this article

Now press the "Go" button and the user will get created.

Further after choose the Privileges menu right on the bottom of the page once again, select through the checkbox the username you have just created let's say the previously created user is phpbb3

Go to Action (There is a picture with a man and a pencil on the right side of this button

Scroll down to the page part saying Database-specific privileges and in the field Add privileges on the following database: fill in your previosly created database name in our case it's phpbb3forum

and then press the "Go" button once again.
A page will appear where you will have to select the exact privileges you would like to grant on the specific selected database.
For some simplicity just check all the checkbox to grant as many privilegs to your database as you could.
Then again you will have to press the "Go" button and there you go you should have already configured an username and database ready to go with your new phpbb forum.

4. Create a virtualhost if you would like to have the forum as a subdomain or into a separate domain

If you decide to have the forum on a separate sub-domain or domain as I did you will have to add some kind of Virtualhost into either your Apache configuration /etc/apache2/apache2.conf or into where officially the virutualhosts are laid in Debian Linux in /etc/apache2/sites-available
I've personally created a new file like for instance /etc/apache2/sites-available/mysubdomain.mydomain.com

Here is an example content of the new Virtualhost:

<VirtualHost *>
ServerAdmin admin-email@domain.com
ServerName mysubdomain.domain.com

# Indexes + Directory Root.
DirectoryIndex index.php index.php5 index.htm index.html index.pl index.cgi index.phtml index.jsp index.py index.asp

DocumentRoot /usr/share/phpbb3/www/

# Logfiles
ErrorLog /var/log/apache2/yourdomain/error.log
CustomLog /var/log/apache2/yourdomain/access.log combined
# CustomLog /dev/null combined
<Directory /usr/share/phpbb3/www/>
Options FollowSymLinks MultiViews -Includes ExecCGI
AllowOverride All
Order allow,deny
allow from all </Directory>
</VirtualHost>

In above Virtualhost just change the values for ServerAdmin , ServerName , DocumentRoot , ErrorLog , CustomLog and Directory declaration to adjust it to your situation.

5. Restart the Apache webserver for the new Virtualhost to take affect

debian:~# /etc/init.d/apache2 restart

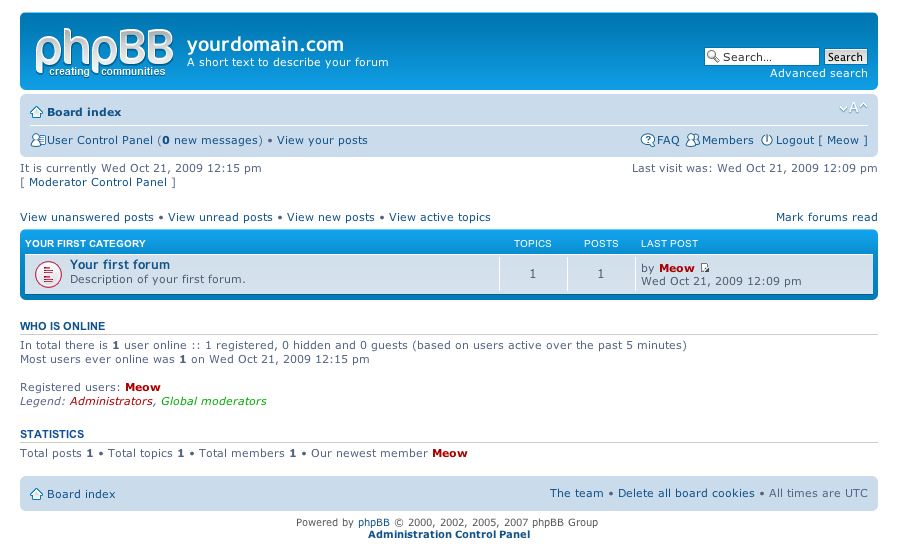
Now accessing your http://mysubdomain.domain.com should display the installed phpbb3 forum
The default username and password for your forum you can use straight are:

username: admin
password: admin

So far so good you by now have the PHPBB3 forum properly installed and running, however if you try to Register a new user in the forum you will notice that it's impossible because of a terrible ugly message reading:

Sorry but this board is currently unavailable.

I've spend few minutes online to scrape through the forums before I can understand what I have to stop that annoying message from appearing and allow new users to register in the phpbb forum

The solution came natural and was a setting that had to be changed with the forum admin account, thus login as admin and look at the bottom of the page, below the text reading Powered by phpBB © 2000, 2002, 2005, 2007 phpBB Group you will notice a link with Administration Control Panel
just press there a whole bunch of menus will appear on the screen allowing you to do numerous things, however what you will have to do is go to
Board Settings -> Disable Board

and change the radio button there to say No

That's all now your forum will be ready to go and your users can freely register and if the server where the forum is installed has an already running mail server, they will receive an emails with a registration data concerning their new registrations in your new phpbb forum.
Cheers and Enjoy your new shiny phpbb Forum 🙂

Install TeamViewer on latest Debian, Ubuntu, Fedora, CentOS Linux quick how to

Tuesday, October 31st, 2017

teamviewer-howto-install-on-gnu-linux-teamviewer-and-tux-penguin-logo

If you're a sysadmin who uses GNU / Linux as a Desktop as me you will certainly need to have TeamViewer installed and ready for use on your Linux desktop.

Even though TeamViewer is a proprietary application and I prefer not to use it I'm forced to have it installed because of every now and then a friend or customer would require you to login remotely to his Windows server and clean up the system either from spyware or viruses or just deploy some new software.

Nowdays most of people are running 64 bit ( amd64 ) built operating system and the problem with TeamViewer on Linux 64bit is that it doesn't have an actual full featured 64 port of the application but only have a 32 bits install, besides that big part of components of TeamViewer are running using wine windows emulation and hencing making it work on Linux is sometimes not so trivial as we might have desired.

Because TeamViewer is a 32 bit application, it has a number of dependency libraries that are 32 bit in Linux that's the so called (i386) built libraries (packages).

Hence to make TeamViewer work on modern GNU / Linux operating systems such as Debian / Ubuntu / Mint Linux / Fedora / CentOS etc. it is necessery to have some i386 libraries and other 32 bit things pre-installed and only then you can have a working copy of teamviewer on your Linux.

1. Installing i386 applications required for TeamViewer operation

– On Debian / Ubuntu / Kubuntu / Xubuntu Linux run below commands:

First we need to add the i386 architecture to be supported by Linux


dpkg –add-architecture i386
apt update


Then on Debian and other deb based Linux we need to install following libraries
 

# apt install libjpeg62-turbo:i386 wget gdebi-core


2. Download latest teamviewer version from TeamViewer website

– On Debian, Ubuntu and other deb based Linux distros.

Download latest teamviewer version and install it:


# wget https://download.teamviewer.com/download/teamviewer_i386.deb


On CentOS, Fedora, OpenSuSE other RPM based distros:

Download the Teamviewer package and package signature using wget


# wget https://download.teamviewer.com/download/linux/signature/TeamViewer2017.asc
# wget https://download.teamviewer.com/download/teamviewer.i686.rpm


3. Insteall teamviewer with gdebi (Simple Tool to install deb files)


# gdebi teamviewer_i386.deb


Remote control and meeting solution.
 TeamViewer provides easy, fast and secure remote access and meeting solutions
 to Linux, Windows PCs, Apple PCs and various other platforms,
 including Android and iPhone.
 .
 TeamViewer is free for personal use.
 You can use TeamViewer completely free of charge to access your private
 computers or to help your friends with their computer problems.
 .
 To buy a license for commercial use, please visit http://www.teamviewer.com
 .
 This package contains Free Software components.
 For details, see /opt/teamviewer/doc/license_foss.txt
Do you want to install the software package? [y/N]:y


On Fedora, CentOS, SuSE RPM based ones:


# rpm –import TeamViewer_Linux_PubKey.asc


# rpm -i teamviewer_12.0.xxxxx.i686.rpm


or if you face some failed dependencies you better use zypper that will download any missing teamviewer dependencies.


# zypper install teamviewer_12.0.xxxxx.i686.rpm


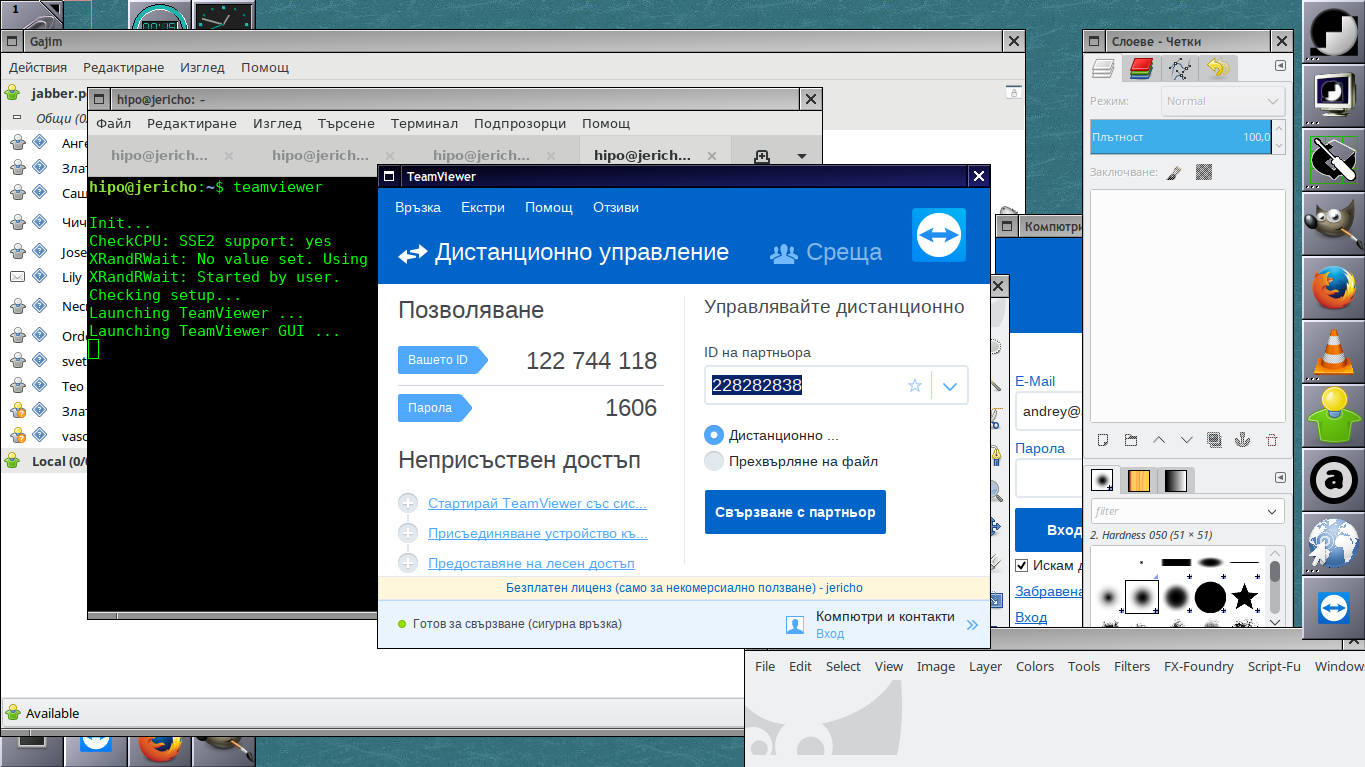
4. Start Teamviewer


teamviewer-running-on-linux-screenshot


linux:~$ teamviewer
Init…
CheckCPU: SSE2 support: yes
XRandRWait: No value set. Using default.
XRandRWait: Started by user.
Checking setup…
wine: configuration in '/home/hipo/.local/share/teamviewer12' has been updated.
Launching TeamViewer …
Launching TeamViewer GUI …


How to install and configure torbutton on Debian / Anonymizing Iceweasel, Firefox on Debian GNU/Linux

Thursday, August 5th, 2010

Tor Onion Logo

There is a quite a buzz online recently about the implications breach of personal privacy by simple browing online.
A week ago I've blogged On How to improve your web browser security for better personal identity
Though there is probably a plenty of more things to be done on guaranteeing your anonymous identity online, the article lacked to mention one very one vital project related with anonymity – the tor Anonymity online project
The project offer the user the right to be anonymous online through a complex constantly expanding network of volunteers which voluntary install and grant access to the installed tor server to be used as a proxy from their computers.
A very thorough explanation on what is tor can be red here
Enabling tor on your personal computer would at least guarantee you that every now and then your traffic browser network traffic (request) would flow through a random tor servers located on a different worldly geographic locations.
Usually the traffic to a destination host would pass through 5 tor network nodes. Where the traffic is unecrypted between last node and the 4th node, while in the other four ones it's completely crypted.
This makes your tracking almost impossible if it's based on technologies like for instance Maxmind's Geoip or Geonames's geographical data base because every now and then you'll appear to be coming to the end point referrar web server originating from a different tor node ip address

The tor server is a free software licensed under the GPL and this is also a good assurance because everybody is able to have a look on the code and this is a further guarantee that the software doesn't include a malicious ways for a middle users to sniff on your traffic.

The tor project has even built a pre-bundled browser ready to be worn by yourself on a usb stick, so you can quickly start using the tor anonymous network on any random computer anywhere.
The tor browser page is available here also Tor Browser Bundle for Windows is available here
Tor server is available for both Windows, Mac OS X, Linux and Linux/BSD Unix
Of course tor is not perfect it opens some other possible doors for attackers which are much less likely to occur if you don't use it, however in general it's better off with tor than without it.

One serious reason for not reason for not using Tor might be that it's usually many times slower than normal browser since, it routes traffic through a different tor network nodes.
So if you decide to go on and use it you better be patient and calm 🙂

Since I'm a Debian user and I really do value my privacy I decided to start using Tor.
In order to start using Tor it's usually necessary to configure your browser to use The TorButoon Firefox browserextension

Nevertheless on Debian GNU/Linux if you try to go the straigh way as explained on Tor's website install the TorButton and configure it to work in cooperation with the polipo caching proxy
You will be not able to browse after enabling straight the tor plugin.
If you try the up-mentioned approach you're probably about to come to errors like:
"the proxy server is refusing connections"
,
Proxy error: 502 Disconnected operation and object not in cache
or
504 Connect to superquizgames.com:80 failed: SOCKS error: host unreachableThe following error occurred while trying to access http://yourwebsite.com/:504 Connect to superquizgames.com:80 failed: SOCKS error: host unreachable

In order to properly install configure and enable the TorButton on my Debian GNU/Linux I had to get through the following steps:

1. Install the polipo caching proxy

debian:~# apt-get install polipo

2. Download and overwrite default polipo configuration with the one from torproject.org

This is necessary to configure in order to have polipo adapted to work with tor, so issue the following commands:

debian:~# cd /etc/polipo
debian:~# wget https://svn.torproject.org/svn/torbrowser/trunk/build-scripts/config/polipo.conf
debian:~# mv config config.bak
debian:~# mv polipo.conf config

3. Restart polipo for the new config settings to take affect

debian:~# /etc/init.d/polipo restart

4. Install the iceweasel-torbutton browser extension

debian:~# apt-get install iceweasel-torbutton

The iceweasel-torbutton will also install you the tor package which is evidently required for the torbutton to operate.
Now you should be ready to go, you can enable the tor use from the tor button which should appear in your browser in the bottom right corner of your browser.
It should look something similar to:

Tor Button screenshot in Iceweasel

Tor Enable/Disable Iceweasel browser Button

To test your Tor Configuration you can use the Test Settings button which is straight available from TorButton's preferences

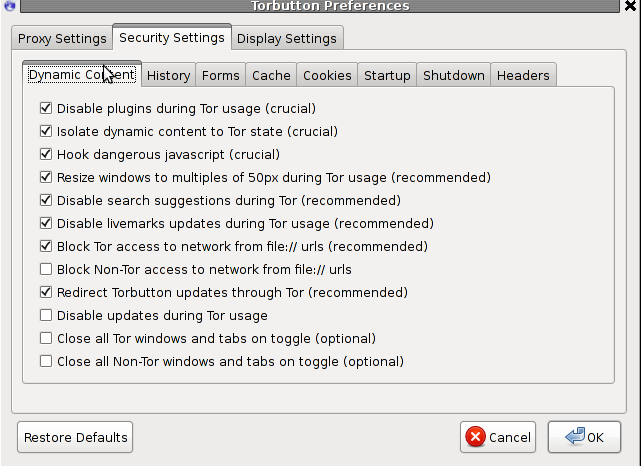
From here after it might be a good idea to play with the TorButton security settings and configure it according to your liking, bear in mind that you should have a solid knowledge on how browsers work and some basic Internet protocols before you start tampering this options.
If tou don't know what you do you better stop and don't tamper with the torbutton security options.
The only one that you will most probably want to untick is The Disable plugins during Tor usage , stopping this option will allow you to have a flash video streaming display properly, otherwise you won't be able to use , Vbox etc.
Below you see a screenshot of the TorButton Security Settings dialog.

TorButton properties Dialog

To open up this dialog you need to navigate to the TorButto and choose preferences with the right mouse buttons 🙂
Hope this article is informative to somebody out there.
User feedback is mostly welcome! Cheers 🙂

Install JBL Go Bluetooth Speaker on Debian GNU / Linux and Ubuntu

Thursday, August 24th, 2017

jbl-go-on-gnu-how-to-install-on-debian-and-ubuntu-linux

Here is how to configure a JBL Go Bluetooth (Wireless) speaker and presumably other Bluetooth external speakers to Debian GNU / Linux Wheezy 7 and Ubuntu 14.04 . 1. Install following bunch of deb packages

debian:~# apt-get install pulseaudio pulseaudio-module-bluetooth pavucontrol bluez-firmware

Here it is notable to mention pavucontrol if you have previously played more extensively on GNU / Linux you should have already used if not it is really cozy volume control tool with a lot of tuning options regarding pulseaudio stream server. Considering that like me you're using a GNOME as a desktop environment you will also need gnome-bluetooth package, e.g.:

debian:~# apt-get install gnome-bluetooth

As Pulseaudio is used as a sound streaming server in GNU / Linux (assuming your Debian version is using it you'll also need to have installed pulseaudio-module-bluetooth)

debian:~# apt-get install pulseaudio-module

For Ubuntu 14.04 GNU / Linux users the list of necessery bluetooth packages is a bit longer, if you're on this OS go and install:

debian:~# apt-get install bluez bluez-alsa bluez-audio bluez-btsco bluez-compat bluez-cups bluez-dbg bluez-gstreamer bluez-hcidump bluez-pcmcia-support bluez-tools bluez-utils python-bluez bluewho indicator-bluetooth libbluetooth-dev libgnome-bluetooth11 libbluetooth3 python-gobject python-dbus

Moreover you will need pulseaudio-module-bluetooth deb package installed in order to be able to select the desired sound output.

Next it is time to restart Bluetooth service

debian:~# service bluetooth restart
[ ok ] Stopping bluetooth: rfcomm /usr/sbin/bluetoothd.
[ ok ] Starting bluetooth: bluetoothd rfcomm.

It is also a good idea to restart pulseaudio snd streaming server in order to load the newly installed pulseaudio bluetooth module settings, to do so issue:

debian:~# killall pulseaudio

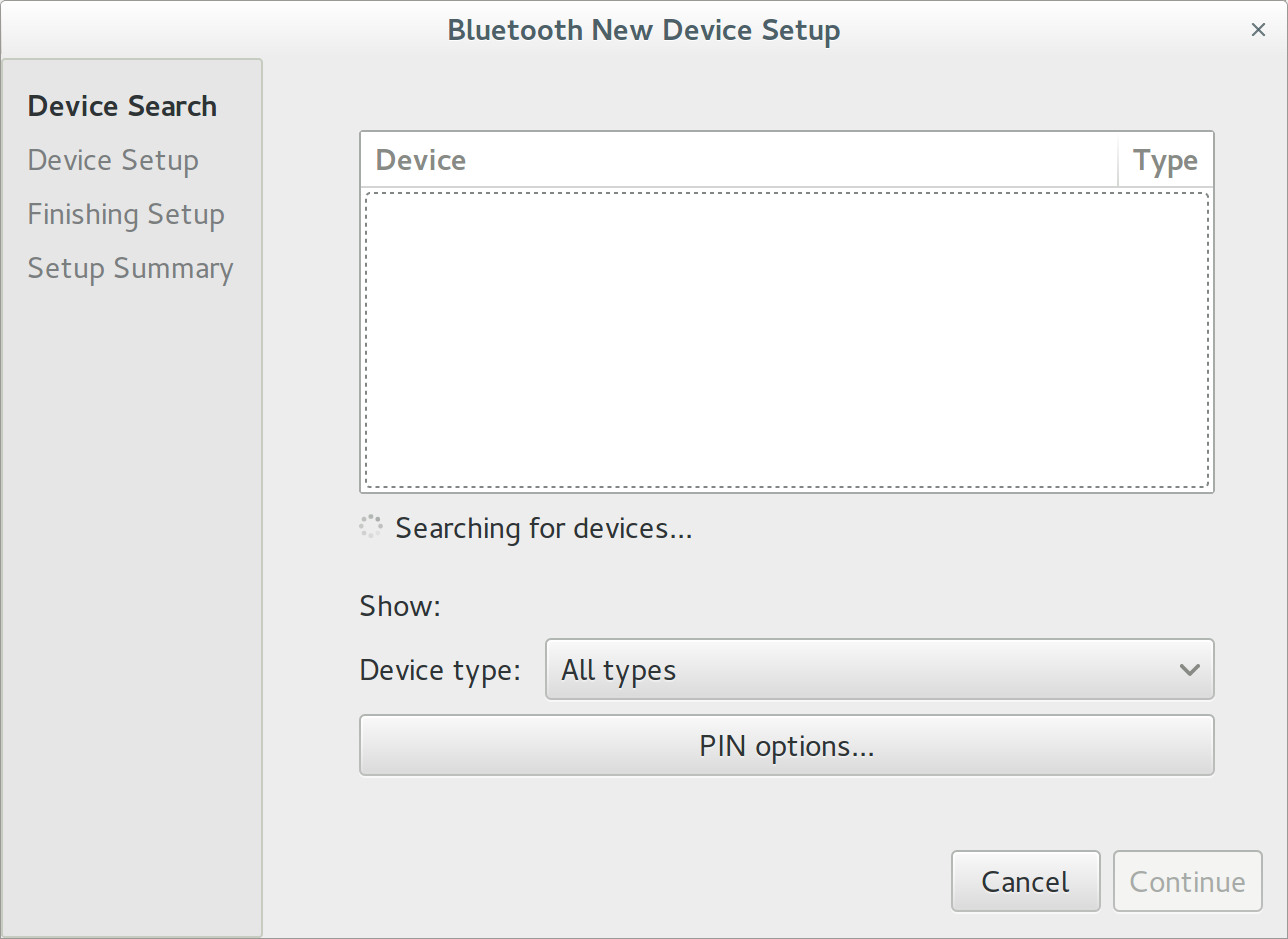
And try to establish connection from Gnome-Bluetooth to the JBL Go (press the JBL Go bluetooth button) and search from the Linux bluetooth interface, once founded connect it.

bluetooth-new-device-setup

jbl-go-connected-screenshot

Before JBL Go appears to list listable blootooth devices you will also need to run following command:

debian:~# pactl load-module module-bluetooth-discover
26

This command is to connect bluetooth discovered JBL Go device to the audio sink interface.

It is generally idea to add this line also to /etc/rc.local to make the setting permanently executed on every Linux boot.

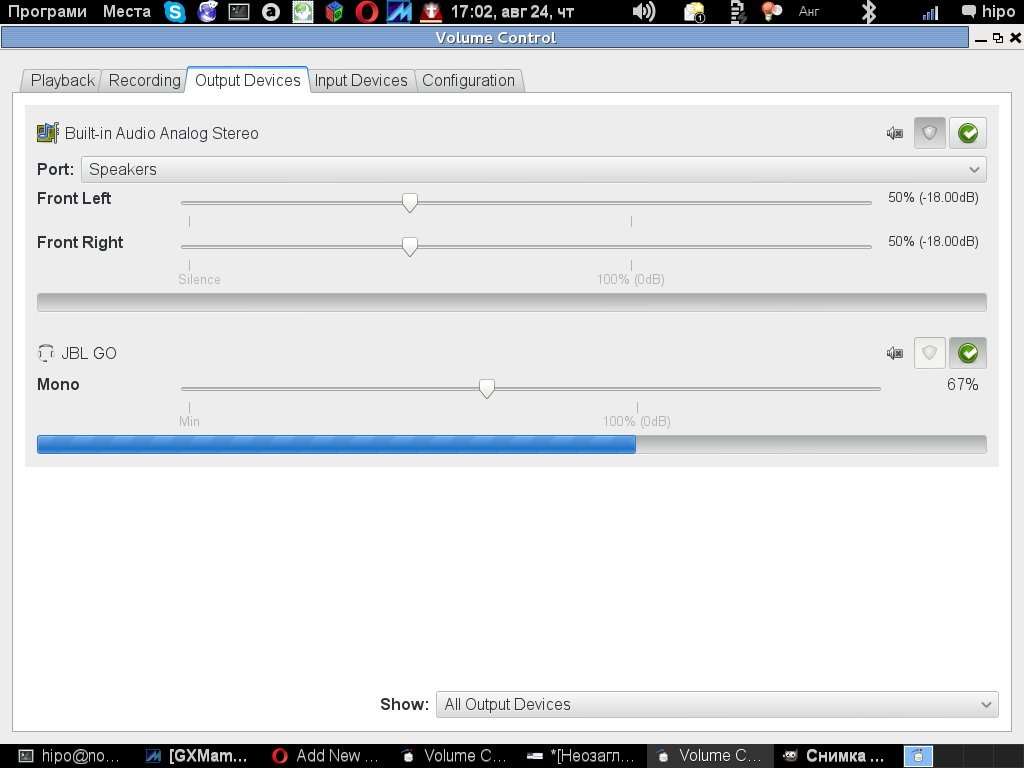
Now you can launch pavucontrol and hopefully the JBL GO bluetooth speaker should be visible as an option, check out my below screenshot:


In case you further experience issues connecting the Bluetooth Speaker I would recommend to check out this Debian a2dp page at the end of the page are troubleshooting suggestions.

Troubleshooting

Refused to switch profile to a2dp_sink: Not connected

Bluetooth headset is connected, but ALSA/PulseAudio fails to pick up the connected device or there's no device to pick. This happens because GDM captures A2DP sink on session start, as GDM needs pulseaudio in the gdm session for accessibility. For example, the screen reader requires it. See 805414 for some discussion.


Workaround 1: disable pulseaudio in gdm

In order to prevent GDM from capturing the A2DP sink on session start, edit /var/lib/gdm3/.config/pulse/client.conf (or create it, if it doesn't exist):


autospawn = no
daemon-binary = /bin/true

After that you have to grant access to this file to Debian-gdm user:


chown Debian-gdm:Debian-gdm /var/lib/gdm3/.config/pulse/client.conf

You will also need to disable pulseaudio startup:


rm /var/lib/gdm3/.config/systemd/user/sockets.target.wants/pulseaudio.socket

In order to auto-connect a2dp for some devices, add this to /etc/pulse/default.pa:


load-module module-switch-on-connect

Logout your Desktop environment and restart gdm3 /etc/init.d/gdm3 restart or Reboot the PC and then it should be fine.


Now the sound device (bluetooth headset) should be accessible through pavucontrol and standard audio device manager.


Workaround 2: disable pulseaudio's bluetooth in gdm

The actual solution package maintainers are looking into next is to simply disable the bluetooth sink in the gdm pulseaudio daemon so that it doesn't take over the device. Add this to /var/lib/gdm3/.config/pulse/default.pa:


#!/usr/bin/pulseaudio -nF
#
# load system wide configuration
.include /etc/pulse/default.pa
### unload driver modules for Bluetooth hardware
.ifexists module-bluetooth-policy.so
unload-module module-bluetooth-policy
.endif
.ifexists module-bluetooth-discover.so
unload-module module-bluetooth-discover
.endif

Though this article explains how to connect a bluetooth speaker connecting Bluetooth Speaker to GNU / Linux is done in analogous way


How to check Linux OS install date / How long ago was Linux installed

Sunday, October 22nd, 2017

If you're sysadmin who inherited a few hundreds of Linux machines from a previous admin and you're in process of investigating how things were configured by the previous administrator one of the crucial things to find out might be

How Long ago was Linux installed?

Here is how to check the Linux OS install date.

The universal way nomatter the Linux distribution is to use fullowing command:


root@pcfreak:~# tune2fs -l /dev/sda1 | grep 'Filesystem created:'
Filesystem created:       Thu Sep  6 21:44:22 2012


Above command assumes the Linux's root partition / is installed on /dev/sda1 however if your case is different, e.g. the primary root partition is installed on /dev/sda2 or /dev/sdb1 / dev/sdb2 etc. just place the right first partition into the command.

If primary install root partition is /dev/sdb1 for example:
 

root@pcfreak:~# tune2fs -l /dev/sdb1 | grep 'Filesystem created:'


To find out what is the root partition of the Linux server installed use fdisk command:


root@pcfreak:~# fdisk -l


Disk /dev/sda: 465,8 GiB, 500107862016 bytes, 976773168 sectors
Units: sectors of 1 * 512 = 512 bytes
Sector size (logical/physical): 512 bytes / 512 bytes
I/O size (minimum/optimal): 512 bytes / 512 bytes
Disklabel type: dos
Disk identifier: 0x00051eda

Device     Boot     Start       End   Sectors   Size Id Type
/dev/sda1  *         2048 965193727 965191680 460,2G 83 Linux
/dev/sda2       965195774 976771071  11575298   5,5G  5 Extended
/dev/sda5       965195776 976771071  11575296   5,5G 82 Linux swap / Solaris

Disk /dev/sdb: 111,8 GiB, 120034123776 bytes, 234441648 sectors
Units: sectors of 1 * 512 = 512 bytes
Sector size (logical/physical): 512 bytes / 512 bytes
I/O size (minimum/optimal): 512 bytes / 512 bytes
Disklabel type: dos
Disk identifier: 0x00000000


Other ways to check the Linux OS install date on Debian / Ubuntu / Mint etc. deb. based GNU / Linux


Deban based Linux distributions do create an initial /var/log/installer directory containing various install information such as hardware-summary, partition, initial installed deb packages, exact version of Linux distribution, and the way it was installed either it was installed from an ISO image, or it was network install etc.


root@pcfreak:~# ls -al /var/log/installer/
total 1228
drwxr-xr-x  3 root root   4096 sep  6  2012 ./
drwxr-xr-x 72 root root  12288 окт 22 06:26 ../
drwxr-xr-x  2 root root   4096 sep  6  2012 cdebconf/
-rw-r–r–  1 root root  17691 sep  6  2012 hardware-summary
-rw-r–r–  1 root root    163 sep  6  2012 lsb-release
-rw——-  1 root root 779983 sep  6  2012 partman
-rw-r–r–  1 root root  51640 sep  6  2012 status
-rw——-  1 root root 363674 sep  6  2012 syslog


If those directory is missing was wiped out by the previous administrator, to clear up traces of his previous work before he left job another possible way to find out exact install date is to check timestamp of /lost+found directory;
 

root@pcfreak:~# ls -ld /lost+found/
drwx—— 2 root root 16384 sep  6  2012 /lost+found//


Check OS Linux install date on (Fedora, CentOS, Scientific Linux, Oracle and other Redhat RPM based Distros)


[root@centos: ~]# rpm -qi basesystem
Name        : basesystem
Version     : 10.0
Release     : 7.el7
Architecture: noarch
Install Date: Mon 02 May 2016 19:20:58 BST
Group       : System Environment/Base
Size        : 0
License     : Public Domain
Signature   : RSA/SHA256, Tue 01 Apr 2014 14:23:16 BST, Key ID     199e2f91fd431d51
Source RPM  : basesystem-10.0-7.el7.src.rpm
Build Date  : Fri 27 Dec 2013 17:22:15 GMT
Build Host  : ppc-015.build.eng.bos.redhat.com
Relocations : (not relocatable)
Packager    : Red Hat, Inc. <http://bugzilla.redhat.com/bugzilla>
Vendor      : Red Hat, Inc.
Summary     : The skeleton package which defines a simple Red Hat Enterprise Linux system
Description :
Basesystem defines the components of a basic Red Hat Enterprise Linux
system (for example, the package installation order to use during
bootstrapping). Basesystem should be in every installation of a system,
and it should never be removed.


How to install / add new root certificates on Debian, Ubuntu, Mint Linux

Saturday, October 21st, 2017

add-install-new-root-ca-certificates-to-debian-ubuntu-linux-howto

How to add / Installing a root/CA Certificate on Debian, Ubuntu, Mint Linux


 Because of various auditing failures and other security issues, the CAcert root certificate set is slowly disappearing from the Ubuntu and Debian ‘ca-certificates’ package.

That's really tricky because if you're a system administrator or have a bunch of programmers whose needs is to install a new set of root certificates for their freshly develped Application or you have to make a corporate certificates added to debian rootca, then the good news is it is quite easy to install new certificates to deb based distributions.


Given a CA certificate file foo.crt, follow these steps to install it on Debian / Ubuntu:

    Create a directory for extra CA certificates in /usr/share/ca-certificates:


    debian:~# mkdir /usr/share/ca-certificates/extra-certificates


    Copy the CA .crt file to this directory:


    debian:~# cp foo.crt /usr/share/ca-certificates/extra-certificates/foo.crt


    Let Debian / Ubuntu add the .crt file's path relative to /usr/share/ca-certificates to /etc/ca-certificates.conf (the file lists certificates that you wish to use or to ignore to be installed in /etc/ssl/certs)


    debian:~# dpkg-reconfigure ca-certificates


In case you want to include a .pem file to the list of trustable certificates on Debian / Ubuntu, it must first be converted to a .crt file first, you can do that with:


    debian:~# openssl x509 -in foo.pem -inform PEM -out foo.crt


Lets say you want to add some custom Root certificate for exapmle cacert.org


   debian:~# mkdir /usr/local/share/ca-certificates/cacert.org
   debian:~# cd /usr/local/share/ca-certificates/cacert.org
   debian:~# mkdir /usr/local/share/ca-certificates/cacert.org
   debian:~# wget -P /usr/local/share/ca-certificates/cacert.org http://www.cacert.org/certs/root.crt http://www.cacert.org/certs/class3.crt


Then once again update the ca certificates bundle

   debian:~# update-ca-certificates


Graphic tool to get Hardware Information on Linux / How to view Hardware Information easy in Linux

Tuesday, October 3rd, 2017


howto-get-graphically-system-hardware-info-linux-gui-program-for-hardware-recognition-linu


IS THERE A GRAPHIC ( GUI ) TOOL TO VIEW HARDWARE INFORMATION ON LINUX?


If you are a console maniac like myself, perhaps you never think that you might need anything graphical besides to view hardware information on Linux, but as we're growing older sometimes it becomes much less easier to just use a graphical tool that can show us all the information we need regarding a Notebook / Desktop PC with Linux or even Server machine with enabled Graphical Environment with a brand new installed GNU / Linux whatever version (I hope you don't own server with running Xorg / Gnome / Mate / Xfce etc. as that's pretty much a waste of hardware resource and opens a dozen of other security risks for the server running services ).


 There are at least 2 ways to quickly check hardware on both PC WorkStation or Server, the easiest and quickest for PC / Notebook Linux users if you have installed GTK libraries or Gnome Desktop Environment is with;
 

LSHW-GTK


LSHW-GTK is simply a GTK frontend over the command line tool for hardware information gathering LSHW
 

HardiInfo


HardInfo – is a small application that displays information about your hardware and operating system. Currently it knows about PCI, ISA PnP, USB, IDE, SCSI, Serial and parallel port devices.


1. Howto Install LSHW-GTK / HardInfo on Debian / Ubuntu / Mint GNU / Linux to easy view hardware information


To install both of them on Debian / Ubuntu GNU / Linux, run:
 

apt-get install –yes lshw lshw-gtk hardinfo


2. Howto install LSHW-GTK on Fedora, CentOS and OpenSuSE Linux to view easy hardware information

On RedHat RPM based Linux distributions, the package to install is called lshw-gui

Install with yum RPM package manager:
 

yum install –yes lshw lshw-gui  hardinfo


3. Run lshw-gtk / hardinfo

Again, find them and run from GUI environment menus or run manually like in below example:

$ lshw-gtk


graphic-program-to-view-computer-hardware-on-linux-lshw-gtk-on-debian-linux-screenshot-view-hardware-easy-linux1


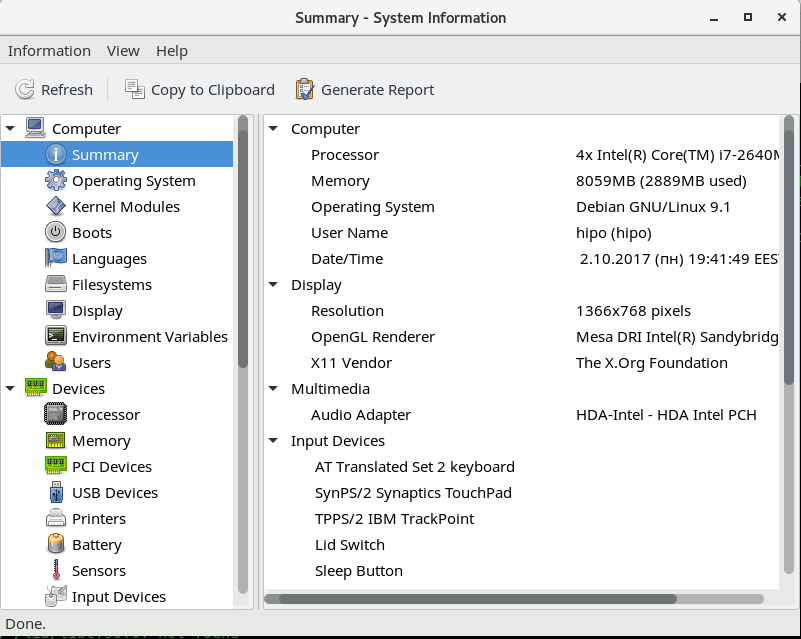
$ hardinfo


hardinfo-a-gui-program-to-view-computer-hardware-info-on-linux-and-freebsd

As you see hardinfo is really interactive and it gives you pretty much all the information, you might need, the only information that was missing at my case and I guess, that would happen to others is information about the SSD Hard Disk, which   180GB

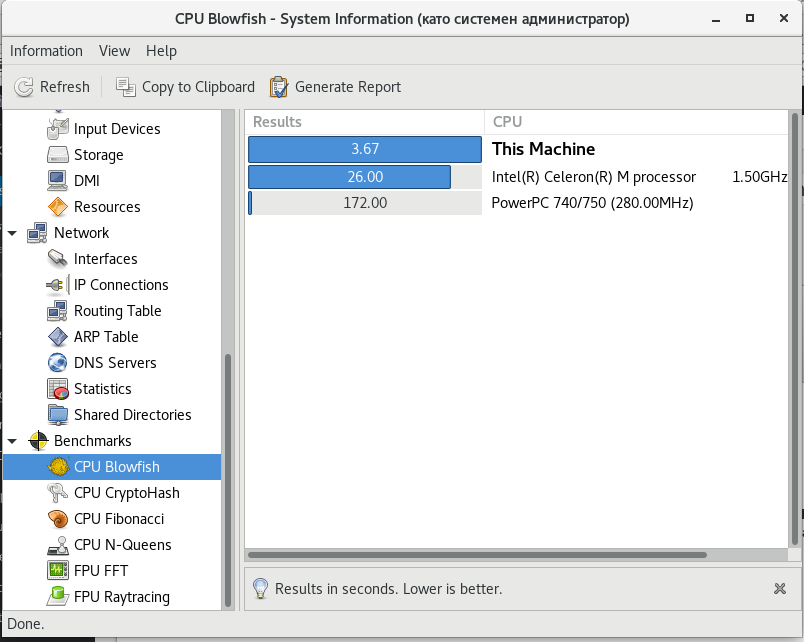
HardInfo is really amazing program as it even includes various common Benchmark Tests and comparison with other Computers:

hardinfo-get-hardware-information-easily-on-linux-and-freebsd-benchmark-info-screenshot-debian-stretch

True that the tests, are pretty simple but still could be useful.

Now run it either from GNOME / Cinnamon (The default graphical environment of Debian Linux) or PLASMA (The new name for the second most popular Linux Graphical Environment – KDE desktop environment)


$ lshw


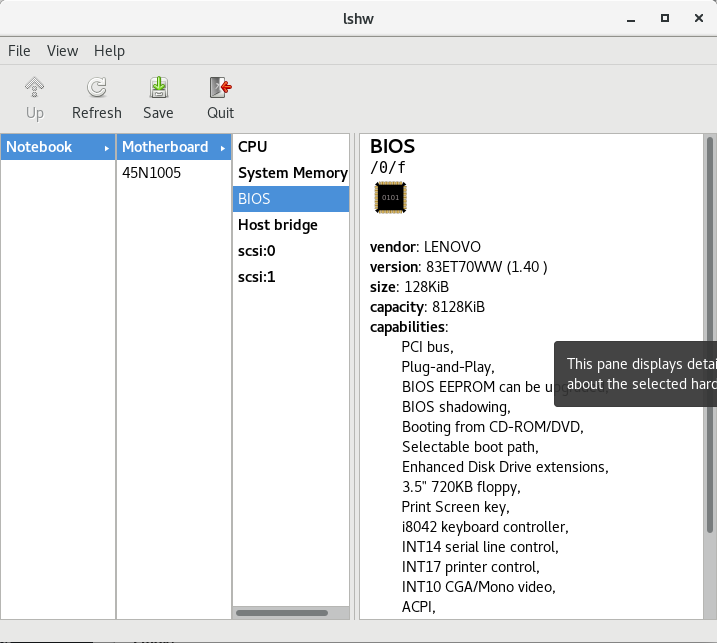
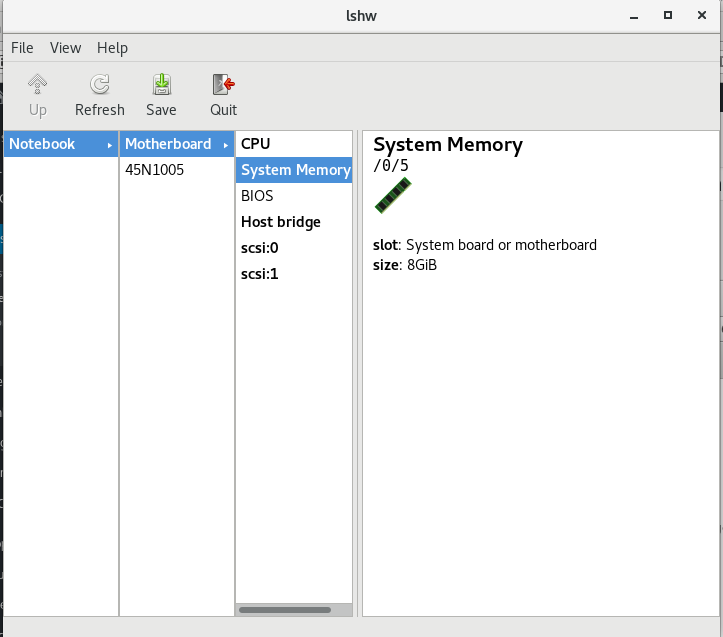
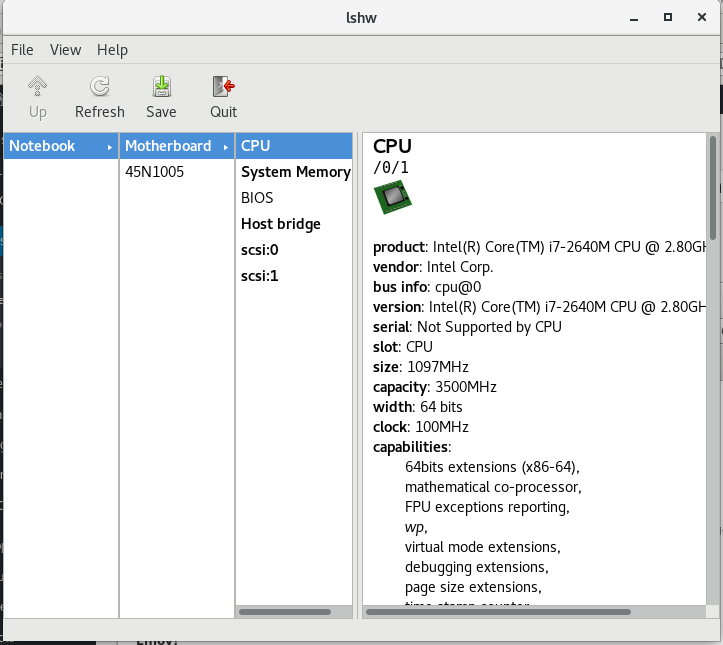
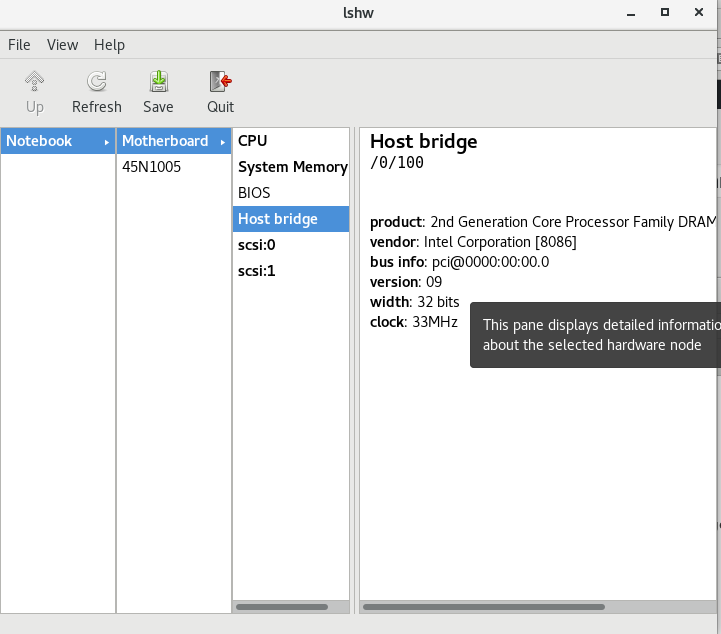
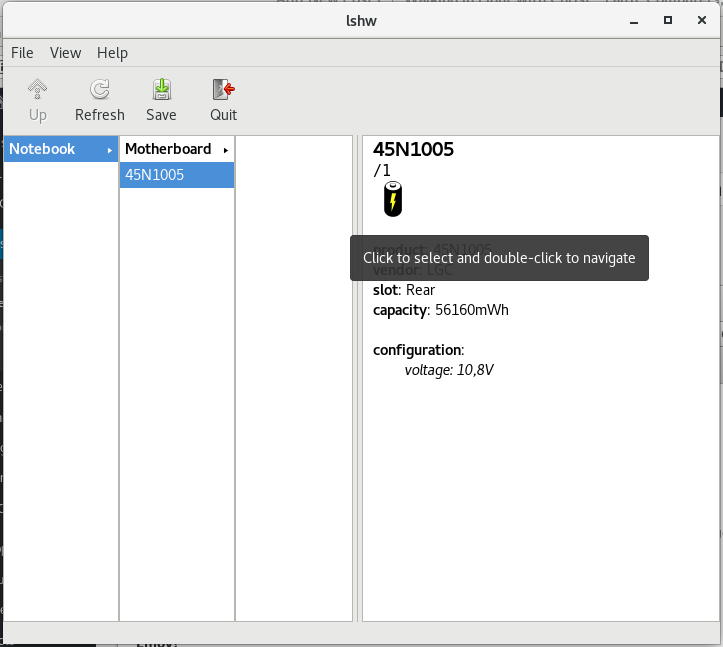
Here is few more screenshots from hardware info reported from my ThinkPad T410 Laptop Running Debian 9 Stretch at the moment.


MotherBoard -> BIOS Information

(thatnks God this old but gold Thinkpad T420 business notebook does not run UEFI substitute for BIOS 🙂

graphic-program-to-view-computer-hardware-on-linux-lshw-gtk-on-debian-linux-screenshot-view-hardware-easy-linux2

CPU Information (with all the supported CPU capabilities (extensions)

graphic-program-to-view-computer-hardware-on-linux-lshw-gtk-on-debian-linux-screenshot-view-hardware-easy-linux3

Host Bridge Info

graphic-program-to-view-computer-hardware-on-linux-lshw-gtk-on-debian-linux-screenshot-view-hardware-easy-linux4

Thinkpad BATTERY (45N1005) Info

graphic-program-to-view-computer-hardware-on-linux-lshw-gtk-on-debian-linux-screenshot-view-hardware-easy-linux5

By the way another Way to GUI View your Computer is to just generate HTML from lshw command line tool (as it supports export to HTML), here is how:


$ lshw -html > ~/hardware-specs.html


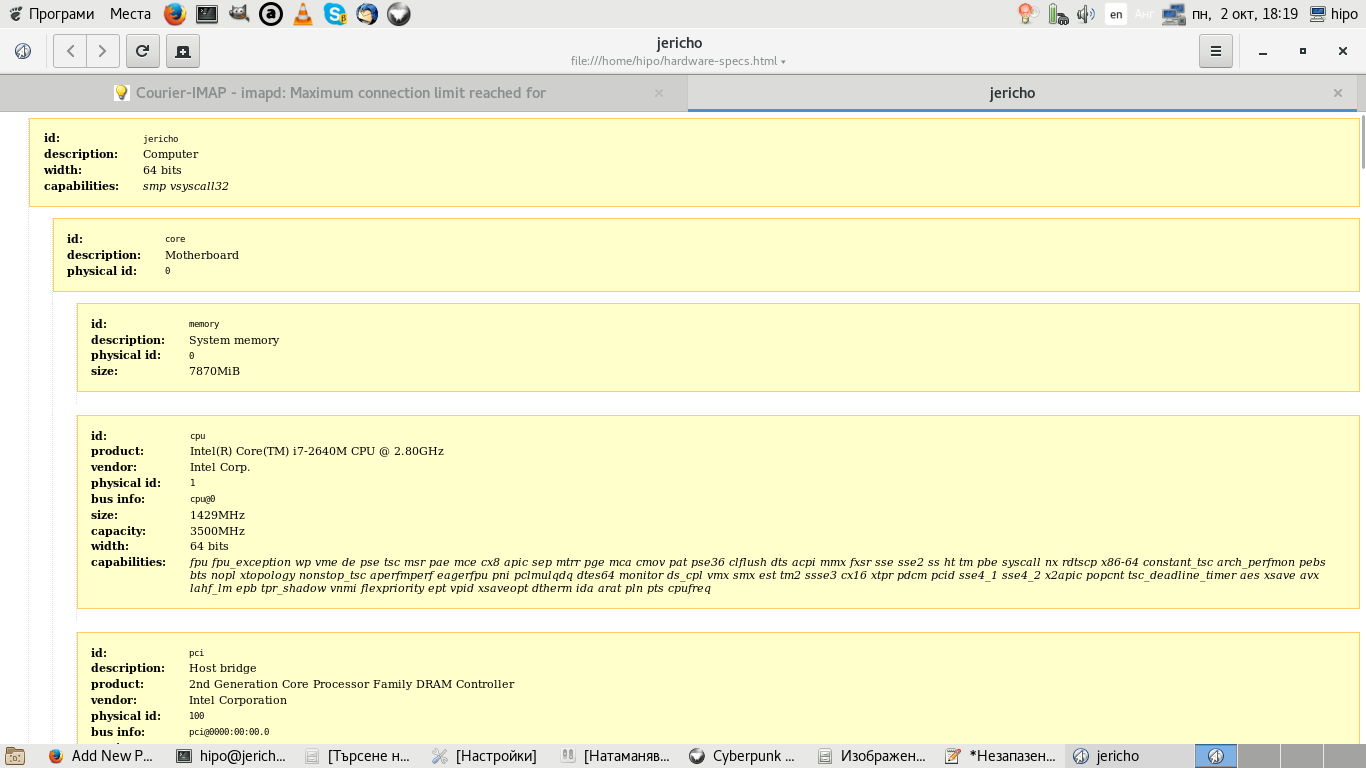
Then just open it with Browser, for example I like GNOME Epiphany browser, so I'll read HTML with it:


$ epiphany ~/hardware-specs.html


graphical-software-to-view-hardware-on-linux-lshw-command-to-generate-html-and-view-it-graphically-in-browser-on-home-pc-or-server


The great thing about generating HTML report for hardware is that on Staging / Production / Development servers which you inherited from some other administrator who for some reason (laziness 🙂 ) didn't left necessery documentation, you can easily map the machine hardware and even if it is a group of machines, you can automate report generation for all of them write a short script that parses the data on each of the HTML reports and finally creates a merged document with main important information about hardware of a cluster of computers etc.

If you still want to stick to console run the console version of lshw or use dmidecode or lshw:


$ lshw

hipo@jericho:~$ lshw
WARNING: you should run this program as super-user.
jericho                     
    description: Computer
    width: 64 bits
    capabilities: smp vsyscall32
  *-core
       description: Motherboard
       physical id: 0
     *-memory
          description: System memory
          physical id: 0
          size: 7870MiB
     *-cpu
          product: Intel(R) Core(TM) i7-2640M CPU @ 2.80GHz
          vendor: Intel Corp.
          physical id: 1
          bus info: cpu@0
          size: 891MHz
          capacity: 3500MHz
          width: 64 bits
          capabilities: fpu fpu_exception wp vme de pse tsc msr pae mce cx8 apic sep mtrr pge mca cmov pat pse36 clflush dts acpi mmx fxsr sse sse2 ss ht tm pbe syscall nx rdtscp x86-64 constant_tsc arch_perfmon pebs bts nopl xtopology nonstop_tsc aperfmperf eagerfpu pni pclmulqdq dtes64 monitor ds_cpl vmx smx est tm2 ssse3 cx16 xtpr pdcm pcid sse4_1 sse4_2 x2apic popcnt tsc_deadline_timer aes xsave avx lahf_lm epb tpr_shadow vnmi flexpriority ept vpid xsaveopt dtherm ida arat pln pts cpufreq
     *-pci
          description: Host bridge
          product: 2nd Generation Core Processor Family DRAM Controller
          vendor: Intel Corporation
          physical id: 100
          bus info: pci@0000:00:00.0
          version: 09
          width: 32 bits
          clock: 33MHz
        *-pci:0
             description: PCI bridge
             product: Xeon E3-1200/2nd Generation Core Processor Family PCI Express Root Port
             vendor: Intel Corporation
             physical id: 1
             bus info: pci@0000:00:01.0
             version: 09
             width: 32 bits
             clock: 33MHz
             capabilities: pci normal_decode bus_master cap_list
             configuration: driver=pcieport
             resources: irq:24 ioport:5000(size=4096) memory:f0000000-f10fffff ioport:c0000000(size=301989888)
           *-generic UNCLAIMED
                description: Unassigned class
                product: Illegal Vendor ID
                vendor: Illegal Vendor ID
                physical id: 0
                bus info: pci@0000:01:00.0
                version: ff
                width: 32 bits
                clock: 66MHz
                capabilities: bus_master vga_palette cap_list
                configuration: latency=255 maxlatency=255 mingnt=255
                resources: memory:f0000000-f0ffffff memory:c0000000-cfffffff memory:d0000000-d1ffffff ioport:5000(size=128) memory:f1000000-f107ffff
        *-display
             description: VGA compatible controller
             product: 2nd Generation Core Processor Family Integrated Graphics Controller
             vendor: Intel Corporation
             physical id: 2
             bus info: pci@0000:00:02.0
             version: 09
             width: 64 bits
             clock: 33MHz
             capabilities: vga_controller bus_master cap_list rom
             configuration: driver=i915 latency=0
             resources: irq:30 memory:f1400000-f17fffff memory:e0000000-efffffff ioport:6000(size=64) memory:c0000-dffff
        *-communication:0
             description: Communication controller
             product: 6 Series/C200 Series Chipset Family MEI Controller #1
             vendor: Intel Corporation
             physical id: 16
             bus info: pci@0000:00:16.0
             version: 04
             width: 64 bits
             clock: 33MHz
             capabilities: bus_master cap_list
             configuration: driver=mei_me latency=0
             resources: irq:27 memory:f3925000-f392500f
        *-communication:1
             description: Serial controller
             product: 6 Series/C200 Series Chipset Family KT Controller
             vendor: Intel Corporation
             physical id: 16.3
             bus info: pci@0000:00:16.3
             version: 04
             width: 32 bits
             clock: 66MHz
             capabilities: 16550 bus_master cap_list
             configuration: driver=serial latency=0
             resources: irq:19 ioport:60b0(size=8) memory:f392c000-f392cfff
        *-network
             description: Ethernet interface
             product: 82579LM Gigabit Network Connection
             vendor: Intel Corporation
             physical id: 19
             bus info: pci@0000:00:19.0
             logical name: enp0s25
             version: 04
             serial: 00:21:cc:cc:b2:27
             capacity: 1Gbit/s
             width: 32 bits
             clock: 33MHz
             capabilities: bus_master cap_list ethernet physical tp 10bt 10bt-fd 100bt 100bt-fd 1000bt-fd autonegotiation
             configuration: autonegotiation=on broadcast=yes driver=e1000e driverversion=3.2.6-k firmware=0.13-3 latency=0 link=no multicast=yes port=twisted pair
             resources: irq:25 memory:f3900000-f391ffff memory:f392b000-f392bfff ioport:6080(size=32)
        *-usb:0
             description: USB controller
             product: 6 Series/C200 Series Chipset Family USB Enhanced Host Controller #2
             vendor: Intel Corporation
             physical id: 1a
             bus info: pci@0000:00:1a.0
             version: 04
             width: 32 bits
             clock: 33MHz
             capabilities: ehci bus_master cap_list
             configuration: driver=ehci-pci latency=0
             resources: irq:16 memory:f392a000-f392a3ff
        *-multimedia
             description: Audio device
             product: 6 Series/C200 Series Chipset Family High Definition Audio Controller
             vendor: Intel Corporation
             physical id: 1b
             bus info: pci@0000:00:1b.0
             version: 04
             width: 64 bits
             clock: 33MHz
             capabilities: bus_master cap_list
             configuration: driver=snd_hda_intel latency=0
             resources: irq:29 memory:f3920000-f3923fff
        *-pci:1
             description: PCI bridge
             product: 6 Series/C200 Series Chipset Family PCI Express Root Port 1
             vendor: Intel Corporation
             physical id: 1c
             bus info: pci@0000:00:1c.0
             version: b4
             width: 32 bits
             clock: 33MHz
             capabilities: pci normal_decode cap_list
             configuration: driver=pcieport
             resources: irq:16
        *-pci:2
             description: PCI bridge
             product: 6 Series/C200 Series Chipset Family PCI Express Root Port 2
             vendor: Intel Corporation
             physical id: 1c.1
             bus info: pci@0000:00:1c.1
             version: b4
             width: 32 bits
             clock: 33MHz
             capabilities: pci normal_decode bus_master cap_list
             configuration: driver=pcieport
             resources: irq:17 memory:f3800000-f38fffff
           *-network
                description: Wireless interface
                product: Centrino Advanced-N 6205 [Taylor Peak]
                vendor: Intel Corporation
                physical id: 0
                bus info: pci@0000:03:00.0
                logical name: wlp3s0
                version: 34
                serial: 26:ad:26:50:f1:db
                width: 64 bits
                clock: 33MHz
                capabilities: bus_master cap_list ethernet physical wireless
                configuration: broadcast=yes driver=iwlwifi driverversion=4.9.0-3-amd64 firmware=18.168.6.1 ip=192.168.0.102 latency=0 link=yes multicast=yes wireless=IEEE 802.11
                resources: irq:28 memory:f3800000-f3801fff
        *-pci:3
             description: PCI bridge
             product: 6 Series/C200 Series Chipset Family PCI Express Root Port 4
             vendor: Intel Corporation
             physical id: 1c.3
             bus info: pci@0000:00:1c.3
             version: b4
             width: 32 bits
             clock: 33MHz
             capabilities: pci normal_decode bus_master cap_list
             configuration: driver=pcieport
             resources: irq:19 ioport:4000(size=4096) memory:f3000000-f37fffff ioport:f1800000(size=8388608)
        *-pci:4
             description: PCI bridge
             product: 6 Series/C200 Series Chipset Family PCI Express Root Port 5
             vendor: Intel Corporation
             physical id: 1c.4
             bus info: pci@0000:00:1c.4
             version: b4
             width: 32 bits
             clock: 33MHz
             capabilities: pci normal_decode bus_master cap_list
             configuration: driver=pcieport
             resources: irq:16 ioport:3000(size=4096) memory:f2800000-f2ffffff ioport:f2000000(size=8388608)
           *-generic
                description: System peripheral
                product: MMC/SD Host Controller
                vendor: Ricoh Co Ltd
                physical id: 0
                bus info: pci@0000:0d:00.0
                version: 08
                width: 32 bits
                clock: 33MHz
                capabilities: bus_master cap_list
                configuration: driver=sdhci-pci latency=0
                resources: irq:16 memory:f2800000-f28000ff
        *-usb:1
             description: USB controller
             product: 6 Series/C200 Series Chipset Family USB Enhanced Host Controller #1
             vendor: Intel Corporation
             physical id: 1d
             bus info: pci@0000:00:1d.0
             version: 04
             width: 32 bits
             clock: 33MHz
             capabilities: ehci bus_master cap_list
             configuration: driver=ehci-pci latency=0
             resources: irq:23 memory:f3929000-f39293ff
        *-isa
             description: ISA bridge
             product: QM67 Express Chipset Family LPC Controller
             vendor: Intel Corporation
             physical id: 1f
             bus info: pci@0000:00:1f.0
             version: 04
             width: 32 bits
             clock: 33MHz
             capabilities: isa bus_master cap_list
             configuration: driver=lpc_ich latency=0
             resources: irq:0
        *-storage
             description: SATA controller
             product: 6 Series/C200 Series Chipset Family 6 port SATA AHCI Controller
             vendor: Intel Corporation
             physical id: 1f.2
             bus info: pci@0000:00:1f.2
             version: 04
             width: 32 bits
             clock: 66MHz
             capabilities: storage ahci_1.0 bus_master cap_list
             configuration: driver=ahci latency=0
             resources: irq:26 ioport:60a8(size=8) ioport:60bc(size=4) ioport:60a0(size=8) ioport:60b8(size=4) ioport:6060(size=32) memory:f3928000-f39287ff
        *-serial
             description: SMBus
             product: 6 Series/C200 Series Chipset Family SMBus Controller
             vendor: Intel Corporation
             physical id: 1f.3
             bus info: pci@0000:00:1f.3
             version: 04
             width: 64 bits
             clock: 33MHz
             configuration: driver=i801_smbus latency=0
             resources: irq:18 memory:f3924000-f39240ff ioport:efa0(size=32)
     *-scsi
          physical id: 2
          logical name: scsi1
          capabilities: emulated
        *-cdrom
             description: DVD-RAM writer
             product: DVDRAM GT50N
             vendor: HL-DT-ST
             physical id: 0.0.0
             bus info: scsi@1:0.0.0
             logical name: /dev/cdrom
             logical name: /dev/cdrw
             logical name: /dev/dvd
             logical name: /dev/dvdrw
             logical name: /dev/sr0
             version: LT20
             capabilities: removable audio cd-r cd-rw dvd dvd-r dvd-ram
             configuration: ansiversion=5 status=nodisc
WARNING: output may be incomplete or inaccurate, you should run this program as super-user.


Enjoy Life ! 🙂

Install and make Apache + PHP to work with PosgreSQL database server on Debian Linux and set up server Web Posgre interface Pgpadmin howto

Wednesday, June 15th, 2016

make-apache-php-work-with-postgresql-pgsql-and-install-postgresql-db-web-admin-interface

In previous article I've wrote on how to install postgresql on Debian Linux using the deb repository this was necessery to import some PostGres DBs, however this was not enough to run the posgresql php based website aimed as connection from Apache / PHP module to PostGre was failing after a bit of investigation and a check in phpinfo(); I've realized the module PHP module for postgres pgsql.so was missing, here is what I did in order to install it:
 

debian:~# apt-get install php5-pgsql phppgadmin libapache2-mod-auth-pgsql 

PHP sessions enable configuration

As it is common a common problem with PHP applications written to use PostGres is to loose sessions and by default PHP does not have configured sessions.save_path it is a very good practice to directly enable it in /etc/php5/apache2/php.ini open the file in text editor:
 

debian:~# vim /etc/php5/apache2/php.ini


Find the commented directive line:
 

;session.save_path = “/tmp”


and uncomment it, i.e.:
 

session.save_path = “/tmp”


Quit saving vim with the usual :wq!

The 3 modules provides pgsql.so for PHP and mod_auth_pgsql.so for Apache2, the 3rd packae phpgadmin provides a Web administration interface for installed PostgreSQL servers Databases, for those experienced with MySQL Database its the same as PHPMyAdmin.


 Here is quick configuration for use of PostgreAdmin interface:

By default PHPPGADMIN installation process configure the Apache2 server' /etc/phppgadmin/apache.conf  to use  /etc/apache2/conf.d/phppgadmin


Here is the default my server package instaleld  file content:


Alias /phppgadmin /usr/share/phppgadmin

<Directory /usr/share/phppgadmin>

DirectoryIndex index.php
AllowOverride None

order deny,allow
deny from all
allow from 127.0.0.0/255.0.0.0 ::1/128
# allow from all

<IfModule mod_php5.c>
  php_flag magic_quotes_gpc Off
  php_flag track_vars On
  #php_value include_path .
</IfModule>
<IfModule !mod_php5.c>
  <IfModule mod_actions.c>
    <IfModule mod_cgi.c>
      AddType application/x-httpd-php .php
      Action application/x-httpd-php /cgi-bin/php
    </IfModule>
    <IfModule mod_cgid.c>
      AddType application/x-httpd-php .php
      Action application/x-httpd-php /cgi-bin/php
    </IfModule>
  </IfModule>
</IfModule>

</Directory>

It is generally a good practice to change the default Alias location of phppgadmin, so edit the file and change it to something like:
 

Alias /phppostgresgadmin /usr/share/phppgadmin


  • Then phpPgAdmin is available at http://servername.com/phppostgresadmin (only from localhost, however in my case I wanted to be able to access it also from other hosts so allowed PostgresGadmin from every hosts, to do so, I've commented in above config


# allow from 127.0.0.0/255.0.0.0 ::1/128


and uncommented #allow from all line, e.g.:
 

allow from all


Also another thing here is in your VirtualHost whenever you plan to access the PHPPGADMIN is to include in config ( in my case this is the file /etc/apache2/sites-enabled/000-default before (</VirtualHost> end line) following Alias:
 

Alias /phpposgreadmin /usr/share/phppgadmin


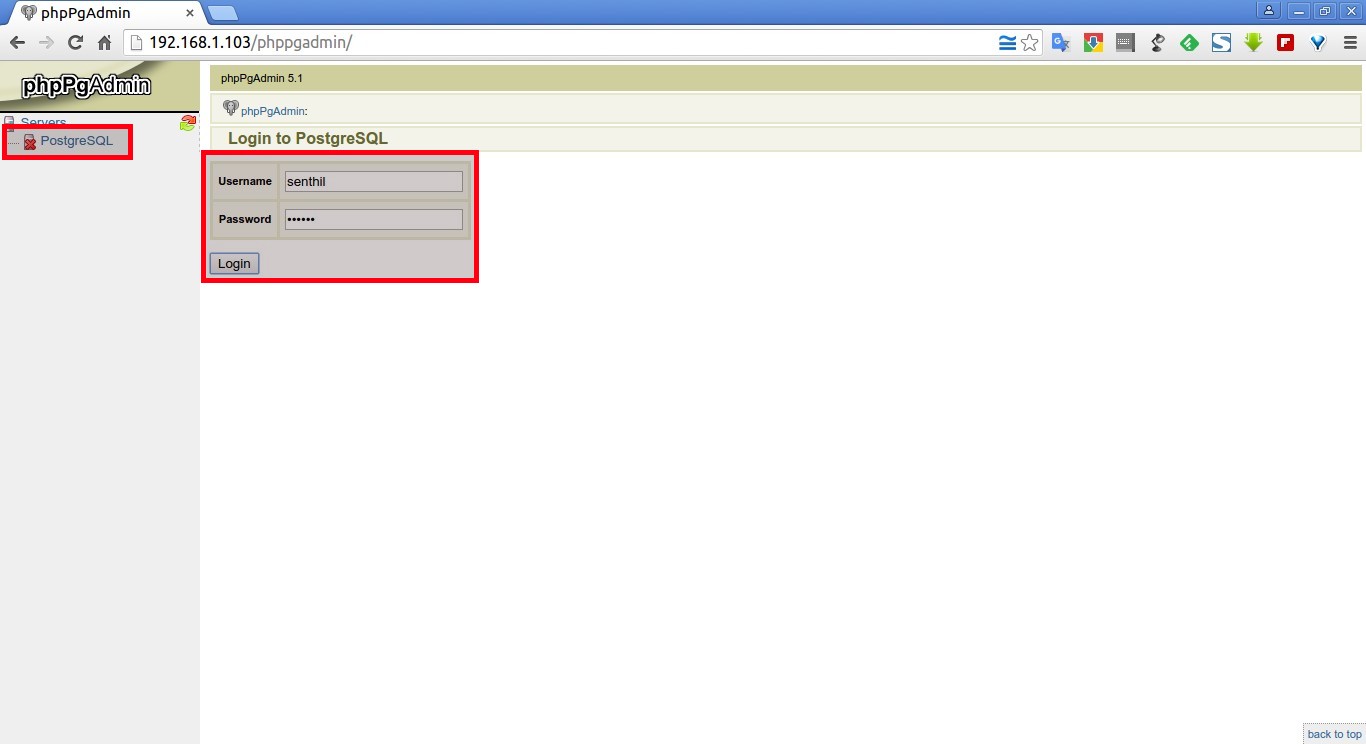
Then to access PostGreSQL PHP Admin interface in Firefox / Chrome open URL:


http://your-default-domain.com/phpposgreadmin

phpPgAdmin-postgresql-php-web-interface-debian-linux-screenshot


Configure access to a remote PostgreSQL Server

With PhpPgAdmin, you can manage many PostgreSQL servers locally (on the localhost) or on remote hosts.

First, you have to make sure that the distant PostgreSQL server can handle your request, that you can connect to it. You can do this by modifying the /etc/postgresql/9.5/main/filepg_hba.conf and adding a line like:

# PhpPgAdmin server access host all db_admin xx.xx.xx.xx 255.255.255.255 md5

Then, you need to add your distant PostgreSQL server into the config file for PhpPgAdmin. This file is  /etc/phppgadmin/config.inc.php the default postgresql port is 5432, however you might have configured it already to use some different port if you're not sure about the port number the postgresql is listening check it out:


debian:~# grep -i port /etc/postgresql/*/main/postgresql.conf
etc/postgresql/9.5/main/postgresql.conf:port = 5433                # (change requires restart)
/etc/postgresql/9.5/main/postgresql.conf:                    # supported by the operating system:
/etc/postgresql/9.5/main/postgresql.conf:# ERROR REPORTING AND LOGGING


To login to phppgadmin interface there is no root administrator user such as in PHP so you will need to priorly create some user and later use it for connection from Postgres Web interface.

To create from console new user in postgres:
 

debian:~# su – postgres
posgres@debian:~$ psql template1
posgres@debian:~$ psql -d template1 -U postgres


Welcome to psql 9.5, the PostgreSQL interactive terminal. Type: \copyright for distribution terms \h for help with SQL commands \? for help on internal slash commands \g or terminate with semicolon to execute query \q to quit template1=#

template1=# CREATE USER MyNewUser WITH PASSWORD 'myPassword';


To add a new database to postgres from shell:

template1=# CREATE DATABASE NewDatabase;
 

template1=# GRANT ALL PRIVILEGES ON DATABASE NewDatabase to MyNewUser;


template1=# q

Last command instructs it to quit if you want to get more info about possible commands do type instead of q ? for general help or for database / table commands only h
If you need to connect to NewDatabase just to test first it works in console before trying it from postgrepgadmin


posgres@debian:~$ psql -d NewDatabase -U MyNewUser


Install postgresql on Debian Squeeze / How to install PostGreSQL on Obsolete Debian installation

Friday, June 10th, 2016

how-to-install-postgresql-on-obsolete-old-debian-squeeze-tutorial

If you're in position like me to be running an old version of Debian (Squeeze) and you need to install PostgreSQL you will notice that the Debian 6.0 standard repositories are no longer active and apt-get update && apt-get upgrade are returning errors, thus because this Debian release is already too old and even the LTS repositories are inactive it is impossible to install postgresql with the usual.

To get around the situation first thing I did was to try to add followin Debian  repositories. to /etc/apt/sources.list
 

deb http://ftp.debian.net/debian-backports squeeze-backports-sloppy main
deb http://archive.debian.org/debian-archive/debian/ squeeze main contrib non-free
deb http://archive.debian.org/debian-archive/debian/ squeeze-lts main contrib non-free

After adding it I continued getting missing package errors while trying:
 

# apt-get update && apt-get install postgresql postgresql-client
….
…..


E: Some index files failed to download. They have been ignored, or old ones used instead.


Thus I googled a bit and I found the following PostgreSQL instructions working Debian 7.0 Wheeze and decided to try it 1 in 1 just changing the repository package wheezy word with squeeze
in original tutorial postgre's deb repositories are:


deb http://apt.postgresql.org/pub/repos/apt/ wheezy-pgdg main


I've only changed that one with:


deb http://apt.postgresql.org/pub/repos/apt/ squeeze-pgdg main


I guess though this worked for Debian Squeeze installing current versions such as Debian 8.0 Jessis and newer wouldn't be a prolem if you just change the debian version keyword witht he distribution for which you need the postgresql package


Here is all the consequential steps I took to make the PostgreSQL 9.5 running on my old and unsupported Debian 6.0 Squeeze

Create /etc/apt/sources.list.d/pgdg.list. The distributions are called codename-pgdg. In the example, replace wheezy with the actual distribution you are using:

# vim /etc/apt/sources.list.d/pgdg.list


deb http://apt.postgresql.org/pub/repos/apt/ squeeze-pgdg main

debian:~# apt-get –yes install wget ca-certificates debian:~# wget –quiet -O – https://www.postgresql.org/media/keys/ACCC4CF8.asc | sudo apt-key add – debian:~# apt-get update debian:~# apt-get upgrade debian:~# apt-get –yes install postgresql-9.5 pgadmin3

Next step is to connect to PostGreSQL and create database user and a database # su – postgres $ psql

Create a new database user and a database:

postgres=# CREATE USER mypguser WITH PASSWORD 'mypguserpass'; postgres=# CREATE DATABASE mypgdatabase OWNER mypguser;


or

# createuser mypguser #from regular shell # createdb -O mypguser mypgdatabase

Quit from the database

postgres=# q

Connect as user mypguser to new database

# su – mypguser $ psql mypgdatabase

or

# psql -d mypgdatabase -U mypguser

If you get errors like:

psql: FATAL: Ident authentication failed for user "mypguser"

edit pg_hba.conf in /etc/postgresql/9.5.Y/main/pg_hba.conf


local all all trust # replace ident or peer with trust

reload postgresql

/etc/init.d/postgresql reload …


To make sure that PostGreSQL is running on the system check the following processes are present on the server:


root@pcfreak:/var/www/images# ps axu|grep -i post postgres 9893 0.0 0.0 318696 16172 ? S 15:20 0:00 /usr/lib/postgresql/9.5/bin/postgres -D /var/lib/postgresql/9.5/main -c config_file=/etc/postgresql/9.5/main/postgresql.conf postgres 9895 0.0 0.0 318696 1768 ? Ss 15:20 0:00 postgres: checkpointer process postgres 9896 0.0 0.0 318696 2700 ? Ss 15:20 0:00 postgres: writer process postgres 9897 0.0 0.0 318696 1708 ? Ss 15:20 0:00 postgres: wal writer process postgres 9898 0.0 0.0 319132 2564 ? Ss 15:20 0:00 postgres: autovacuum launcher process postgres 9899 0.0 0.0 173680 1652 ? Ss 15:20 0:00 postgres: stats collector process root 14117 0.0 0.0 112404 924 pts/1 S+ 16:09 0:00 grep -i post


Well that's all folks now you will have the postgresql running on its default port 5433:


debian:/etc/postgresql/9.5/main# grep -i port postgresql.conf
port = 5433 # (change requires restart)
# supported by the operating system:
# ERROR REPORTING AND LOGGING # %r = remote host and port


Well that's it folks thanks The Lord Jesus Christ grace by the prayers of John The Baptist and Saint Sergij Radonezhki it works 🙂