Posts Tagged ‘Install’

Install btop on Debian Linux, btop an advanced htop like monitoring for Linux to beautify your console life

Tuesday, May 30th, 2023

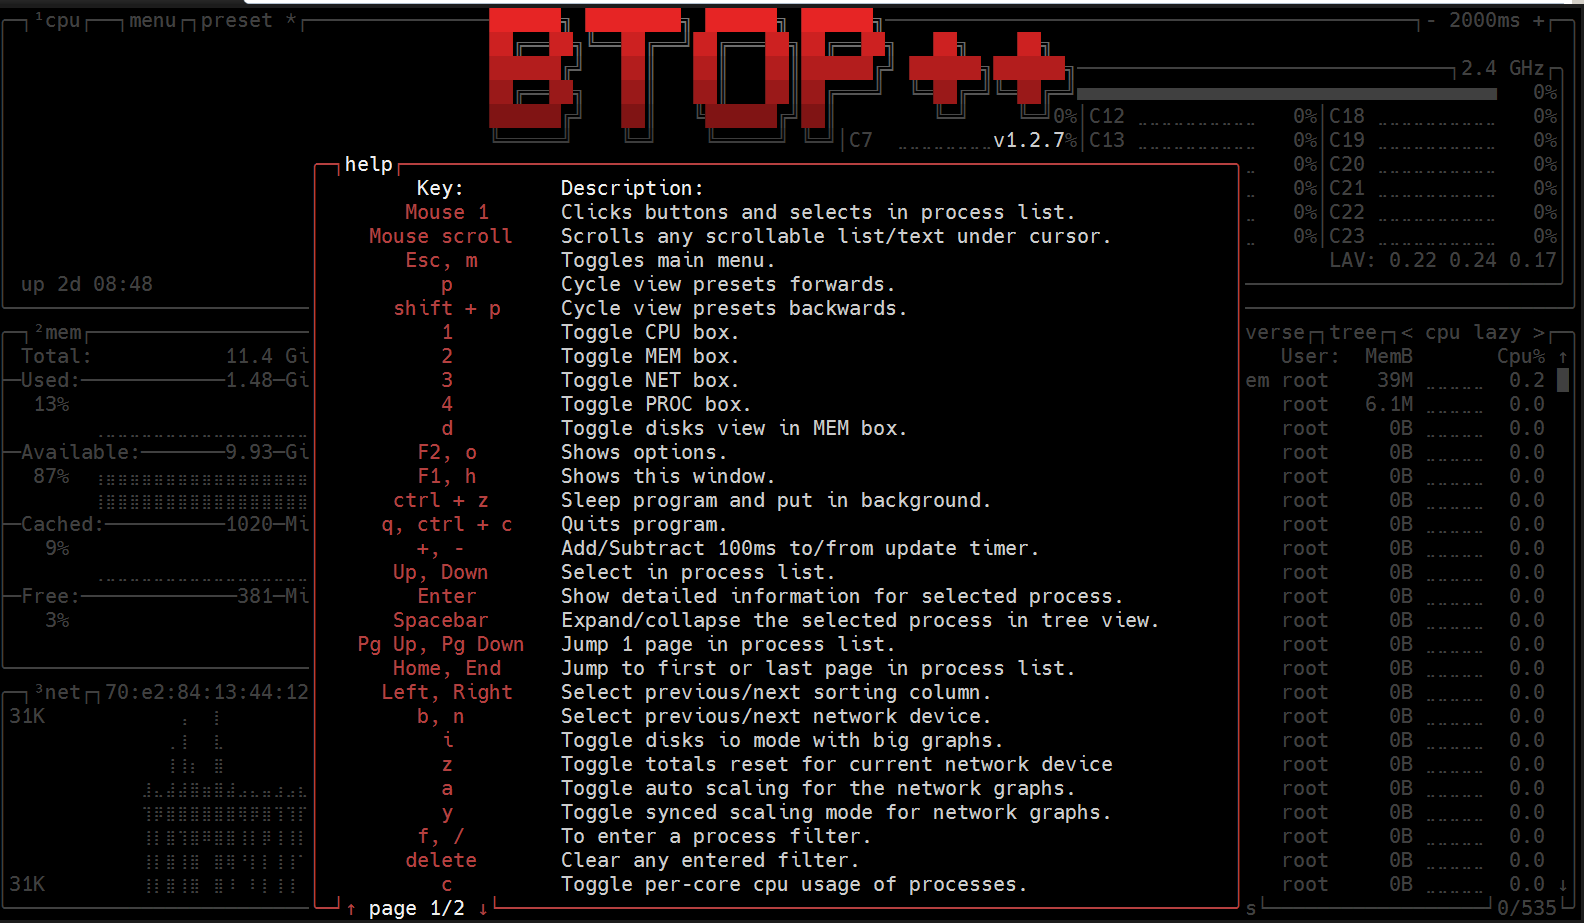
btop-linux-monitoring-tool-screenshot-help-menu

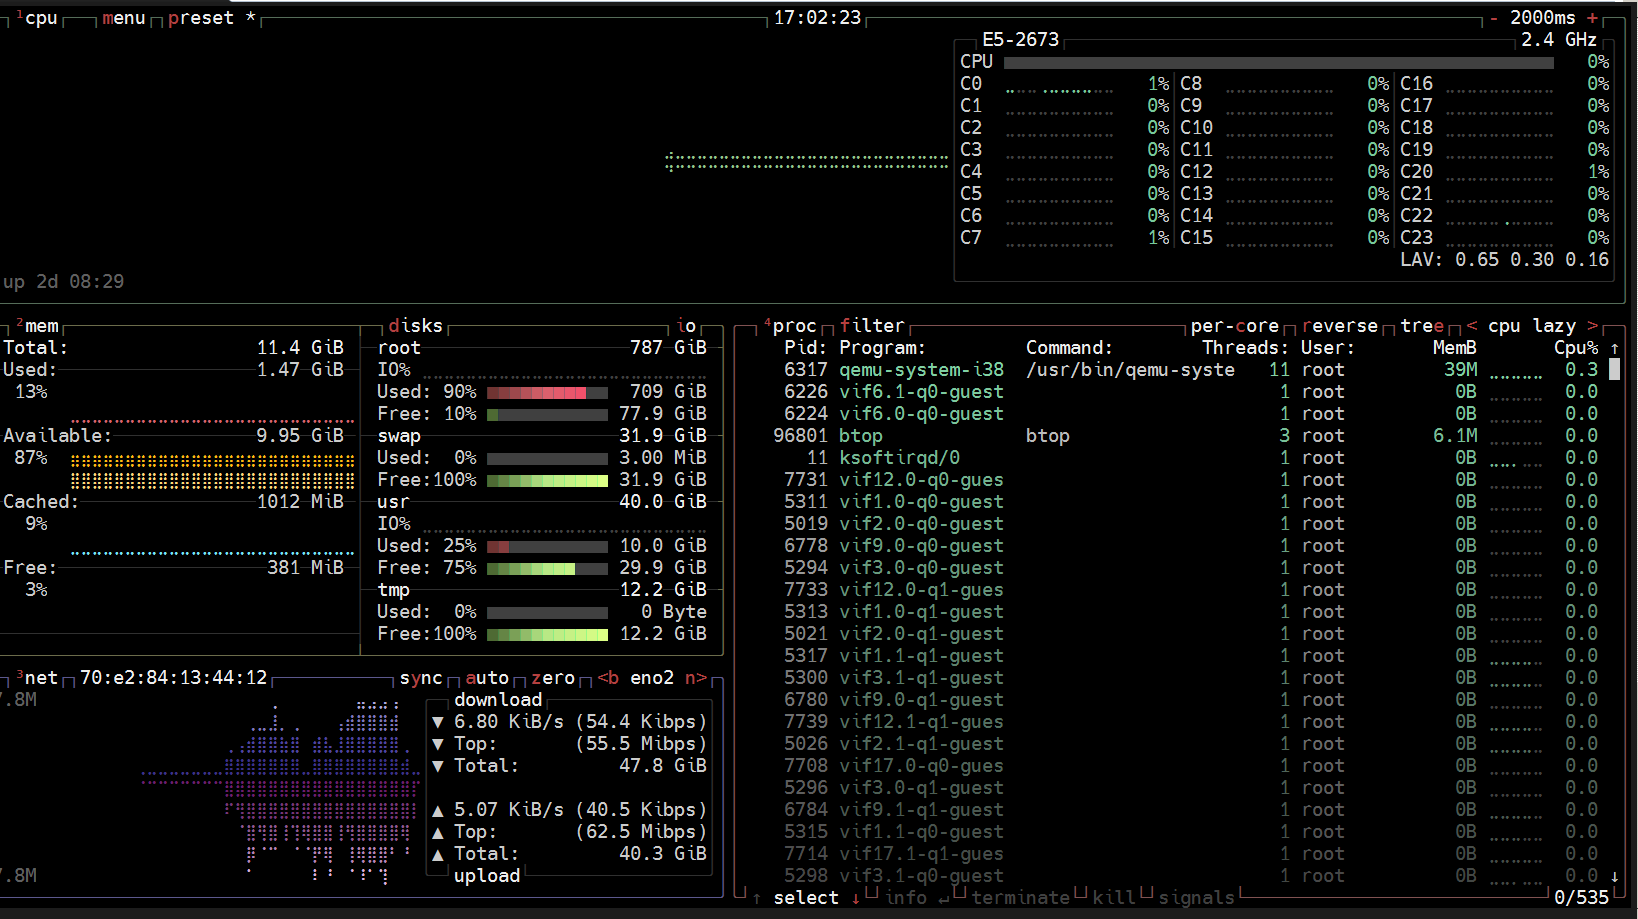
I've accidently stubmled on btop a colorful and interactive ncurses like command line utility to provide you a bunch of information about CPU / memory / disks and processes with nice console graphic in the style of Cubic Player 🙂
Those who love htop and like their consoles to be full of shiny colors, will really appreciate those nice Linux monitoring tool.
To install btop on latest current stable Debian bullseyes, you will have to install it via backports, as the regular Debian repositories does not have the tool available out of the box.

To Add backports packages support for your Debian 11:

1. Edit /etc/apt/sources.list and include following repositories


# vim /etc/apt/sources.list

deb http://deb.debian.org/debian bullseye-backports main contrib non-free
deb-src http://deb.debian.org/debian bullseye-backports main contrib non-free


2. Update the known repos list to include it


# apt update


3. Install the btop deb package from backports


# apt-cache show btop|grep -A 20 -i descrip
Description-en: Modern and colorful command line resource monitor that shows usage and stats
 btop is a modern and colorful command line resource monitor that shows
 usage and stats for processor, memory, disks, network and processes.
 btop features:
  – Easy to use, with a game inspired menu system.
  – Full mouse support, all buttons with a highlighted key is clickable
  and mouse scroll works in process list and menu boxes.
  – Fast and responsive UI with UP, DOWN keys process selection.
  – Function for showing detailed stats for selected process.
  – Ability to filter processes.
  – Easy switching between sorting options.
  – Tree view of processes.
  – Send any signal to selected process.
  – UI menu for changing all config file options.
  – Auto scaling graph for network usage.
  – Shows IO activity and speeds for disks
  – Battery meter
  – Selectable symbols for the graphs
  – Custom presets
  – And more…
  btop is written in C++ and is continuation of bashtop and bpytop.
Description-md5: 73df6c70fe01f5bf05cca0e3031c1fe2
Multi-Arch: foreign
Homepage: https://github.com/aristocratos/btop
Section: utils
Priority: optional
Filename: pool/main/b/btop/btop_1.2.7-1~bpo11+1_amd64.deb
Size: 431500
SHA256: d79e35c420a2ac5dd88ee96305e1ea7997166d365bd2f30e14ef57b556aecb36


# apt install -t bullsye-backports btop –yes

Once I installed it, I can straight use it except on some of my Linux machines, which were having a strange encoding $LANG defined, those ones spitted some errors like:

root@freak:~# btop
ERROR: No UTF-8 locale detected!
Use –utf-force argument to force start if you're sure your terminal can handle it.


To work around it simply redefine LANG variable and rerun it
 

# export LANG=en_US.UTF8

# btop


btop-linux-monitoring-console-beautiful-colorful-tool-graphics-screenshot

btop-linux-monitoring-tool-screenshot-help-menu

How to install and configure AIDE ( Advanced Intrusion Detection Environment ) on Debian GNU / Linux 11 to monitor files for changes

Thursday, March 9th, 2023

aide-logo-linux

How to install and configure AIDE ( Advanced Intrusion Detection Environment ) on Debian GNU / Linux 11 to monitor files for changes

Having a intrusion detection system is essential to keeping a server security to good level and being compliant with PCI (Payment Card Industry) DSS Standards. It is a great thing for the sake to protect oneself from hackers assaults. 

There is plenty of Intrusion Detection systems available all around since many years, in the past one of main ones for Linux as older system administrators should remember was Tripwire – integrity tool for monitoring and alerting on specific file change(s) on a range of systems

Tripwire is still used today but many today prefer to use AIDE that is a free software replacement for Tripwire under GPL (General Public License), that is starting to become like a "standard"  for many Unix-like systems as an inexpensive baseline control and rootkit detection system.

In this article I'll explain shortly how to Install / Configure and Use AIDE to monitor, changes with files on the system.

But before proceeding it is worthy to mention on some of the alternatives companies and businesses choose to as an IDS (Intrusion Detection Systems), that is useful to give a brief idea of the sysadmins that has to deal with Security, on what is some of the main Intrusion Detection Systems adopted on UNIX OSes today:
 

  • Samhain

    An integrity checker and host intrusion detection system that can be used on single hosts as well as large, UNIX-based networks. It supports central monitoring as well as powerful (and new) stealth features to run undetected in memory, using steganography. Samhain is an open-source multiplatform application for POSIX systems (Unix, Linux, Cygwin/Windows).

  • OSSEC 
    OSSEC uses a centralized, cross-platform architecture allowing multiple systems to be monitored and managed.
     
  • Snort
    IDS which has the capabilities to prevent attacks. By taking a particular action based on traffic patterns, it can become an intrusion prevention system (IPS). – written in Pure C.
     
  • Zeek (Bro)
    Zeek helps to perform security monitoring by looking into the network's activity. It can find suspicious data streams. Based on the data, it alert, react, and integrate with other tools – written in C++.
  • Maltrail (Maltrail monitors for traffic on the network that might indicate system compromise or other bad behavior. It is great for intrusion detection and monitoring. – written in Python).

1. Install aide deb package

# apt -y install aide

root@haproxy2:~# aide -v
Aide 0.17.3

Compiled with the following options:

WITH_MMAP
WITH_PCRE
WITH_POSIX_ACL
WITH_SELINUX
WITH_XATTR
WITH_CAPABILITIES
WITH_E2FSATTRS
WITH_ZLIB
WITH_MHASH
WITH_AUDIT

Default config values:
config file: <none>
database_in: <none>
database_out: <none>

Available hashsum groups:
md5: yes
sha1: yes
sha256: yes
sha512: yes
rmd160: yes
tiger: yes
crc32: yes
crc32b: yes
haval: yes
whirlpool: yes
gost: yes
stribog256: no
stribog512: no

Default compound groups:
R: l+p+u+g+s+c+m+i+n+md5+acl+selinux+xattrs+ftype+e2fsattrs+caps
L: l+p+u+g+i+n+acl+selinux+xattrs+ftype+e2fsattrs+caps
>: l+p+u+g+i+n+acl+S+selinux+xattrs+ftype+e2fsattrs+caps
H: md5+sha1+rmd160+tiger+crc32+haval+gost+crc32b+sha256+sha512+whirlpool
X: acl+selinux+xattrs+e2fsattrs+caps

2. Prepare AIDE configuration and geenrate (initialize) database

Either you can use the default AIDE configuration which already has a preset rules for various files and directories to be monitored,
or you might add up additional ones.
 

  • For details on configuration of aide.conf accepted options "man aide.conf"

The rules and other configurations resides lays under  /etc/aide/ directory
 

The AIDE database is located under /var/lib/aide

root@server:~# ls -al /var/lib/aide/
общо 33008
drwxr-xr-x  2 root root     4096  9 мар 12:38 ./
drwxr-xr-x 27 root root     4096  9 мар 12:01 ../
-rw——-  1 root root 16895467  9 мар 16:03 aide.db
-rw——-  1 root root 16895467  9 мар 18:49 aide.db.new


Also, details about major setting rules config regarding how AIDE will run via cronjob as with most debian services are into /etc/default/aide

Default aide.conf config is in /etc/aide/aide.conf if you need custom stuff to do with it simply edit it.

Here is an Example:
Lets say you want to omit some directory to not be monitored by aide, which would otherwise do, i.e.
omit /var/log/* from monitoring

# At the end of file /etc/aide/aide.conf

add:

!/var/log
!/home/
!/var/lib
!/proc

  • Initialize the aide database first time

Run aideinit command, aideinit will create a new baseline database –  /var/lib/aide/aide.db.new (a baseline)
Note that, /var/lib/aide/aide.db is the old database that aide uses to check against for any changes of files / directories on the configured monitored filesystem objects.

root@server:~# aideinit
Running aide –init…

debug1: client_input_channel_req: channel 0 rtype keepalive@openssh.com reply 1
Start timestamp: 2023-03-09 12:06:16 +0200 (AIDE 0.17.3)
AIDE initialized database at /var/lib/aide/aide.db.new

Number of entries:      66971

—————————————————
The attributes of the (uncompressed) database(s):
—————————————————

/var/lib/aide/aide.db.new
 SHA256    : nVrYljiBFM/KaKCTjbaJtR2w6N8vc8qN
             DPObbo2UMVo=
 SHA512    : S1ZNB0DCqb4UTmuqaalTgiQ3UAltTOzO
             YNfEQJldp32q5ahplBo4/65uwgtGusMy
             rJC8nvxvYmh+mq+16kfrKA==
 RMD160    : xaUnfW1+/DJV/6FEm/nn1k1UKOU=
 TIGER     : nGYEbX281tsQ6T21VPx1Hr/FwBdwF4cK
 CRC32     : fzf7cg==
 HAVAL     : yYQw/87KUmRiRLSu5JcEIvBUVfsW/G9H
             tVvs6WqL/0I=
 WHIRLPOOL : 6b5y42axPjpUxWFipUs1PtbgP2q0KJWK
             FwFvAGxHXjZeCBPEYZCNkj8mt8MkXBTJ
             g83ZELK9GQBPLea7UF3tng==
 GOST      : sHAzx7hkr5H3q8TCSGCKjndEiZgcvCEL
             E45qcRb25tM=


End timestamp: 2023-03-09 12:38:30 +0200 (run time: 32m 14s)


Be patient now, go grab a coffee / tea or snack as the command might take up to few minutes for the aide to walk through the whole monitored filesystems and built its database.

root@server:~# echo cp /var/lib/aide/aide.db{.new,}
cp /var/lib/aide/aide.db.new /var/lib/aide/aide.db


root@server:~# cp /var/lib/aide/aide.db{.new,}

root@server:~# aide –check –config /etc/aide/aide.conf

Start timestamp: 2023-03-09 13:01:32 +0200 (AIDE 0.17.3)
AIDE found differences between database and filesystem!!

Summary:
  Total number of entries:      66972
  Added entries:                1
  Removed entries:              0
  Changed entries:              7

—————————————————
Added entries:
—————————————————

f+++++++++++++++++: /var/lib/aide/aide.db

—————————————————
Changed entries:
—————————————————

d =…. mc.. .. . : /etc/aide
d =…. mc.. .. . : /root
f <…. mci.H.. . : /root/.viminfo
f =…. mc..H.. . : /var/lib/fail2ban/fail2ban.sqlite3
d =…. mc.. .. . : /var/lib/vnstat
f =…. mc..H.. . : /var/lib/vnstat/vnstat.db
f >b… mc..H.. . : /var/log/sysstat/sa09

—————————————————
Detailed information about changes:
—————————————————

Directory: /etc/aide
 Mtime     : 2023-03-09 12:04:03 +0200        | 2023-03-09 12:51:11 +0200
 Ctime     : 2023-03-09 12:04:03 +0200        | 2023-03-09 12:51:11 +0200

Directory: /root
 Mtime     : 2023-03-09 12:06:13 +0200        | 2023-03-09 12:51:11 +0200
 Ctime     : 2023-03-09 12:06:13 +0200        | 2023-03-09 12:51:11 +0200

File: /root/.viminfo
 Size      : 18688                            | 17764
 Mtime     : 2023-03-09 12:06:13 +0200        | 2023-03-09 12:51:11 +0200
 Ctime     : 2023-03-09 12:06:13 +0200        | 2023-03-09 12:51:11 +0200
 Inode     : 133828                           | 133827
 SHA256    : aV54gi33aA/z/FuBj2ZioU2cTa9H16TT | dnFdLVQ/kx3UlTah09IgEMrJ/aYgczHe
             TzkLSxBDSB4=                     | DdxDAmPOSAM=

3. Test aide detects file changes

Create a new file and append some text and rerun the aide check


root@server:~# touch /root/test.txt
root@server:~# echo aaa > /root/test.txt
root@server:~# aide –check –config /etc/aide/aide.conf


Start timestamp: 2023-03-09 13:07:21 +0200 (AIDE 0.17.3)
AIDE found differences between database and filesystem!!

Summary:
  Total number of entries:      66973
  Added entries:                2
  Removed entries:              0
  Changed entries:              7

—————————————————
Added entries:
—————————————————

f+++++++++++++++++: /root/test.txt
f+++++++++++++++++: /var/lib/aide/aide.db

—————————————————
Changed entries:
—————————————————

d =…. mc.. .. . : /etc/aide
d =…. mc.. .. . : /root
f <…. mci.H.. . : /root/.viminfo
f =…. mc..H.. . : /var/lib/fail2ban/fail2ban.sqlite3
d =…. mc.. .. . : /var/lib/vnstat
f =…. mc..H.. . : /var/lib/vnstat/vnstat.db
f >b… mc..H.. . : /var/log/sysstat/sa09

….


The same command can be shortened for the lazy typist:

root@server:~# aide -c /etc/aide/aide.conf -C

The command will basically try to check the deviation between the AIDE database and the filesystem.

4. Limiting AIDES Integrity Checks to Specific Files / Directories

In order to limit the integrity checks to a specific entries for example /etc, pass the –limit REGEX option to AIDE check command where REGEX is the entry to check.

For example, check and update the database entries matching /etc, you would run aide command as shown below;
 

root@server:~# aide -c /etc/aide/aide.conf –limit /etc –check


AIDE found differences between database and filesystem!!
Limit: /etc

Summary:
  Total number of entries:      66791
  Added entries:                0
  Removed entries:              0
  Changed entries:              2

—————————————————
Changed entries:
—————————————————

d =…. mc.. .. . : /etc/aide
d =…. mc.. .. . : /etc/default

—————————————————
Detailed information about changes:
—————————————————

Directory: /etc/aide
 Mtime     : 2023-03-09 15:59:53 +0200        | 2023-03-09 16:43:03 +0200
 Ctime     : 2023-03-09 15:59:53 +0200        | 2023-03-09 16:43:03 +0200

Directory: /etc/default
 Mtime     : 2023-03-09 12:06:13 +0200        | 2023-03-09 18:42:12 +0200
 Ctime     : 2023-03-09 12:06:13 +0200        | 2023-03-09 18:42:12 +0200


—————————————————
The attributes of the (uncompressed) database(s):
—————————————————

/var/lib/aide/aide.db
 SHA256    : sjCxyIkr0nC/gTkNmn7DNqAQWttreDF6
             vSUV4jBoFY4=
 SHA512    : vNMpb54qxrbOk6S1Z+m9r0UwGvRarkWY
             0m50TfMvGElfZWR1I3SSaeTdORAZ4rQe
             17Oapo5+Sc0E2E+STO93tA==
 RMD160    : anhm5E6UlKmPYYJ4WYnWXk/LT3A=
 TIGER     : 5e1wycoF35/ABrRf7FNypZ45169VTuV4
 CRC32     : EAJlFg==
 HAVAL     : R5imONWRYgNGEfhBTc096K+ABnMFkMmh
             Hsqe9xt20NU=
 WHIRLPOOL : c6zySLliXNgnOA2DkHUdLTCG2d/T18gE
             4rdAuKaC+s7gqAGyA4p2bnDHhdd0v06I
             xEGY7YXCOXiwx8BM8xHAvQ==
 GOST      : F5zO2Ovtvf+f7Lw0Ef++ign1znZAQMHM
             AApQOiB9CqA=


End timestamp: 2023-03-09 20:02:18 +0200 (run time: 1m 32s)

5. Add the modified /root/test.txt to AIDE list of known modified files database
 

root@server:~# aide –update –config /etc/aide/aide.
  ERROR: cannot open config file '/etc/aide/aide.': No such file or directory


root@server:~# ​ aide –update –config /etc/aide/aide.conf
 

Start timestamp: 2023-03-09 18:45:17 +0200 (AIDE 0.17.3)
AIDE found differences between database and filesystem!!
New AIDE database written to /var/lib/aide/aide.db.new

Summary:
  Total number of entries:      66791
  Added entries:                0
  Removed entries:              0
  Changed entries:              8

—————————————————
Changed entries:
—————————————————

d =…. mc.. .. . : /etc/aide
d =…. mc.. .. . : /etc/default
d =…. mc.. .. . : /root
f >…. mci.H.. . : /root/.viminfo
f >…. mci.H.. . : /root/test.txt
f =…. mc..H.. . : /var/lib/fail2ban/fail2ban.sqlite3
d =…. mc.. .. . : /var/lib/vnstat
f =…. mc..H.. . : /var/lib/vnstat/vnstat.db

—————————————————
Detailed information about changes:
—————————————————

Directory: /etc/aide
 Mtime     : 2023-03-09 15:59:53 +0200        | 2023-03-09 16:43:03 +0200
 Ctime     : 2023-03-09 15:59:53 +0200        | 2023-03-09 16:43:03 +0200

Directory: /etc/default
 Mtime     : 2023-03-09 12:06:13 +0200        | 2023-03-09 18:42:12 +0200
 Ctime     : 2023-03-09 12:06:13 +0200        | 2023-03-09 18:42:12 +0200

Directory: /root
 Mtime     : 2023-03-09 15:59:53 +0200        | 2023-03-09 18:44:34 +0200
 Ctime     : 2023-03-09 15:59:53 +0200        | 2023-03-09 18:44:34 +0200

File: /root/.viminfo
 Size      : 16706                            | 16933
 Mtime     : 2023-03-09 15:59:53 +0200        | 2023-03-09 18:44:34 +0200
 Ctime     : 2023-03-09 15:59:53 +0200        | 2023-03-09 18:44:34 +0200
 Inode     : 136749                           | 133828
 SHA256    : KMHGoMVJo10BtafVrWIOLt3Ht9gK8bc+ | rrp8S3VftzZzvjBP1JC+PBpODv9wPKGw
             9uHh/z7iJWA=                     | TA+hyhTiY+U=
 SHA512    : ieDHy7ObSTfYm5d8DtYcHKxHya13CS65 | PDAJjyZ39uU3kKFo2lHBduTqxMDq4i01
             ObMYIRAre6IgvLslEs0ZodQFyrczMyRt | 1Kvm/h6xzFhHtFgjidtcemG8wDcjtfNF
             +d6SrW0gn3skKn2B7G09eQ==         | Z7LO230fgGeO7UepqtxZjQ==
 RMD160    : nUgg/G4zsVGKzVmmrqltuYUDvtg=     | jj61KAFONK92mj+u66RDJmxFhmI=
 TIGER     : 3vPSOrla5k+k2br1E2ES4eNiSZ2novFX | mn4kNCzd8SQr2ID2VSe4f4l0ta7pO/xo
 CRC32     : NDnMgw==                         | AyzVUQ==
 HAVAL     : Q9/KozxRiPbLEkaIfnBUZdEWftaF52Mw | 6jADKV6jg7ZVr/A/oMhR4NXc8TO1AOGW
             7tiR7DXhl0o=                     | NrYe+j6UcO0=
 WHIRLPOOL : vB/ZMCul4hN0aYd39gBu+HmZT/peRUI8 | mg6c1lYYVNZcy4mVzGojwraim8e3X2/R
             KDkaslNb8+YleoFWx0mbhAbkGurc0+jh | urVvEmbsgTuUCJOuf9+OrEACiF0fbe/x
             YPBviZIKcxUbTc2nGthTWw==         | t+BXnSQWk08OL9EI6gMGqA==
 GOST      : owVGTgU9BH3b0If569wQygw3FAbZIZde | ffx29GV2jaCB7XzuNjdiRzziIiZYnbi3
             eAfQfzlRPGY=                     | Ar7jyNMUutk=

File: /root/test.txt
 Size      : 4                                | 8
 Mtime     : 2023-03-09 13:07:12 +0200        | 2023-03-09 18:44:34 +0200
 Ctime     : 2023-03-09 13:07:12 +0200        | 2023-03-09 18:44:34 +0200
 Inode     : 133828                           | 136751
 SHA256    : F+aC8GC1+OR+oExcSFWQiwpa1hICImD+ | jUIZMGfiMdAlWFHu8mmmlml4qAGNQNL5
             UOEeywzAq3Y=                     | 6NhzJ1sYFZE=
 SHA512    : d+UmFKFBzvGadt5hk+nIRbjP//7PSXNl | ixn20lcEMDEtsJo3hO90Ea/wHWLCHcrz
             Pl16XRIUUPq2FCiQ4PeUcVciukJX7ijL | seBWunbBysY0z3BWcfgnN2vH05WfRfvA
             D045ZvGOEcnmL6a6vwp0jw==         | QiNtQS1tStuEdB3Voq54zQ==
 RMD160    : I6waxKN3rMx4WTz4VCUQXoNoxUg=     | urTh1j1t3UHchnJGnBG4lUZnjI4=
 TIGER     : cwUYgfKHcJnWXcA0pr/OKuxuoxh+b9lA | prstKqCfMXL39aVGFPA0kX4Q9x7a+hUn
 CRC32     : UD78Dw==                         | zoYiEA==
 HAVAL     : bdbKR9LvPgsYClViKiHx48fFixfIL/jA | ZdpdeMhw4MvKBgWsM4EeyUgerO86Rt82
             F3tjdc2Gm8Y=                     | W94fJFRWbrM=
 WHIRLPOOL : OLP0Y4oKcqW2yEvme8z419N1KE4TB9GJ | Xk8Ujo3IU2SzSqbJFegq7p1ockmrnxJF
             biHn/9XgrBz4fQiDJ8eHpx+0exA9hXmY | R3Rfstd1jWSwLFNTEwfbRRw+TARtRK50
             EbbakMJJdzLt1ipKWiV9gg==         | iWJeHLsD5dZ+CzV0tf4sUg==
 GOST      : ystISzoeH/ZznYrrXmxe4rwmybWMpGuE | GhMWNxg7Is0svJ+5LP+DVWbgt+CDQO+3
             0PzRnVEqnR8=                     | 08dwBuVAwB8=

File: /var/lib/fail2ban/fail2ban.sqlite3
 Mtime     : 2023-03-09 15:55:01 +0200        | 2023-03-09 18:45:01 +0200
 Ctime     : 2023-03-09 15:55:01 +0200        | 2023-03-09 18:45:01 +0200
 SHA256    : lLilXNleqSgHIP1y4o7c+oG5XyUPGzgi | NCJJ2H6xgCw/NYys1LMA7hOWwoOoxI8Y
             RHYH+zvlAL4=                     | 4SJygfqEioE=
 SHA512    : iQj2pNT4NES4fBcujzdlEEGZhDnkhKgc | ClQZ5HMOSayUNb//++eZc813fiMJcXnj
             QDlGFSAn6vi+RXesFCjCABT7/00eEm5/ | vTGs/2tANojoe6cqpsT/LaJ3QZXpmrfh
             ILcaqlQtBSLJgHjMQehzdg==         | syVak1I4n9yg8cDKEkZUvw==
 RMD160    : Xg4YU8YI935L+DLvkRsDanS4DGo=     | SYrQ27n+/1fvIZ7v+Sar/wQHulI=
 TIGER     : 2WhhPq9kuyeNJkOicDTDeOeJB8HR8zZe | o1LDZtRclri2KfZBe5J3D4YhM05UaP4E
 CRC32     : NQmi4A==                         | tzIsqg==
 HAVAL     : t1ET+84+8WgfwqlLy4R1Qk9qGZQRUbJI | MwVnjtM3dad/RuN2BfgsySX2DpfYq4qi
             z2J0ROGduXc=                     | H1pq6RYsA6o=
 WHIRLPOOL : xKSn71gFIVhk5rWJIBaYQASl0V+pGn+3 | m5LEXfhBbhWFg/d8CFJhklOurmRSkDSG
             N85R0tiCKsTZ2+LRkxDrzcVQdss2k8+z | LC/vICnbEWzLwrCuMwBi1/e5wDNIY8gK
             oqExhoXtPsMaREjpCugd3Q==         | mvGn40x+G4cCYNZ6lGT9Zg==
 GOST      : WptpUlfooIlUjzDHU8XGuOU2waRud5SR | i6K4COXU0nyZ1mL3ZBuGUPz/ZXTj8KKQ
             E/tnoBqk+q0=                     | L6VNyS8/X2Y=

Directory: /var/lib/vnstat
 Mtime     : 2023-03-09 16:00:00 +0200        | 2023-03-09 18:45:01 +0200
 Ctime     : 2023-03-09 16:00:00 +0200        | 2023-03-09 18:45:01 +0200

File: /var/lib/vnstat/vnstat.db
 Mtime     : 2023-03-09 16:00:00 +0200        | 2023-03-09 18:45:00 +0200
 Ctime     : 2023-03-09 16:00:00 +0200        | 2023-03-09 18:45:00 +0200
 SHA256    : X/lnJuuSo4jX4HRzxMBodnKHAjQFvugi | oqtY3HTNds/qDNFCRAEsfN5SuO0U5LRg
             2sh2c0u69x8=                     | otc5z1y+eGY=
 SHA512    : U/g8O6G8cuhsqCUCbrElxgiy+naJKPkI | y+sw4LX8mlDWkRJMX38TsYSo1DQzxPOS
             hG7vdH9rBINjakL87UWajT0s6WSy0pvt | 068otnzw2FSSlM5X5j5EtyJiY6Hd5P+A
             ALaTcDFKHBAmmFrl8df2nQ==         | jFiWStMbx+dQidXYZ4XFAw==
 RMD160    : F6YEjIIQu2J3ru7IaTvSemA9e34=     | bmVSaRKN2qU7qpEWkzfXFoH4ZK4=
 TIGER     : UEwLoeR6Qlf2oOI58pUCEDaWk0pHDkcY | 0Qb4nUqe3cKh/g5CQUnOXGfjZwJHjeWa
 CRC32     : Bv3/6A==                         | jvW6mg==
 HAVAL     : VD7tjHb8o8KTUo5xUH7eJEmTWgB9zjft | rumfiWJvy/sTK/09uj7XlmV3f7vj6KBM
             kOkzKxFWqqU=                     | qeOuKvu0Zjc=
 WHIRLPOOL : wR0qt8u4N8aQn8VQ+bmfrxB7CyCWVwHi | FVWDRE3uY6qHxLlJQLU9i9QggLW+neMj
             ADHpMTUxBEKOpOBlHTWXIk13qYZiD+o/ | Wt+Dj9Rz92BG9EomgLUgUkxfiVFO8cMq
             XtzTB4rMbxS4Z5PAdC/07A==         | WaR/KKq3Z7R8f/50tc9GMQ==
 GOST      : l3ibqMkHMSPpQ+9ok51/xBthET9+JQMd | qn0GyyCg67KRGP13At52tnviZfZDgyAm
             OZtiFGYXmgU=                     | c82NXSzeyV0=


—————————————————
The attributes of the (uncompressed) database(s):
—————————————————

/var/lib/aide/aide.db
 SHA256    : sjCxyIkr0nC/gTkNmn7DNqAQWttreDF6
             vSUV4jBoFY4=
 SHA512    : vNMpb54qxrbOk6S1Z+m9r0UwGvRarkWY
             0m50TfMvGElfZWR1I3SSaeTdORAZ4rQe
             17Oapo5+Sc0E2E+STO93tA==
 RMD160    : anhm5E6UlKmPYYJ4WYnWXk/LT3A=
 TIGER     : 5e1wycoF35/ABrRf7FNypZ45169VTuV4
 CRC32     : EAJlFg==
 HAVAL     : R5imONWRYgNGEfhBTc096K+ABnMFkMmh
             Hsqe9xt20NU=
 WHIRLPOOL : c6zySLliXNgnOA2DkHUdLTCG2d/T18gE
             4rdAuKaC+s7gqAGyA4p2bnDHhdd0v06I
             xEGY7YXCOXiwx8BM8xHAvQ==
 GOST      : F5zO2Ovtvf+f7Lw0Ef++ign1znZAQMHM
             AApQOiB9CqA=

/var/lib/aide/aide.db.new
 SHA256    : QRwubXnz8md/08n28Ek6DOsSQKGkLvuc
             gSZRsw6gRw8=
 SHA512    : 238RmI1PHhd9pXhzcHqM4+VjNzR0es+3
             6eiGNrXHAdDTz7GlAQQ4WfKeQJH9LdyT
             1r5ho/oXRgzfa2BfhKvTHg==
 RMD160    : GJWuX/nIPY05gz62YXxk4tWiH5I=
 TIGER     : l0aOjXlM4/HjyN9bhgBOvvCYeqoQyjpw
 CRC32     : KFz6GA==
 HAVAL     : a//4jwVxF22URf2BRNA612WOOvOrScy7
             OmI44KrNbBM=
 WHIRLPOOL : MBf+NeXElUvscJ2khIuAp+NDu1dm4h1f
             5tBQ0XrQ6dQPNA2HZfOShCBOPzEl/zrl
             +Px3QFV4FqD0jggr5sHK2g==
 GOST      : EQnPh6jQLVUqaAK9B4/U4V89tanTI55N
             K7XqZR9eMG4=


End timestamp: 2023-03-09 18:49:51 +0200 (run time: 4m 34s)
 

6. Substitute old aide database with the new that includes the modified files

As you see AIDE detected the changes in /root/test.txt

To apply the changes be known by AIDE for next time (e.g. this file was authorized and supposed to be written there) simply move the new generated database
to current aide database.

# copy generated DB to master DB
root@dlp:~# cp -p /var/lib/aide/aide.db.new /var/lib/aide/aide.db

7. Check once again to make sure recently modified files are no longer seen as changed by AIDE

Recheck again the database to make sure the files you wanted to omit are no longer mentioned as changed

root@server:~# aide –check –config /etc/aide/aide.conf
Start timestamp: 2023-03-09 16:23:05 +0200 (AIDE 0.17.3)
AIDE found differences between database and filesystem!!

Summary:
  Total number of entries:      66791
  Added entries:                0
  Removed entries:              0
  Changed entries:              3

—————————————————
Changed entries:
—————————————————

f =…. mc..H.. . : /var/lib/fail2ban/fail2ban.sqlite3
d =…. mc.. .. . : /var/lib/vnstat
f =…. mc..H.. . : /var/lib/vnstat/vnstat.db

—————————————————
Detailed information about changes:
—————————————————

File: /var/lib/fail2ban/fail2ban.sqlite3
 Mtime     : 2023-03-09 15:55:01 +0200        | 2023-03-09 16:25:02 +0200
 Ctime     : 2023-03-09 15:55:01 +0200        | 2023-03-09 16:25:02 +0200
 SHA256    : lLilXNleqSgHIP1y4o7c+oG5XyUPGzgi | MnWXC2rBMf7DNJ91kXtHXpM2c2xxF60X
             RHYH+zvlAL4=                     | DfLUQLHiSiY=
 SHA512    : iQj2pNT4NES4fBcujzdlEEGZhDnkhKgc | gxHVBxhGTKi0TjRE8/sn6/gtWsRw7Mfy
             QDlGFSAn6vi+RXesFCjCABT7/00eEm5/ | /wCfPlDK0dkRZEbr8IE2BNUhBgwwocCq
             ILcaqlQtBSLJgHjMQehzdg==         | zuazTy4N4x6X8bwOzRmY0w==
 RMD160    : Xg4YU8YI935L+DLvkRsDanS4DGo=     | +ksl9kjDoSU9aL4tR7FFFOK3mqw=
 TIGER     : 2WhhPq9kuyeNJkOicDTDeOeJB8HR8zZe | 9cvXZNbU+cp5dA5PLiX6sGncXd1Ff5QO
 CRC32     : NQmi4A==                         | y6Oixg==
 HAVAL     : t1ET+84+8WgfwqlLy4R1Qk9qGZQRUbJI | aPnCrHfmZAUm7QjROGEl6rd3776wO+Ep
             z2J0ROGduXc=                     | s/TQn7tH1tY=
 WHIRLPOOL : xKSn71gFIVhk5rWJIBaYQASl0V+pGn+3 | 9Hu6NBhz+puja7uandb21Nt6cEW6zEpm
             N85R0tiCKsTZ2+LRkxDrzcVQdss2k8+z | bTsq4xYA09ekhDHMQJHj2WpKpzZbA+t0
             oqExhoXtPsMaREjpCugd3Q==         | cttMDX8J8M/UadqfL8KZkQ==
 GOST      : WptpUlfooIlUjzDHU8XGuOU2waRud5SR | WUQfAMtye4wADUepBvblvgO+vBodS0Ej
             E/tnoBqk+q0=                     | cIbXy4vpPYc=

Directory: /var/lib/vnstat
 Mtime     : 2023-03-09 16:00:00 +0200        | 2023-03-09 16:25:01 +0200
 Ctime     : 2023-03-09 16:00:00 +0200        | 2023-03-09 16:25:01 +0200

File: /var/lib/vnstat/vnstat.db
 Mtime     : 2023-03-09 16:00:00 +0200        | 2023-03-09 16:25:01 +0200
 Ctime     : 2023-03-09 16:00:00 +0200        | 2023-03-09 16:25:01 +0200
 SHA256    : X/lnJuuSo4jX4HRzxMBodnKHAjQFvugi | N1lzhV3+tkDBud3AVlmIpDkU1c3Rqhnt
             2sh2c0u69x8=                     | YqE8naDicoM=
 SHA512    : U/g8O6G8cuhsqCUCbrElxgiy+naJKPkI | +8B9HvHhOp1C/XdlOORjyd3J2RtTbRBF
             hG7vdH9rBINjakL87UWajT0s6WSy0pvt | b0Moo2Gj+cIxaMCu5wOkgreMp6FloqJR
             ALaTcDFKHBAmmFrl8df2nQ==         | UH4cNES/bAWtonmbj4W7Vw==
 RMD160    : F6YEjIIQu2J3ru7IaTvSemA9e34=     | 8M6TIOHt0NWgR5Mo47DxU28cp+4=
 TIGER     : UEwLoeR6Qlf2oOI58pUCEDaWk0pHDkcY | Du9Ue0JA2URO2tiij31B/+663OaWKefR
 CRC32     : Bv3/6A==                         | v0Ai4w==
 HAVAL     : VD7tjHb8o8KTUo5xUH7eJEmTWgB9zjft | XA+vRnMNdVGFrO+IZtEA0icunWqBGaCf
             kOkzKxFWqqU=                     | leR27LN4ejc=
 WHIRLPOOL : wR0qt8u4N8aQn8VQ+bmfrxB7CyCWVwHi | HG31dNEEcak2zZGR24W7FDJx8mh24MaJ
             ADHpMTUxBEKOpOBlHTWXIk13qYZiD+o/ | BQNhqkuS6R/bmlhx+P+eQ/JimwPAPOaM
             XtzTB4rMbxS4Z5PAdC/07A==         | xWG7cMETIXdT9sUOUal8Sw==
 GOST      : l3ibqMkHMSPpQ+9ok51/xBthET9+JQMd | y6Ek/TyAMGV5egkfCu92Y4qqk1Xge8c0
             OZtiFGYXmgU=                     | 3ONXRveOlr0=


—————————————————
The attributes of the (uncompressed) database(s):
—————————————————

/var/lib/aide/aide.db
 SHA256    : sjCxyIkr0nC/gTkNmn7DNqAQWttreDF6
             vSUV4jBoFY4=
 SHA512    : vNMpb54qxrbOk6S1Z+m9r0UwGvRarkWY
             0m50TfMvGElfZWR1I3SSaeTdORAZ4rQe
             17Oapo5+Sc0E2E+STO93tA==
 RMD160    : anhm5E6UlKmPYYJ4WYnWXk/LT3A=
 TIGER     : 5e1wycoF35/ABrRf7FNypZ45169VTuV4
 CRC32     : EAJlFg==
 HAVAL     : R5imONWRYgNGEfhBTc096K+ABnMFkMmh
             Hsqe9xt20NU=
 WHIRLPOOL : c6zySLliXNgnOA2DkHUdLTCG2d/T18gE
             4rdAuKaC+s7gqAGyA4p2bnDHhdd0v06I
             xEGY7YXCOXiwx8BM8xHAvQ==
 GOST      : F5zO2Ovtvf+f7Lw0Ef++ign1znZAQMHM
             AApQOiB9CqA=


End timestamp: 2023-03-09 16:27:33 +0200 (run time: 4m 28s)

As you can see there are no new added entries for /root/test.txt and some other changed records for vnstat service as well as fail2ban ones, so the Intrusion detection system works just as we expected it.

8. Configure Email AIDE changed files alerting Email recipient address

From here on aide package has set its own cron job which is automatically doing the check operation every day and any new file modifications will be captured and alerts sent to local root@localhost mailbox account, so you can check it out later with mail command.

If you want to sent the Email alert for any files modifications occured to another email, assuming that you have a locally running SMTP server with a mail relay to send to external mails, you can do it via /etc/default/aide via:

MAILTO=root


For example change it to a FQDN email address

MAILTO=external_mail@your-mail.com

9.Force AIDE to run AIDE at specitic more frequent time intervals

You can as well install a cron job to execute AIDE at specific time intervals, as of your choice

Lets say you want to run a custom prepared set of files to monitor in /etc/aide/aide_custom_config.conf configure a new cronjob like below:

root@server:~# crontab -u root -e
*/5 * * * * aide -c /etc/aide/aide_custom_config.conf -u && cp /var/lib/custom-aide/aide.db{.new,}


This will execute AIDE system check every 5 minutse and email the report to ealier configured email username@whatever-your-smtp.com via /etc/default/aide

10. Check the output of AIDE for changes – useful for getting a files changes from aide from scripts

Check the command exit status.

root@server:~# echo $?

According to AIDE man pages, the AIDE’s exit status is normally 0 if no errors occurred. Except when the –check, –compare or –update command was requested, in which case the exit status is defined as:

   1 * (new files detected?)     +

   2 * (removed files detected?) +

   4 * (changed files detected?)


   Since  those three cases can occur together, the respective error codes are added. For example, if there are new files and removed files detected, the exit status will be 1 + 2 = 3.

   Additionally, the following exit codes are defined for generic error conditions in aide help manual:

   14 Error writing error

   15 Invalid argument error

   16 Unimplemented function error

   17 Invalid configureline error

   18 IO error

   19 Version mismatch error

PLEASE CONSIDER

  • That AIDE checks might be resource intensive
    and could cause a peak in CPU use and have a negative effect on lets very loaded application server machines,
    thus causing a performance issuea during integrity checks !
     
  • If you are scanning file system wide and you do it frequent, be sure to provide “enough” resources or schedule the scan at a times that the Linux host will be less used !
     
  • Whenever you made any AIDE configuration changes, remember to initialize the database to create a baseline !

Configure own Media streaming minidlna Linux server to access data from your Smart TV

Friday, February 18th, 2022

dlna-media-minidlna-server-linux-logo

If you happen to buy or already own or just have to install a Smart TV to be connected with a LAN Network to a Linux based custom built NAS (Network Attached Storage) server. You might benefit of the smart TV to Share and Watching the Disk Storage Pictures, Music, Video files from the NAS  to the Smart TV using the Media Server protocol.

You have certainly already faced the Media Server at your life on many locations in stores and Mall Buildings, because virtually any reoccuring advertisements, movies projected on the TVs, Kids entertainment or Floor and Buildings Room location schedules or timeline promition schedules are streamed using the Media Server protocol, for many years now. Thus having a brief idea about Media Server proto existence is foundamental stuff to be aware of for sysadmins and programmers.

Shortly about DLNA UPnP Media Streaming Protocol

Assuming that your Smart TV has been already connected to your Wireless Router 2.4Ghz or 5Ghz Wifi, one would think that the easiest way to share the files with the SmartTV is via something like a simple SAMBA Linux server via smb:// cifs:// protocols or via the good old NFS Server, however most of Samsung Smart TV and many other in year 2022 does not have embedded support for Samba SMB / CIFS Protocol but instead have support for the DLNA (Digital Living Network Alliance) streaming support. DLNA is part of the UPnP (Universal Plug and Play) Protocols, UPnP is also known to those using and familiar with Windows Operating Systems realm simply as UPnP AV Media server or Windows Media server.
Windows Media server for those who never heard it or used it 
 allows you to build a Playlists with Media files Video and Audio data files, that can be then later played remotely via a Local LAN or even long distance over TCP / IP remote side connected Internet network.
 

1. Set up and Stream data via Media server on  Windows PC / notebook with integrated Windows Media server 

Windows Media server configuration on Windows 7, 10 and 11 is a relatively easy to configure via:

Network and Sharing Center -> Media Streaming Options -> Turn on Media Streaming 


Then you have to define the name of the Media Library, configure whether Media server should show
on the Local Netework
for other conected devices and Allow or Block access from the other network present devices.


 2. Using a more advanced Media Server to get rid about the limitation of DLNA set of supported file codecs.
 

The Windows default embedded DLNA server is the easiest and fastest one to set up, but it’s not necessarily the best option.
Due to the way DLNA works, you can only stream certain types of media codecs supported by the server. If you have other types of media not defaultly supported and defined by DLNA win server, it just won’t work.

Thus thanksfully it was developed other DLNA servers improve this by offering real-time transcoding.
If you try to play an unsupported file, they’ll transcode it on-the-fly, streaming the video in a supported format to your DLNA device.
Just to name few of the DLNA Media Streaming servers that have supported for larger MPG Video, MP3 / MP4 and other Audio formats encodings,
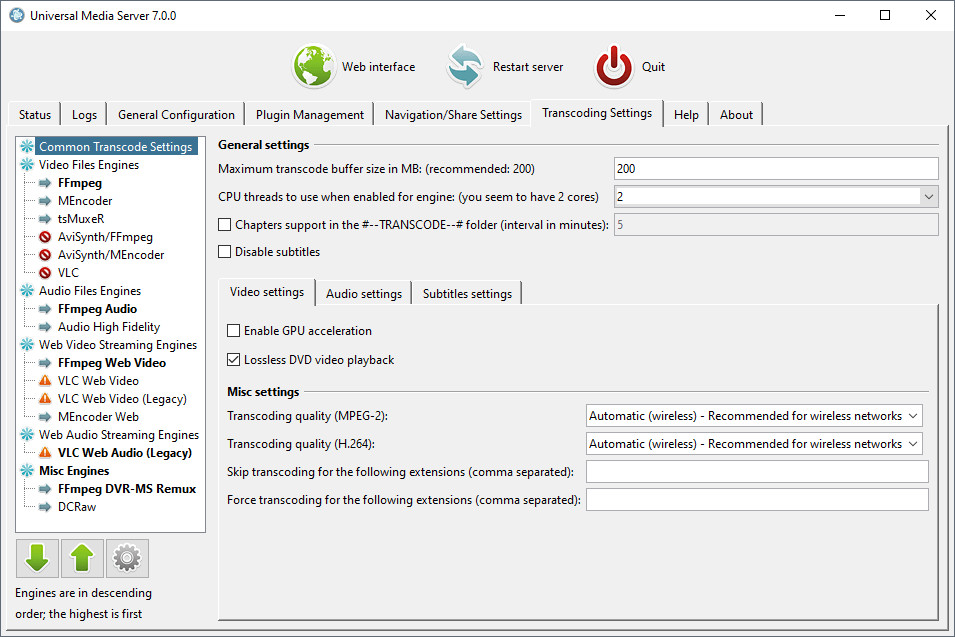
you can try Plex or the Universal Media Server both of which are free to use under freeware license and have versions for Linux and Mac OS.


Universal_media_server-windows-screenshot-stream-media-data-on-network


3. Setting up a free as in freedom DLNA server MiniDLNA (ReadyMedia) on GNU / Linux


ReadyMedia (formerly known as MiniDLNA) is a simple media server software, with the aim of being fully compliant with DLNA/UPnP-AV clients. It was originally developed by a NETGEAR employee for the ReadyNAS product line.

MiniDNLA daemon serves media files (music, pictures, and video) to clients on a network. Linux Media servers clients you can use to test or scan your network for existent Media servers are multiple perhaps the most famous ones are applications such as totem (for QT users) and Kodi (for KDE).
The devices that can be used with minidlna are devices such as portable media players (iPod), Smartphones, Televisions, Tablets, and gaming systems (such as PS3 and Xbox 360) etc.
 

ReadyMedia is a simple, lightweight, the downside of it is It does not have a web interface for administration and must be configured by editing a text file. But for a simple Video streaming in most cases does a great job.


3.1 Install the minidlna software package 

Minidlna is available out of the box on most linux distributions (Fedora / CentOS / Debian / Ubuntu etc.) as of year 2022.

  • Install on Debian Linux (Deb based distro)

media-server:~# apt install minidlna –yes

  • Install on Fedora / CentOS (other RPM based distro)

media-server:~# yum install -y minidlna


3.2 Configure minidlna

– /etc/minidlna.conf – main config file
Open with text editor and set user= ,  media_dir= ,  port=, friendly_name= ,  network_interface= variables as minimum.
To be add minidlnad support symlinks to external file locations, set also wide_links=yes

media-server:~# vim /etc/minidlna.conf

#user=minidlna
user=root
media_dir=/var/www/owncloud/data
network_interface=eth0,eth1

# Port number for HTTP traffic (descriptions, SOAP, media transfer).
# This option is mandatory (or it must be specified on the command-line using
# "-p").
port=8200
# Name that the DLNA server presents to clients.
# Defaults to "hostname: username".
#friendly_name=
friendly_name=DLNAServer Linux
# set this to yes to allow symlinks that point outside user-defined media_dirs.
wide_links=yes
# Automatic discovery of new files in the media_dir directory.
#inotify=yes

Keep in mind that it is supported to provide separete media_dir and provide different USB / External Hard Drive or SD Card sources separated only by content be it Video, Audio or Pictures short named in config as (A,V,P).

media_dir=P,/media/usb/photos
media_dir=V,/media/external-disk/videos
media_dir=A,/media/sd-card/music

You might want to diasble / ineable the inotify depending on your liking, if you don't plan to place new files automated to the NAS and don't care to get indexed and streamed from the Media server you can disable it with inotify=no otherwise keep that on.

– /etc/default/minidlna – additional startup config to set minidlnad (daemon) options such as setup to run with admin superuser root:root 
(usually it is safe to leave it empty and set the user=root, whether needed straight from /etc/minidlna.conf
That's all now go on and launch the minidlna and enable it to automatically boot on Linux boot.

media-server:~# systemctl start minidlna
media-server:~# systemctl enable minidlna
media-server:~# systemctl status minidlna


3.3 Rebuilt minidlna database with data indexed files

If you need to re- generate minidlna's database.
To do so stop the minidlna server with the
 

media-server:~# systemctop stop minidlna


 command, then issue the following command (both commands should be run as root):

media-server:~# minidlna -R

Since this command might kept in the background and keep the minidlna server running with incorrect flags, after a minute or two kill minidlna process and relaunch the server via sysctl.

media-server:~#  killall -9 minidlna
media-server:~#  systemctl start minidlna


3.4 Permission Issues / Scanning issues

If you plan to place files in /home directory. You better have a seperate partition or folder *outside* your "home" directory devoted to your media. Default user with which minidlna runs is minidlna, this could prevent some files with root or other users being red. So either run minidlna daemon as root or as other user with whom all media files should be accessible.
If service runs as root:root, and still getting some scanning issues, check permissions on your files and remove special characters from file names.
 

media-server:~# tail -10 /var/log/minidlna/minidlna.log 
[2022/02/17 22:51:36] scanner.c:489: warn: Unsuccessful getting details for /var/www/owncloud/data/Videos/Family-Videos/FILE006.MPG
[2022/02/17 22:52:08] scanner.c:819: warn: Scanning /var/www/owncloud/data finished (10637 files)!
[2022/02/17 22:52:08] playlist.c:135: warn: Parsing playlists…
[2022/02/17 22:52:08] playlist.c:269: warn: Finished parsing playlists.
minidlna.c:1126: warn: Starting MiniDLNA version 1.3.0.
minidlna.c:1186: warn: HTTP listening on port 8200
scanner.c:489: warn: Unsuccessful getting details for /var/www/owncloud/data/admin/files/origin/External SD card/media/Viber Images/IMG-4477de7b1eee273d5e6ae25236c5c223-V.jpg
scanner.c:489: warn: Unsuccessful getting details for /var/www/owncloud/data/Videos/Family-Video/FILE006.MPG
playlist.c:135: warn: Parsing playlists…
playlist.c:269: warn: Finished parsing playlists.


3.5. Fix minidlna Inotify errors

In /etc/sysctl.conf 

Add:

fs.inotify.max_user_watches=65536

in a blank line at end of file and do 

media-server:~# sysctl -p

Debugging minidlna problems, index errors, warnings etc

minidlna does write by default to /var/log/minidlna/minidlna.log inspect the log closely and you should get most of the time what is wrong with it.
Note that some files might not get indexed because minidlna won't support the strange file codecs such as SWF encoding, if you have some important files to stream that are not indexed by minidlna, then install and try one of the more sophisticated free software Media Servers for Linux:

plex-media-streaming-server-screenshot

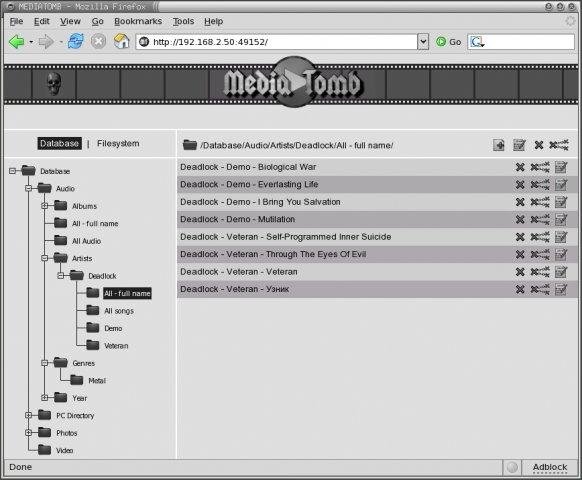
Note that most Linux users from my quick research shows, MediaTomb is the preferred advanced features Open Source Linux Media Server of choice for most of the guys.

mediatomb-linux-media-streaming-server-picture.jpg.webp


4. Test minidlna Linux servers works, getting information of other DLNA Servers on the network

media-server:~# lynx -dump  http://127.0.0.1:8200
MiniDLNA status

  Media library

   Audio files 0
   Video files 455
   Image files 10182

  Connected clients

   ID Type                   IP Address    HW Address        Connections
   0  Samsung Series [CDEFJ] 192.168.1.11  7C:0A:3D:88:A6:FA 0
   1  Generic DLNA 1.5       192.168.0.241 00:16:4E:1D:48:05 0
   2  Generic DLNA 1.5       192.168.1.18  00:16:3F:0D:45:05 0
   3  Unknown                127.0.0.1     FF:FF:FF:FF:FF:FF 0

   -1 connections currently open
 

Note that there is -1 connections (no active connections) currently to the server. 
The 2 Generic DLNA 1.5 IPs are another DLNA servers provided by a OpenXEN hosted Windows 7 Virtual machines, that are also broadcasting their existence in the network. The Samsung Series [CDEFJ] is the DLNA client on the Samsung TV found, used to detect and stream data from the just configured Linux dlna server.

The DLNA Protocol enabled devices on a network as you can see are quite easy to access, querying localhost on the 8200 server dumps, what minidlna knows, the rest of IPs connecting should not be able to receive this info. But anyways since the minidlna does not have a special layers of security to access it, but the only way to restrict is filtering the 8200 port, it is a very good idea to put a good iptables firewall on the machine to allow only the devices that should have access to the data.

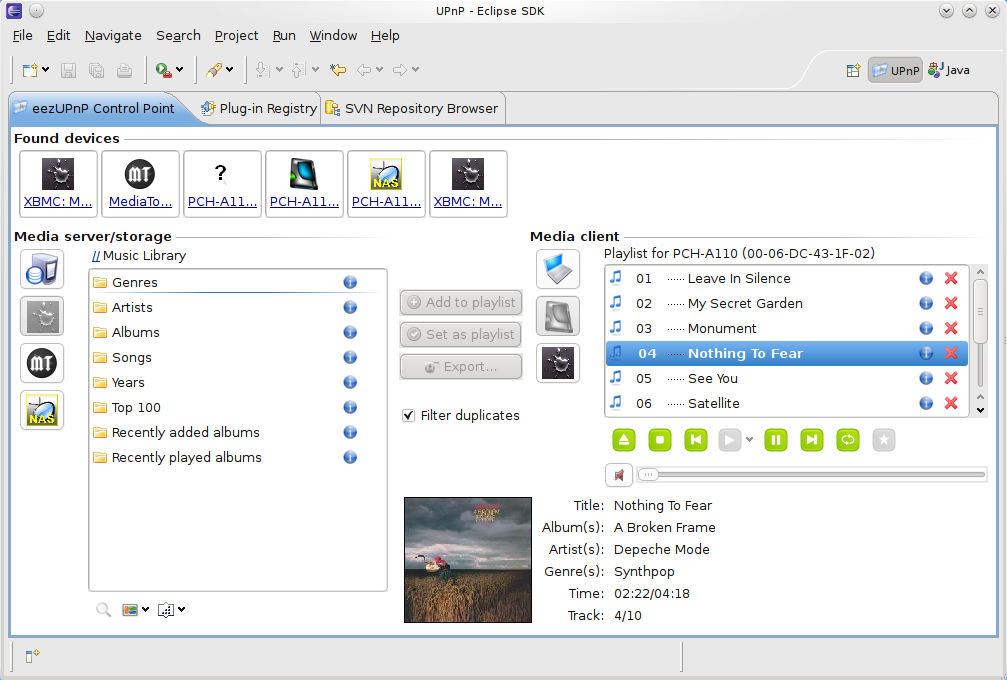
Further more if you happen to need to access the Media files on Linux from GUI you might use some client as upmentioned totem, VLC or if you need something more feature rich Java eezUPnP .

eeZUPnP-screenshot-java-client-for-media-server

That's all folks !
Enjoy your media on the TV 🙂

Install and configure rkhunter for improved security on a PCI DSS Linux / BSD servers with no access to Internet

Wednesday, November 10th, 2021

install-and-configure-rkhunter-with-tightened-security-variables-rkhunter-logo

rkhunter or Rootkit Hunter scans systems for known and unknown rootkits. The tool is not new and most system administrators that has to mantain some good security servers perhaps already use it in their daily sysadmin tasks.

It does this by comparing SHA-1 Hashes of important files with known good ones in online databases, searching for default directories (of rootkits), wrong permissions, hidden files, suspicious strings in kernel modules, commmon backdoors, sniffers and exploits as well as other special tests mostly for Linux and FreeBSD though a ports for other UNIX operating systems like Solaris etc. are perhaps available. rkhunter is notable due to its inclusion in popular mainstream FOSS operating systems (CentOS, Fedora,Debian, Ubuntu etc.).

Even though rkhunter is not rapidly improved over the last 3 years (its last Official version release was on 20th of Febuary 2018), it is a good tool that helps to strengthen even further security and it is often a requirement for Unix servers systems that should follow the PCI DSS Standards (Payment Card Industry Data Security Standards).

Configuring rkhunter is a pretty straight forward if you don't have too much requirements but I decided to write this article for the reason there are fwe interesting options that you might want to adopt in configuration to whitelist any files that are reported as Warnings, as well as how to set a configuration that sets a stricter security checks than the installation defaults. 

1. Install rkhunter .deb / .rpm package depending on the Linux distro or BSD

  • If you have to place it on a Redhat based distro CentOS / Redhat / Fedora

[root@Centos ~]# yum install -y rkhunter


  • On Debian distros the package name is equevallent to install there exec usual:

root@debian:~# apt install –yes rkhunter

  • On FreeBSD / NetBSD or other BSD forks you can install it from the BSD "World" ports system or install it from a precompiled binary.

freebsd# pkg install rkhunter

One important note to make here is to have a fully functional Alarming from rkhunter, you will have to have a fully functional configured postfix / exim / qmail whatever mail server to relay via official SMTP so you the Warning Alarm emails be able to reach your preferred Alarm email address. If you haven't installed postfix for example and configure it you might do.

– On Deb based distros 

[root@Centos ~]#yum install postfix


– On RPM based distros

root@debian:~# apt-get install –yes postfix


and as minimum, further on configure some functional Email Relay server within /etc/postfix/main.cf
 

# vi /etc/postfix/main.cf
relayhost = [relay.smtp-server.com]

2. Prepare rkhunter.conf initial configuration


Depending on what kind of files are present on the filesystem it could be for some reasons some standard package binaries has to be excluded for verification, because they possess unusual permissions because of manual sys admin monification this is done with the rkhunter variable PKGMGR_NO_VRFY.

If remote logging is configured on the system via something like rsyslog you will want to specificly tell it to rkhunter so this check as a possible security issue is skipped via ALLOW_SYSLOG_REMOTE_LOGGING=1. 

In case if remote root login via SSH protocol is disabled via /etc/ssh/sshd_config
PermitRootLogin no variable, the variable to include is ALLOW_SSH_ROOT_USER=no

It is useful to also increase the hashing check algorithm for security default one SHA256 you might want to change to SHA512, this is done via rkhunter.conf var HASH_CMD=SHA512

Triggering new email Warnings has to be configured so you receive, new mails at a preconfigured mailbox of your choice via variable
MAIL-ON-WARNING=SetMailAddress


# vi /etc/rkhunter.conf

PKGMGR_NO_VRFY=/usr/bin/su

PKGMGR_NO_VRFY=/usr/bin/passwd

ALLOW_SYSLOG_REMOTE_LOGGING=1

# Needed for corosync/pacemaker since update 19.11.2020

ALLOWDEVFILE=/dev/shm/qb-*/qb-*

# enabled ssh root access skip

ALLOW_SSH_ROOT_USER=no

HASH_CMD=SHA512

# Email address to sent alert in case of Warnings

MAIL-ON-WARNING=Your-Customer@Your-Email-Server-Destination-Address.com

MAIL-ON-WARNING=Your-Second-Peronsl-Email-Address@SMTP-Server.com

DISABLE_TESTS=os_specific


Optionally if you're using something specific such as corosync / pacemaker High Availability cluster or some specific software that is creating /dev/ files identified as potential Risks you might want to add more rkhunter.conf options like:
 

# Allow PCS/Pacemaker/Corosync
ALLOWDEVFILE=/dev/shm/qb-attrd-*
ALLOWDEVFILE=/dev/shm/qb-cfg-*
ALLOWDEVFILE=/dev/shm/qb-cib_rw-*
ALLOWDEVFILE=/dev/shm/qb-cib_shm-*
ALLOWDEVFILE=/dev/shm/qb-corosync-*
ALLOWDEVFILE=/dev/shm/qb-cpg-*
ALLOWDEVFILE=/dev/shm/qb-lrmd-*
ALLOWDEVFILE=/dev/shm/qb-pengine-*
ALLOWDEVFILE=/dev/shm/qb-quorum-*
ALLOWDEVFILE=/dev/shm/qb-stonith-*
ALLOWDEVFILE=/dev/shm/pulse-shm-*
ALLOWDEVFILE=/dev/md/md-device-map
# Needed for corosync/pacemaker since update 19.11.2020
ALLOWDEVFILE=/dev/shm/qb-*/qb-*

# tomboy creates this one
ALLOWDEVFILE="/dev/shm/mono.*"
# created by libv4l
ALLOWDEVFILE="/dev/shm/libv4l-*"
# created by spice video
ALLOWDEVFILE="/dev/shm/spice.*"
# created by mdadm
ALLOWDEVFILE="/dev/md/autorebuild.pid"
# 389 Directory Server
ALLOWDEVFILE=/dev/shm/sem.slapd-*.stats
# squid proxy
ALLOWDEVFILE=/dev/shm/squid-cf*
# squid ssl cache
ALLOWDEVFILE=/dev/shm/squid-ssl_session_cache.shm
# Allow podman
ALLOWDEVFILE=/dev/shm/libpod*lock*


3. Set the proper mirror database URL location to internal network repository


Usually  file /var/lib/rkhunter/db/mirrors.dat does contain Internet server address where latest version of mirrors.dat could be fetched, below is how it looks by default on Debian 10 Linux.

root@debian:/var/lib/rkhunter/db# cat mirrors.dat 
Version:2007060601
mirror=http://rkhunter.sourceforge.net

As you can guess a machine that doesn't have access to the Internet neither directly, neither via some kind of secure proxy because it is in a Paranoic Demilitarized Zone (DMZ) Network with many firewalls. What you can do then is setup another Mirror server (Apache / Nginx) within the local PCI secured LAN that gets regularly the database from official database on http://rkhunter.sourceforge.net/ (by installing and running rkhunter –update command on the Mirror WebServer and copying data under some directory structure on the remote local LAN accessible server, to keep the DB uptodate you might want to setup a cron to periodically copy latest available rkhunter database towards the http://mirror-url/path-folder/)

# vi /var/lib/rkhunter/db/mirrors.dat

local=http://rkhunter-url-mirror-server-url.com/rkhunter/1.4/


A mirror copy of entire db files from Debian 10.8 ( Buster ) ready for download are here.

Update entire file property db and check for rkhunter db updates


# rkhunter –update && rkhunter –propupdate

[ Rootkit Hunter version 1.4.6 ]

Checking rkhunter data files…
  Checking file mirrors.dat                                  [ Skipped ]
  Checking file programs_bad.dat                             [ No update ]
  Checking file backdoorports.dat                            [ No update ]
  Checking file suspscan.dat                                 [ No update ]
  Checking file i18n/cn                                      [ No update ]
  Checking file i18n/de                                      [ No update ]
  Checking file i18n/en                                      [ No update ]
  Checking file i18n/tr                                      [ No update ]
  Checking file i18n/tr.utf8                                 [ No update ]
  Checking file i18n/zh                                      [ No update ]
  Checking file i18n/zh.utf8                                 [ No update ]
  Checking file i18n/ja                                      [ No update ]


rkhunter-update-propupdate-screenshot-centos-linux


4. Initiate a first time check and see whether something is not triggering Warnings

# rkhunter –check

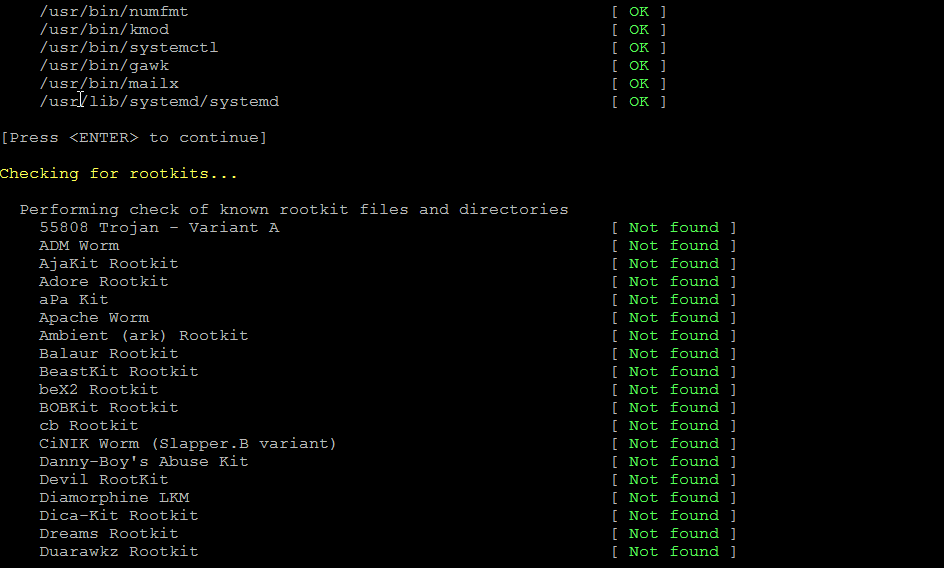
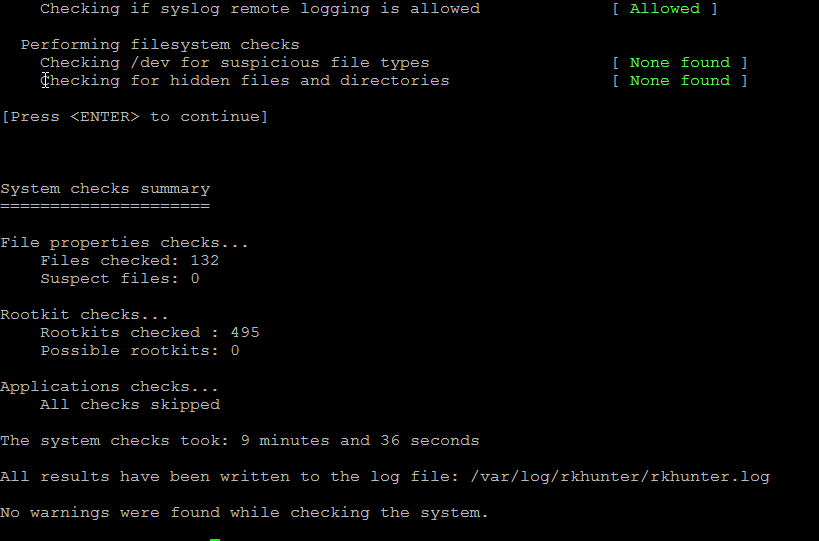
rkhunter-checking-for-rootkits-linux-screenshot

As you might have to run the rkhunter multiple times, there is annoying Press Enter prompt, between checks. The idea of it is that you're able to inspect what went on but since usually, inspecting /var/log/rkhunter/rkhunter.log is much more easier, I prefer to skip this with –skip-keypress option.

# rkhunter –check  –skip-keypress


5. Whitelist additional files and dev triggering false warnings alerts


You have to keep in mind many files which are considered to not be officially PCI compatible and potentially dangerous such as lynx browser curl, telnet etc. might trigger Warning, after checking them thoroughfully with some AntiVirus software such as Clamav and checking the MD5 checksum compared to a clean installed .deb / .rpm package on another RootKit, Virus, Spyware etc. Clean system (be it virtual machine or a Testing / Staging) machine you might want to simply whitelist the files which are incorrectly detected as dangerous for the system security.

Again this can be achieved with

PKGMGR_NO_VRFY=

Some Cluster softwares that are preparing their own /dev/ temporary files such as Pacemaker / Corosync might also trigger alarms, so you might want to suppress this as well with ALLOWDEVFILE

ALLOWDEVFILE=/dev/shm/qb-*/qb-*


If Warnings are found check what is the issue and if necessery white list files due to incorrect permissions in /etc/rkhunter.conf .

rkhunter-warnings-found-screenshot

Re-run the check until all appears clean as in below screenshot.

rkhunter-clean-report-linux-screenshot

Fixing Checking for a system logging configuration file [ Warning ]

If you happen to get some message like, message appears when rkhunter -C is done on legacy CentOS release 6.10 (Final) servers:

[13:45:29] Checking for a system logging configuration file [ Warning ]
[13:45:29] Warning: The 'systemd-journald' daemon is running, but no configuration file can be found.
[13:45:29] Checking if syslog remote logging is allowed [ Allowed ]

To fix it, you will have to disable SYSLOG_CONFIG_FILE at all.
 

SYSLOG_CONFIG_FILE=NONE

Install and enable Sysstats IO / DIsk / CPU / Network monitoring console suite on Redhat 8.3, Few sar useful command examples

Tuesday, September 28th, 2021

linux-sysstat-monitoring-logo


Why to monitoring CPU, Memory, Hard Disk, Network usage etc. with sysstats tools?
 

Using system monitoring tools such as Zabbix, Nagios Monit is a good approach, however sometimes due to zabbix server interruptions you might not be able to track certain aspects of system performance on time. Thus it is always a good idea to 
Gain more insights on system peroformance from command line. Of course there is cmd tools such as iostat and top, free, vnstat that provides plenty of useful info on system performance issues or bottlenecks. However from my experience to have a better historical data that is systimized and all the time accessible from console it is a great thing to have sysstat package at place. Since many years mostly on every server I administer, I've been using sysstats to monitor what is going on servers over a short time frames and I'm quite happy with it. In current company we're using Redhats and CentOS-es and I had to install sysstats on Redhat 8.3. I've earlier done it multiple times on Debian / Ubuntu Linux and while I've faced on some .deb distributions complications of making sysstat collect statistics I've come with an article on Howto fix sysstat Cannot open /var/log/sysstat/sa no such file or directory” on Debian / Ubuntu Linux
 

Sysstat contains the following tools related to collecting I/O and CPU statistics:
iostat
Displays an overview of CPU utilization, along with I/O statistics for one or more disk drives.
mpstat
Displays more in-depth CPU statistics.
Sysstat also contains tools that collect system resource utilization data and create daily reports based on that data. These tools are:
sadc
Known as the system activity data collector, sadc collects system resource utilization information and writes it to a file.
sar
Producing reports from the files created by sadc, sar reports can be generated interactively or written to a file for more intensive analysis.

My experience with CentOS 7 and Fedora to install sysstat it was pretty straight forward, I just had to install it via yum install sysstat wait for some time and use sar (System Activity Reporter) tool to report collected system activity info stats over time.
Unfortunately it seems on RedHat 8.3 as well as on CentOS 8.XX instaling sysstats does not work out of the box.

To complete a successful installation of it on RHEL 8.3, I had to:

[root@server ~]# yum install -y sysstat


To make sysstat enabled on the system and make it run, I've enabled it in sysstat

[root@server ~]# systemctl enable sysstat


Running immediately sar command, I've faced the shitty error:


Cannot open /var/log/sysstat/sa18:
No such file or directory. Please check if data collecting is enabled”


Once installed I've waited for about 5 minutes hoping, that somehow automatically sysstat would manage it but it didn't.

To solve it, I've had to create additionally file /etc/cron.d/sysstat (weirdly RPM's post install instructions does not tell it to automatically create it)

[root@server ~]# vim /etc/cron.d/sysstat

# run system activity accounting tool every 10 minutes
0 * * * * root /usr/lib64/sa/sa1 60 59 &
# generate a daily summary of process accounting at 23:53
53 23 * * * root /usr/lib64/sa/sa2 -A &


  • /usr/local/lib/sa1 is a shell script that we can use for scheduling cron which will create daily binary log file.
  • /usr/local/lib/sa2 is a shell script will change binary log file to human-readable form.


[root@server ~]# chmod 600 /etc/cron.d/sysstat

[root@server ~]# systemctl restart sysstat


In a while if sysstat is working correctly you should get produced its data history logs inside /var/log/sa

[root@server ~]# ls -al /var/log/sa 


Note that the standard sysstat history files on Debian and other modern .deb based distros such as Debian 10 (in  y.2021) is stored under /var/log/sysstat

Here is few useful uses of sysstat cmds


1. Check with sysstat machine history SWAP and RAM Memory use


To lets say check last 10 minutes SWAP memory use:

[hipo@server yum.repos.d] $ sar -W  |last -n 10
 

Linux 4.18.0-240.el8.x86_64 (server)       09/28/2021      _x86_64_        (8 CPU)

12:00:00 AM  pswpin/s pswpout/s
12:00:01 AM      0.00      0.00
12:01:01 AM      0.00      0.00
12:02:01 AM      0.00      0.00
12:03:01 AM      0.00      0.00
12:04:01 AM      0.00      0.00
12:05:01 AM      0.00      0.00
12:06:01 AM      0.00      0.00

[root@ccnrlb01 ~]# sar -r | tail -n 10
14:00:01        93008   1788832     95.06         0   1357700    725740      9.02    795168    683484        32
14:10:01        78756   1803084     95.81         0   1358780    725740      9.02    827660    652248        16
14:20:01        92844   1788996     95.07         0   1344332    725740      9.02    813912    651620        28
14:30:01        92408   1789432     95.09         0   1344612    725740      9.02    816392    649544        24
14:40:01        91740   1790100     95.12         0   1344876    725740      9.02    816948    649436        36
14:50:01        91688   1790152     95.13         0   1345144    725740      9.02    817136    649448        36
15:00:02        91544   1790296     95.14         0   1345448    725740      9.02    817472    649448        36
15:10:01        91108   1790732     95.16         0   1345724    725740      9.02    817732    649340        36
15:20:01        90844   1790996     95.17         0   1346000    725740      9.02    818016    649332        28
Average:        93473   1788367     95.03         0   1369583    725074      9.02    800965    671266        29


2. Check system load? Are my processes waiting too long to run on the CPU?

[root@server ~ ]# sar -q |head -n 10
Linux 4.18.0-240.el8.x86_64 (server)       09/28/2021      _x86_64_        (8 CPU)

12:00:00 AM   runq-sz  plist-sz   ldavg-1   ldavg-5  ldavg-15   blocked
12:00:01 AM         0       272      0.00      0.02      0.00         0
12:01:01 AM         1       271      0.00      0.02      0.00         0
12:02:01 AM         0       268      0.00      0.01      0.00         0
12:03:01 AM         0       268      0.00      0.00      0.00         0
12:04:01 AM         1       271      0.00      0.00      0.00         0
12:05:01 AM         1       271      0.00      0.00      0.00         0
12:06:01 AM         1       265      0.00      0.00      0.00         0


3. Show various CPU statistics per CPU use
 

On a multiprocessor, multi core server sometimes for scripting it is useful to fetch processor per use historic data, 
this can be attained with:


[hipo@server ~ ] $ mpstat -P ALL
Linux 4.18.0-240.el8.x86_64 (server)       09/28/2021      _x86_64_        (8 CPU)

06:08:38 PM  CPU    %usr   %nice    %sys %iowait    %irq   %soft  %steal  %guest  %gnice   %idle
06:08:38 PM  all    0.17    0.02    0.25    0.00    0.05    0.02    0.00    0.00    0.00   99.49
06:08:38 PM    0    0.22    0.02    0.28    0.00    0.06    0.03    0.00    0.00    0.00   99.39
06:08:38 PM    1    0.28    0.02    0.36    0.00    0.08    0.02    0.00    0.00    0.00   99.23
06:08:38 PM    2    0.27    0.02    0.31    0.00    0.06    0.01    0.00    0.00    0.00   99.33
06:08:38 PM    3    0.15    0.02    0.22    0.00    0.03    0.01    0.00    0.00    0.00   99.57
06:08:38 PM    4    0.13    0.02    0.20    0.01    0.03    0.01    0.00    0.00    0.00   99.60
06:08:38 PM    5    0.14    0.02    0.27    0.00    0.04    0.06    0.01    0.00    0.00   99.47
06:08:38 PM    6    0.10    0.02    0.17    0.00    0.04    0.02    0.00    0.00    0.00   99.65
06:08:38 PM    7    0.09    0.02    0.15    0.00    0.02    0.01    0.00    0.00    0.00   99.70


sar-sysstat-cpu-statistics-screenshot

Monitor processes and threads currently being managed by the Linux kernel.

[hipo@server ~ ] $ pidstat

pidstat-various-random-process-statistics

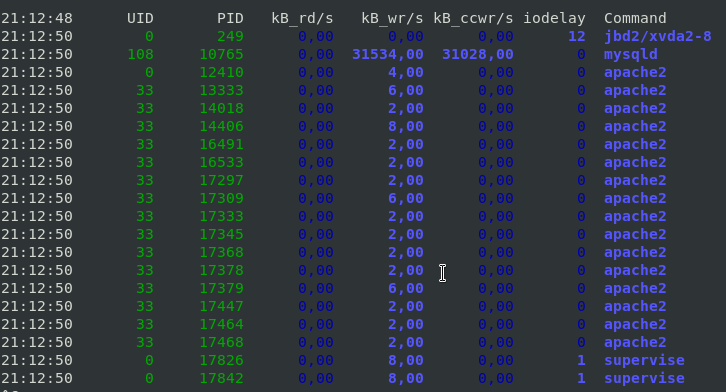
[hipo@server ~ ] $ pidstat -d 2


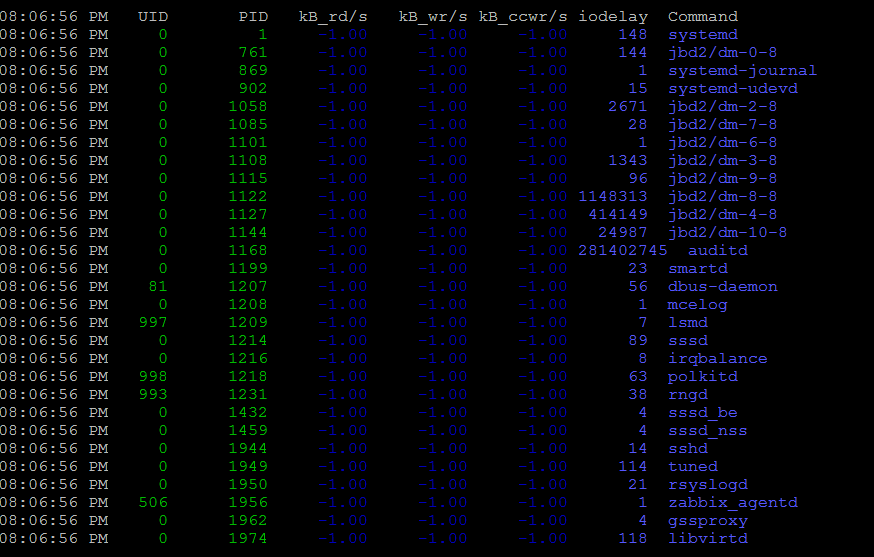
pidstat-show-processes-with-most-io-activities-linux-screenshot

This report tells us that there is few processes with heave I/O use Filesystem system journalling daemon jbd2, apache, mysqld and supervise, in 3rd column you see their respective PID IDs.

To show threads used inside a process (like if you press SHIFT + H) inside Linux top command:

[hipo@server ~ ] $ pidstat -t -p 10765 1 3

Linux 4.19.0-14-amd64 (server)     28.09.2021     _x86_64_    (10 CPU)

21:41:22      UID      TGID       TID    %usr %system  %guest   %wait    %CPU   CPU  Command
21:41:23      108     10765         –    1,98    0,99    0,00    0,00    2,97     1  mysqld
21:41:23      108         –     10765    0,00    0,00    0,00    0,00    0,00     1  |__mysqld
21:41:23      108         –     10768    0,00    0,00    0,00    0,00    0,00     0  |__mysqld
21:41:23      108         –     10771    0,00    0,00    0,00    0,00    0,00     5  |__mysqld
21:41:23      108         –     10784    0,00    0,00    0,00    0,00    0,00     7  |__mysqld
21:41:23      108         –     10785    0,00    0,00    0,00    0,00    0,00     6  |__mysqld
21:41:23      108         –     10786    0,00    0,00    0,00    0,00    0,00     2  |__mysqld

10765 – is the Process ID whose threads you would like to list

With pidstat, you can further monitor processes for memory leaks with:

[hipo@server ~ ] $ pidstat -r 2


4. Report paging statistics for some old period


[root@server ~ ]# sar -B -f /var/log/sa/sa27 |head -n 10
Linux 4.18.0-240.el8.x86_64 (server)       09/27/2021      _x86_64_        (8 CPU)

15:42:26     LINUX RESTART      (8 CPU)

15:55:30     LINUX RESTART      (8 CPU)

04:00:01 PM  pgpgin/s pgpgout/s   fault/s  majflt/s  pgfree/s pgscank/s pgscand/s pgsteal/s    %vmeff
04:01:01 PM      0.00     14.47    629.17      0.00    502.53      0.00      0.00      0.00      0.00
04:02:01 PM      0.00     13.07    553.75      0.00    419.98      0.00      0.00      0.00      0.00
04:03:01 PM      0.00     11.67    548.13      0.00    411.80      0.00      0.00      0.00      0.00


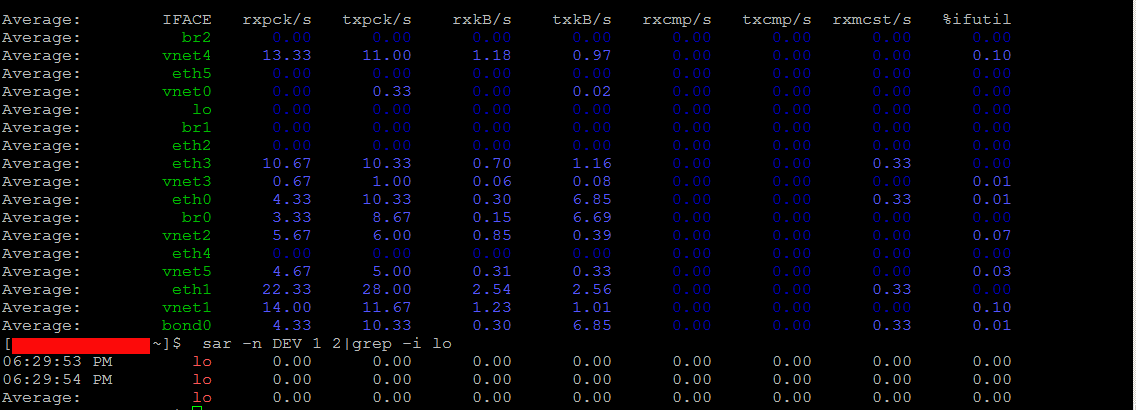
5.  Monitor Received RX and Transmitted TX network traffic perl Network interface real time
 

To print out Received and Send traffic per network interface 4 times in a raw

sar-sysstats-network-traffic-statistics-screenshot
 

[hipo@server ~ ] $ sar -n DEV 1 4


To continusly monitor all network interfaces I/O traffic

[hipo@server ~ ] $ sar -n DEV 1


To only monitor a certain network interface lets say loopback interface (127.0.0.1) received / transmitted bytes

[hipo@server yum.repos.d] $  sar -n DEV 1 2|grep -i lo
06:29:53 PM        lo      0.00      0.00      0.00      0.00      0.00      0.00      0.00      0.00
06:29:54 PM        lo      0.00      0.00      0.00      0.00      0.00      0.00      0.00      0.00
Average:           lo      0.00      0.00      0.00      0.00      0.00      0.00      0.00      0.00


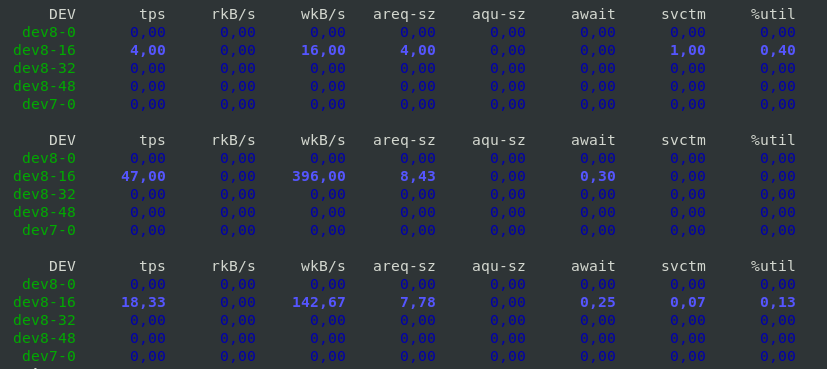
6. Monitor block devices use
 

To check block devices use 3 times in a raw
 

[hipo@server yum.repos.d] $ sar -d 1 3


sar-sysstats-blockdevice-statistics-screenshot
 

7. Output server monitoring data in CSV database structured format


For preparing a nice graphs with Excel from CSV strucuted file format, you can dump the collected data as so:

 [root@server yum.repos.d]# sadf -d /var/log/sa/sa27 — -n DEV | grep -v lo|head -n 10
server-name-fqdn;-1;2021-09-27 13:42:26 UTC;LINUX-RESTART    (8 CPU)
# hostname;interval;timestamp;IFACE;rxpck/s;txpck/s;rxkB/s;txkB/s;rxcmp/s;txcmp/s;rxmcst/s;%ifutil
server-name-fqdn;-1;2021-09-27 13:55:30 UTC;LINUX-RESTART    (8 CPU)
# hostname;interval;timestamp;IFACE;rxpck/s;txpck/s;rxkB/s;txkB/s;rxcmp/s;txcmp/s;rxmcst/s;%ifutil
server-name-fqdn;60;2021-09-27 14:01:01 UTC;eth1;19.42;16.12;1.94;1.68;0.00;0.00;0.00;0.00
server-name-fqdn;60;2021-09-27 14:01:01 UTC;eth0;7.18;9.65;0.55;0.78;0.00;0.00;0.00;0.00
server-name-fqdn;60;2021-09-27 14:01:01 UTC;eth2;5.65;5.13;0.42;0.39;0.00;0.00;0.00;0.00
server-name-fqdn;60;2021-09-27 14:02:01 UTC;eth1;18.90;15.55;1.89;1.60;0.00;0.00;0.00;0.00
server-name-fqdn;60;2021-09-27 14:02:01 UTC;eth0;7.15;9.63;0.55;0.74;0.00;0.00;0.00;0.00
server-name-fqdn;60;2021-09-27 14:02:01 UTC;eth2;5.67;5.15;0.42;0.39;0.00;0.00;0.00;0.00

To graph the output data you can use Excel / LibreOffice's Excel equivalent Calc or if you need to dump a CSV sar output and generate it on the fly from a script  use gnuplot 


What we've learned?


How to install and enable on cron sysstats on Redhat and CentOS 8 Linux ? 
How to continuously monitor CPU / Disk and Network, block devices, paging use and processes and threads used by the kernel per process ?  
As well as how to export previously collected data to CSV to import to database or for later use inrder to generate graphic presentation of data.
Cheers ! 🙂
 

Install certbot on Debian, Ubuntu, CentOS, Fedora Linux 10 / Generate and use Apache / Nginx SSL Letsencrypt certificates

Monday, December 21st, 2020

letsencrypt certbot install on any linux distribution with apache or nginx webserver howto</a><p> Let's Encrypt is a free, automated, and open certificate authority brought to you by the nonprofit <a data-cke-saved-href=
Internet Security Research Group (ISRG). ISRG group gave initiative with the goal to "encrypt the internet", i.e. offer free alternative to the overpriced domani registrer sold certificates with the goal to make more people offer SSL / TSL Free secured connection line on their websites. 
ISRG group supported Letsencrypt non-profit certificate authority actrively by Internet industry standard giants such as Mozilla, Cisco, EFF (Electronic Frontier Foundation),  Facebook, Google Chrome, Amazon AWS, OVH Cloud, Redhat, VMWare, Github and many many of the leading companies in IT.

Letsencrpyt is aimed at automating the process designed to overcome manual creation, validation, signing, installation, and renewal of certificates for secure websites. I.e. you don't have to manually write on console complicated openssl command lines with passing on Certificate CSR /  KEY / PEM files etc and generate Self-Signed Untrusted Authority Certificates (noted in my previous article How to generate Self-Signed SSL Certificates with openssl or use similar process to pay money generate secret key and submit the key to third party authority through a their website webadmin  interface in order to Generate SSL brought by Godaddy or Other Certificate Authority.

But of course as you can guess there are downsides as you submit your private key automatically via letsencrypt set of SSL certificate automation domain scripts to a third party Certificate Authority which is at Letsencrypt.org. A security intrusion in their private key store servers might mean a catastrophy for your data as malicious stealer might be able to decrypt your data with some additional effort and see in plain text what is talking to your Apache / Nginx or Mail Server nevertheless the cert. Hence for a high standards such as PCI environments Letsencrypt as well as for the paranoid security freak admins,  who don't trust the mainstream letsencrypt is definitely not a choice. Anyways for most small and midsized businesses who doesn't hold too much of a top secret data and want a moderate level of security Letsencrypt is a great opportunity to try. But enough talk, lets get down to business.

How to install and use certbot on Debian GNU / Linux 10 Buster?
Certbot is not available from the Debian software repositories by default, but it’s possible to configure the buster-backports repository in your /etc/apt/sources.list file to allow you to install a backport of the Certbot software with APT tool.
 

1. Install certbot on Debian / Ubuntu Linux


root@webserver:/etc/apt# tail -n 1 /etc/apt/sources.list
deb http://ftp.debian.org/debian buster-backports main


If not there append the repositories to file:


  • Install certbot-nginx certbot-apache deb packages

root@webserver:/ # echo 'deb http://ftp.debian.org/debian buster-backports main' >> /etc/apt/sources.list


  • Install certbot-nginx certbot-apache deb packages

root@webserver:/ # apt update
root@webserver:/ # apt install certbot python-certbot-nginx python3-certbot-apache python-certbot-nginx-doc


This will install the /usr/bin/certbot python executable script which is used to register / renew / revoke / delete your domains certificates.
 

2. Install letsencrypt certbot client on CentOS / RHEL / Fedora and other Linux Distributions


For RPM based distributions and other Linux distributions you will have to install snap package (if not already installed) and use snap command :


[root@centos ~ :] # yum install snapd
systemctl enable –now snapd.socket

To enable classic snap support, enter the following to create a symbolic link between

[root@centos ~ :] # ln -s /var/lib/snapd/snap /snap

snap command lets you install, configure, refresh and remove snaps.  Snaps are packages that work across many different Linux distributions, enabling secure delivery and operation of the latest apps and utilities.

[root@centos ~ :] # snap install core; sudo snap refresh core

Logout from console or Xsession to make the snap update its $PATH definitions.

Then use snap universal distro certbot classic package

 [root@centos ~ :] # snap install –classic certbot
[root@centos ~ :] # ln -s /snap/bin/certbot /usr/bin/certbot


If you're having an XOrg server access on the RHEL / CentOS via Xming or other type of Xemulator you might check out also the snap-store as it contains a multitude of packages installable which are not usually available in RPM distros.

 [root@centos ~ :] # snap install snap-store


how-to-install-snap-applications-on-centos-rhel-linux-snap-store

snap-store is a powerful and via it you can install many non easily installable stuff on Linux such as eclipse famous development IDE, notepad++ , Discord, the so favourite for the Quality Assurance guy Protocol tester Postman etc.

  • Installing certbot to any distribution via acme.sh script

Another often preferred solution to Universally deploy  and upgrade an existing LetsEncrypt program to any Linux distribution (e.g. RHEL / CentOS / Fedora etc.) is the acme.sh script. To install acme you have to clone the repository and run the script with –install

P.S. If you don't have git installed yet do

root@webserver:/ # apt-get install –yes git


and then the usual git clone to fetch it at your side

# cd /root
# git clone https://github.com/acmesh-official/acme.sh
Cloning into 'acme.sh'…
remote: Enumerating objects: 71, done.
remote: Counting objects: 100% (71/71), done.
remote: Compressing objects: 100% (53/53), done.
remote: Total 12475 (delta 39), reused 38 (delta 18), pack-reused 12404
Receiving objects: 100% (12475/12475), 4.79 MiB | 6.66 MiB/s, done.
Resolving deltas: 100% (7444/7444), done.

# sh acme.sh –install


To later upgrade acme.sh to latest you can do

# sh acme.sh –upgrade


In order to renew a concrete existing letsencrypt certificiate

# sh acme.sh –renew domainname.com


To renew all certificates using acme.sh script

# ./acme.sh –renew-all


3. Generate Apache or NGINX Free SSL / TLS Certificate with certbot tool

Now lets generate a certificate for a domain running on Apache Webserver with a Website WebRoot directory /home/phpdev/public/www


root@webserver:/ # certbot –apache –webroot -w /home/phpdev/public/www/ -d your-domain-name.com -d your-domain-name.com

root@webserver:/ # certbot certonly –webroot -w /home/phpdev/public/www/ -d your-domain-name.com -d other-domain-name.com


As you see all the domains for which you will need to generate are passed on with -d option.

Once certificates are properly generated you can test it in a browser and once you're sure they work as expected usually you can sleep safe for the next 3 months ( 90 days) which is the default for TSL / SSL Letsencrypt certificates the reason behind of course is security.


4. Enable freshly generated letsencrypt SSL certificate in Nginx VirtualHost config

Go to your nginx VirtualHost configuration (i.e. /etc/nginx/sites-enabled/phpmyadmin.adzone.pro ) and inside chunk of config add after location { … } – 443 TCP Port SSL listener (as in shown in bolded configuration)
 

server {

….
   location ~ \.php$ {
      include /etc/nginx/fastcgi_params;
##      fastcgi_pass 127.0.0.1:9000;
      fastcgi_pass unix:/run/php/php7.3-fpm.sock;
      fastcgi_index index.php;
      fastcgi_param SCRIPT_FILENAME /usr/share/phpmyadmin$fastcgi_script_name;
   }


    listen 443 ssl; # managed by Certbot
    ssl_certificate /etc/letsencrypt/live/phpmyadmin.adzone.pro/fullchain.pem; # managed by Certbot
    ssl_certificate_key /etc/letsencrypt/live/phpmyadmin.adzone.pro/privkey.pem; # managed by Certbot
    include /etc/letsencrypt/options-ssl-nginx.conf; # managed by Certbot
    ssl_dhparam /etc/letsencrypt/ssl-dhparams.pem; # managed by Certbot


5. Enable new generated letsencrypt SSL certificate in Apache VirtualHost


In /etc/apache2/{sites-available,sites-enabled}/your-domain.com-ssl.conf you should have as a minimum a configuration setup like below:


NameVirtualHost *:443 <VirtualHost 123.123.123.12:443>
    ServerAdmin hipo@domain.com
    ServerName www.pc-freak.net
    ServerAlias www.your-domain.com wwww.your-domain.com your-domain.com
 
    HostnameLookups off
    DocumentRoot /var/www
    DirectoryIndex index.html index.htm index.php index.html.var


CheckSpelling on
SSLEngine on

    <Directory />
        Options FollowSymLinks
        AllowOverride All
        ##Order allow,deny
        ##allow from all
        Require all granted
    </Directory>
    <Directory /var/www>
        Options Indexes FollowSymLinks MultiViews
        AllowOverride All
##      Order allow,deny
##      allow from all
Require all granted
    </Directory>

Include /etc/letsencrypt/options-ssl-apache.conf
SSLCertificateFile /etc/letsencrypt/live/your-domain.com/fullchain.pem
SSLCertificateKeyFile /etc/letsencrypt/live/your-domain.com/privkey.pem
</VirtualHost>


6. Simulate a certificate regenerate with –dry-run

Soon before the 90 days period expiry approaches, it is a good idea to test how all installed Nginx webserver certficiates will be renewed and whether any issues are expected this can be done with the –dry-run option.

root@webserver:/ # certbot renew –dry-run


– – – – – – – – – – – – – – – – – – – – – – – – – – – – – – – – – – – – – – – –
** DRY RUN: simulating 'certbot renew' close to cert expiry
**          (The test certificates below have not been saved.)

Congratulations, all renewals succeeded. The following certs have been renewed:
  /etc/letsencrypt/live/adzone.pro/fullchain.pem (success)
  /etc/letsencrypt/live/cdn.natsr.pro/fullchain.pem (success)
  /etc/letsencrypt/live/mail.adzone.pro/fullchain.pem (success)
  /etc/letsencrypt/live/natsr.pro-0001/fullchain.pem (success)
  /etc/letsencrypt/live/natsr.pro/fullchain.pem (success)
  /etc/letsencrypt/live/phpmyadmin.adzone.pro/fullchain.pem (success)
  /etc/letsencrypt/live/www.adzone.pro/fullchain.pem (success)
  /etc/letsencrypt/live/www.natsr.pro/fullchain.pem (success)
** DRY RUN: simulating 'certbot renew' close to cert expiry
**          (The test certificates above have not been saved.)
– – – – – – – – – – – – – – – – – – – – – – – – – – – – – – – – – – – – – – – –


7. Renew a certificate from a multiple installed certificate list

In some time when you need to renew letsencrypt domain certificates you can list them and choose manually which one you want to renew.

root@webserver:/ # certbot –force-renewal
Saving debug log to /var/log/letsencrypt/letsencrypt.log

How would you like to authenticate and install certificates?
– – – – – – – – – – – – – – – – – – – – – – – – – – – – – – – – – – – – – – – –
1: Apache Web Server plugin (apache)
2: Nginx Web Server plugin (nginx)
– – – – – – – – – – – – – – – – – – – – – – – – – – – – – – – – – – – – – – – –
Select the appropriate number [1-2] then [enter] (press 'c' to cancel): 2
Plugins selected: Authenticator nginx, Installer nginx

Which names would you like to activate HTTPS for?
– – – – – – – – – – – – – – – – – – – – – – – – – – – – – – – – – – – – – – – –
1: adzone.pro
2: mail.adzone.pro
3: phpmyadmin.adzone.pro
4: www.adzone.pro
5: natsr.pro
6: cdn.natsr.pro
7: www.natsr.pro
– – – – – – – – – – – – – – – – – – – – – – – – – – – – – – – – – – – – – – – –
Select the appropriate numbers separated by commas and/or spaces, or leave input
blank to select all options shown (Enter 'c' to cancel): 3
Renewing an existing certificate
Deploying Certificate to VirtualHost /etc/nginx/sites-enabled/phpmyadmin.adzone.pro

Please choose whether or not to redirect HTTP traffic to HTTPS, removing HTTP access.
– – – – – – – – – – – – – – – – – – – – – – – – – – – – – – – – – – – – – – – –
1: No redirect – Make no further changes to the webserver configuration.
2: Redirect – Make all requests redirect to secure HTTPS access. Choose this for
new sites, or if you're confident your site works on HTTPS. You can undo this
change by editing your web server's configuration.
– – – – – – – – – – – – – – – – – – – – – – – – – – – – – – – – – – – – – – – –
Select the appropriate number [1-2] then [enter] (press 'c' to cancel): 2
Redirecting all traffic on port 80 to ssl in /etc/nginx/sites-enabled/phpmyadmin.adzone.pro

– – – – – – – – – – – – – – – – – – – – – – – – – – – – – – – – – – – – – – – –
Your existing certificate has been successfully renewed, and the new certificate
has been installed.

The new certificate covers the following domains: https://phpmyadmin.adzone.pro

You should test your configuration at:
https://www.ssllabs.com/ssltest/analyze.html?d=phpmyadmin.adzone.pro
– – – – – – – – – – – – – – – – – – – – – – – – – – – – – – – – – – – – – – – –

IMPORTANT NOTES:
 – Congratulations! Your certificate and chain have been saved at:
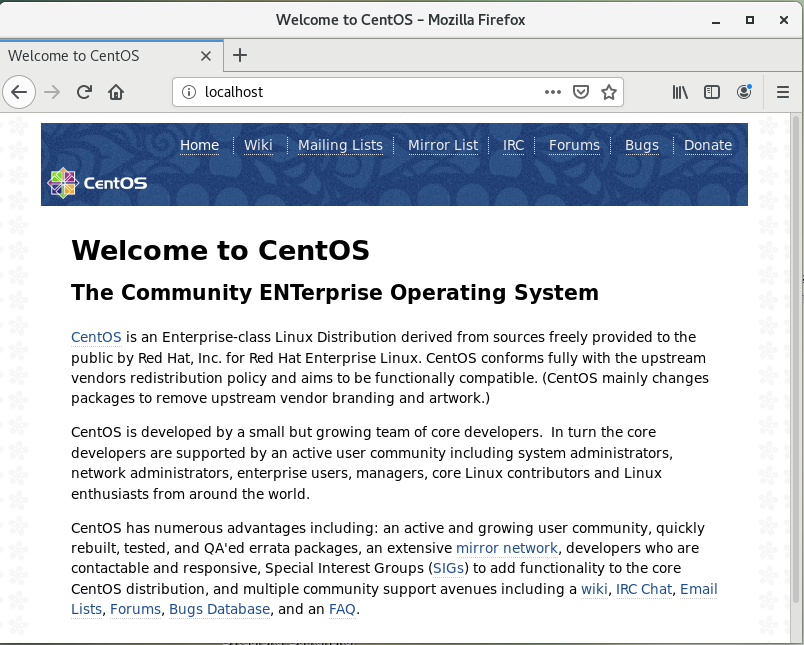
   /etc/letsencrypt/live/phpmyadmin.adzone.pro/fullchain.pem

   Your key file has been saved at:
   /etc/letsencrypt/live/phpmyadmin.adzone.pro/privkey.pem
   Your cert will expire on 2021-03-21. To obtain a new or tweaked
   version of this certificate in the future, simply run certbot again
   with the "certonly" option. To non-interactively renew *all* of
   your certificates, run "certbot renew"
 – If you like Certbot, please consider supporting our work by:

   Donating to ISRG / Let's Encrypt:   https://letsencrypt.org/donate
   Donating to EFF:                    https://eff.org/donate-le


8. Renew all present SSL certificates

root@webserver:/ # certbot renew

Processing /etc/letsencrypt/renewal/www.natsr.pro.conf
– – – – – – – – – – – – – – – – – – – – – – – – – – – – – – – – – – – – – – – –
Cert not yet due for renewal


– – – – – – – – – – – – – – – – – – – – – – – – – – – – – – – – – – – – – – – –

The following certs are not due for renewal yet:
  /etc/letsencrypt/live/adzone.pro/fullchain.pem expires on 2021-03-01 (skipped)
  /etc/letsencrypt/live/cdn.natsr.pro/fullchain.pem expires on 2021-02-28 (skipped)
  /etc/letsencrypt/live/mail.adzone.pro/fullchain.pem expires on 2021-02-28 (skipped)
  /etc/letsencrypt/live/natsr.pro-0001/fullchain.pem expires on 2021-03-01 (skipped)
  /etc/letsencrypt/live/natsr.pro/fullchain.pem expires on 2021-02-25 (skipped)
  /etc/letsencrypt/live/phpmyadmin.adzone.pro/fullchain.pem expires on 2021-03-21 (skipped)
  /etc/letsencrypt/live/www.adzone.pro/fullchain.pem expires on 2021-02-28 (skipped)
  /etc/letsencrypt/live/www.natsr.pro/fullchain.pem expires on 2021-03-01 (skipped)
No renewals were attempted.
– – – – – – – – – – – – – – – – – – – – – – – – – – – – – – – – – – – – – – – –


9. Renew all existing server certificates from a cron job


The certbot package will install a script under /etc/cron.d/certbot to be run that will attempt every 12 hours however from my experience
often this script is not going to work, the script looks similar to below:

# Upgrade all existing SSL certbot machine certificates


0 */12 * * * root test -x /usr/bin/certbot -a \! -d /run/systemd/system && perl -e 'sleep int(rand(43200))' && certbot -q renew

Another approach to renew all installed certificates if you want to have a specific options and keep log of what happened is using a tiny shell script like this:


10. Auto renew installed SSL / TSL Certbot certificates with a bash loop over all present certificates

#!/bin/sh
# update SSL certificates
# prints from 1 to 104 (according to each certbot generated certificate and triggers rewew and logs what happened to log file
# an ugly hack for certbot certificate renew
for i in $(seq 1 104); do echo "Updating $i SSL Cert" | tee -a /root/certificate-update.log; yes "$i" | certbot –force-renewal | tee -a /root/certificate-update.log 2>&1; sleep 5; done

Note: The seq 1 104 is the range depends on the count of installed SSL certificates you have installed on the machine, that can be seen and set the proper value according to your case when you run one time certbot –force-renewal.
 

How to Configure Nginx as a Reverse Proxy Load Balancer on Debian, CentOS, RHEL Linux

Monday, December 14th, 2020

set-up-nginx-reverse-proxy-howto-linux-logo

What is reverse Proxy?

Reverse Proxy (RP) is a Proxy server which routes all incoming traffic to secondary Webserver situated behind the Reverse Proxy site.

Then all incoming replies from secondary webserver (which is not visible) from the internet gets routed back to Reverse Proxy service. The result is it seems like all incoming and outgoing HTTP requests are served from Reverse Proxy host where in reality, reverse proxy host just does traffic redirection. Problem with reverse proxies is it is one more point of failure the good side of it can protect and route only certain traffic to your webserver, preventing the behind reverse proxy located server from crackers malicious HTTP requests.

Treverse proxy, which accepts all traffic and forwards it to a specific resource, like a server or container.  Earlier I've blogged on how to create Apache reverse Proxy to Tomcat.
Having a reverse proxy with apache is a classical scenarios however as NGINX is taking lead slowly and overthrowing apache's use due to its easiness to configure, its high reliability and less consumption of resources.


One of most common use of Reverse Proxy is to use it as a software Load Balancer for traffic towards another webserver or directly to a backend server. Using RP as a to mitigate DDoS attacks from hacked computers Bot nets (coming from a network range) is very common Anti-DDoS protection measure.
With the bloom of VM and Contrainerizations technology such as docker. And the trend to switch services towards micro-services, often reverse proxy is used to seamessly redirect incoming requests traff to multiple separate OS docker running containers etc.


Some of the other security pros of using a Reverse proxy that could be pointed are:

  • Restrict access to locations that may be obvious targets for brute-force attacks, reducing the effectiveness of DDOS attacks by limiting the number of connections and the download rate per IP address. 
  • Cache pre-rendered versions of popular pages to speed up page load times.
  • Interfere with other unwanted traffic when needed.


what-is-reverse-proxy-explained-proxying-tubes


1. Install nginx webserver


Assuming you have a Debian at hand as an OS which will be used for Nginx RP host, lets install nginx.
 

[hipo@proxy ~]$ sudo su – root

[root@proxy ~]#  apt update

[root@proxy ~]# apt install -y nginx


Fedora / CentOS / Redhat Linux could use yum or dnf to install NGINX
 

[root@proxy ~]# dnf install -y nginx
[root@proxy ~]# yum install -y nginx


2. Launch nginx for a first time and test


Start nginx one time to test default configuration is reachable
 

systemctl enable –now nginx


To test nginx works out of the box right after install, open a browser and go to http://localhost if you have X or use text based browser such as lynx or some web console fetcher as curl to verify that the web server is running as expected.

nginx-test-default-page-centos-linux-screenshot
 

3. Create Reverse proxy configuration file

Remove default Nginx package provided configuration

As of 2020 by default nginx does load configuration from file /etc/nginx/sites-enabled/default on DEB based Linuxes and in /etc/nginx/nginx.conf on RPM based ones, therefore to setup our desired configuration and disable default domain config to be loaded we have to unlink on Debian

[root@proxy ~]# unlink /etc/nginx/sites-enabled/default

or move out the original nginx.conf on Fedora / CentOS / RHEL:
 

[root@proxy ~]# mv /etc/nginx/nginx.conf /etc/nginx/nginx.conf-distro


Lets take a scenario where you have a local IP address that's NAT-ted ot DMZ-ed and and you want to run nginx to server as a reverse proxy to accelerate traffic and forward all traffic to another webserver such as LigHTTPD / Apache or towards java serving Application server Jboss / Tomcat etc that listens on the same host on lets say on port 8000 accessible via app server from /application/.

To do so prepare new /etc/nginx/nginx.conf to look like so
 

[root@proxy ~]# mv /etc/nginx/nginx.conf /etc/nginx.conf.bak
[root@proxy ~]# vim /etc/nginx/nginx.conf

user nginx;
worker_processes auto;
worker_rlimit_nofile 10240;
pid /run/nginx.pid;
include /etc/nginx/modules-enabled/*.conf;


events {
#       worker_connections 768;
        worker_connections 4096;
        multi_accept on;
        # multi_accept on;
}

http {

        ##
        # Basic Settings
        ##

        sendfile on;
        tcp_nopush on;
        tcp_nodelay on;
        #keepalive_timeout 65;
        keepalive_requests 1024;
        client_header_timeout 30;
        client_body_timeout 30;
        keepalive_timeout 30;
        types_hash_max_size 2048;
        # server_tokens off;

        # server_names_hash_bucket_size 64;
        # server_name_in_redirect off;

        include /etc/nginx/mime.types;
        default_type application/octet-stream;

        ##
        # SSL Settings
        ##

        ssl_protocols TLSv1 TLSv1.1 TLSv1.2; # Dropping SSLv3, ref: POODLE
        ssl_prefer_server_ciphers on;

        ##
        # Logging Settings
        ##

        access_log /var/log/nginx/domain.com/access.log;
        error_log /var/log/nginx/domain.com/error.log;

        ##
        # Gzip Settings
        ##

        gzip on;

        # gzip_vary on;
        # gzip_proxied any;
        # gzip_comp_level 6;
        # gzip_buffers 16 8k;
        # gzip_http_version 1.1;
        # gzip_types text/plain text/css application/json application/javascript text/xml application/xml application/xml+rss text/javascript;

        ##
        # Virtual Host Configs
        ##

        include /etc/nginx/conf.d/*.conf;
        include /etc/nginx/sites-enabled/*;

 include /etc/nginx/default.d/*.conf;

upstream myapp {
    server 127.0.0.1:8000 weight=3;
    server 127.0.0.1:8001;
    server 127.0.0.1:8002;
    server 127.0.0.1:8003;
# Uncomment and use Load balancing with external FQDNs if needed
#  server srv1.example.com;
#   server srv2.example.com;
#   server srv3.example.co

}

#mail {
#       # See sample authentication script at:
#       # http://wiki.nginx.org/ImapAuthenticateWithApachePhpScript
#
#       # auth_http localhost/auth.php;
#       # pop3_capabilities "TOP" "USER";
#       # imap_capabilities "IMAP4rev1" "UIDPLUS";
#
#       server {
#               listen     localhost:110;
#               protocol   pop3;
#               proxy      on;
#       }
#
#       server {
#               listen     localhost:143;
#               protocol   imap;
#               proxy      on;
#       }
#}


In the example above, there are 3 instances of the same application running on 3 IPs on different ports, just for the sake to illustrate Fully Qualified Domain Names (FQDNs) Load balancing is also supported you can see the 3 commented application instances srv1-srv3.
 When the load balancing method is not specifically configured, it defaults to round-robin. All requests are proxied to the server group myapp1, and nginx applies HTTP load balancing to distribute the requests.Reverse proxy implementation in nginx includes load balancing for HTTP, HTTPS, FastCGI, uwsgi, SCGI, memcached, and gRPC.
To configure load balancing for HTTPS instead of HTTP, just use “https” as the protocol.


To download above nginx.conf configured for High traffic servers and supports Nginx virtualhosts click here.

Now lets prepare for the reverse proxy nginx configuration a separate file under /etc/nginx/default.d/ all files stored there with .conf extension are to be red by nginx.conf as instructed by /etc/nginx/nginx.conf :

We'll need prepare a sample nginx

[root@proxy ~]# vim /etc/nginx/sites-available/reverse-proxy.conf

server {

        listen 80;
        listen [::]:80;


 server_name domain.com www.domain.com;
#index       index.php;
# fallback for index.php usually this one is never used
root        /var/www/domain.com/public    ;
#location / {
#try_files $uri $uri/ /index.php?$query_string;
#}

        location / {
                    proxy_pass http://127.0.0.1:8080;
  }


location /application {
proxy_pass http://domain.com/application/ ;

proxy_http_version                 1.1;
proxy_cache_bypass                 $http_upgrade;

# Proxy headers
proxy_set_header Upgrade           $http_upgrade;
proxy_set_header Connection        "upgrade";
proxy_set_header Host              $host;
proxy_set_header X-Real-IP         $remote_addr;
proxy_set_header X-Forwarded-For   $proxy_add_x_forwarded_for;
proxy_set_header X-Forwarded-Proto $scheme;
proxy_set_header X-Forwarded-Host  $host;
proxy_set_header X-Forwarded-Port  $server_port;

# Proxy timeouts
proxy_connect_timeout              60s;
proxy_send_timeout                 60s;
proxy_read_timeout                 60s;

        access_log /var/log/nginx/reverse-access.log;
        error_log /var/log/nginx/reverse-error.log;

}

##listen 443 ssl;
##    ssl_certificate /etc/letsencrypt/live/domain.com/fullchain.pem;
##    ssl_certificate_key /etc/letsencrypt/live/domain.com/privkey.pem;
##    include /etc/letsencrypt/options-ssl-nginx.conf;
##    ssl_dhparam /etc/letsencrypt/ssl-dhparams.pem;

}

Get above reverse-proxy.conf from here

As you see config makes all incoming traffic towards root ( / ) NGINX directory for domain http://domain.com on port 80 on Nginx Webserver to be passed on http://127.0.0.1:8000/application.

      location / {
                    proxy_pass http://127.0.0.1:8000;
  }


Another set of configuration has configuration domain.com/application to reverse proxy to Webserver on Port 8080 /application.


location /application {
proxy_pass http://domain.com/application/ ;

proxy_http_version                 1.1;
proxy_cache_bypass                 $http_upgrade;

# Proxy headers
proxy_set_header Upgrade           $http_upgrade;
proxy_set_header Connection        "upgrade";
proxy_set_header Host              $host;
proxy_set_header X-Real-IP         $remote_addr;
proxy_set_header X-Forwarded-For   $proxy_add_x_forwarded_for;
proxy_set_header X-Forwarded-Proto $scheme;
proxy_set_header X-Forwarded-Host  $host;
proxy_set_header X-Forwarded-Port  $server_port;

# Proxy timeouts
proxy_connect_timeout              60s;
proxy_send_timeout                 60s;
proxy_read_timeout                 60s;

        access_log /var/log/nginx/reverse-access.log;
        error_log /var/log/nginx/reverse-error.log;

}

– Enable new configuration to be active in NGINX


[root@proxy ~]# ln -s /etc/nginx/sites-available/reverse-proxy.conf /etc/nginx/sites-enabled/reverse-proxy.conf


4. Test reverse proxy nginx config for syntax errors


[root@proxy ~]# nginx -t


nginx: the configuration file /etc/nginx/nginx.conf syntax is ok
nginx: configuration file /etc/nginx/nginx.conf test is successful

Test connectivity to listen external IP address


5. Enable nginx SSL letsencrypt certificates support


[root@proxy ~]# apt-get update
[root@proxy ~]# apt-get install software-properties-common

[root@proxy ~]# apt-get update
[root@proxy ~]# apt-get install python-certbot-nginx


6. Generate NGINX Letsencrypt certificates


[root@proxy ~]# certbot –nginx

Saving debug log to /var/log/letsencrypt/letsencrypt.log
Plugins selected: Authenticator nginx, Installer nginx

Which names would you like to activate HTTPS for?
– – – – – – – – – – – – – – – – – – – – – – – – – – – – – – – – – – – – – – – –
1: your.domain.com
– – – – – – – – – – – – – – – – – – – – – – – – – – – – – – – – – – – – – – – –
Select the appropriate numbers separated by commas and/or spaces, or leave input
blank to select all options shown (Enter 'c' to cancel): 1
Obtaining a new certificate
Performing the following challenges:
http-01 challenge for your.domain.com
Waiting for verification…
Cleaning up challenges
Deploying Certificate to VirtualHost /etc/nginx/sites-enabled/reverse-proxy.conf

Please choose whether or not to redirect HTTP traffic to HTTPS, removing HTTP access.
– – – – – – – – – – – – – – – – – – – – – – – – – – – – – – – – – – – – – – – –
1: No redirect – Make no further changes to the webserver configuration.
2: Redirect – Make all requests redirect to secure HTTPS access. Choose this for
new sites, or if you're confident your site works on HTTPS. You can undo this
change by editing your web server's configuration.
– – – – – – – – – – – – – – – – – – – – – – – – – – – – – – – – – – – – – – – –
Select the appropriate number [1-2] then [enter] (press 'c' to cancel): 2
Redirecting all traffic on port 80 to ssl in /etc/nginx/sites-enabled/reverse-proxy.conf

– – – – – – – – – – – – – – – – – – – – – – – – – – – – – – – – – – – – – – – –
Congratulations! You have successfully enabled https://your.domain.com

You should test your configuration at:
https://www.ssllabs.com/ssltest/analyze.html?d=your.domain.com
– – – – – – – – – – – – – – – – – – – – – – – – – – – – – – – – – – – – – – – –


7. Set NGINX Reverse Proxy to auto-start on Linux server boot

On most modern Linux distros use systemctl for legacy machines depending on the Linux distribution use the addequate runlevel /etc/rc3.d/ symlink link on Debian based distros on Fedoras / CentOS / RHEL and other RPM based ones use chkconfig RedHat command.


[root@proxy ~]# systemctl start nginx
[root@proxy ~]# systemctl enable nginx


8. Fixing weird connection permission denied errors


If you get a weird permission denied errors right after you have configured the ProxyPass on Nginx and you're wondering what is causing it you have to know by default on CentOS 7 and RHEL you'll get this errors due to automatically enabled OS selinux security hardening.

If this is the case after you setup Nginx + HTTPD or whatever application server you will get errors in  /var/log/nginx.log like:

2020/12/14 07:46:01 [crit] 7626#0: *1 connect() to 127.0.0.1:8080 failed (13: Permission denied) while connecting to upstream, client: 127.0.0.1, server: , request: "GET / HTTP/1.1", upstream: "http://127.0.0.1:8080/", host: "localhost"
2020/12/14 07:46:02 [crit] 7626#0: *1 connect() to 127.0.0.1:8080 failed (13: Permission denied) while connecting to upstream, client: 127.0.0.1, server: , request: "GET / HTTP/1.1", upstream: "http://127.0.0.1:8080/", host: "localhost"


The solution to proxy_pass weird permission denied errors is to turn off selinux

[root@proxy ~]# setsebool -P httpd_can_network_connect 1

To permanently allow nginx and httpd

[root@proxy ~]# cat /var/log/audit/audit.log | grep nginx | grep denied | audit2allow -M mynginx
[root@proxy ~]# semodule -i mynginx.pp


[root@proxy ~]# cat /var/log/audit/audit.log | grep httpd | grep denied | audit2allow -M myhttpd
[root@proxy ~]# semodule -i myhttpd.pp


Then to let know nginx and httpd (or whatever else app you run) be aware of new settings restart both

[root@proxy ~]# systemctl restart nginx
[root@proxy ~]# systemctl restart httpd

VIM Project (VI Improvied IDE Editor extension to facilitate web development with vi enhanced editor

Wednesday, August 25th, 2010

I use VIM as an editor of choice for many years already.
Yet it's until recently I use it for a PHP ZF (Zend Framework) web development.

Few days ago I've blogged How to configure vimrc for a php syntax highlightning (A Nicely pre-configured vimrc to imrpove the daily text editing experience

This enhancements significantly improves the overall PHP code editing with VIM. However I felt something is yet missing because I didn't have the power and functunality of a complete IDE like for instance The Eclipse IDE

I was pretty sure that VIM has to have a way to be used in a similar fashion to a fully functional IDE and looked around the net to find for any VIM plugins that will add vim an IDE like coding interface.

I then come accross a vim plugin called VIM Prokject : Organize/Navigate projects of files (like IDE/buffer explorer)

The latest VIM Project as of time of writting is 1.4.1 and I've mirrored it here

The installation of the VIM Project VIM extension is pretty straight forward to install it and start using it on your PC issue commands:

1. Install the project VIM add-on

debian:~$ wget https://www.pc-freak.net/files/project-1.4.1.tar.gz
debian:~$ mv project-1.4.1.tar.gz ~/.vim/
debian:~$ cd ~/.vim/
debian:~$ tar -zxvvf project-1.4.1.tar.gz

2. Load the plugin

Launch your vim editor and type : Project(without the space between : and P)
You will further see a screen like:

vim project entry screen

3. You will have to press C within the Project window to load a new project

Then you will have to type a directory to use to load a project sources files from:

vim project enter file source directory screen

You will be prompted with to type a project name like in the screenshot below:

vim project load test project

4. Next you will have to type a CD (Current Dir) parameter
To see more about the CD parameter consult vim project documentation by typing in main vim pane :help project

The appearing screen will be something like:

vim project extension cd parameter screen

5. Thereafter you will have to type a file filter

File filter is necessary and will instruct the vim project plugin to load all files with the specified extension within vim project pane window

You will experience a screen like:


vim project plugin file filter screen

Following will be a short interval in which all specified files by the filter type will get loaded in VIM project pane and your Zend Framework, PHP or any other source files will be listed in a directory tree structure like in the picture shown below:

vim project successful loaded project screen

6. Saving loaded project hierarchy state

In order to save a state of a loaded project within the VIM project window pane you will have to type in vim, let's say:

:saveas .projects/someproject

Later on to load back the saved project state you will have to type in vim :r .projects/someproject

You will now have almost fully functional development IDE on top of your simple vim text editor.

You can navigate within the Project files loaded with the Project extension pane easily and select a file you would like to open up, whenever a source file is opened and you work on it to switch in between the Project file listing pane and the opened source code file you will have to type twice CTRL+w or in vim language C-w

To even further sophisticate your web development in PHP with vim you can add within your ~/.vimrc file the following two lines:

" run file with PHP CLI (CTRL-M)
:autocmd FileType php noremap <C-M> :w!<CR>:!/usr/bin/php %<CR>
" PHP parser check (CTRL-L)
:autocmd FileType php noremap <C-L> :!/usr/bin/php -l %>CR>

In the above vim configuration directovies the " character is a comment line and the autocmd is actually vim declarations.
The first :autocmd … declaration will instruct vim to execute your current opened php source file with the php cli interpreter whenever a key press of CTRL+M (C-m) occurs.

The second :autocmd … will add to your vim a shortcut, so whenever a CTRL+L (C-l) key combination is pressed VIM editor will check your current edited source file for syntax errors.
Therefore this will enable you to very easily periodically check if your file syntax is correct.

Well this things were really helpful to me, so I hope they will be profitable for you as well.
Cheers 🙂