Posts Tagged ‘gui environment’

Linux: how to Start multiple X sessions – Connect to remote Linux GNOME with no need for VNC by exporting display

Thursday, October 10th, 2013

start multiple X server Xorg sessions export graphic X display to use Linux gui from another Linux like dumb terminal
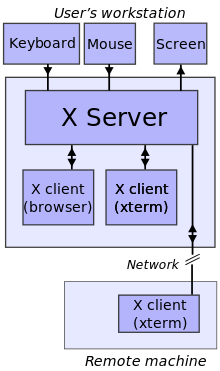
It is useful sometimes in Linux to run multiple Xservers and from there to start few Window Managers (lets say one with Window Maker and one with GNOME and FluxBox). Running second / 3rd etc. X session is nice especially when you you'd like to access remotely your Desktop (lets say from another Linux).

To start second Xsession with only terminal from which you can invoke any GUI environment use:

xinit -- :1

For third one do

xinit -- :2


First Xsession is working on screen :0 (e.g. xinit — :0). To access and navigate later via various X sessions depending on the Linux distribution and how it is configured to which console to start new sessions use

ALT + F5, ALT + F6, ALT + F7.

On GNU / Linux distributions where default Xorg server is running on TTY7 to switch to 2nd and 3rd Window Manager use instead:

ALT + F7, ALT + F8, ALT + F9

Alternative command to issue to launch multiple sessions with lets say GNOME (if that's default set GUI environment) use:
 

startx -- :1

and

startx -- :2

Whether you want to launch GUI environment from another Linux after connecting through SSH or telnet term client (i.e. you have old machine hardware with Linux with no graphical environment and would like to use 2nd machine with decent hardware and Xorg + GNOME running fine), way to do is via:

xhost +

and exporting DISPLAY to remote IP host.

Here is example how to launch second Xsession with GUI environment from remote Linux host.
For example we assume host which will host 2nd X session is 192.168.1.1 and host from which remote Xorg with GNOME will be accessed is 192.168.1.2.

a. Use ssh from 192.168.1.2 to 192.168.1.1

# ssh user@192.168.1.1
xorg-machine:~# xhost +

Above command allows all hosts to be able to connect to 192.168.1.1.

To enable just single host to be able to connect to Xorg server on 192.168.1.1:

xorg-machine:~# xhost +192.168.1.1

b. On xorg-machine (192.168.1.1) its necessary export display to 192.168.1.2

xorg-machine:~# export DISPLAY=192.168.1.2:0.0

To make Xorg + default GUI window manager popup then on 192.168.1.2

xorg-machine:~# startx

How to take a screenshot of a game or Full Screen running program inside GNOME or KDE desktop environment on GNU / Linux and FreeBSD

Thursday, December 15th, 2011

Image Magick logo take screenshot of fullscreen running program with import on Linux / FreeBSD

I’m writting some game reviews and movie reviews, every now and then and therefore being able to capture a fullscreen running program like let’s say mplayer or vlc or some full screen running game is something I really need.

The usual PrtScr button which normally works to prepare screenshots in GNOME or KDE, however is not working if the root window handler is being passed to a different program than the Window Manager and pressing it while inside of many older programs or applicationsdoes not produce a print screen of the current screen.

Anyways I found a hack to this using the good old ImageMagickimport command line screenshotting program.

To take a screenshot of a certain program run from gnome-terminal or konsole using import cmd its possible to use a quick one liner which will take a snapshot of the root Window the started program will use.

Let’s say you want to make a screenshot of the entry screen of the FreeDOOM (DooM 3d shooter classical game arcade free Software Alternative).

Launch gnome-terminal or konsole , xterm , depending on the GUI environment you use and issue the commands:

debian:~$ ( sleep 15; import -window root my_desired_screenshot_name.png ) &
debian:~$ freedoom

The first command will launch import after a sleep of 15 secs and therefore will screenshot the active window which will be at focus after 15 seconds, where the & sign will background it and the second one will launch FreeDooM . You will have to wait for a certain secs and switch to the exact screen you will want to screenshot.
If you want to screenshot some game scene that will appear in 20 minutes change above sleep 15 cmd to be to something like sleep 180
That method can be used for screenshotting any other program running on fullscreen, the method is a bit inflexible as you will have to adjust a timing but it works fine 😉