Posts Tagged ‘freak’

How to get full host and IP address of last month logged in users on GNU / Linux

Friday, December 21st, 2012

This post might be a bit trivial for the Linux gurus, but for novices Linux users hopefully helpful. I bet, all Linux users know and use the so common used last command.

last cmd provides information on last logged in users over the last 1 month time as well as shows if at present time of execution there are logged in users. It has plenty of options and is quite useful. The problem with it I have often, since I don't get into the habit to use it with arguments different from the so classical and often used:

last | less

back in time when learning Linux, is that whether run it like this I can't see full hostname of users who logged in or is currently logged in from remote hosts consisting of longer host names strings than 16 characters.

To show you what I mean, here is a chunk of  last | less output taken from my home router www.pc-freak.net.

# last|less
root     pts/1        ip156-108-174-82 Fri Dec 21 13:20   still logged in  
root     pts/0        ip156-108-174-82 Fri Dec 21 13:18   still logged in  
hipo     pts/0        ip156-108-174-82 Thu Dec 20 23:14 - 23:50  (00:36)   
root     pts/0        g45066.upc-g.che Thu Dec 20 22:31 - 22:42  (00:11)   
root     pts/0        g45066.upc-g.che Thu Dec 20 21:56 - 21:56  (00:00)   
play     pts/2        vexploit.net.s1. Thu Dec 20 17:30 - 17:31  (00:00)   
play     pts/2        vexploit.net.s1. Thu Dec 20 17:29 - 17:30  (00:00)   
play     pts/1        vexploit.net.s1. Thu Dec 20 17:27 - 17:29  (00:01)   
play     pts/1        vexploit.net.s1. Thu Dec 20 17:23 - 17:27  (00:03)   
play     pts/1        vexploit.net.s1. Thu Dec 20 17:21 - 17:23  (00:02)   

root     pts/0        ip156-108-174-82 Thu Dec 20 13:42 - 19:39  (05:56)   
reboot   system boot  2.6.32-5-amd64   Thu Dec 20 11:29 - 13:57 (1+02:27)  
root     pts/0        e59234.upc-e.che Wed Dec 19 20:53 - 23:24  (02:31)   

The hostname last cmd output as you can see is sliced, so one cannot see full hostname. This is quite inconvenient, especially, if you have on your system some users who logged in with suspicious hostnames like the user play which is a user, I've opened for people to be able to play my system installed Cool  Linux ASCII (text) Games. In normal means, I would skip worrying about the vexploit.net.s1…..  user, however as I've noticed one of the ascii games similar to nethack called hunt was kept hanging on the system putting a load of about 50% on the CPU   and was run with the play user and according to logs, the last logged in username with play was containing a hostname with "vexploit.net" as a hostname.

This looked to me very much like a script kiddie, attempt to root my system, so I killed hunt, huntd and HUNT hanging processes and decided investigate on the case.

I wanted to do whois on the host, but since the host was showing incomplete in last | less, I needed a way to get the full host. The first idea I got is to get the info from binary file /var/log/wtmp – storing the hostname records for all logged in users:

# strings /var/log/wtmp | grep -i vexploit | uniq
vexploit.net.s1.fti.net

To get in a bit raw format, all the hostnames and IPs (whether IP did not have a PTR record assigned):

strings /var/log/wtmp|grep -i 'ts/' -A 1|less

Another way to get the full host info is to check in /var/log/auth.log – this is the Debian Linux file storing ssh user login info; in Fedora and CentOS the file is /var/log/secure.

# grep -i vexploit auth.log
Dec 20 17:30:22 pcfreak sshd[13073]: pam_unix(sshd:auth): authentication failure; logname= uid=0 euid=0 tty=ssh ruser= rhost=vexploit.net.s1.fti.net  user=play

Finally, I decided to also check last man page and see if last is capable of showing full hostname or IPS of previously logged in hosts. It appears, last is having already an argument for that so my upper suggested methods, turned to be useless overcomplexity. To show full hostname of all hosts logged in on Linux over the last month:
 

# last -a |less

root     pts/2        Fri Dec 21 14:04   still logged in    ip156-108-174-82.adsl2.static.versatel.nl
root     pts/1        Fri Dec 21 13:20   still logged in    ip156-108-174-82.adsl2.static.versatel.nl
root     pts/0        Fri Dec 21 13:18   still logged in    ip156-108-174-82.adsl2.static.versatel.nl
hipo     pts/0        Thu Dec 20 23:14 - 23:50  (00:36)     ip156-108-174-82.adsl2.static.versatel.nl
root     pts/0        Thu Dec 20 22:31 - 22:42  (00:11)     g45066.upc-g.chello.nl
root     pts/0        Thu Dec 20 21:56 - 21:56  (00:00)     g45066.upc-g.chello.nl
play     pts/2        Thu Dec 20 17:30 - 17:31  (00:00)     vexploit.net.s1.fti.net
play     pts/2        Thu Dec 20 17:29 - 17:30  (00:00)     vexploit.net.s1.fti.net
play     pts/1        Thu Dec 20 17:27 - 17:29  (00:01)     vexploit.net.s1.fti.net
play     pts/1        Thu Dec 20 17:23 - 17:27  (00:03)     vexploit.net.s1.fti.net
play     pts/1        Thu Dec 20 17:21 - 17:23  (00:02)     vexploit.net.s1.fti.net
root     pts/0        Thu Dec 20 13:42 - 19:39  (05:56)     ip156-108-174-82.adsl2.static.versatel.nl
reboot   system boot  Thu Dec 20 11:29 - 14:58 (1+03:28)    2.6.32-5-amd64
root     pts/0        Wed Dec 19 20:53 - 23:24  (02:31)     e59234.upc-e.chello.nl

Listing all logged in users remote host IPs (only) is done with last's "-i" argument:

# last -i
root     pts/2        82.174.108.156   Fri Dec 21 14:04   still logged in  
root     pts/1        82.174.108.156   Fri Dec 21 13:20   still logged in  
root     pts/0        82.174.108.156   Fri Dec 21 13:18   still logged in  
hipo     pts/0        82.174.108.156   Thu Dec 20 23:14 - 23:50  (00:36)   
root     pts/0        80.57.45.66      Thu Dec 20 22:31 - 22:42  (00:11)   
root     pts/0        80.57.45.66      Thu Dec 20 21:56 - 21:56  (00:00)   
play     pts/2        193.252.149.203  Thu Dec 20 17:30 - 17:31  (00:00)   
play     pts/2        193.252.149.203  Thu Dec 20 17:29 - 17:30  (00:00)   
play     pts/1        193.252.149.203  Thu Dec 20 17:27 - 17:29  (00:01)   
play     pts/1        193.252.149.203  Thu Dec 20 17:23 - 17:27  (00:03)   
play     pts/1        193.252.149.203  Thu Dec 20 17:21 - 17:23  (00:02)   
root     pts/0        82.174.108.156   Thu Dec 20 13:42 - 19:39  (05:56)   
reboot   system boot  0.0.0.0          Thu Dec 20 11:29 - 15:01 (1+03:31)  

One note to make here is on every 1st number of month last command  clear ups the records storing for user logins in /var/log/wtmp and nullifies the file.

Though the other 2 suggested, methods are not necessary, as they are provided in last argument. They're surely a mus do routine, t when checking a system for which doubting it could have been intruded (hacked). Checking both /var/log/wtmp and /var/log/auth.log / and /var/log/auth.log.1 content and comparing if the records on user logins match is a good way to check if your login logs are not forged. It is not a 100% guarantee however, since sometimes attacker scripts wipe out their records from both files. Out of security interest some time, ago I've written a small script  to clean logged in user recordfrom /var/log/wtmp and /var/log/auth.log – log_cleaner.sh – the script has to be run as a super to have write access to /var/log/wtmp and /var/log/auth.log. It is good to mention for those who don't know, that last reads and displays its records from /var/log/wtmp file, thus altering records in this files will alter  last displayed login info.

Thanks God in my case after examing this files as well as super users in /etc/passwd,  there was no  "signs", of any succesful breach.


Pc-Freak 2 days Downtime / Debian Linux Squeeze 32 bit i386 to amd64 hell / Expression of my great Thanks to Alex and my Sister

Tuesday, October 16th, 2012

Debian upgrade Squeeze Linux from 32 to 64 problems, don't try do it except you have physical access !!!

Recently for some UNKNOWN to ME reasons New Pc-Freak computer hardware crashed 2 times over last 2 weeks time, this was completely unexpected especially after the huge hardware upgrade of the system. Currently the system is equipped with 8GB of memory a a nice Dual Core Intel CPU running on CPU speed of 6 GHZ, however for completely unknown to me reasons it continued experience outages and mysteriously hang ups ….

So far I didn’t have the time to put some few documentary pictures of PC hardware on which this blog and the the rest of sites and shell access is running so I will use this post to do this as well:

Below I include a picture for sake of History preservation 🙂 of Old Pc-Freak hardware running on IBM ThinkCentre (1GB Memory, 3Ghz Intel CPU and 80 GB HDD):

IBM Desktop ThinkCentre old pc-freak hardware server PC

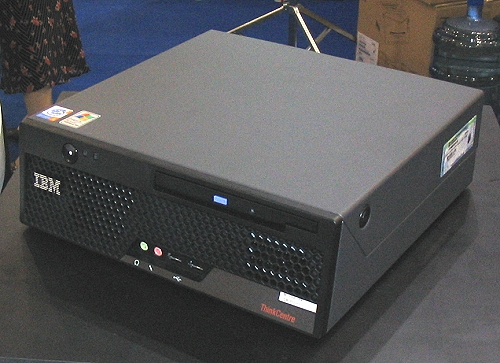
The old FreeBSD powered Pc-Freak IBM ThinkCentre

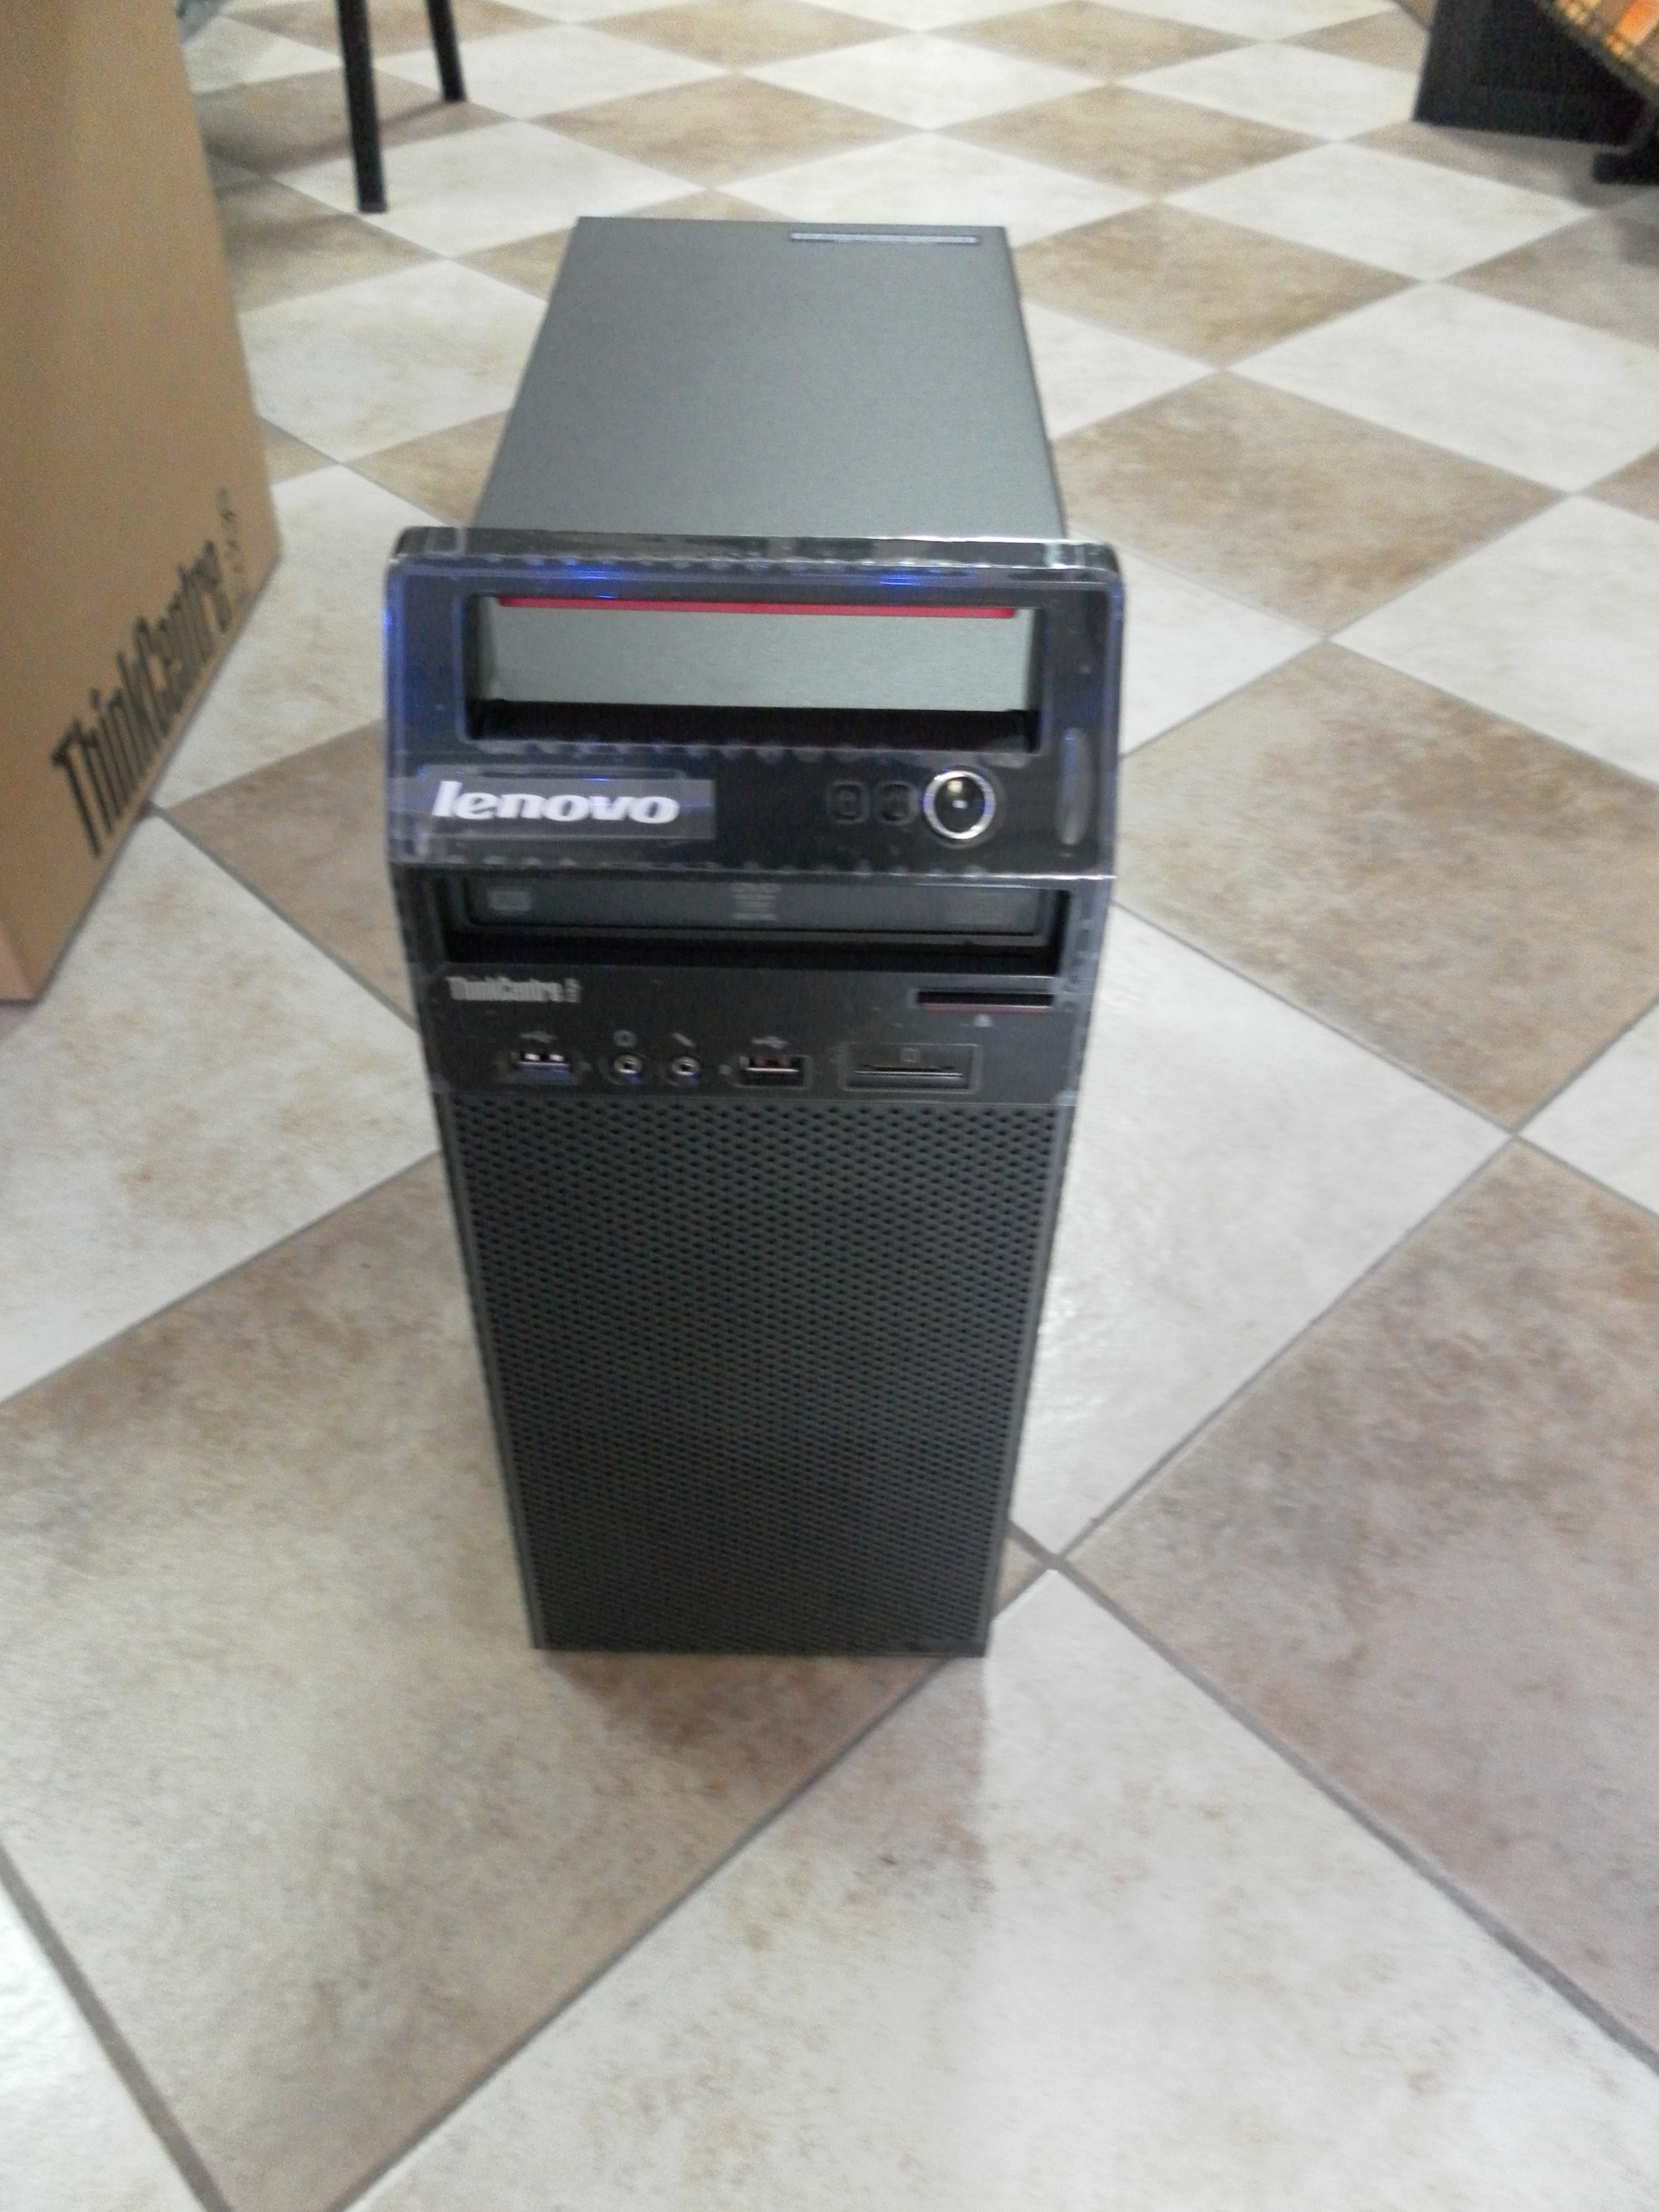
Here are 2 photos of new hardware host running on Lenovo ThinCentre Edge:

New Pc-Freak host hardware lenovo ThinkEdge Photo
New Pc-Freak host hardware Lenovo ThinkEdge Camera Photo
My guess was those unsual “freezes” were caused due to momentum overloads of WebServer or MySQL db.
Actually the Linux Squeeze installed was “stupidly” installed with a 32 bit Debian Linux (by me). I did that stupidity, just few weeks ago, when I moved every data content (SQL, Apache config, Qmail accounts, Shell accounts etc. etc.) from old Pc-Freak computer to the new purchased one.

After finding out I have improperly installed (being in a hurry) – 32 Bit system, I’ve Upgrade only the system 32 bit kernel hich doesn’t support well more than 4GB to an amd64 one supporting up to 64GB of memory – if interested I’ve prior blogged on this here.
Thanks to my dear friend Alexander (who in this case should have a title similar to Alexander the Great – for he did great and not let me down being there in such a difficult moment for me spending from his personal time helping me bringing up Pc-Freak.Net. To find a bit more about Alex you might check his personal home page hosted on www.pc-freak.net too here 🙂
I don’t exaggerate, really Alex did a lot for me and this is maybe the 10th time I disturb him over the last 2 years, so I owe him a lot ! Alex – I really owe you a lot bro – thanks for your great efforts; thanks for going home 3 times for just to days, thanks for recording Rescue CDs, staying at home until 2 A.M. and really thanks for all!!

Just to mention again, to let me via Secure Shell, Alex burned and booted for me Debian Linux Rescue Live CD downloaded from linke here.

This time I messed my tiny little home hosted server, very very badly!!! Those of you who might read my blog or have SSH accounts on Pc-Freak.NET, already should have figured out Pc-Freak.net was down for about 2 days time (48 HOURS!!!!).

The exact “official” downtime period was:

Saturday OCTOBER 13!!!( from around 16:00 o’clock – I’m not fatalist but this 13th was really a harsh date) until Monday 15-th of Oct (14:00h) ….

I’m completely in charge and responsible for the 2 days down time, and honestly I had one of my worst life days, so far. The whole SHIT story occurred after I attempted to do a 32 bit (i386) to AMD64 (64 bit) system packages deb binary upgrade; host is installed to run Debian Squeeze 6.0.5 ….; Note to make here is Officially according to documentation package binary upgrades from 32 bit to 64 arch Debian Linux are not possible!. Official debian.org documentation recommended for 32 bit to 64 packs update (back up all system existent data) and do a clean CD install / re-install, over the old installed 32 bit version. However ignoring the official documentation, being unwise and stubborn, I decided to try to anyways upgrading using those Dutch person guide … !!!

I’ve literally followed above Dutch guy, steps and instead of succeeding 64 bit update, after few of the steps outlined in his article the node completely (libc – library to which all libraries are linked) broke up. Then trying to fix those amd64 libc, I tried re-installing coreutils package part of base-files – basis libs and bins deb;
I’ve followed few tutorials (found on the next instructing on the 32bit to 64 bit upgrade), combined chunks from them, reloaded libc in a live system !!! (DON’T TRY THAT EVER!); then by mistake during update deleted coreutils package!!!, leaving myself without even essential command tools like /bin/ls , /bin/cp etc. etc. ….. And finally very much (in my fashion) to make the mess complete I decided to restart the system in those state without /bin/ls and all essential /bins ….
Instead of making things better I made the system completely un-bootable 🙁

Well to conclude it, here I am once again I stupid enough not to follow the System Administrator Golden Rule of Thumb:

IF SOMETHING WORKS DON’T TOUCH IT !!!!!!!!! EVER !!!!, cause of my stubbornness I screw it up all so badly.
I should really take some moral from this event, as similar stories has happened to me long time ago on few Fedora Linux hosts on productive Web servers, and I went through all this upgrades nightmare but apparently learned nothing from it. My personal moral out of the story is I NEVER LEARN FROM MY MISTAKES!!! PFFF …

I haven’t had days like this in which I was totally down, for a very long time, really I fell in severe desperation and even depressed, after un-abling to access in any way Pc-Freak.NET, I even thought it will be un-fixable forever and I will loose all data on the host and this deeply saddened me.
Here is good time to Give thanks to Svetlana (Sveta) (A lovely kind, very beautiful Belarusian lady 🙂 who supported me and Sali and his wife Mimi (Meleha) who encouraged and lived up my hardly bearable tempper when angry or/and sad :)). Lastly I have to thank a lot to Happy (Indian Lady whose whose my dear indian brother Jose met me with in Skype earlier. Happy encouraged me in many times of trouble in Skype, giving me wise advices not to take all so serious and be more confied, also most importantly Happy helped me with her prayers …. Probably many others to which I complained about situation helped with their prayers too – Thanks to to God and to all and let God return them blessing according to their good prayers for me !

Some people who know me well might know Pc-Freak.Net Linux host has very sentimental value for me and even though it doesn’t host too much websites (only 38 sites not so important ones ), still it is very bad to know your “work input” which you worked on in your spare time over the last 3 years (including my BLOG – blogging almost every day for last 3 yrs, the public shell SSH access for my Friends, custom Qmail Mail server / POP3 and IMAP services / SQL data etc. might not be lost forever. Or in more positive better scenario could be down for huge period of time like few months until I go home and fix it physically on phys terminal …

All this downtime mess occurred due to my own inability to estimate properly update risks (obviously showing how bad I’m in risk management …). Whole “down time story”” proofed me only, I have a lot to learn in life and worry less about things ….
It also show me how much of an “idol”, one can make some kind of object of daily works as www.pc-freak.net become to me. Good thing is I at least realize my blog has with time, become like an idol to me as I’m mostly busy with it and in a way too much worrying for it makes me fill up in the gap “worshipping an idol” and each Christian knows pretty well, God tells us: “Do not have other Gods besides me”.

I suppose this whole mess was allowed to happen by God’s Great Mercy to show me how weak my faith is, and how often I put my personal interest on top of real important things. Whole situation teached me, once again I easy fall in spirit and despair; hope it is a lesson given to me I will learn from and next time I will be more solid in critical situation …

Here are some of my thoughts on the downtime, as I felt obliged to express them too;

Whole problem severeness (in my mind), would not be so bad if I only had some kind of physical access to System terminal. However as I’m currently in Arnhem Holland 6500 kilometers away from the Server (hosted in Dobrich, Bulgaria), don’t have access to IPKVM or any kind of web management to act on the physical keyboard input, my only option was to ask Alex go home and tell him act as a pro tech support which though I repeat myself I will say again, he did great.
What made this whole downtime mess even worser in my distorted vision on situation is, fact; I don’t know people who are Linux GURUs who can deal with the situation and fix the host without me being physically there, so this even exaggerated me worrying it even more …

I’m relatively poor person and I couldn’t easily afford to buy a flight ticket back to Bulgaria which in best case as I checked today in WizzAir.com’s website would costs me about 90EUR (at best – just one way flight ticket ) to Sofia and then more 17 euro for bus ticket from Sofia to Dobrich; Meaning whole repair costs would be no less than 250 EUR with prince included train ticket expenses to Eindhoven.);

Therefore obviously traveling back to fix it on physical console was not an option.
Some other options I considered (as adviced by Sveta), was hiring some (pro sysadm to fix the host) – here I should say it is almost impossible to find person in Dobrich who has the Linux knowledge to fix the system; moreover Linux system administrators are so expensive these days. Most pro sysadmins will not bother to fix the host if not being paid hour – fee of at least 40 / 50 EUR. Obviously therefore hiring a professional UNIX system adminsitrator to solve my system issues would have cost approximately equal to travel expenses of myself, if going physically to the computer; spend the same 5 hours fixing it and loose at least 2 or 3 more days in traveling back to Holland …..
Also it is good to mention on the system, I’ve done a lot of custom things, which an external hired person will be hardly possible to deal with, without my further interference and even if I had hired someone to fix it I would have spend at least 50 euro on Phone Bills to explain specifics ….

As I was in the shit, I should thanks in this post also (on first place) to MY DEAR SISTER Stanimira !!! My sis was smart enough to call my dear friend Alexander (Alex), who as always didn’t fail me – for a 3rd time BIG THANKS ALEX !, spending time and having desire to help me at this critical times. I instructed him as a first step to try loading on the unbootable linux, the usual boot-able Debian Squeeze Install LiveCD….
So far so good, but unfortunately with this bootable CD, the problem is Debian Setup (Install) CD does not come equipped with SSHD (SSH Server) by default and hence I can’t just get in via Internet;
I’ve searched through the net if there is a way to make the default Debian Install CD1 (.iso) recovery CD to have openssh-server enabled, but couldn’t find anyone explainig how ?? If there is some way and someone reading this post knows it please drop a comment ….

As some might know Debian Setup CD is running as its basis environment busybox; system tools there provided whether choosing boot the Recovery Console are good mostly for installing or re-installing Debian, but doesn’t include any way to allow one to do remote system recovery over SSH connection.

Further on, have instructed Alex, brought up the Network Interfacse on the system with ifconfig using cmds:


# /sbin/ifconfig MY_IP netmask 255.255.255.240
# /sbin/route add default gw MY_GATEWAY_IP;

BTW, I have previously blogged on how to bring network interfaces with ifconfig here
Though the LAN Interfaces were up after that and I could ping ($ ping www.pc-freak.net) this was of not much use, as I couldn’t log in. Neither somehow can access system in a chroot.
I did thoroughfully explained Alex, how to fix the un-chroot-table badly broken (mounted) system. ….
In order to have accessed the system via SSH, after a bit of research I’ve asked Alex to download and boot from the CD Drive Debian Linux based AMD64 Rescue CD available here ….

Using this much better rescue CD than default Debian Install CD1, thanks God, Alex was able to bring up a working sshd server.

To let me access the rescue CD, Alex changed root pass to a trivial one with usual:


# passwd root
....

Then finally I logged in on host via ssh. Since chroot over the mounted /vev/sda1 in /tmp/aaa was impossible due to a missing working /bin/bash – Here just try imagine how messed up this system was!!!, I asked Alex to copy over the basic system files from the Rescue CD with cp copy command within /tmp/aaa/. The commands I asked him to execute to override some of the old messed up Linux files were:


# cp -rpf /lib/* /tmp/aaa/lib
# cp -rpf /usr/lib/* /tmp/aaa/usr/lib
# cp -rpf /lib32/* /tmp/aaa/lib32
# cp -rpf /bin/* /tmp/aaa/bin
# cp -rpf /usr/lib64/* /tmp/aaa/usr/lib64
# cp -rpf /sbin/* /tmp/aaa/sbin
# cp -rpf /usr/sbin/* /tmp/aaa/usr/sbin

After this at least chroot /tmp/aaa worked!! Thanks God!

I also said Alex to try bootstrap to install a base debian system files inside the broken /tmp/aaa, but this didn’t make things better (so I’m not sure if debootstrap helped or made things worse)??. Exact bootstrap command tried on the host was:


# debootstrap --arch amd64 squeeze /tmp/aaa http://ftp.us.debian.org/debian

This command as explained in Debian Wiki Debootstrap section is supposed to download and override basis Linux system with working base bins and libs.

After I logged in over ssh, I’ve entered chroot-ing and following instructions of 2 of my previous articles:

1. How to do proper chroot and recover broken Ubuntu using mount and chrooting

2. How to mount /proc and /dev and in chroot on Linux – for fail system recovery

Next on, after logging in via ssh I chrooted to mounted system;


# mount /dev/sda1 /mnt/aaa
# chroot /mnt/aaa

Inside chrooted environment, I tried running ssh server, listen on separate port 2208 with command:


# /usr/sbin/sshd -p 2208

sshd did not start up but spitted mer error: PRNG is not seeded, after reading a bit online I’ve found others experiencing PRNG is not seeded err in thread here

The PRNG is not seeded error is caused due to a missing /dev/urandom inside the chroot-ed environment:


# ls -al /dev/urandom
ls: cannot access /dev/urandom: No such file or directory

To solve it, one has to create /dev/urandom with mknod command:


# mknod /dev/urandom c 1 9

….

Something else worthy to mention is very helpful post found on noah.org explaining few basic things on apt, aptitude and dpkg which helped me over the whole severe failed dependency apt-get issues experienced inside chroot.

Inside the chroot, I tried using few usual apt-get cmds to solve the multiple appearing broken packages inter-dependency. I tried:


# apt-get update
....
# apt-get --yes upgrade
# apt-get -f install

Even before that apt, package was broken, so I instructed Alex, to download me one from a web link. By mistake I gave him, a Debian Etch apt version instead of Debian Squeze. So using once again dpkg -i apt* after downloading the latest stable apt deb binaries from debian.org, I had to re-install apt-get…

Besides that Alex, had copied a bunch of libraries, straight copied from my notebook running amd64 Debian Squeeze and has to place all this transferred binaries in /mnt/aaa/{lib,usr/lib} in order to solve missing libraries for proper apt-get operation.

As it seemed slightly impossible fix the broken dependencies with apt-get, I first tried fixing failed inter-dependencies using the other automated dependency solver tool (written in perl language) aptitude. I tried with it solving the situation issuing:


# aptitute update
# aptitude safe-upgrade
# aptitude safe-upgrade --full-resolver

No of the above aptitude command options helped anyhow, so
I’ve decided to try the old but gold approach of combining common logic with a bit of shell scripting 🙂
Here is my customly invented approach 🙂 :

1. Inside the chroot, make a dump of all installed deb packages names in a file
2. Outside the chroot straight ssh-ing again to the Rescucd shell, use RescueCD apt-get to only download all amd64 binaries corresponding to dumped packages names
3. Move all downloaded only apt-get binaries from /var/cache/apt/archives to /mnt/aaa/var/cache/apt/archives
4. Inside chroot, run cd to /var/cache/apt/archives/ and use for bash loop to install each package with dpkg -i

Inside Chroot-ed environment chroot /tmp/aaa, dpkg – to dump list of all installed i386 previous packages on broken system:


# dpkg -l|awk '{ print $2 }' >> /mnt/aaa/root/all_deb_packages_list.txt

Thereon, I delete first 5 lines in beginning of file (2 empty lines) and 3 lines with content:


Status=Not/Inst/Conf-files/Unpacked/halF-conf/Half-inst/trig-aWait/Trig-pend
Err?=(none)/Reinst-required
Name

should be deleted.

Onwards outside of chroot-ed env, I downloaded all deb packages corresponding to previous ones in all_deb_packges.txt:


# mkdir /tmp/apt
# cd /tmp/apt
# for i in $(cat /mnt/aaa/root/all_deb_packages.txt; do \
apt-get --download-only install -yy $i \
....
.....
done

In a while after 30 / 40 minutes all amd64 .deb packages were downloaded in rescuecd /var/cache/apt/archives/.
/var/cache/apt/archives/ in LiveCDs is stored in system memory, thanksfully I have 8 Gigabytes of memory on the host so memory was more than enough to store all packs 😉
Once above loop, completed. I copied all debs to /mnt/aaa/var/cache/apt, i.e.:


# cp -vrpf /var/cache/apt/archives/*.deb /mnt/aaa/var/cache/apt/archives/

Then back in the (chroot-ed broken system), in another ssh session chroot /mnt/aaa, I run another shell loop aim-ing to install each copied deb package (below command should run after chroot-ing):


# cd /var/cache/apt/archives
# for i in *.deb; do \
dpkg -i $i
done

I had on the system installed Qmail server which was previously linked against old 32 bit installed libs, so in my case was also necessery rebuild qmail install as well as ucsp-tcp and ucsp-ssl, after rebooting and booting the finally working amd64 libs system (after reboot and proper boot!):

a) to Re-compile qmail base binaries, had to issue:


# qmailctl stop
# cd /usr/src/qmail
# make clean
# make man
# make setup check

b) to re-compile ucspi-tcp and ucspi-ssl:


# rm -rf /packages/ucspi-ssl-0.70.2/
#mkdir /packages
# chmod 1755 /packages
# cd /tmp
# tar -zxvf /downloads/ucspi-ssl-0.70.2.tar.gz
....
# mv /tmp/host/superscript.com/net/ucspi-ssl-0.70.2/ /packages
# cd /packages/ucspi-ssl-0.70.2/
# rm -rf /tmp/host/
# sed -i 's/local\///' src/conf-tcpbin
# sed -i 's/usr\/local/etc/' src/conf-cadir
# sed -i 's/usr\/local\/ssl\/pem/etc\/ssl/' src/conf-dhfile
# openssl dhparam -check -text -5 1024 -out /etc/ssl/dh1024.pem

Then had to stop temporary daemontools service, through commenting line in /etc/inittab:


# SV:123456:respawn:/usr/bin/svscanboot


# init q

After that remove commented line:


SV:123456:respawn:/usr/bin/svscanboot

and consequentually install ucsp-{tcp,ssl}:


# cd /packages/ucspi-ssl-0.70.2/
# package/compile
# package/rts
# package/install

c) Rebuild Courier-Imap and CourierImapSSL

As I have custom compiled Courier-IMAP and Courier-IMAPSSL it was necessery to rebuild Courier-imaps following steps earlier explained in this article

I have on the system running DjbDNS as local caching server so I had to also re-install djbdns, re-compiling it from source

Finally after restart the system booted OKAY!! Thanks God!!!!!! 🙂
Further on to check the boot-ed system runs 64 bit architecture dpkg should be used
To check if the system architecture is 64 now 64 bit, there is a command dpkg-architecture, as I learned from superuser.com forums thread here


root@pcfreak:~# dpkg-architecture -qDEB_HOST_ARCH
amd64

One more thing, which helped me a lot during the whole system recovery was main Debian deb HTTP repositories ftp.us.debian.org/debian/pool/ , I’ve downloaded apt (amd64 Squeeze) version and few other packages from there.
Hope this article helps someone who end up in 32 to 64 bit debian arch upgrade. Enjoy 🙂

How to convert OGG Vorbis .ogg to MP3 on GNU / Linux and FreeBSD

Friday, July 27th, 2012

I’ve used K3B just recently to RIP an Audio CD with music to MP3. K3b has done a great job ripping the tracks, the only problem was By default k3b RIPs songs in OGG Vorbis (.ogg) and not mp3. I personally prefer OGG Vorbis as it is a free freedom respecting audio format, however the problem was the .ogg-s cannot be read on many of the audio players and it could be a problem reading the RIPped oggs on Windows. I’ve done the RIP not for myself but for a Belarusian gfriend of mine and she is completely computer illiterate and if I pass her the songs in .OGG, there is no chance she succed in listening the oggs. I’ve seen later k3b has an option to choose to convert directly to MP3 Using linux mp3 lame library this however is time consuming and I have to wait another 10 minutes or so for the songs to be ripped to shorten the time I decided to directly convert the existing .ogg files to .mp3 on my (Debian Linux). There are probably many ways to convert .ogg to mp3 on linux and likely many GUI frontends (like SoundConverter) to use in graphic env.

SoundConverter Debian GNU Linux graphic GUI environment program for convertion of ogg to mp3 and mp3 to ogg, convert multiple sound formats on GNU / Linux.

I however am a console freak so I preferred doing it from terminal. I’ve done quick research on the net and figured out the good old ffmpeg is capable of converting .oggs to .mp3s. To convert all mp3s just ripped in the separate directory I had to run ffmpeg in a tiny bash loop.

A short bash shell script 1 liner combined with ffmpeg does it, e.g.;

for f in *.ogg; do ffmpeg -i "$f" "`basename "$f" .ogg`.mp3"; done.....

The loop example is in bash so in order to make the code work on FreeBSD it is necessery it is run in a bash shell and not in BSDs so common csh or tcsh.

Well, that’s all oggs are in mp3; Hip-hip Hooray 😉

Tiny PHP script to dump your browser set HTTP headers (useful in debugging)

Friday, March 30th, 2012

While browsing I stumbled upon a nice blog article

Dumping HTTP headers

The arcitle, points at few ways to DUMP the HTTP headers obtained from user browser.
As I'm not proficient with Ruby, Java and AOL Server what catched my attention is a tiny php for loop, which loops through all the HTTP_* browser set variables and prints them out. Here is the PHP script code:

<?php<br />
foreach($_SERVER as $h=>$v)<br />
if(ereg('HTTP_(.+)',$h,$hp))<br />
echo "<li>$h = $v</li>\n";<br />
header('Content-type: text/html');<br />
?>

The script is pretty easy to use, just place it in a directory on a WebServer capable of executing php and save it under a name like:
show_HTTP_headers.php

If you don't want to bother copy pasting above code, you can also download the dump_HTTP_headers.php script here , rename the dump_HTTP_headers.php.txt to dump_HTTP_headers.php and you're ready to go.

Follow to the respective url to exec the script. I've installed the script on my webserver, so if you are curious of the output the script will be returning check your own browser HTTP set values by clicking here.
PHP will produce output like the one in the screenshot you see below, the shot is taken from my Opera browser:

Screenshot show HTTP headers.php script Opera Debian Linux

Another sample of the text output the script produce whilst invoked in my Epiphany GNOME browser is:

HTTP_HOST = www.pc-freak.net
HTTP_USER_AGENT = Mozilla/5.0 (X11; U; Linux x86_64; en-us) AppleWebKit/531.2+ (KHTML, like Gecko) Version/5.0 Safari/531.2+ Debian/squeeze (2.30.6-1) Epiphany/2.30.6
HTTP_ACCEPT = application/xml,application/xhtml+xml,text/html;q=0.9,text/plain;q=0.8,image/png,*/*;q=0.5
HTTP_ACCEPT_ENCODING = gzip
HTTP_ACCEPT_LANGUAGE = en-us, en;q=0.90
HTTP_COOKIE = __qca=P0-2141911651-1294433424320;
__utma_a2a=8614995036.1305562814.1274005888.1319809825.1320152237.2021;wooMeta=MzMxJjMyOCY1NTcmODU1MDMmMTMwODQyNDA1MDUyNCYxMzI4MjcwNjk0ODc0JiYxMDAmJjImJiYm; 3ec0a0ded7adebfeauth=22770a75911b9fb92360ec8b9cf586c9;
__unam=56cea60-12ed86f16c4-3ee02a99-3019;
__utma=238407297.1677217909.1260789806.1333014220.1333023753.1606;
__utmb=238407297.1.10.1333023754; __utmc=238407297;
__utmz=238407297.1332444980.1586.413.utmcsr=www.pc-freak.net|utmccn=(referral)|utmcmd=referral|utmcct=/blog/

You see the script returns, plenty of useful information for debugging purposes:
HTTP_HOST – Virtual Host Webserver name
HTTP_USER_AGENT – The browser exact type useragent returnedHTTP_ACCEPT – the type of MIME applications accepted by the WebServerHTTP_ACCEPT_LANGUAGE – The language types the browser has support for
HTTP_ACCEPT_ENCODING – This PHP variable is usually set to gzip or deflate by the browser if the browser has support for webserver returned content gzipping.
If HTTP_ACCEPT_ENCODING is there, then this means remote webserver is configured to return its HTML and static files in gzipped form.
HTTP_COOKIE – Information about browser cookies, this info can be used for XSS attacks etc. 🙂
HTTP_COOKIE also contains the referrar which in the above case is:
__utmz=238407297.1332444980.1586.413.utmcsr=www.pc-freak.net|utmccn=(referral)
The Cookie information HTTP var also contains information of the exact link referrar:
|utmcmd=referral|utmcct=/blog/

For the sake of comparison show_HTTP_headers.php script output from elinks text browser is like so:

* HTTP_HOST = www.pc-freak.net
* HTTP_USER_AGENT = Links (2.3pre1; Linux 2.6.32-5-amd64 x86_64; 143x42)
* HTTP_ACCEPT = */*
* HTTP_ACCEPT_ENCODING = gzip,deflate * HTTP_ACCEPT_CHARSET = us-ascii, ISO-8859-1, ISO-8859-2, ISO-8859-3, ISO-8859-4, ISO-8859-5, ISO-8859-6, ISO-8859-7, ISO-8859-8, ISO-8859-9, ISO-8859-10, ISO-8859-13, ISO-8859-14, ISO-8859-15, ISO-8859-16, windows-1250, windows-1251, windows-1252, windows-1256,
windows-1257, cp437, cp737, cp850, cp852, cp866, x-cp866-u, x-mac, x-mac-ce, x-kam-cs, koi8-r, koi8-u, koi8-ru, TCVN-5712, VISCII,utf-8 * HTTP_ACCEPT_LANGUAGE = en,*;q=0.1
* HTTP_CONNECTION = keep-alive
One good reason, why it is good to give this script a run is cause it can help you reveal problems with HTTP headers impoperly set cookies, language encoding problems, security holes etc. Also the script is a good example, for starters in learning PHP programming.


PC Freak old website now hostead on pc-freak.net/crew/

Thursday, November 22nd, 2007

A friend of Mine Marto a.k.a. (Amridikon) has regged a domain for pc-freak. So www.pc-freak.net is now upcheck his Development Studio dhstudio http://dhstudio.euPc-Freak’s site can be accessed from

https://www.pc-freak.net//crew/  :)END—–

How to list enabled VirtualHosts in Apache on GNU / Linux and FreeBSD

Thursday, December 8th, 2011

How Apache process vhost requests picture, how to list Apache virtualhosts on Linux and FreeBSD

I decided to start this post with this picture I found on onlamp.com article called “Simplify Your Life with Apache VirtualHosts .I put it here because I thing it illustrates quite well Apache’s webserver internal processes. The picture gives also a good clue when Virtual Hosts gets loaded, anways I’ll go back to the main topic of this article, hoping the above picture gives some more insight on how Apache works.;
Here is how to list all the enabled virtualhosts in Apache on Debian GNU / Linux serving pages:

server:~# /usr/sbin/ apache2ctl -S
VirtualHost configuration:
wildcard NameVirtualHosts and _default_ servers:
*:* is a NameVirtualHost
default server exampleserver1.com (/etc/apache2/sites-enabled/000-default:2)
port * namevhost exampleserver2.com (/etc/apache2/sites-enabled/000-default
port * namevhost exampleserver3.com (/etc/apache2/sites-enabled/exampleserver3.com:1)
port * namevhost exampleserver4.com (/etc/apache2/sites-enabled/exampleserver4.com:1)
...
Syntax OK

The line *:* is a NameVirtualHost, means the Apache VirtualHosts module will be able to use Virtualhosts listening on any IP address (configured on the host), on any port configured for the respective Virtualhost to listen on.

The next output line:
port * namevhost exampleserver2.com (/etc/apache2/sites-enabled/000-default Shows requests to the domain on any port will be accepted (port *) by the webserver as well as indicates the <VirtualHost> in the file /etc/apache2/sites-enabled/000-default:2 is defined on line 2 (e.g. :2).

To see the same all enabled VirtualHosts on FreeBSD the command to be issued is:

freebsd# pcfreak# /usr/local/sbin/httpd -S VirtualHost configuration:
wildcard NameVirtualHosts and _default_ servers:
*:80 is a NameVirtualHost
default server www.pc-freak.net (/usr/local/etc/apache2/httpd.conf:1218)
port 80 namevhost www.pc-freak.net (/usr/local/etc/apache2/httpd.conf:1218)
port 80 namevhost pcfreak.afraid.org (/usr/local/etc/apache2/httpd.conf:1353)
...
Syntax OK

On Fedora and the other Redhat Linux distributions, the apache2ctl -S should be displaying the enabled Virtualhosts.

One might wonder, what might be the reason for someone to want to check the VirtualHosts which are loaded by the Apache server, since this could be also checked if one reviews Apache / Apache2’s config file. Well the main advantage is that checking directly into the file might sometimes take more time, especially if the file contains thousands of similar named virtual host domains. Another time using the -S option is better would be if some enabled VirtualHost in a config file seems to not be accessible. Checking directly if Apache has properly loaded the VirtualHost directives ensures, there is no problem with loading the VirtualHost. Another scenario is if there are multiple Apache config files / installs located on the system and you’re unsure which one to check for the exact list of Virtual domains loaded.

Convert single PDF pages to multiple SVG files on Debian Linux with pdf2svg

Sunday, February 26th, 2012

In my last article, I've explained How to create PNG, JPG, GIF pictures from one single PDF document
Convertion of PDF to images is useful, however as PNG and JPEG graphic formats are raster graphics the image quality gets crappy if the picture is zoomed to lets say 300%.
This means convertion to PNG / GIF etc. is not a good practice especially if image quality is targetted.

I myself am not a quality freak but it was interesting to find out if it is possible to convert the PDF pages to SVG (Scalable Vector Graphics) graphics format.

Converting PDF to SVG is very easy as for GNU / Linux there is a command line tool called pdf2svg
pdf2svg's official page is here

The traditional source way compile and install is described on the homepage. For Debian users pdf2svg has already existing a deb package.

To install pdf2svg on Debian use:

debian:~# apt-get install --yes pdf2svg
...

Once installed usage of pdf2svg to convert PDF to multiple SVG files is analogous to imagemagick's convert .
To convert the 44 pages Projects.pdf to multiple SVG pages – (each PDF page to a separate SVG file) issue:

debian:~/project-pdf-to-images$ for i in $(seq 1 44); do \
pdf2svg Projects.pdf Projects-$i.SVG $i; \
done

This little loop tells each page number from the 44 PDF document to be stored in separate SVG vector graphics file:

debian:~/project-pdf-to-images$ ls -1 *.svg|wc -l
44

For BSD users and in particular FreeBSD ones png2svg has a bsd port in:

/usr/ports/graphics/pdf2svg

Installing on BSD is possible directly via the port and convertion of PDF to SVG on FreeBSD, should be working in the same manner. The only requirement is that bash shell is used for the above little bash loop, as by default FreeBSD runs the csh. 
On FreeBSD launch /usr/local/bin/bash, before following the Linux instructions if you're not already in bash.

Now the output SVG files are perfect for editting with Inkscape or Scribus and the picture quality is way superior to old rasterized (JPEG, PNG) images

How to build website sitemap (sitemap.xml) in Joomla

Monday, December 20th, 2010

A joomla installation I’m managing needed to have created a sitemap.xml

From a SEO perspective sitemap.xml and sitemap.xml.gz are absolutely necessary for a website to bewell indexed in google.

After some investigation I’ve found out a perfect program that makes generation of sitemap.xml in joomla a piece of cake.

All necessary to be done for the sitemap.xml to be created comes to download and install of JCrawler

What makes JCrawler even better is that it’s open source program.

To install Jcrawler go in the joomla administrator panel:

Extensiosn -> Install/Uninstall

You will see the Install from URL on the bottom, there place the link to the com_jcrawler.zip installation archive, for instance you can place the link of the downloaded copy of com_jcrawler.zip I’ve mirrored on www.pc-freak.net ,by placing it on https://www.pc-freak.net/files/com_jcrawler.zip

The installation will be done in a few seconds and you will hopefully be greated with a Installation Success message.

Last thing to do in order to have the sitemap.xml in your joomla based website generated is to navigate to:

Components -> JCrawler

There a screen will appear where you can customize certain things related to the sitemap.xml generation, I myself used the default options and continued straight to the Start button.

Further on a screen will appear asking you to Submit the newly generated sitemap to; Google, MSN, Ask.com, Moreover and Yahoo , so press the Submit button.
That’s all now your joomla website will be equipped with sitemap.xml, enjoy!

How to fix wordpress blog sudden redirection to present post problem

Wednesday, December 22nd, 2010

My blog’s index has suddenly started redirecting to my last post. That was rather strange, since I haven’t done anything special, all I did before the problem occured was a change in wordpress wp-admin to my latest post.

There in I changed the post Visibility from Public to Private

Right after this my blog’s home started redirecting to the blog post where the changes was made.

This was really strange, so I reverted back the changes in Post’s Publish Visibility to the default setting.
Though the change the redirect to the latest post by accessing my www.pc-freak.net/blog/ was still there.

I tried completely wiping out the post by sending it to Trash and issuing the same post again, but now things became even worser.

Accessing my blog was opening 404 not found error message . Everything seemed fine in wordpress admin and therefore I suspected the redirect is being applied from info read in my wordpress database in MySQL.

A bit of investigation prooved my guess was correct, for some reason a record was made to the MySQL blog database in table wp_redirection_items.

The incorrect redirection wihtin the database looked like so:

| 4 | /blog/ | 0 | 2 | 0 | 0000-00-00 00:00:00 | 2 | enabled | url | 301 | /blog/how-to-change-from-default-main-menu-to-other-text-in-joomla/ | url | NULL |

Removing the incorrect redirect was kind of easy and came to simply issuing:

mysql> delete from wp_redirection_items where id='3';
Query OK, 1 row affected (0.00 sec)

This fixed the redirection issue and opening my blog main page started correctly opening the main page again! 🙂