How to install GUI on CentOS 7 Minimal and set Gnome Graphical Environment to automatically load on system boot


July 22nd, 2020

centos-linux-logo

I have installed CentOS 7.7 Minimal Server Linux on a VirtualBox Virtual Environment as a test bed machine.

The system got installed easily succesfully with the standard CentOS python based graphical installer, however I needed to place various software which was not there
and for that of course I needed to have a network enabled.

To make network working instead of the default Network NAT configuration for the Virtual Machine I needed to use the Network to be Attached to a Bridged Adapter in order to make
my Windows machine to provide network and (internet) access to VirtualMachine.

virtualbox-virtualmachine-bridged-networking-configuration-screenshot

Then to make networking work after booting into CentOS I had to manually fetch IP via DHCP protocol with command:
 

[root@centos :~]# dhclient enp0s3


ethernet0-interface-dhclient-get-ip-linux

To make the setting permanent I had to also of course modify /etc/sysconfig/network-scripts/ifcfg-enp0s3 file and change 


ONBOOT=no


to 

ONBOOT=yes


enable-dhclient-centos-linux-shot

On next reboot CentOS boots normally with networking as expected

As by default CentOS Minimal does not provide any graphical environment however I needed to have it in my VM in order to be able to use VboxLinuxAdditions.run (VirtualBox Guest Additions plugins) that enabled the CentOS Operating System to show in Virtualbox in fullscreen and to enable the Copy / Paste buffers to work from The Hypervisor (Windows in that case) and the Guest VM (the CentOS VM).

In CentOS terminology metapackages (a  grouped package under a certain name, alias) are called simply groups) there is a "GNOME Desktop" group that can be used to install the GNOME Graphical Command from that point on with yum, like so:
 

[root@centos :~]# yum -y groups install "GNOME Desktop"


In a while the graphical environment will be in place, the command will install about 1300+ RPM packages, this will take about 5 minutes or so depending on your bandwidth connectivity. Once all is installed and configured succesfully you can use the good old startx command to launch GNOME.


[root@centos :~]# startx


centos7-linux-graphical-environment-screenshot

This of course will make Xserver and GNOME to run one time and on next reboot, you will end up in a plain text mode environment, so perhaps you will need to make the autolaunch of GNOME environment automatically on each boot in CentOS just like in most modern Linux distributions that use SYSTEMD to handle runlevels, you will need to configure it by changing the systemd default configured target via systemctl:


[root@centos :~]# systemctl list-units –type target | egrep "eme|res|gra|mul" 
graphical.target       loaded active active Graphical Interface
multi-user.target      loaded active active Multi-User System


[root@centos :~]# systemctl set-default graphical.target
multi-user.target


[root@centos :~]# systemctl set-default
graphical.target


[root@centos :~]# systemctl set-default graphical.target
graphical.target


Next step was to enable the Guest Additions to do so I had to install in advance 2 RPM packages kernel-headers and kernel-devel


[root@centos :~]# yum install -y kernel-headers kernel-devel

Then I had to mount and run the VboxLinuxAdditions.run script to enable them, i.e.:


[root@centos :~]# mkdir /mnt/cdrom
[root@centos :~]# mount /dev/cdrom /mnt/cdrom

[root@centos :~]# cd /mnt/cdrom/
[root@centos :~]# sh VboxLinuxAdditions.run


virtualbox-linux-additions-install-screenshot-centos-7-linux


Get daily E-Mail Reports statistics on postfix Linux mail server


July 14th, 2020

https://www.pc-freak.net/images/Postfix-email-server-logo.svg-1

I've had today a task at work to monitor a postfix mail send and received emails (MAIL FROM / RPCT TO) and get out a simple statistics on what kind of emails are coming and going out from the Postfix SMTP on a server?

Below is shortly explained how I did it plus you will learn how you can use something more advanced to get server mail count, delivery status, errors etc. daily.
 

1. Using a simple script to process /var/log/messages

For that I made a small script to do the trick, the script simply checks mail delivery logged information from /var/log/maillog process a bit sort and logs in a separate log daily.

#!/bin/sh
# Process /var/log/maillog extract from= and to= mails sort
# And log mails to $LOGF
# Author Georgi Georgiev 14.07.2020

DATE_FORM=$(date +'%m_%d_%y_%H_%M_%S_%h_%m');
LOG='/home/gge/mail_from_to-mails';
LOGF="$LOG.$DATE_FORM.log";
CUR_DATE=$(date +'%m_%d_%y_%T');
echo "Processing /var/log/maillog";
echo "Processing /var/log/maillog" > $LOGF;
echo >>$LOGF
echo "!!! $CUR_DATE # Sent MAIL FROM: addresses: !!!" >> $LOGF;
grep -E 'from=' /var/log/maillog|sed -e 's#=# #g'|awk '{ print $8 }'|sed -e 's#<# #g' -e 's#># #g' -e 's#\,##'|sort -rn|uniq >> $LOGF;

echo "!!! $CUR_DATE # Receive RCPT TO: addresses !!!" >>$LOGF;
grep -E 'to=' /var/log/maillog|sed -e 's#=# #g'|awk '{ print $8 }'|sed -e 's#<# #g' -e 's#># #g' -e 's#\,##'|sort -rn|uniq >> $LOGF;


You can get a copy of the mail_from_to_collect_mails_postfix.sh script here.

I've set the script to run via a crond scheduled job once early in the mornthing and I'll leave it like that for 5 days or so to get a good idea on what are the mailboxes that are receiving incoming mail.

The cron I've set to use is as follows:

# crontab -u root -l 
05 03 * * *     sh /home/gge/mail_from_to.sh >/dev/null 2>&1


This will be necessery later for a Email Server planned migration to relay its mail via another MTA host.


2. Getting More Robust Postifx Mail Statistics from logs


My little script is of course far from best solution to get postfix mail statistics from logs.

If you want something more professional and you need to have a daily report on what mails sent to mail server and mails sent from the MTA to give you information about the Email delivery queue status, number of successful and failed emails from a mail sender / recipient and a whole bunch of useful info you can use something more advanced such as pflogsumm perl script to get daily / weekly monthly mail delivery statistics.

What can pflogsumm do for you ?


Pflogsumm is a log analyzer/summarizer for the Postfix MTA. It is
designed to provide an overview of Postfix activity, with just enough
detail to give the administrator a “heads up” for potential trouble
spots and fixing any SMTP and email related issues.

Pflogsumm generates summaries and, in some cases, detailed reports of
mail server traffic volumes rejected and bounced email and server
warnings, errors, and panics.

At the time of writting this article it is living on jimsun.linxnet.com just in case if pflogsumm.pl's official download location disappears at some time in future here is pflogsumm-1.1.3.tar.gz mirror stored on www.pc-freak.net

– Install pflogsumm

Use of pflogsumm is pretty straight forward, you download unarchive the script to some location such as /usr/local/bin/pflogsumm.pl  add the script executable flag and you run it to create a Postfix Mail Log statistics report for you

wget http://jimsun.linxnet.com/downloads/pflogsumm-1.1.3.tar.gz -O /usr/local/src/pflogsumm-1.1.3.tar.gz


# mkdir -p /usr/local/src/
# cd /usr/local/src/
# tar -zxvf pflogsumm-1.1.3.tar.gz
# cd pflogsumm-1.1.3/

# mv /usr/local/pflogsumm-1.1.3/pflogsumm.pl /usr/local/bin/pflogsumm
# chmod a+x /usr/local/bin/pflogsumm


That's all, assuming you have perl installed on the system with some standard modules, we're now good to go: 

To give it a test report to the command line:

# /usr/local/bin/pflogsumm -d today /var/log/maillog

pflogsumm-log-summary-screenshot-linux-received-forwarded-bounced-rejected

To generate mail server use report and launch to some email of choice do:

# /usr/local/bin/pflogsumm -d today /var/log/maillog | mail -s Mailstats your-mail@your-domain.com


To make pflogsumm report everyday various interesting stuff such as (message deferrals, message bounce, details, smtp delivery failures, fatal errors, recipients by message size etc. add some cronjob like below to the server:

# /usr/sbin/pflogsumm -d yesterday /var/log/maillog | mail -s Mailstats | mail -s Mailstats your-mail@your-domain.com

If you need a GUI graphical mail monitoring in a Web Browser, you will need to install a webserver with a perl / cgi support,  RRDTools and MailGraph.

linux-monitoring-mail-server-with-mailgraph.cgi

How to check how many processor and volume groups IBM AIX eServer have


July 13th, 2020

how-many-cpus-are-on-commands-Linux-sysadmin-and-user-show-know-AIX-logo
In daily sysadmin duties I have been usually administrating GNU / Linux or FreeBSD servers.
However now in my daily sysadmin jobs I've been added to do some minor sysadmin activities on  a few IBM AIX eServers UNIX machines.

As the eServers were completely unknown to me and I logged in for a first time I needed a way to get idea on what kind of hardware I'm logging in so I wanted to get information about the Central Processing UNIT CPUs on the host.

On Linux I'm used to do a cat /proc/cpuinfo or do dmidecode etc. to get the number of CPUs, however AIX does not have /proc/cpuinfo and has its own way to get information about the system hardware.
As I've red in the IBM AIX's RedBook to get system information on AIX there is the lscfg command.
 

aix:/# lscfg
INSTALLED RESOURCE LIST

The following resources are installed on the machine.
+/- = Added or deleted from Resource List.
*   = Diagnostic support not available.

  Model Architecture: chrp
  Model Implementation: Multiple Processor, PCI bus

+ sys0                                                            System Object
+ sysplanar0                                                      System Planar
* vio0                                                            Virtual I/O Bus
* vscsi3           U8205.E6B.068D6AP-V4-C21-T1                    Virtual SCSI Client Adapter
* vscsi2           U8205.E6B.068D6AP-V4-C20-T1                    Virtual SCSI Client Adapter
* vscsi1           U8205.E6B.068D6AP-V4-C11-T1                    Virtual SCSI Client Adapter
* hdisk1           U8205.E6B.068D6AP-V4-C11-T1-L8100000000000000  Virtual SCSI Disk Drive
* vscsi0           U8205.E6B.068D6AP-V4-C10-T1                    Virtual SCSI Client Adapter
* hdisk0           U8205.E6B.068D6AP-V4-C10-T1-L8100000000000000  Virtual SCSI Disk Drive
* ent3             U8205.E6B.068D6AP-V4-C5-T1                     Virtual I/O Ethernet Adapter (l-lan)
* ent2             U8205.E6B.068D6AP-V4-C4-T1                     Virtual I/O Ethernet Adapter (l-lan)
* ent1             U8205.E6B.068D6AP-V4-C3-T1                     Virtual I/O Ethernet Adapter (l-lan)
* ent0             U8205.E6B.068D6AP-V4-C2-T1                     Virtual I/O Ethernet Adapter (l-lan)
* vsa0             U8205.E6B.068D6AP-V4-C0                        LPAR Virtual Serial Adapter
* vty0             U8205.E6B.068D6AP-V4-C0-L0                     Asynchronous Terminal
+ L2cache0                                                        L2 Cache
+ mem0                                                            Memory
+ proc0                                                           Processor
+ proc4                                                           Processor


To get the number of processors on the host I've had to use:


aix:/# lscfg|grep -i proc
  Model Implementation: Multiple Processor, PCI bus
+ proc0                                                           Processor
+ proc4                                                           Processor


Another way to get the CPU number is with:

aix:/# lsdev -C -c processor
proc0 Available 00-00 Processor
proc4 Available 00-04 Processor


aix:/# lsattr -EH -l proc4
attribute   value          description           user_settable


frequency   3720000000     Processor Speed       False
smt_enabled true           Processor SMT enabled False
smt_threads 4              Processor SMT threads False
state       enable         Processor state       False
type        PowerPC_POWER7 Processor type        False

aix:/# lsattr -EH -l proc0
attribute   value          description           user_settable


frequency   3720000000     Processor Speed       False
smt_enabled true           Processor SMT enabled False
smt_threads 4              Processor SMT threads False
state       enable         Processor state       False
type        PowerPC_POWER7 Processor type        False


As you can see each of the processor is multicore has 2 Cores and each of the cores have for Threads, to get the overall number of CPUs on the system including the threaded Virtual CPUs:

aix:/# bindprocessor -q
The available processors are:  0 1 2 3 4 5 6 7


This specific machine has overall of 8 CPUs cores.

lscfg can be used to get various useful other info of the iron:

aix:/# lscfg -s
INSTALLED RESOURCE LIST


The following resources are installed on the machine.
+/- = Added or deleted from Resource List.
*   = Diagnostic support not available.

  Model Architecture: chrp
  Model Implementation: Multiple Processor, PCI bus

+ sys0
        System Object
+ sysplanar0
        System Planar
* vio0
        Virtual I/O Bus
* vscsi3           U8305…………….
        Virtual SCSI Client Adapter
* vscsi2           U8305…………….
        Virtual SCSI Client Adapter
* vscsi1           U8305…………….
        Virtual SCSI Client Adapter
* hdisk1           U8305…………….
        Virtual SCSI Disk Drive
* vscsi0           U8305……………..
        Virtual SCSI Client Adapter
* hdisk0           U8305…………….
        Virtual SCSI Disk Drive
* ent3             U8305…………….
        Virtual I/O Ethernet Adapter (l-lan)
* ent2             U8305.E6B…………….
        Virtual I/O Ethernet Adapter (l-lan)
* ent1             U8305.E6B…………….
        Virtual I/O Ethernet Adapter (l-lan)
* ent0             U8305.E6B…………….
        Virtual I/O Ethernet Adapter (l-lan)
* vsa0             U8305.E7B…………….
        LPAR Virtual Serial Adapter
* vty0             U8305.E7B…………….
        Asynchronous Terminal
+ L2cache0
        L2 Cache
+ mem0
        Memory
+ proc0
        Processor
+ proc4
        Processor

aix:/# lscfg -p
INSTALLED RESOURCE LIST

The following resources are installed on the machine.

  Model Architecture: chrp
  Model Implementation: Multiple Processor, PCI bus

  sys0                                                            System Object
  sysplanar0                                                      System Planar
  vio0                                                            Virtual I/O Bus
  vscsi3           U8305.E7B…………….V6-C40-T1                    Virtual SCSI Client Adapter
  vscsi2           U8305.E7B…………….V6-C40-T1                     Virtual SCSI Client Adapter
  vscsi1           U8305.E7B…………….V6-C40-T1                    Virtual SCSI Client Adapter
  hdisk1           U8305.E7B…………….V6-C40-T1-L8500000000000000  Virtual SCSI Disk Drive
  vscsi0           U8305.E7B…………….V6-C40-T1                    Virtual SCSI Client Adapter
  hdisk0           U8305.E7B…………….V6-C40-T1-L8500000000000000  Virtual SCSI Disk Drive
  ent3             U8305.E7B…………….V6-C40-T1                     Virtual I/O Ethernet Adapter (l-lan)
  ent2             U8305.E7B…………….V6-C40-T1                     Virtual I/O Ethernet Adapter (l-lan)
  ent1             U8305.E7B…………….V6-C40-T1                     Virtual I/O Ethernet Adapter (l-lan)
  ent0             U8305.E7B…………….V6-C40-T1                     Virtual I/O Ethernet Adapter (l-lan)
  vsa0             U8305.E7B.069D7AP-V5-C1                        LPAR Virtual Serial Adapter
  vty0             U8305.E7B.069D7AP-V5-D1-L0                     Asynchronous Terminal
  L2cache0                                                        L2 Cache
  mem0                                                            Memory
  proc0                                                           Processor
  proc4                                                           Processor

  PLATFORM SPECIFIC

  Name:  IBM,8305-E7B
    Model:  IBM,8305-E7B
    Node:  /
    Device Type:  chrp

  Name:  openprom
    Model:  IBM,AL730_158
    Node:  openprom

  Name:  interrupt-controller
    Model:  IBM, Logical PowerPC-PIC, 00
    Node:  interrupt-controller@0
    Device Type:  PowerPC-External-Interrupt-Presentation

  Name:  vty
    Node:  vty@30000000
    Device Type:  serial
    Physical Location: …………………………………………..

  Name:  l-lan
    Node:  l-lan@30000002
    Device Type:  network
    Physical Location: …………………………………………..

  Name:  l-lan
    Node:  l-lan@30000003
    Device Type:  network
    Physical Location: …………………………………………..

  Name:  l-lan
    Node:  l-lan@30000004
    Device Type:  network
    Physical Location: …………………………………………..

  Name:  l-lan
    Node:  l-lan@30000005
    Device Type:  network
    Physical Location: …………………………………………..

  Name:  v-scsi
    Node:  v-scsi@3000005a
    Device Type:  vscsi
    Physical Location: …………………………………………..

  Name:  v-scsi
    Node:  v-scsi@3000005b
    Device Type:  vscsi
    Physical Location: …………………………………………..

  Name:  v-scsi
    Node:  v-scsi@30000014
    Device Type:  vscsi
    Physical Location: ………………………………..

  Name:  v-scsi
    Node:  v-scsi@30000017
    Device Type:  vscsi
    Physical Location: …………………………………


Another useful command I found is to list the equivalent of Linux's LVM Logical Volumes configured on the system, below is how:

aix:/# lspv hdisk0
00f68c6a84acb0d5 rootvg active hdisk1 00f69d6a85400468 dsvg active

To get more info on a volume group:

aix:/# lspv hdisk0 PHYSICAL VOLUME: hdisk0 VOLUME GROUP: rootvg PV IDENTIFIER: 00f68d6a85acb0d5 VG IDENTIFIER 00f68d6a00004c0000000131353444a5 PV STATE: active STALE PARTITIONS: 0 ALLOCATABLE: yes PP SIZE: 32 megabyte(s) LOGICAL VOLUMES: 12 TOTAL PPs: 959 (30688 megabytes) VG DESCRIPTORS: 2 FREE PPs: 493 (15776 megabytes) HOT SPARE: no USED PPs: 466 (14912 megabytes) MAX REQUEST: 256 kilobytes FREE DISTRIBUTION: 191..00..00..110..192 USED DISTRIBUTION: 01..192..191..82..00 MIRROR POOL: None


You can get which local configured partition is set on which ( PV )Physical Volume

aix:/# lspv -l hdisk0
hdisk0:
LV NAME               LPs     PPs     DISTRIBUTION          MOUNT POINT
lg_dumplv             64      64      00..64..00..00..00    N/A
hd8                   1       1       00..00..01..00..00    N/A
hd6                   16      16      00..16..00..00..00    N/A
hd2                   166     166     00..45..89..32..00    /usr
hd4                   29      29      00..11..18..00..00    /
hd3                   40      40      00..04..04..32..00    /tmp
hd9var                55      55      00..00..37..18..00    /var
hd10opt               74      74      00..37..37..00..00    /opt
hd1                   8       8       00..07..01..00..00    /home
hd5                   1       1       01..00..00..00..00    N/A

Linux Send Monitoring Alert Emails without Mail Server via relay SMTP with ssmtp / msmtp


July 10th, 2020

ssmtp-linux-server-sending-email-without-a-local-mail-server-mta-relay-howto

If you have to setup a new Linux server where you need to do a certain local running daemons monitoring with a custom scripts on the local machine Nagios / Zabbix / Graphana etc. that should notify about local running custom programs or services in case of a certain criteria is matched or you simply want your local existing UNIX accounts to be able to send outbound Emails to the Internet.

Then usually you need to install a fully functional SMTP Email server that was Sendmail or QMAIL in old times in early 21st century andusually postfix or Exim in recent days and configure it to use as as a Relay mail server some Kind of SMTP.

The common Relay smtp setting would be such as Google's smtp.gmail.com, Yahoo!'s  smtp.mail.yahoo.com relay host, mail.com or External configured MTA Physical server with proper PTR / MX records or a SMTP hosted on a virtual machine living in Amazon's AWS or m$ Azure that is capable to delivere EMails to the Internet.

Configuring the local installed Mail Transport Agent (MTA) as a relay server is a relatively easy task to do but of course why should you have a fully stacked MTA service with a number of unnecessery services such as Email Queue, Local created mailboxes, Firewall rules, DNS records, SMTP Auth, DKIM keys etc. and even the ability to acccept any emails back in case if you just want to simply careless send and forget with a confirmation that remote email was send successfully?

This is often the case for some machines and especially with the inclusion of technologies such as Kubernettes / Clustered environments / VirtualMachines small proggies such as ssmtp / msmtp that could send mail without a Fully functional mail server installed on localhost ( 127.0.0.1 ) is true jams.

ssmtp program is Simple Send-only sendMail emulator  has been around in Debian GNU / Linux, Ubuntu, CentOS and mostly all Linuxes for quite some a time but recently the Debian package has been orphaned so to install it on a deb based server host you need to use instead msmtp.
 

1. Install ssmtp on CentOS / Fedora / RHEL Linux

In RPM distributions you can't install until epel-release repository is enabled.

[root@centos:~]# yum –enablerepo=extras install epel-release

[root@centos:~]# yum install ssmtp


2. Install ssmp / msmtp Debian / Ubuntu Linux

If you run older version of Debian based distribution the package to install is ssmtp, e.g.:

root@debian:~# apt-get install –yes ssmtp


On Newer Debians as of Debian 10.0 Buster onwards install instead

root@debian:~# apt install –yes msmtp-mta

can save you a lot of effort to keep an eye on a separately MTA hanging around and running as a local service eating up resources that could be spared.
 

3. Configure Relay host for ssmtp


A simple configuration to make ssmtp use gmail.com SMTP servers as a relay host below:

linux:~# cat << EOF > /etc/ssmtp/ssmtp.conf
# /etc/ssmtp/ssmtp.conf
# The user that gets all the mails (UID < 1000, usually the admin)
root=user@host.name
# The full hostname.  Must be correctly formed, fully qualified domain name or GMail will reject connection.
hostname=host.name
# The mail server (where the mail is sent to), both port 465 or 587 should be acceptable
# See also https://support.google.com/mail/answer/78799
mailhub=smtp.gmail.com:587
#mailhub=smtp.host.name:465

# The address where the mail appears to come from for user authentication.
rewriteDomain=gmail.com
# Email 'From header's can override the default domain?

FromLineOverride=YES

# Username/Password
AuthUser=username@gmail.com
AuthPass=password
AuthMethod=LOGIN
# Use SSL/TLS before starting negotiation
UseTLS=YES
UseTLS=Yes
UseSTARTTLS=Yes
logfile        ~/.msmtp.log

EOF

This configuration is very basic and it is useful only if you don't want to get delivered mails back as this functionality is also supported even though rarely used by most.

One downside of ssmtp is mail password will be plain text, so make sure you set proper permissions to /etc/ssmtp/ssmtp.conf
 

– If your Gmail account is secured with two-factor authentication, you need to generate a unique App Password to use in ssmtp.conf. You can do so on your App Passwords page. Use Gmail username (not the App Name) in the AuthUser line and use the generated 16-character password in the AuthPass line, spaces in the password can be omitted.

– If you do not use two-factor authentication, you need to allow access to unsecure apps.
 

4. Configuring different msmtp for separate user profiles


SSMTP is capable of respecting multiple relays for different local UNIX users assuming each of whom has a separate home under /home/your-username

To set a certain user lets say georgi to relay smtp sent emails with mail or mailx command create ~/.msmtprc


linux:~# vim ~/.msmtprc


Append configuration like:

# Set default values for all following accounts.
defaults
port 587
tls on
tls_trust_file /etc/ssl/certs/ca-certificates.crt
account gmail
host smtp.gmail.com
from <user>@gmail.com
auth on
user <user>
passwordeval gpg –no-tty -q -d ~/.msmtp-gmail.gpg
# Set a default account

account default : gmail


To add it for any different user modify the respective fields and set the different Mail hostname etc.
 

5. Using mail address aliases


msmtp also supports mail aliases, to make them work you will need to have file /etc/msmptrc with
 

aliases               /etc/aliases


Standard aliasses them should work 

linux:~# cat /etc/aliases
# Example aliases file
     
# Send root to Joe and Jane
root: georgi_georgiev@example.com, georgi@example.com
   
# Send everything else to admin
default: admin@domain.example


6. Get updated when your Debian servers have new packages to update 

msmpt can be used for multiple stuff one example use would be to use it together with cron to get daily updates if there are new debian issued security or errata update pending packages, to do so you can use the apticron shell script.

To use it on debian install the apticron pack:
 

root@debian:~# apt-get install –yes apticron

apticron has the capability to:

 * send daily emails about pending upgrades in your system;
 * give you the choice of receiving only those upgrades not previously notified;
 * automatically integrate to apt-listchanges in order to give you by email the
   new changes of the pending upgrade packages;
 * handle and warn you about packages put on hold via aptitude/dselect,
   avoiding unexpected package upgrades (see #137771);
 * give you all these stuff in a simple default installation;


To configure it you have to place a config copy the one from /usr/lib/apticron/apticron.conf to /etc/apticron/apticron.conf

The only important value to modify in the config is the email address to which an apt-listchanges info for new installable debs from the apt-get dist-upgrade command. Output from them will be be send to the configured EMAIL field  in apticron.conf.
 

EMAIL="<your-user@email-addr-domain.com>"


The timing at which the offered new pending package update reminder will be sent is controlled by /etc/cron.d/apticron
 

debian:~# cat /etc/cron.d/apticron
# cron entry for apticron

48 * * * * root if test -x /usr/sbin/apticron; then /usr/sbin/apticron –cron; else true; fi

apticron will use the local previous ssmtp / msmpt program to deliver to configured mailbox.
To manually trigger apticron run:
 

root@debian:~# if test -x /usr/sbin/apticron; then /usr/sbin/apticron –cron; else true; fi


7. Test whether local mail send works to the Internet

To test mail sent we can use either mail / mailx or sendmail command or some more advanced mailer as alpine or mutt.

Below is few examples.

linux:~$ echo -e "Subject: this is the subject\n\nthis is the body" | mail user@your-recipient-domain.com

To test attachments to mail also works run:

linux:~$ mail -s "Subject" recipient-email@domain.com < mail-content-to-attach.txt

or

Prepare the mail you want to send and send it with sendmail

linux:~$ vim test-mail.txt
To:username@example.com
From:youraccount@gmail.com
Subject: Test Email
This is a test mail.

linux:~$ sendmail -t < test-mail.txt

Sending encoded atacchments with uuencode is also possible but you will need sharutils Deb / RPM package installed.

To attach lets say 2 simple text files uuencoded:

linux:~$ uuencode file.txt myfile.txt | sendmail user@example.com

echo "

To: username@domain.com From: username@gmail.com Subject: A test Hello there." > test.mail

linux:~$ cat test.mail | msmtp -a default <username>@domain.com


That's all folks, hope you learned something, if you know of some better stuff like ssmtp please shar e it.

Stop SSH Bruteforce authentication attempt Attacks with fail2ban


July 6th, 2020

Fail2ban stop restrict ssh bruteforce authentication attempt attacks

Most of webmasters today have some kind of SSH console remote access to the server and the OpenSSH Secure Shell service is usually not filtered for specific Networks but fully accessbible on the internet. This is especially true for home brew Linux Web servers as well as small to mid sized websites and blogs hosted on a cheap dedicated servers hosted in UK2 / Contabo RackSpace etc.

Brute force password guess attack tools such as Hydra and a distributed password dictionary files have been circulating quite for a while and if the attacker has enough time as well as a solid dictionary base, as well as some kind of relatively weak password you can expect that sooner or later some of the local UNIX accounts can be breaked and the script kiddie can get access to your server and make quickly a havoc, if he is lucky enough to be able to exploit some local vulnerability and get root access …

If you're a sysadmin that has to manage the Linux server and you do a routine log reading on the machine, you will soon get annoyed of the ever growing amount of different users, that are trying to login unsucessfully to the SSH (TCP port 22) service filling up the logs with junk and filling up disk space for nothing as well as consuming some CPU and Memory resources for nothing, you will need some easy  solution to make brute force attacks from an IP get filtered after few unsuccessful login attempts.
 

The common way to protect SSH would then be to ban an IP address from logging in if there are too many failed login attempts based on an automatic firewall inclusion of any IP that tried to unsuccessfully login lets say 5 or 10 reoccuring times.

In Linux there is a toll called “fail2ban” (F2B) used to limit brute force authentication attempts.

F2B works with minimal configuration and besides being capable of protecting the SSH service, it can be set to protect a lot of other Server applications like;

 Apache / NGINX Web Servers with PHP / Mail Servers (Exim, Postfix, Qmail, Sendmail), POP3 IMAP / AUTH services (Dovecot, Courier, Cyrus), DNS Bind servers, MySQL DBs, Monitoring tools such as Nagios, FTP servers (ProFTPD / PureFTP), Proxy servers (Squid), WordPress sites (wp-login) brute force attacks, Web Mail services (Horde / Roundcube / OpenWebmail), jabber servers etc.

To get a better overview below is F2B package description:
 

linux:~# apt-cache show fail2ban|grep -i description-en -A 21
Description-en: ban hosts that cause multiple authentication errors
 Fail2ban monitors log files (e.g. /var/log/auth.log,
 /var/log/apache/access.log) and temporarily or persistently bans
 failure-prone addresses by updating existing firewall rules.  Fail2ban
 allows easy specification of different actions to be taken such as to ban
 an IP using iptables or hostsdeny rules, or simply to send a notification
 email.
 .
 By default, it comes with filter expressions for various services
 (sshd, apache, qmail, proftpd, sasl etc.) but configuration can be
 easily extended for monitoring any other text file.  All filters and
 actions are given in the config files, thus fail2ban can be adopted
 to be used with a variety of files and firewalls.  Following recommends
 are listed:
 .
  – iptables/nftables — default installation uses iptables for banning.
    nftables is also suported. You most probably need it
  – whois — used by a number of *mail-whois* actions to send notification
    emails with whois information about attacker hosts. Unless you will use
    those you don't need whois
  – python3-pyinotify — unless you monitor services logs via systemd, you
    need pyinotify for efficient monitoring for log files changes


Using fail2ban is easy as there is a multitude of preexisting filters and actions (that gets triggered on a filter match) already written by different people usually found in /etc/fail2ban/filter.d an /etc/fail2ban/action.d.
as well as custom action / filter / jails is easy to do.
Fail2ban is available as a standard distro RPM / DEB package
on most modern versions of Ubuntu (16.04 and later), Debian, Mint and CentOS 7, OpenSuSE, Fedora etc.
 

1. Install Fail2ban package


– On Deb based distros do the usual:


linux:~# apt update
linux:~# apt install –yes fail2ban


On RPM distros Fedora / CentOS / SuSE etc.
 

linux:~# sudo yum -y install epel-release
linux:~# sudo yum -y install fail2ban


2. Enable fail2ban ban rules for SSH failed authentication filtering


Create the file /etc/fail2ban/jail.local :
 

# cat > /etc/fail2ban/jail.local


Paste below content:
 

[DEFAULT]
# Ban hosts for one hour:
bantime = 360
# Override /etc/fail2ban/jail.d/00-firewalld.conf:
banaction = iptables-multiport


[sshd]
enabled = true
maxretry = 10
findtime = 43200
# ban for 1 day
bantime = 3600
# ban for 1 day
#bantime = 86400


This config will ban for 1 day any IP that tries to access more than 10 unsuccesful times sshd daemon.
This works through IPTABLES indicated by config banaction = iptables-multiport config making fail2ban to automatically add a new iptables block rule valid for 1 day.

To close the file press CTRL + D simulanesly

  • maxretry controls the maximum number of allowed retries.
  • findtime specifies the time window (in seconds) which should be considered for banning an IP. (43200 seconds is 12 hours)
  • bantime specifies the time window (in seconds) for which the IP address will be banned (86400 seconds is 24 hours).

If SSH listens to a different port from 22 on the machine, you can specify the port number with  port = <port_number>  in this file.


3. Start fail2ban service


Either use the /etc/init.d/fail2ban start script or systemd systemctl
 

linux:~# systemctl enable fail2ban
linux:~# systemctl restart fail2ban


4. Fail2ban operational principle in short


Fail2ban uses Filters, Actions And Jails:

Filtersspecify certain patterns of text that Fail2ban should recognize in log files.
Actionsare things Fail2ban can do once a filter is matched.
Jailstell Fail2ban to match a filter on some logs. When the number of matches goes beyond a certain limit specified in the jail, Fail2ban takes an action specified in the jail.

If still wonder what is Fail2ban jail? Each configured jail tells fail2ban to look at system logs and take actions against attacks on a configured service, in our case OpenSSH service.
 

5. Blocking repeated unsuccessful password authentication attempts for longer periods


If more than number of failed ssh logins happen to occur (lets say 35 reoccuring ones in /var/log/auth.log (the debian failed ssh login file) or /var/log/secure (redhat distros failed ssh log file).
You will perhaps want to permanently block this IP for 3 days or so, here is how:
 

banaction = iptables-multiport
maxretry  = 35
findtime  = 259200
bantime   = 608400
enabled   = true
filter    = sshd


Add this to [sshlongterm] section to make it finally look like this:
 

[sshlongterm]
port      = ssh
logpath   = %(sshd_log)s
banaction = iptables-multiport
maxretry  = 35
findtime  = 259200
bantime   = 608400
enabled   = true
filter    = sshd


Of course to load new config restart fail2ban
 

# /etc/init.d/fail2ban restart


Default jail as well as the sshlongterm jail should now work together. Short term attacks will be handled by the default jail under [sshd], and the long term attacks handled by our own second jail [sshlongterm].
 

6. Checking which intruders were blocked by fail2ban


Fail2ban creates a separate chain f2b-sshd to which it adds each blocked IP for the period of time preset in the config, to list it:

linux:~# /sbin/iptables -L f2b-sshd
Chain f2b-sshd (1 references)
target     prot opt source               destination         
REJECT     all  —  165.22.2.95          anywhere             reject-with icmp-port-unreachable
REJECT     all  —  ec2-13-250-58-46.ap-southeast-1.compute.amazonaws.com  anywhere             reject-with icmp-port-unreachable
REJECT     all  —  cable200-116-3-133.epm.net.co  anywhere             reject-with icmp-port-unreachable
REJECT     all  —  mail.antracite.org   anywhere             reject-with icmp-port-unreachable
REJECT     all  —  139.59.57.2          anywhere             reject-with icmp-port-unreachable
REJECT     all  —  111.68.98.152.pern.pk  anywhere             reject-with icmp-port-unreachable
REJECT     all  —  216.126.59.61        anywhere             reject-with icmp-port-unreachable
REJECT     all  —  104.248.4.138        anywhere             reject-with icmp-port-unreachable
REJECT     all  —  210.211.119.10       anywhere             reject-with icmp-port-unreachable
REJECT     all  —  85.204.118.13        anywhere             reject-with icmp-port-unreachable
REJECT     all  —  broadband.actcorp.in  anywhere             reject-with icmp-port-unreachable
REJECT     all  —  104.236.33.155       anywhere             reject-with icmp-port-unreachable
REJECT     all  —  114.ip-167-114-114.net  anywhere             reject-with icmp-port-unreachable
REJECT     all  —  142.162.194.168.rfc6598.dynamic.copelfibra.com.br  anywhere             reject-with icmp-port-unreachable
REJECT     all  —  server.domain.cl     anywhere             reject-with icmp-port-unreachable
REJECT     all  —  ip202.ip-51-68-251.eu  anywhere             reject-with icmp-port-unreachable
REJECT     all  —  188.166.185.157      anywhere             reject-with icmp-port-unreachable
REJECT     all  —  93.49.11.206         anywhere             reject-with icmp-port-unreachable
RETURN     all  —  anywhere             anywhere            


Conclusion


What we have seen here is how to make fail2ban protect Internet firewall unrestricted SSHD Service to filter out 1337 skript kiddie 'hackers' out of your machine. With a bit of tuning could not only break the occasional SSH Brute Force bot scanners that craw the new but could even mitigate massive big botnet initiated brute force attacks to servers.
Of course fail2ban is not a panacea and to make sure you won't get hacked one days better make sure to only allow access to SSH service only for a certain IP addresses or IP address ranges that are of your own PCs.

Report haproxy node switch script useful for Zabbix or other monitoring


June 9th, 2020

zabbix-monitoring-logo
For those who administer corosync clustered haproxy and needs to build monitoring in case if the main configured Haproxy node in the cluster is changed, I've developed a small script to be integrated with zabbix-agent installed to report to a central zabbix server via a zabbix proxy.
The script  is very simple it assumed DC1 variable is the default used haproxy node and DC2 and DC3 are 2 backup nodes. The script is made to use crm_mon which is not installed by default on each server by default so if you'll be using it you'll have to install it first, but anyways the script can easily be adapted to use pcs cmd instead.

Below is the bash shell script:

UserParameter=active.dc,f=0; for i in $(sudo /usr/sbin/crm_mon -n -1|grep -i 'Node ' |awk '{ print $2 }'); do ((f++)); DC[$f]="$i"; done; \
DC=$(sudo /usr/sbin/crm_mon -n -1 | grep 'Current DC' | awk '{ print $1 " " $2 " " $3}' | awk '{ print $3 }'); \
if [ “$DC” == “${DC[1]}” ]; then echo “1 Default DC Switched to ${DC[1]}”; elif [ “$DC” == “${DC[2]}” ]; then \
echo "2 Default DC Switched to ${DC[2]}”; elif [ “$DC” == “${DC[3]}” ]; then echo “3 Default DC: ${DC[3]}"; fi


To configure it with zabbix monitoring it can be configured via UserParameterScript.

The way I configured  it in Zabbix is as so:


1. Create the userpameter_active_node.conf

Below script is 3 nodes Haproxy cluster

# cat > /etc/zabbix/zabbix_agentd.d/userparameter_active_node.conf

UserParameter=active.dc,f=0; for i in $(sudo /usr/sbin/crm_mon -n -1|grep -i 'Node ' |awk '{ print $2 }'); do ((f++)); DC[$f]="$i"; done; \
DC=$(sudo /usr/sbin/crm_mon -n -1 | grep 'Current DC' | awk '{ print $1 " " $2 " " $3}' | awk '{ print $3 }'); \
if [ “$DC” == “${DC[1]}” ]; then echo “1 Default DC Switched to ${DC[1]}”; elif [ “$DC” == “${DC[2]}” ]; then \
echo "2 Default DC Switched to ${DC[2]}”; elif [ “$DC” == “${DC[3]}” ]; then echo “3 Default DC: ${DC[3]}"; fi

Once pasted to save the file press CTRL + D


The version of the script with 2 nodes slightly improved is like so:
 

UserParameter=active.dc,f=0; for i in $(sudo /usr/sbin/crm_mon -n -1|grep -i 'Node ' |awk '{ print $2 }' | sed -e 's#:##g'); do DC_ARRAY[$f]=”$i”; ((f++)); done; GET_CURR_DC=$(sudo /usr/sbin/crm_mon -n -1 | grep ‘Current DC’ | awk ‘{ print $1 ” ” $2 ” ” $3}’ | awk ‘{ print $3 }’); if [ “$GET_CURR_DC” == “${DC_ARRAY[0]}” ]; then echo “1 Default DC ${DC_ARRAY[0]}”; fi; if [ “$GET_CURR_DC” == “${DC_ARRAY[1]}” ]; then echo “2 Default Current DC Switched to ${DC_ARRAY[1]} Please check “; fi; if [ -z “$GET_CURR_DC” ] || [ -z “$DC_ARRAY[1]” ]; then printf "Error something might be wrong with HAProxy Cluster on  $HOSTNAME "; fi;


The haproxy_active_DC_zabbix.sh script with a bit of more comments as explanations is available here 
2. Configure access for /usr/sbin/crm_mon for zabbix user in sudoers


# vim /etc/sudoers

zabbix          ALL=NOPASSWD: /usr/sbin/crm_mon


3. Configure in Zabbix for active.dc key Trigger and Item

active-node-switch1

Linux: Howto Disable logging for all VirtualHosts on Apache and NGINX Webservers one liner


July 1st, 2020

disable-apache-nginx-logging-for-all-virtualhosts
Did you happen to administer Apache Webservers or NGINX webservers whose logs start to grow so rapidly that are flooding the disk too quickly?
Well this happens sometimes and it also happens that sometimes you just want to stop logging especially, to offload disk writting.

There is an easy way to disable logging for requests and errors (access_log and error_log usually residing under /var/log/httpd or /var/log/nginx ) for  all configured Virtual Domains with a short one liner, here is how.

Before you start  Create backup of /etc/apache2/sites-enabled / or /etc/nginx to be able to revert back to original config.

# cp -rpf /etc/apache2/sites-enabled/ ~/

# cp -rpf /etc/nginx/ ~/


1. Disable Logging for All  Virtual Domains configured for Apache Webserver

First lets print what the command will do to make sure we don't mess something

# find /home/hipo/sites-enabled/* -exec echo sed -i 's/#*[Cc]ustom[Ll]og/#CustomLog/g' {} \;


You will get some output like

find /home/hipo//sites-enabled/* -exec echo sed -i 's/#*[Cc]ustom[Ll]og/#CustomLog/g' {} \;

find /etc/apache2/sites-enabled/* -exec sed -i 's/#*[Cc]ustom[Ll]og/#CustomLog/g' {} \;
find /etc/apache2/sites-enabled/* -exec sed -i 's/#*[Ee]rror[Ll]og/#ErrorLog/g' {} \;

2. Disable Logging for All configured Virtual Domains for NGINX Webserver
 

find /etc/nginx/sites-enabled/* -exec sed -i 's/#*access_log/#access_log/g' {} \;
find /etc/nginx/sites-enabled/* -exec sed -i 's/#*error_log/#error_log/g' {} \;

f course above substituations that will comment out with '#' occurances from file configs of only default set access_log and error_log / access.log, error.log 
for machines where there is no certain convention on file naming and there are multiple domains in custom produced named log files this won't work.

This one liner was inspired from a friend's daily Martin Petrov. Martin blogged initially about this nice tip for those reading Cyrillic check out mpetrov.net, so. Thanks Marto ! 🙂

June 29 the Feast of The Glorious and First among Apostles Peter and Paul in the Church and What were the names of The twelve Apostles


June 30th, 2020

saint-Glorious-Apostle-Peter-and-Paul-holy-orthodox-icon

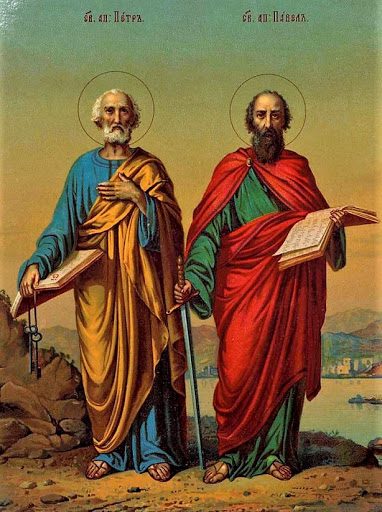
Saint Apostle Peter and Paul are the most glorious of all Christ desciples thanks to whom by God's mercy and Grace the nations have received the good news of the Lord Jesus's Christ Crucifix for the sins of all us the sinful people whose evils and unthankfullness is on the way to reach its climax in this days of apostacy where the Church built on top of the Holy Martyrs blood and the Blood and tortures for Christ and the Truth of this two holy man is in one of its biggest temptetation caused by the Coronavirus hysteria exeggerated by the mass-media and purposing to mark a slavery upon human mind and took away the freedoms of man and change the life as we know it.

The Holy Apostles day is the End of the post-Pentecostal fasting which is in the Church from the ancient days of the Church. Rhe date selected being the anniversary of either their death or the translation of their relics.

Fasting is among the 4 main fasts in the One Holy Orthodox Church and the feast in the number of the biggest feasts of the Church. If one reads the historical records for all the places this two simple man was to preach the Gospel he is puzzled and couldn't comprehend how could it be for a simple Roman and a Fisherman to be able to walk through so many lands by boats, ships, through rivers, by carrets, on horses, donkeys, axes, elephants and God knows what kind of other animals typical for the multiple countries and lands this two most holy man has visit. 
It is even more amazing that their frutis of faith planted in the nations are still present today in so many Christians through the world …

The saint Peter and Paul fasting has been set for the reason the Apostles, have fasted immediately after Pentecost the descent of the Holy spirit over The desciples of Christ on the 50th day after the Resurrection of the Lord Jesus Christ. The feast has been setup because the Apostles immerse joy of the Holy Spirit who filled their heart spirits, soul and body made them understood how much dirty and how much in sin they and all the humanity is and how much cleanness is necessery in order for them to start their hard mission of spreading the fact of the Resurrection they have witnessed with their own eyes. A small bracket to open here that Saint Paul never had the  chance to see in Body the Savior just like Saint Paul and the rest of the Apostles, but he was illuminated by The Lord Jesus Christ's appearance to him on the road of the mask when he was on a journey to hunt for christians and put them to court and to death.

Saint Paul was so fierce (by his zillotism) for the Old Testamental Jewish pharisee faith who was based on human interpretation of God's laws, that he was even physically present on the Killing of Saint Archideacon Stephan.
Saint Paul was the one holding the dresses of the Killers of the first Christian martyr St. Stephan thinking that this devilish deed was truthful and pleasant to God. 
But God loved Saint Paul for his Zilotism and his heart aiming to know the Truth and because of that on the Road to Damascus appeared, blinding him from the unbearable light that was emitted by the Lord Jesus Christ who has answered the simple prayer of St. Paul who was honestly looking for the truth. On the Question Saint Paul asked the Unknown bright man who appeared in Glory and surrounded by Angels and Archangels he asked "Who are you Lord"? The reply came, 'I am Jesus, whom you are persecuting'." Acts of the Holy Apostles 9:4-5.

This moment changed Paul forever to make him from a fierce persecutor to a truthful desciple. However as it is said in the Holy Scriptures noone who sees the Lord can't stay alive in the Flesh and perhaps due to that the appearance of Christ left St. Paul to be blind for 3 days until God sent Ananias to heal his eyes by the ordination of Hands in the name of Jesus Christ – again a miracle of God aiming to strengthen the weakness of Faith of Saint Paul and stimulate him to continue on the way of Salvation. Even after the healing of his eyes, later in his eyes by God's providence the eyesight of Paul become weak again and he had to dictate his Apostle letters in the New Testament to his desciples who put it on paper and quite rarely write with his own hand due to his visionary problems. But apperantly the weak physical eye sight doesn't always mean a blindness as with his spiritual eyes the holy apostle was seeing much more than with his physical eyes and one weakness of seeing the physical let him contemplate the eternal.

It is little known fact that saint Paul among with his preaching the Gospel everywhere he went had a profession of making Tents and has worked hardly along with praying day and night, and the sleepless nights of vigil, the tortures by different anti-christians, jews, pagans, philosophers, magicians and others multitude of people who led by his spiritual blindness and passions has done multiple evils and tried in all means to stop Paul to preach the Gospel. But they did not succeeded and we see today the Result as there is rarely a man in the civillized world in all continents who doesn't heard or know about him 20-teen centuries after his martyrdom in the Capital of Roman Empire Rome.

saint-Paul-and-Peter-holy-icon

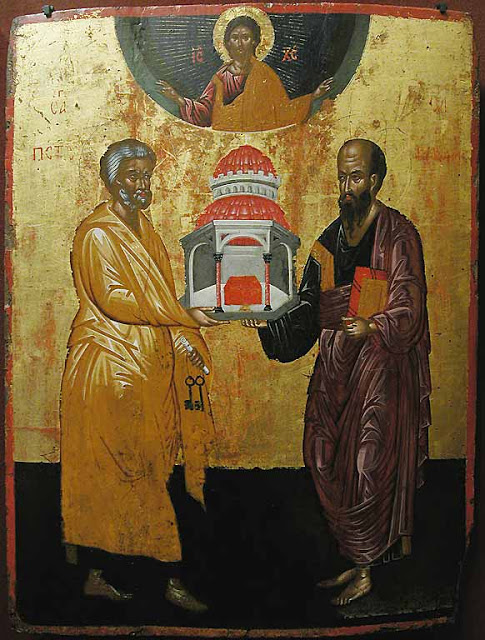
Saint Peter on the other hand was known for his simplicity and he like all of us was suffering of sickness of weakness of faith, he even rejected to know Christ thrice on the Christ trial, even though he was with Christ for the 3.5 years of Christ's preaching his Salvation Way to the world. But again just like with Paul, God made the miracle of preliminary foretelling him the future, warning him that he is about to reject Christ as his teacher a fact that occured just like prophecised by Christ earlier. Saint Peter seeing that The Lord Jesus Christ as the Son of God knows the future believed him and recover his trust in the Resurrection and with repentance came to believe and await the Resurrection of Christ which by the mercy of God he soon saw with his own eys. Soon after this mercy of God and his preparation with the Eyes of Christ and his desires to follow the will of God for his life led him to completely sacrifice all he had in his remaining earthly life for Christ. Saint Peter "Simon" (Σίμων Simōn in Greek), means stone and he is called that way for the fact he become a stone on which the Church of Christ was build and this stone is present their in the Church and everyone in both Christians and not Christians knows him well.

Saint-Apostle-Paul-and-Peter-embrace


In a dialogue between Jesus and his disciples (Matthew 16:13–19), Jesus asks, "Who do people say that the Son of Man is?" The disciples give various answers. When he asks "Who do you say that I am?", Simon Peter answers, "You are the Messiah, the Son of the living God." Jesus then declares:

Blessed are you, Simon son of Jonah, for this was not revealed to you by flesh and blood, but by my Father in heaven. And I tell you that you are Cephas (Peter) (Petros), and on this rock (petra) I will build my church, and the gates of Hades will not overcome it. I will give you the keys of the kingdom of heaven; whatever you bind on earth will be bound in heaven, and whatever you loose on earth will be loosed in heaven.

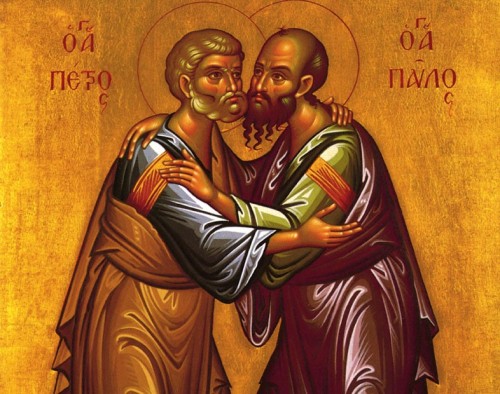
Saint Peter is known to have been in Antioch and Corinth and many other lands and is believed to have been the First PopSaint-Apostle-Paul-and-Peter-embrace.jpge of Rome.

Saint-Apostle-Peter-Crucifix-with-head-downed-cross-as-he-said-he-is-unworthy-to-die-as-the-saviour

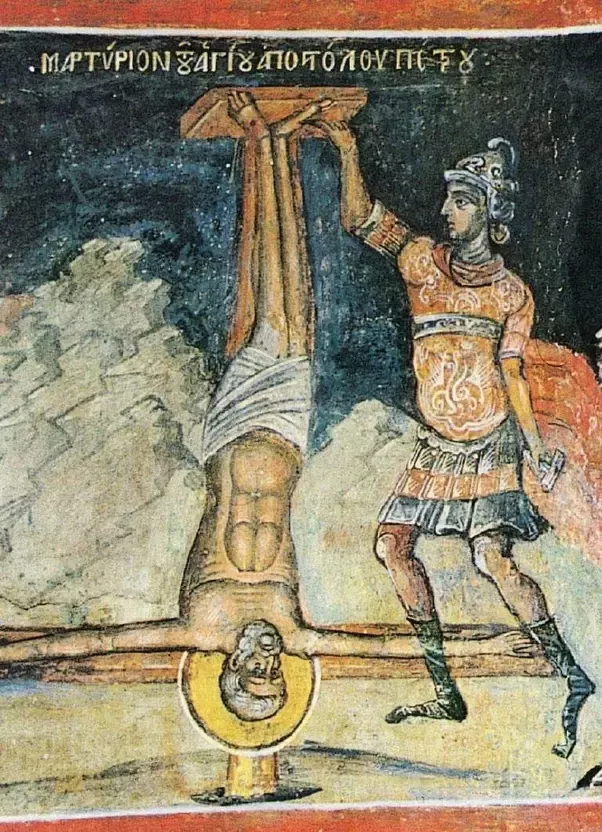
Early Church tradition says that Peter probably died by crucifixion (with arms outstretched) at the time of the Great Fire of Rome in the year 64. This took place three months after the disastrous fire that destroyed Rome for which the emperor (Nero) wished to blame the Christians. This "dies imperii" (regnal day anniversary) was an important one, exactly ten years after Nero ascended to the throne, and it was "as usual" accompanied by much bloodshed. Traditionally, Roman authorities sentenced him to death by crucifixion. In accordance with the apocryphal Acts of Peter, he was crucified head down. Tradition also locates his burial place where the Basilica of Saint Peter was later built, directly beneath the Basilica's high altar.

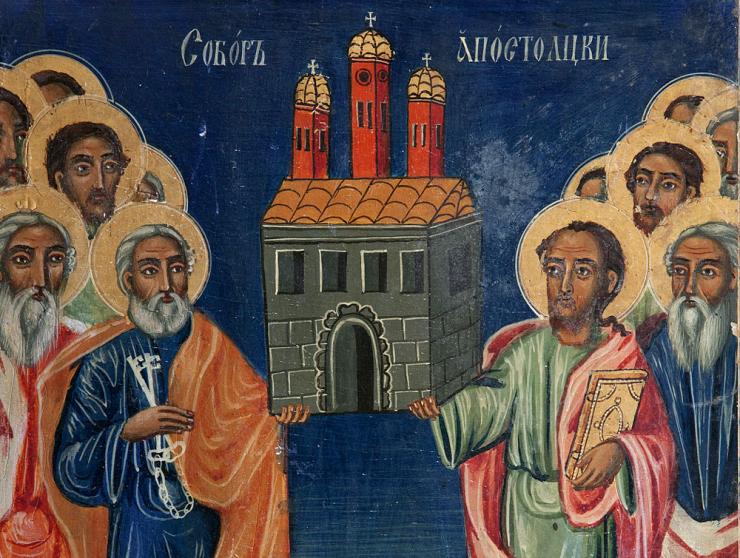
On the next day 30th of June the Bulgarian Orthodox Church and some of the other Eastern Orthodox Churches celebrate another great feast The Assembly of the 12 Apostles which honors all the 12 Apostles who were the main building blocks whose preach and martyrdom for Christ put the second stones on the Building of the Church which was based on the main base cornerstone Jesus Christ whom with his holy blood for the Salvation of mankind made the existence of the Ship of Salvation (as the holy fathers) call the Church posslble.

Feast-of-The-Assembly-of-the-Holy-Apostles-and-St-Peter-and-Paul

Below are the Church Troparions and Kontaktions (Praising songs in the Church sang in Holy Liturgy) on 29 of June that every year marks Feast of the Glorious Apostles who enlightened the Universe, I put the songs in Both English and in Cyrillic translated out of Old Bulgarian (Church Slavonic).

Here are the names of the 12 Apostles as we know them by Church Tradition

The 12 disciples of Lord Jesus Christ

1. Peter
2. James
3. John
4. Andrew
5. Bartholomew or Nathanael
6. James, the Lesser or Younger
7. Judas
8. Jude or Thaddeus
9. Matthew or Levi
10. Philip
11. Simon the Zealot
12 . Thomas


Troparion — Tone 4

O first-enthroned of the Apostles, / and teachers of the universe, / intercede with the Master of all / to grant peace to the world, / and to our souls great mercy.

Kontakion — Tone 2

O Lord, You have taken to Yourself the steadfast and divinely-inspired heralds, the leaders of Your disciples, / for the enjoyment of Your blessings for and their rest; / for You have accepted their labors and their deaths as above all burnt offerings, / for You alone know the hearts of men.

Kontakion — Tone 2

Today Christ the Rock glorifies with highest honor / the rock of Faith and leader of the Apostles, / together with Paul and the company of the Twelve, / whose memory we celebrate with eagerness of faith, / glorifying Him Who glorified them.

ТРОПАРЬ, ГЛАС 4-Й

Апостолов первопрестольницы и вселенныя учителие, Владыку всех молите мир вселенный даровати и душам нашым велию милость.

Первенствующие из апостолов и Вселенской Церкви учителя, Владыку всех молите мир миру даровать и душам нашим великую милость.

КОНДАК, ГЛАС 2-Й

Твердыя и боговещанныя проповедатели, верх апостолов твоих, Господи, приял еси, в наслаждение благих Твоих и покой: болезни бо онех и смерть приял еси, паче всякаго всеплодия, Едине сведый сердечная.

Непоколебимых и богогласных проповедников, высших из Апостолов Твоих, Господи, Ты принял в наслаждение благ Твоих и покой, ибо страдания их и смерть благоволил принять как жертву, выше всякой жертвы, Единый, ведающий сердца наши.

ВЕЛИЧАНИЕ

Величаем вас, апостоли Христовы Петре и Павле, весь мир ученьми своими просветившия и вся концы ко Христу приведшия.

Прославляем вас, апостолы Христовы Петр и Павел, весь мир своим учением просветивших и приведших ко Христу народы всей земли.

Let by the Prayers of the Holy Apostles Peter and Paul and the Apostle James, John, Andrew, Bartholomew (Nathnael), James (the lesser or Younger), Judas, Jude (Thaddeus), Mathew (Levi), Philip, Simon Zealot and Thomas God have mercy on all Christians in our age and the ages to come till the Second Glorious Coming of Christ and in the Frightening Judgement day.

Make Laptop Sleep on LID (Monitor) close in Linux Debian and Ubuntu systemd Linux


June 22nd, 2020

make-laptop-auto-sleep-on-lid-close-in-Linux-Ubuntu-Debian-Linux


I need to make my laptop automatically sleep on LID Screen close but it doesn't why?

If have used your laptop for long years with Windows or any Windows user is used to the default beavrior of Windows to automatically sleep the computer on PC close. This default behavior of automatically sleep on LID Close has been Windows standard for many years
and the reason behind that usually laptop is used for mobility and working on a discharging battery so a LID screen close puts the laptop in (SLEEP) BATTERY SUSPEND MODE aiming to make the charged battery last longer. However often for Desktop use in the Office LID close 
trigger of laptop sleep mode is annoying and undesired I've blogged earlier on that issue and how to make laptop not to sleep on LID close on M$ Windows 10 here.

This bahavior was copied and was working in many of the Linux distributions for years however in Debian GNU / Linux and Ubuntu 16.X this feature is often not properly working due to a systemd bug. Of course closing the notebook LID screen without putting
the PC in sleep mode is not a bug but a very useful feature for those who use their laptop as a Desktop machine that is non-stop running, however for most ppl default behavior to auto-suspend the computer on Laptop Monitor close is desired.

Here is how to  force the close of the laptop lid to go to suspend/sleep mode and when open the lid, it wake it up.


1. First requirement is to make sure the laptop has installed the package pm-utils, if it is not there install it with:


# apt-get install –yes pm-utils


2. Next we need to edit logind.conf and append 3 variables


# vim /etc/systemd/logind.conf


Normally the file should have a bit of commented informative lines as well as a commented variables that could be enabled like so:


[Login]
#NAutoVTs=6
#ReserveVT=6
#KillUserProcesses=no
#KillOnlyUsers=
#KillExcludeUsers=root
#InhibitDelayMaxSec=5
#HandlePowerKey=poweroff
#HandleSuspendKey=suspend
#HandleHibernateKey=hibernate
#HandleLidSwitch=suspend
#HandleLidSwitchExternalPower=suspend
#HandleLidSwitchDocked=ignore
#PowerKeyIgnoreInhibited=no
#SuspendKeyIgnoreInhibited=no
#HibernateKeyIgnoreInhibited=no
#LidSwitchIgnoreInhibited=yes
#HoldoffTimeoutSec=30s
#IdleAction=ignore
#IdleActionSec=30min
#RuntimeDirectorySize=10%
#RemoveIPC=yes
#InhibitorsMax=8192
#SessionsMax=8192


These entries are usually the files that are used by default as a systemd settings.
Before starting make a copy just you happen to mess systemd.conf, e.g.:


cp -rpf /etc/systemd/logind.conf /etc/systemd/logind.conf_bak


To make the PC LID close active append in the end of file below 3 lines:


HandleSuspendKey=suspend
HandleLidSwitch=suspend
HandleLidSwitchDocked=suspend


systemd-logind-conf-enable-suspend-sleep-on-laptop-lid-screen-close-linux

Save the file and to make systemd daemon reload restart the PC, even though theoretically systemd can be reloaded to digest its new /etc/systemd/logind.conf with:


# systemctl daemon-reexec


3. Assure yourself the Power Management LID setting of the Desktop Graphical User Interface are set to SUSPEND on close


I use MATE Desktop environment as it is simplistic and quite stable fork of GNOME 2.0, anyway depending on the GUI used on the Linux powered laptop e.g. GNOME / KDE Plasma / XFce etc. make sure the respective
 

Control Panel -> Power Management


settings are set to Force the Laptop Screen LID SUSPEND on Close.

Below is how this is done on MATE:

power-management-preferences-when-lid-is-closed-MATE-on-AC-power

power-management-preferences-when-lid-closed-on-battery-suspend

That's all folks, now close your Laptop and enjoy it going to sleep, open it up and get it awaked 🙂 Cheers ! 


Sysadmin tip: How to force a new Linux user account password change after logging to improve security


June 18th, 2020

chage-linux-force-password-expiry-check-user-password-expiry-setting

Have you logged in through SSH to remote servers with the brand new given UNIX account in your company just to be prompted for your current Password immediately after logging and forced to change your password?
The smart sysadmins or security officers use this trick for many years to make sure the default set password for new user is set to a smarter user to prevent default password leaks which might later impose a severe security risk for a company Demiliterized networks confidential data etc.

If you haven't seen it yet and you're in the beautiful world of UNIX / Linux as a developer qa tester or sysadmin sooner or later you will face it.
Here of course I'm talking about plain password local account authentication using user / pass credentials stored in /etc/passwd or /etc/shadow.

Lets Say hello to the main command chage that is used to do this sysadmin trick.
chage command is used to change user password expiry information and  set and alter password aging parameters on user accounts.


1. Force chage to make password expire on next user login for a new created user
 

# chage -d 0 {user-name} 


Below is a real life example
 

chage-force-user-account-password-expiry-linux


2. Get information on when account expires


[hipo@linux ~]$ chage -l hipo
Last password change                                    : Apr 03, 2020
Password expires                                        : Jul 08, 2020
Password inactive                                       : never
Account expires                                         : never
Minimum number of days between password change          : 0
Maximum number of days between password change          : 90
Number of days of warning before password expires       : 14


3. Use chage to set user account password expiration

The most straight forward way to set an expiration date for an active user acct is with:


# chage -E 2020-08-16 username


To make the account get locked automatically if the password has expired and the user did not logged in to it for 2 days after its expiration.

# chage -I 2 username


– Set Password expire with Minimum days 7 (-n mindays 7), (-x maxdays 28) and (-w warndays 5)

# passwd -n 7 -x 28 -w 5 username

To check the passwod expiration settings use list command:

# chage -l username
Last password change                                    : юни 18, 2020
Password expires                                        : юли 16, 2020
Password inactive                                       : never
Account expires                                         : never
Minimum number of days between password change          : 7
Maximum number of days between password change          : 28
Number of days of warning before password expires       : 5


chage is a command is essential sysadmin command that is mentioned in every Learn Linux book out there, however due to its often rare used many people and sysadmins either, don't know it or learn of it only once it is needed. 
A note to make here is some sysadmins prefer to use usermod to set a password expire instead of chage.

usermod -e 2020-10-14 username


For those who wonder how to set password expiry on FreeBSD and other BSD-es is done, there it is done via the pw system user management tool as chage is not present there.


A note to make here is chage usually does not provide information for Linux user accounts that are stored in LDAP. To get information of such you can use ldapsearch with a query to the LDAP domain store with something like.
 

ldapsearch -x -ZZ -LLL -b dc=domain.com,dc=com objectClass=*


It is worthy to mention also another useful command when managing users this is getent used to get entries from Name Service Switch libraries. 
getent is useful to get various information from basic /etc/ stored db files such as /etc/services /etc/shadow, /etc/group, /etc/aliases, /etc/hosts and even do some simple rpc queries.