Remove old unused kernels and cleanup orphaned packages on CentOS / RHEL/ Fedora and Debian Linux


October 23rd, 2020

remove-old-unused-kernel-on-centos-redhat-rhel-fedora-linux-howto-delete-orphaned-packages

If you administer CentOS 7 / CentOS  8 bunch of servers it is very likely after one of the scheduled Patch days every 6 months or so, you end up with a multiple Linux OS kernels installed on the system.
In normal situation on a freshly installed CentOS machine only one rpm package is installed on the system with the kernel release shipped with CentOS / RHEL / Fedora distro:
The reason to remove the old unused kernels is very simple, you don't want to have a messy installation and after some of the updates to boot up in a revert back old kernel or if you're pedantic to simply save few megas of space.
Some people choose to have more than one kernel just to make sure, if the new installed one doesn't boot, after a restart from ILO / IDRAC remote console interface you can select to boot the proper kernel. I agree having the old kernel before the system *kernel* upgrade as backup recovery is a good thing but this is a good thing to the point the system gets booted after reboot (you know we sysadmins usually after each major system package upgrade), we like to reboot the system warmly praying and hoping it will boot up next time 🙂
 

1. Remove CentOS last XX kernels from the OS

Of course removal of old kernels could be managed by a simple

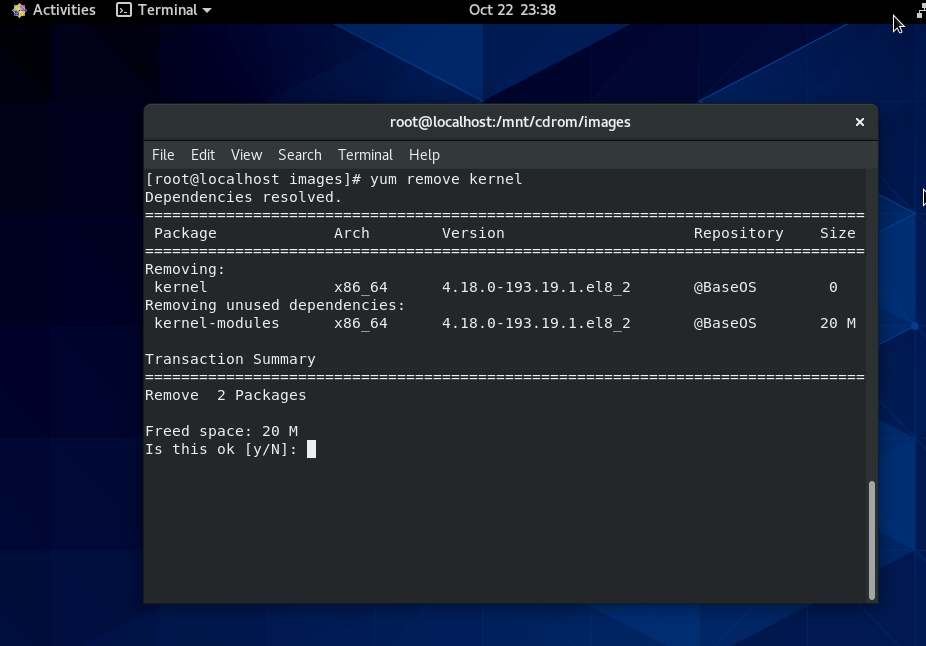
yum remove kernel


yum-kernel-remove-centos-linux

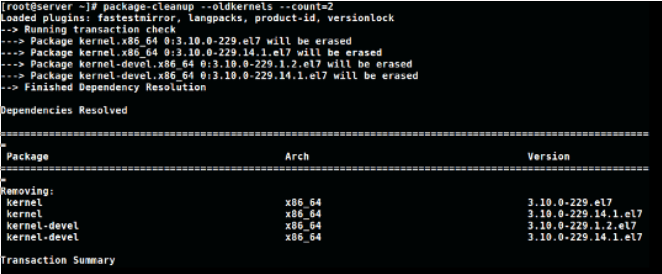
One more than one kernel is present you can hence leave only lets say the last 2 installed kernel on the CentOS host (some people prefer to have only one) but just for the sake of having a backup kernel I like more to have last two kernels installed present, to do so run package-cleanup which is contained in yum-utils rpm package CentOS – this is CentOS / Redhat ( RHEL) specific command.
 

[root@centos ~ ]:# package-cleanup –oldkernels –count=2

package-cleanup-centos-linux-screenshot-1

–count=number argument – tells how many from the  latest version kernels to get removed.

Note if you don't have the package-cleanup command install yum-utils package:

[root@centos ~ :]#  yum install -y yum-utils

cleanup-old-kernels-linux-leave-only-set-of-2-kernels-active-on-centos-rhel-fedora


2. RemoveOld kernels from Fedora Linux – leave only the latest 3 installed

This is done with dnf by setting the –-latest-limit arg to negative value to how many last kernels want to keep

[root@fedora ~ ]:# dnf remove $(dnf repoquery –installonly –latest-limit=-3 -q)


3. Set how many kernels you want to be present on system all the time after package upgrades

It is possible to tell CentOS / RHEL / Fedora's on how many kernels show be kept installed on the system, the default configured on Operating system install time is to keep the last 5 installed kernel on the OS. This is controlled from installonly_limit=5 value that is usually as of year 2020 RPM based distributions found under /etc/yum.conf (on CentOS / RHEL) and in /etc/dnf/dnf.conf (in Fedora) configuration file and sets the desired number of kernels present on system after issuing commands yum upgrade / dnf upgrade –refresh etc.
The minimum number to give to  installonly_limit is 2.
 

4. Remove orphan rpm packages from server

The next thing to do is to check the installed orphan packages to see if we can safely remove them; by orphaned packages we mean all packages which no longer serve a purpose of package dependencies.
Orphan packages are packages who left over from some old dependencies that are no longer needed on the system but just take up space and impose a possible security risk as some of them might end up with time with a public well known and hacked CVE vulnearbility.

Let me try to explain this concept with a quick example: package A is depended on package B, thus, in order to install package A the package B must also be installed. Once the package A is removed the package B might still be installed, hence the package B is now orphaned package.
Here’s how we can safely see the orphan packages we do have on our system:

[root@centos ~ :]#  package-cleanup –quiet –leaves –exclude-bin

And here’s how we can delete them:

[root@centos ~ :]# package-cleanup –quiet –leaves –exclude-bin | xargs yum remove -y


The above commands should be launched multiple times, because the packages deleted with the first batch could create additional orphan packages, and so on: be sure to perform these tasks until no orphan packages appear anymore after the first package-cleanup command.


5. Delete Old Kernels and keep only last three ones on Debian / Ubuntu Linux

To do the same on a debian based distribution there is a command is provided by a deb package byobu, if you want to clean up old kernels on Debians :

$ sudo purge-old-kernels –keep 3


That's all folks enjoy ! 🙂


Delete empty files and directories under directory tree in Linux / UNIX / BSD


October 21st, 2020

delete-empty-directories-and-files-freeup-inodes-by-empty-deleting-directoriers-or-files

Sometimes it happens that you end up on your server with a multiple of empty files. The reason for that could be different for example it could be /tmp is overflown with some session store files on a busy website, or due to some programmers Web executed badly written PHP / Python / Perl / Ruby code bug or lets say Content Management System ( CMS ) based website based on WordPress / Joomla / Drupal / Magento / Shopify etc. due to a broken plugin some specific directory could get filled up with plenty of meaningless empty files, that never gets wiped out if you don't care. This could happen if you offer your users to share files online to a public sharing service as WebFTP and some of the local hacked UNIX user accounts decides to make you look like a fool and run an endless loop to create files in your Hard Drive until your small server HDD filesystem of few terabytes gets filled up with useless empty files and due to full inode count on the filesystem your machine running running services gets disfunctional …

Hence on servers with shared users or simply webservers it is always a good idea to keep an eye on filesystem used nodes count by system are and in case if notices a sudden increase of used FS inodes as part of the investigation process on what caused it to check the amount of empty files on the system attached SCSI / SSD / SAS whatever drive.
 

1. Show a list of free inodes on server


Getting inodes count after logged is done with df command

root@linux-server:~# df -i
Filesystem        Inodes   IUsed     IFree IUse% Mounted on
udev             2041464     516   2040948    1% /dev
tmpfs            2046343    1000   2045343    1% /run
/dev/sdb2       14655488 1794109  12861379   13% /
tmpfs            2046343       4   2046339    1% /dev/shm
tmpfs            2046343       8   2046335    1% /run/lock
tmpfs            2046343      17   2046326    1% /sys/fs/cgroup
/dev/sdc6        6111232  6111232   0   100% /var/www
/dev/sda1       30162944 3734710  26428234   13% /mnt/sda1
/dev/sdd1      122093568 8011342 114082226    7% /backups
tmpfs            2046343      13   2046330    1% /run/user/1000


2. Show all empty files and directories count


### count empty directories ### root@linux-server:~# find /path/ -empty -type d | wc -l

### count empty files only ### root@linux-server:~# find /path/ -empty -type f | wc -l


3. List all empty files in directory or root dir

As you can see on the server in above example the amount of inodes of empty inodes is depleted.
The next step is to anylize what is happening in that web directory and if there is a multitude of empty files taking up all our disk space.
 

root@linux-server:~# find /var/www -type f -empty > /root/empty_files_list.txt


As you can see I'm redirecting output to a file as with the case of many empty files, I'll have to wait for ages and console will get filled up with a data I'll be unable to easily analyze

If the problem is another directory in your case, lets say the root dir.

root@linux-server:~#  DIR='/';
root@linux-server:~# find $DIR -type f -empty > /root/empty_files_list.txt

4. Getting empty directories list


Under some case it might be that the server is overflowed with empty directories. This is also a thing some malicious cracker guy could do to your server if he can't root the server with some exploit but wants to bug you and 'show off his script kiddie 3l337 magic tricks' :). This is easily done with a perl / python or bash shell endless loop inside which a random file named millions of empty directories instead of files is created.

To look up for empty directories hence use:

root@linux-server:~# DIR='/home';
root@linux-server:~# find  $DIR . -type d -empty > /root/empty_directories_list.txt


5. Delete all empty files only to clean up inodes

Deletion of empty files will automatically free up the inodes occupied, to delete them.

root@linux-server:~# cd /path/containing/multiple/empty-dirs/
root@linux-server:~# find . -type f -empty -exec rm -fr {} \;


6. Delete all empty directories only to clean up inocommanddes

root@linux-server:~# find . -type d -empty -exec rm -fr {} \;


7. Delete all empty files and directories to clean up inodes

root@linux-server:~# cd /path/containing/multiple/empty-dirs/
root@linux-server:~# find . -empty -delete


8. Use find + xargs to delete if files count to delete is too high

root@linux-server:~# find . -empty | xargs rm -r


That's all folks ! Enjoy now your Filesystem to have retrieved back the lost inodes from the jump empty files or directories.

Happy cleaning  🙂

Saint Petka Paraskeva of Bulgaria of Epivates Thracia (famous as St. Petka of Tarnovo) feast day 14 October


October 16th, 2020


Sveta-Petka-Paraskeva-Bylgarska-Balkanska-Epivatska

The inhabitants of Thracia are of a great and royal origin and due to recent historical studies, Thracians have been one of the most developed nations for its time they're developments and achievements especially in crafts such as vessel creation even up to day are perhaps the most unique.
It is still unknown of the exact technology used to create such a elegant and precise vessels. A little is known of the Thracians society as they have reached their bloom in a high speed and the place of the later Roman Empire province Thracia has been in a place where it was destroyed to the ground and robbed at multiple times eradicating unique piece of one of the best created ever forms of art.
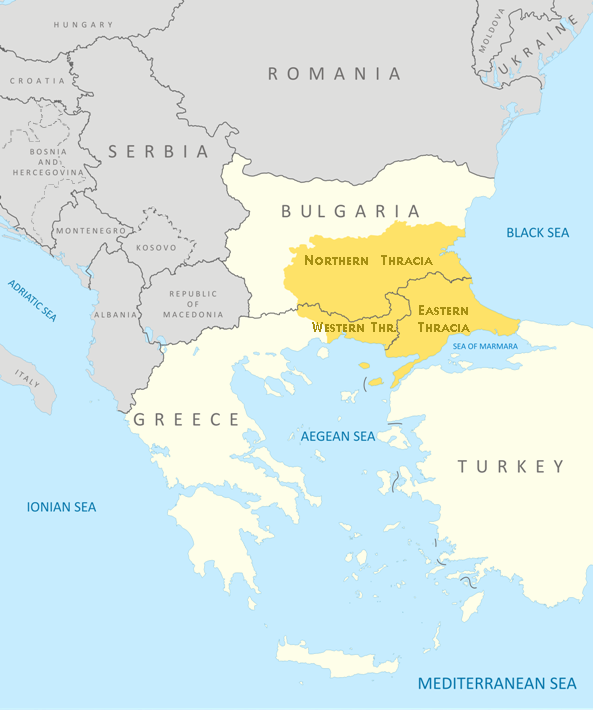
Territories of Thrakia has been geographically today located in Southeast Europe, now split among Bulgaria, Greece, and Turkey, which is bounded by the Balkan Mountains to the north, the Aegean Sea to the south, and the Black Sea to the east.

Thrace_and_Thracians-present-day_state_borderlines-picture

Territy of Thracia shown on a contemporary European (Balkans Maps)

World-famous-Thracian-Treasury-picture-1

One of the most famous piece of such art is the World Famous Thracian's Treasuary.

World-famous-Thracian-Treasury-picture

The thrakians Empire and civillization has its bloom from 5th – 4th century before Christ era (B.C.). 
Saint Petka of Epivates region Thrakia was of a Bulgarian origin and lived much later in Xth – XI-th century A.D in Thracia. It is known she was of Bulgarian origin (her mother and father was of Bulgarian origin.) of the first generations who has received in 9-th century Baptism, in the times of the Baptism of Bulgaria conducted by the Apostle equal Saint King Boris I the Baptizer of Bulgaria in year 864 AD.  Thracians as an ancient and a blessed nation in craftship and arts was among the nations who received baptism on a good 'soil', as the seed of beauty and goodness has already been in their civillization.
 

The short Living of Saint Petka of Bulgaria (of Epivates)


Out of this Christian atmosphere has rised Saint Petka also known as (Parashkeva). Saint Petka name means literally translated Friday and due to being born in Thracia on today territory of Balkans she is been venerated highly not only in Bulgaria but across all Orthodox Christians nations on the Balkans – Bulgarians, Romanians, Serbs, Greeks, Macedonians. Due to that Saint Petka is also famous as "Saint Petka of The Bulkans".
Saint Petka could be therefore heard to be called often Petka of Serbs (of Belgrade), Saint Petka of Moldova (of Iași), Mother Paraskeva / ParashkevaParascheva the New, Parascheva the Young, Ancient Greek: Ὁσία Παρασκευὴ ἡ Ἐπιβατινή, Greek: Οσία Παρασκευή η Επιβατινή ή Νέα, Romanian: Cuvioasa Parascheva, Bulgarian / Serbian : Света Петка / Sveta Petka or Петка Параскева / Petka Paraskeva, Paraskeva Pyatnitsa, Parascheva of Tirnovo).

The first information about her living is found in a local educated person (writter) which as of the time were too little and writter  in Greek in short. It did not follow the Church cannons and due to that by an order of Patriarch of Constantinople Nikolas IV Musalon of Constantinople deacon Vaslik has described in a more well systemized way her living, the Greek original unfortunately is now lost. At the time of writting her biography, she has been mostly popular in the realms of Byzantine Empire Thracia.

Bulgarian-Empire-under-King-Ivan-Asen-II-map-1917

The Bulgarian Empire during the reign of Ivan Asen II. Atlas of Dimitar Rizov year 1917

Since the time of King Ivan Asen II a new biogprahy of saint has been written in Bulgarian which included narration of the transfer of her holy relics to Medieval Capital of Bulgaria Tarnovo. However peak and the key towards the immerse veneration to St. Petka that is evident to this very date has played the biography written by last Bulgarian Patriarch also a saint – st. Euthymius of Tarnovo. in year 1385 AD short before the fall under Turkish Slavery of Bulgaria in y. 1393.

Saint Patriarch Eutymious was the last person who in 1393 has actively parcipated in the protection of the fortified Tarnovo and see with his eyes the fall down of the city (by treachery).

When asked by the terrified people 'To whom do you leave us holy father, when the Turkish were taking him away?' He replied heart tearingly 'To the Holy Trinity The Father, The Son and The Holy Trinity our God I leave you and to the most Blessed Mother of God Theotokos now and For Eternity !!!'

Saint-Patriarch-Eutymious-the-last-Blessing-picture-sveti_Evtimij_seten_blagoslov

Saint Patriarch Eutymius (Evtimij) blessing the people in Medieval Bulgarian city Tarnovo for a last time before the Turkish took him away for imprisonment
Picture source Pravoslavieto.com

St Euthymius of Tarnovo work is one of the most unique bibliographies and a precious piece of medieval literature it is innovative for its time and spectacular, emotion rich creation, who become famous far before the borders of Bulgaria in the whole Slavonic world of that time, especially in todays territory of ex soviet countries Romania, Moldova, Ukraine and even far Russia.

Saint_Patriarch-Eutymius-last-bulgarian-patriarch-before-Turkish-Slavery

Saint Patriarch Eutymious of Bulgaria
Picture source Pravoslavieto.com

The veneration of Saint Petka of Bulgaria as a protector of family and a warm prayerer for all those who venerate her in this country has slowly spread in the coming centuries by pupils of St. Euthymius of Tarnovo who according to some historians whose works came to us in the form of the a bit more standardized Church Slavonic used in the Eastern Orthodox Churches as a fruit of the works of St. Euthymus.

The Living of Saint Petka Parashkeva

Sveta_Petka-Bylgarska-Balkanska-holy-icon

Saint Petka Parashkeva Picture source Pravoslavieto.com

Tropion 4-th voice

 Desertous and silent living you loved after Christ your groom, diligently you ran to and his good yoke you took in your younghood,
with the Sign of the Cross against the thought enemies you have manly armed, with fasting feats and prayer and with tear drops the coals of passions extinguished oh highly famed Paraskevo. And now in the Heavenly halls with the wise virgins you stay in front of Christ, pray for us who venerate your holy remembrance.

Kontakion, voice 6

Let us piusly sung our reverend  mother Saint Petka, because by living the corruptable in live, received the imperishable in eternity, becoming holy intercessor for all in trouble and exhausting from the evils of life. For the reason she received from God imperishable fame, glory and grace to be a wonder worker.

Sveta-Petka-Zakrilnica-Bylgarska-Saint_Petka-Protectress-of-Bulgarian-lands

NB ! St. Petka of Epivates has not to be confused with Saint Petka (from Inokia who lived in 303 AD venerated on 28 of October) or  St Petka the Roman (feast day 26 July).

St. Petka's  has been born in city of Epivates in Byzantium (today city called Selim Pasha nearby Odrin's Aegian City) in 10-th Century from a famous and respectful family, her father Nikita has been very rich landowner.

She lived in the second part of X-th century. According to hear living by Patriarch Eutymious, her smaller brother Eutymious who become a monk has been a Metropolitan of Maditos for 40 years and in year (989 – 996) died aged 81 and is shortly after canonized as saint, his younger sister St. Paraskeva passed away after him in the new 11-th century and is aged at least 85 in the time of passing in the city of Kallikrateia. 

The living continues that near the age of 10 year old she heard in a Christian temple a voice by Jesus Christ himself in resemblance to Saint Apostle Paul and said the Evangelical New Testamental words:
"Whoever wants to walk after me, let him deny himself, to take his cross and follow me !".

The unexpected vision convinced the young Paraskeva to immediately exchange her new clothes to a beggers to leave all her belongings to the poor and live a silent living similarto begger for a time in work and prayer, though she did not leave her parents home. On a few occasions all she had worked for has been distributed to the poor.

Sveta-Petka-Bylgarska-Balkanska

Greek typical depiction of Saint Petka of Epivates

When her parents died, her brother as already a monk and Bishop. St. Petka leave her house and travelled to Constanople and received a nun tonsure and as a nun she lived for 5 years near the deserted Church of the "Protection of the Virgin Mary" in the capital suburb of Heraklia. She travelled to the Holy lands visiting Jerusalem and Church of Holy Sepulchre.
Following the example of the blessed famed Saint Mary of Egypt, she lived in Jordan's desert many years till eldership.

Feeling and foreseeing her death, she travelled back through Constantinople to city of Epivates. Settle near the Church "Holy Apostles", where after 2 years of living in deep prayer and fasting labours living in solitary in holiness passed away silently to Christ in heavenly life. Compassionate Christians immediately buried her body of the nun outside of the city walls as a foreigner. A shortly after numerous miracles started happening on her grave.

St_Petka-Parashkeva-Epivatska-Klisura_Monastery_Holy_Icon

Saint Petka Parashkeva Bulgarian Icon from Klisura Monastery located nearby Sofia Bulgaria

In 1230 King Ivan Asen II the most powerful South-eastern European ruler demanded from the the Knights of the Crusaders to submit him her holy relics who are found still in Tracian city Kaliakratea ruled at that time by the Holy Latin Empire. King Ivan Asen II together with the patriach Joachim the first receives her holy relics with honor and settles her incorruptabilities into the newly creates Church in honour of herself St. Petka behind Tsarevets Fortress. Saint Petka became from that point considered as a protectress of the city, the throne and the country.
Her holy relics arrived from Kallikrateia in Tarnovo, the Capital of Second Bulgarian Empire in year 1230 AD, she has been thus called Paraskeva of Tarnovo and has been venerated as a protectress of the Tarnovo city the Bulgarian nation and the country. The attitude towards Saint Petka Tarnovska as a protectress of Bulgarian nation and contry is been clearly seen by the mention in the Bulgarian and International acts (documents) and manuscripts of that XII – XII century.

Saint_Petka-Epivatska-Bylgarska-Romanian-in-Iashi-Romania-veneration-of-romanian-monks

Romanian Monks and Priests venerate the holy relics of Saint Petka of Epivates in Iashi Romania

In subsequent years, St. Petka Paraskevi’s holy relics were transferred to various churches in the region.

In 1393 due to the fall of Bulgarian capital to save them her holy relics were transferred to fortress of Bdin today city of Vidin Bulgaria, but 3 years later 1396 Vidin's fortress also fall under the ungodly yatagan of  the muslim enslaver and to protect the relics they were again transferred to Belgrade, specifically the Ružica Church. When Belgrade fell to Ottoman forces in 1521, the relics were transferred to Constantinople. In 1641, the relics were transferred to Trei Ierarhi Monastery, in Iaşi, Moldavia (nowadays, eastern part of Romania). In 1888, they were transferred to the Metropolitan Cathedral of Iaşi.

Since 1888 they are kept in Romanian city of Iaşi and are a target of pilgrims from all around Romania, Bulgaria and other Orthodox Christian countries of the Balkans. For the day her memory is remembered in the Romanian Church usually about 200 000 people mostly from Romania and others travel to Iaşi's Cathedral in the Trei Ierarhi Monastery (Three Hierarchs – saint John Crysostom, St. Basilius the Great and St. Gregory the Great) of the  for a blessing and to beg the saint for her families, personal issues, curings especially of eye diseases

A severe drought in 1946-47 affected Moldavia, adding to the misery left by the war. Metropolitan Justinian Marina permitted the first procession featuring the coffin containing the relics of Saint Paraskevi, kept at Iaşi since then. The relics wended their way through the drought-deserted villages of Iaşi, Vaslui, Roman, Bacău, Putna, Neamţ, Baia and Botoşani Counties. The offerings collected on this occasion were distributed, based on Metropolitan Justinian's decisions, to orphans, widows, invalids, school cafeterias, churches under construction, and to monasteries in order to feed the sick, and old or feeble monks.

In the historical document with Venezia as of (year 1347), King Ivan Alexander of Bulgaria swears in the name of most holy considered matters, the document says – quote "in the name of God, The Most Holy Theotokos, The Holy Cross and The Most Holy Paraskeva of Tarnovo".

 
Since Second Bulgarian Kingdom, St. Petka has been venerated as a main patroness and protector of Bulgarian nation and country, protectress of countries of Moldova, Romania and Bulgarian cities of Veliko Tarnovo, Gabrovo and Troyan.

In Bulgaria it is an old tradition to name our childs in favour of Saint Petka, my grand-grand mother God Forgive us has also been called Parashkeva in favor of Saint Petka.

Holy Mother Petka Paraskeva (Parashkevo) Pray the Lord Jesus Christ to have mercy on All us the sinners !

8 October year 927 the feast of Bulgarian Orthodox Church become autocephalous independent from Constantinople


October 12th, 2020

On 8 of October 927 the Bulgarian Orthodox Church has become autocephalous, this historical event is quite memorable for me as it happens to be almo  my birthday.
Thus I found it worthy to write few raw lines on the feast. This post will probably will not be of interest to any serious historian but still might be interesting for people keen on history.

The requirement of Church organization on the Bulgarian lands that is indepedent from the center of Christianity as of then Constantinople has existed with the Glorious and World changing event of receiving Holy Baptism of the Ruler of Bulgaria Saint King Boris-Mikhail in year 864 from Constaniple's Emperor Mikhail III who ruled Byzantine Empire from year (842 – 867).
 

saint-Apostle-equal-King-Boris-Mihail-The-Baptizer-of-Bulgaria
The event for the history of the Civilillized world and the Christian history wordwide is only comparable to the act of saint emperor Constantine's Milano Edict  The Edict of Milan (LatinEdictum Mediolanense, Greek: Διάταγμα των ΜεδιολάνωνDiatagma tōn Mediolanōn) was the February AD 313 agreement to treat Christians benevolently within the Roman Empire. Which opened the doors for Christianity to not only be equal religion within the empire but even to become official religion for the Eastern Roman (Byzantine empire).

Milanos-Edict-year-313-313ad-milanedicta

Assembly of Synod of Holy Fathers

The Milano's edict is today little known both in Eastern and Western world as people have more interest for money and business than to truth, virtues and history, so I find it useful to share with readers this forgotten history …

saint-emperor-Constantine

Saint Emperor Constantine

Western Roman Emperor (and later canonized for Saint) Constantine I and Emperor Licinius, who controlled the Balkans, met in Mediolanum (modern-day Milan) and, among other things, agreed to change policies towards Christians following the Edict of Toleration issued by Emperor Galerius two years earlier in Serdica (today the city of Sofia Bulgaria).
The document is found in Lactantius' De Mortibus Persecutorum and in Eusebius of Caesarea's History of the Church.

It was already a set path for Europe to become Christian and the majority of people and missionaries all through europe has spread the Good words of the Lord Jesus Christ throgh the European lands. Many missionaries both in Greece and the Balkans as well as the far lands of Kiev and North has been preaching for the coming centuries. Christianity has become already official religion for big part of the civillized (non-barbarian) world such as the Hellenes, France, Germany, Hungary,Romania, Ukraine, Belarus, Russia etc.. Monastic life has been also well established all through europe and many missionaries has come from the far deserts of Egypt to baptize and teach Christianity in the West in Ireland, England and even the Netherlands in the 7th century. Rome as a Christian center of the Western Empire even though the hardships has established and in the rule of Charlemagne has seriously expanded Christianity in the west.

The largest unbaptized lands with a paganism at that time seems to be few tribes such as the Vikings, the Gotts, The Traks and perhaps the Slavs. The biggest part of which seems to be the Slavs who has been settled in a large parts of Balkans Bulgaria, Serbia, Macedonia as well as Croatia, Chech, Poland and even in far Moscow.

This people has been following a peaceful paganism and has been still unenlightened. Thanks to Saint Cyril and Methodius and 7 pupils Saint Gorazd, saint Naum, saint Sava, saint Angelarius and Saint Clement of Ohrid (known as Ohridski) tireless work for Christ to translate the Holy Bible in the so called Church-Slavonic which in practice is a form of Ancient Bulgarian (in Glagolitic Script – Glagolica) which was mainly used before saint Clement Ohridski and other pupils of Saint Methodius such as the medieval famous author of many early Christian books Constantine of Preslav who worked in the Preslav Scriptorium and Christian school.
Constantine-of-Preslav-a-Holy-Church-books-and-bible-translator-and-copier-Konstantin_Preslavski

Constantine of Preslav

Saint King Boris-Mikhail  in that time took the right decision to baptize his large for that time lands populated by Bulgarians and Slavs under his rule and enlighten them with the Gospel and faith in the Jesus Christ and the true God the Holy Trinity (the Father the Son and the Holy Spirit).

It took him quite a long to decide whether to baptize his country citizens with the faith from the Western Empire (The Latins) or the Eastern Empire (the Byzantines) who at that time has been in process of creating and establishing the Great Church Schism from year 1054, and due to that he led a corresponce to both Byzantine empire as well as pope Nicolas I. 

One of the questions asked to both the The Pope and the Byzantine emperor has been about his desire of the Bulgarian Church to be an independent Church with independent head and ruleship that is able to take an independent decisions for its destiny. He wanted that as he was understanding the importance for the Cultarial freedom of Bulgaria from Helinism or the Latins. As he found that the Pope can't offer him too much and considering the closeness of the Byzantine empire to his lands as well seeing the Eastern Christianity to be more indepth and filled with beauty he has baptized from Byzantia and has received a Byzantian archibishop.
In the beginning the church services and the preach in Bulgaria has been in Greek and due to the common Bulgarian and Slavs couldn't understand Christianity. Thanks to the Holy Brothers Cyril and Methodius and the acceptance of their pupils by saint King Boris slowly in Preslav and Pliska in 9th 10th century and Ohrid in middle of 10th – 11th century a Spiritual Schools and Scriptoriums has been established which allowed a few years later gradually to have for Bulgaria the Holy Gospel and Church services to be served in the Bulgarian language (in the better understood by both Bulgariand and Slavs cyrllic).

saint-Boris-I-Michael-Baptism-of-Bulgarians-Ioan-Skilica

The baptism of Bulgarians Ioan Skilica (John Skilica)

Saint King Boris-Mikhail completed his earthly life as a humble Monk in the last years of his life, he has put on the throne Vladimir Rasate who tried to bring back paganism and faith in Tangra after his death. When heard about the evilness of his first born son and the hostility to Christianity and his plans to overrule the work of his father Saint King Boris is famous for getting out of the Monastery fighting again his son and with a Miracle about which is written even to the Pope to have win with his weaker supporter army against Vladimir-Rasate. He has blinded his son and put on the throne his second Son, King Simeon who has been officially later recognized by Romans and Byzantines the title usually only given to Byzantine Emperors  – Basileus of Bulgarians (Emperor of Bulgarians).

On the summoned in year 893 Council of Preslav together with the enthronization of King Simeon as a Bulgarian Ruler it was taken as a decision to change the Greek language in the Church with the Old Bulgarian (liked to be called in Russian sources as Church Slavonic). During his governship King Simeon (893 – 927) has gradually changed the Greek higher clergy with a Bulgarian and Created the Bulgarian Exarchate.

Veliki-Preslav_fortress_main-ancient-Christian-center-in-the-10th-century-on-the-Balkans

Veliki Preslav Fortress 

The-medieval-world-famous-Golden_Church_in_Veliki_Preslav-the-round-Church-ruins.

The Golden Church Saint John also known as the Round Church built by Simeon I the Great in Preslav built in 907, aiming to show the
high importance of the new established Bulgarian Church – Known to have been one of most beautiful Churches in Europe

During the rulership of Simeon's (second son) successor saint King Peter I (927 – 970 ) rise on throne, thanks to his wise politics and a lot of efforts to increase the prestige and spirituality in the Church following the path of his father. The Bulgarian Church has been recognized officially by the byzantine Emperor as an independent Church with a Mother Church the Church of Constantinople (today governed by the Ecumenical patriarch of Constantinople Bartholomew).

During the diplomatic negotiations between the King and the ruler of Byzantines Roman Lakapin  in year 927, the emperor has re-ratified the earlier disputed
as well the Church canonical uplifting ordination  of the head of Bulgarian Church the exarch to be a Patriarch of Bulgaria.

8-october-927-the-bulgarian-church-becomes-autocephalous-independent-1

Byzantines has always questioned the title of "Basileus of Bulgarians" with which King Simeon I the Great used to sign his documents, as Basileus was believed to be only supremacy title of the Byzantine emperor. The proud Byzantines did not wanted to accept another new-born Nation with less than 3 centuries of history could be their rivalry neither political nor spiritual and morever to be on the same importance in the known World with authority of the Eastern Emperor.

The archives of Vatican keeps a copies of the decision of the emperor's synclitis (meeting) for the recognition of the Bulgarian Patriarchy officially on 8th of October.
For a First Bulgarian Patriach was selected Patriach Damian (Drystyr) nowadays the city of Silistra with a patriachal seat in medieval city of Veliki Preslav (Great Preslav). Soon after the Patrairchal seat was moved to Silistra.

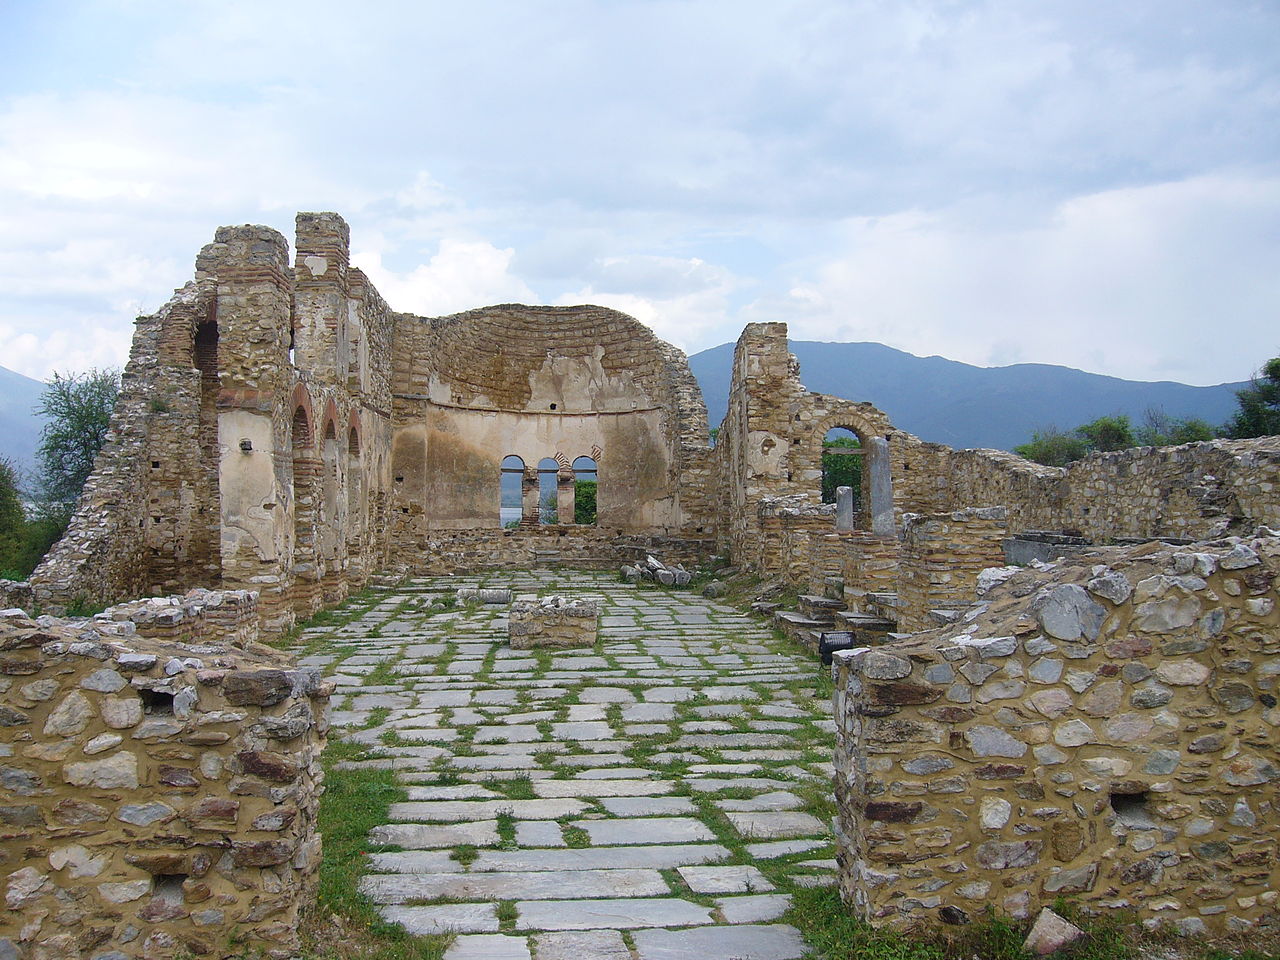
https://upload.wikimedia.org/wikipedia/commons/thumb/d/d7/Sv.Ahil_church.jpg/1280px-Sv.Ahil_church

Saint Ahil Church (Bulgarian Patriarchy) main seat in Prespa

The Eparchy of Dorostol has been existing even to this day, even though the exarchs and patriachal seat and patriachs through the centuries has been concentrated in the mother patriarchal city for our Church Preslav and in Ohrid as well as later for II centuries in city of Turnovo until 1393 when in city of Tarnovo (Trnovo) Fall raided by the Ottoman Turkish invaders. 
During the Ottoman's slavery of Bulgaria it has ceased to exist and has been reduced by the Turkish mostly under the influence of Patriarch of Constantinople to Archibishopship center in Ohrid.

History-of-Bulgarian-Patriarchy-Patriarshia-of-Tarnovo

The Patriarchal Church Ascension of Christ in Carevetz (The city of Kings) Hill Turnovo

After the Liberation of Bulgarian in the Russian-Turkish Bulgarian liberation war (1877 – 1878) in which Bulgaria has been liberated. The Bulgarian Church has been an Exarchy for a while in a dark period when the Bulgarian Church was recognized by the Phanariots (The Greeks). The Schism put over the Bulgarian Church was removed in 22 February 1945 y., few weeks after the enthronement of Patriarch Stephan I of Bulgaria. Unfortunately the next years coincided with the dark years of the imposed totalitarian regime of the Bulgarian Communist Party (BCP), which led to active persecution of the Church, the humilation and torture of priest and Church leaders and martyrdom of many clergymen and people who were against the unhuman kind of the new power that take over.

Boris_Nevrokopski-Metropolitan-a-saint-killed-by-the-Communistic-atheist-regime-in-Bulgaria

One of those many martyrs for Christ is a supposedly a saint Boris Razumov of Nevrokop who was killed by a order of communists by an orthodox priest to his own eparchy who has joined the party by the order of the BCP.


How to check version of most used mail servers Postfix / Qmail / Exim / Sendmail


October 14th, 2020

How to check version of a Linux host's installed Mail server?

Most used mail servers Postfix / Qmail / Exim / Sendmail and usually you have to do a dpkg -l / rpm -qa or whatever package manager to get the package version. But sometimes the package is built to have a different naming convention from the actual installed MTA.

As recently I had to check on a Linux host what kind of version was the installed and used one to the SMTP, below is how to find conrete versions of Postfix / Qmail / Exim / Sendmail.
If none of the 4 is installed and something more cryptic like ssmtp is installed if another one is installed perhaps the best way would be to check with lsof -i :25 command and see  what process has binded and listens on TCP port 25.

mail-server-lsof-linux-screenshot-qmail-vpopmail


1. How to check Postfix exact mail server version

mail-server-exim-check-lsof-screenshot

Once you can find Postfix is the Network listening MTA, you might think you can simply use postfix -v however, but no …
Unlike many other applications, Postfix has no -v or –versions switch. But you can get the version information easily by using the postconf command as shown below:

root@server :~# postconf mail_version

postfix-show-version-postconf-linux

Other approach is to dump all postfix configuration settings (this is useful to get more info on how postfix is configured) and explicitly grep for the version.
 How to check version of a Linux host's installeded webserver?

root@server :~# postconf -d | grep mail_version


2. How to check Exim MTA running version ?

root@exim-mail :/ # exim -bV
Exim version 4.72 #1 built 13-Jul-2010 21:54:55
Copyright (c) University of Cambridge, 1995 – 2007
Berkeley DB: Sleepycat Software: Berkeley DB 4.3.29: (September 19, 2009)
Support for: crypteq iconv() Perl OpenSSL move_frozen_messages Content_Scanning DKIM Old_Demime
Lookups: lsearch wildlsearch nwildlsearch iplsearch cdb dbm dbmnz
Authenticators: cram_md5 plaintext spa
Routers: accept dnslookup ipliteral manualroute queryprogram redirect
Transports: appendfile/maildir/mailstore/mbx autoreply lmtp pipe smtp
Size of off_t: 8
OpenSSL compile-time version: OpenSSL 0.9.8e-fips-rhel5 01 Jul 2008
OpenSSL runtime version: OpenSSL 0.9.8e-fips-rhel5 01 Jul 2008
Configuration file is /etc/exim.conf

how-to-get-exim-version-on-gnu-linux-screenshot


3. How to check Sendmail Mail Transport Agent exact Mail version ?

Though sendmail is rarely used this days and it usually works mostly on obsolete old scrap hosts
or in some old fashioned conservative organizations such as Banks and Payment services providers, you might need to invertise it, just like the configuration m4 format complexity with its annoying macros, getting the version is also not straight forward:

# sendmail -d0.4 -bv root | grep Version
Version 8.14.4

Above commands should be working on most Linux distributions such as Debian / Ubuntu / Fedora / CentOS / SuSE and other Linux derivatives
 

4. How to check Qmail MTA version?

This is a bit of complicated question, as Qmail's base has not been significantly changed for years.
The latest published qmail package is qmail-1.03.tar.gz.  1.03 was released in 1998, Qmail is famous for its unbreakable security. The author of qmail  Daniel J. Bernstein is famous for writting Qmail to make the work installation and configuration of SMTP simple as of the time of writting sendmail was the defacto standard and sendmail was hard to configure.
Also sendmail was famous for a set of Security holes that got a lot of Sendmail MTA's on the Net got hacked. Thus the QMAIL was written as a more security-aware mail transport agent.

In contrast to sendmail, qmail has a modular architecture composed of mutually untrusting components; for instance, the SMTP listener component of qmail runs with different credentials from the queue manager or the SMTP sender. qmail was also implemented with a security-aware replacement to the C standard library, and as a result has not been vulnerable to stack and heap overflows, format string attacks, or temporary file race conditions.

The core qmail package has not been updated for many years. New features were initially provided by third party patches, from which the most important at the time were brought together in a single meta-patch set called netqmail.

The current version of netqmail is at 1.06 netqmail-1.06.tar.gz as of year 2020.

One possible way to get some info about installed qmail or components is to use the documentation look up command apropos

qmail:~# apropos qmail


or check the manual or at worst check for the installation source files that the person that installed the qmail used 🙂

A fun fact about qmail few might know is D. Bernstein offered in 1997 a US$500 reward for the first person to publish a verifiable security hole in the latest version of the software, for many years till 2005 no hole was found security researcher Georgi Guninski found an integer overflow in qmail. On 64-bit platforms, in default configurations with sufficient virtual memory, the delivery of huge amounts of data to certain qmail components may allow remote code execution. Bernstein disputes that this is a practical attack, arguing that no real-world deployment of qmail would be susceptible. Configuration of resource limits for qmail components mitigates the vulnerability.

On November 1, 2007, Bernstein raised the reward to US$1000. At a slide presentation the following day, Bernstein stated that there were 4 "known bugs" in the ten-year-old qmail-1.03, none of which were "security holes." He characterized the bug found by Guninski as a "potential overflow of an unchecked counter." "Fortunately, counter growth was limited by memory and thus by configuration, but this was pure luck.

5. Quick way to check the type of Mail server installed on Debian based Linux that doesn't have telnet installed


As you know simple telnet localhost 25 or a simple ps -ef could reveal at most times general information on the installed server. However there is another way to do it using package manager. by using embedded bash shell type type command like so:
 

# type -p sendmail |
xargs dpkg -S

type-x-bash-command-to-find-out-email-server-version-on-linux

Another hacky way to check whether exim, postfix or sendmail SMTP is installed is with:

hipo@freak:~$ echo $(man sendmail)| grep "exim"|wc -l
1
hipo@freak:~$ echo $(man sendmail)| grep "postfix"|wc -l
0
hipo@freak:~$ echo $(man sendmail)| grep "sendmail"|wc -l
0

I guess there are nice hacks and ways to get versions, so if you're aware of any please share with me.
Enjoy !

Improve wordpress admin password encryption authentication keys security with WordPress Unique Authentication Keys and Salts


October 9th, 2020

wordpress-improve-security-logo-linux

Having a wordpress blog or website with an admistrator and access via a Secured SSL channel is common nowadays. However there are plenty of SSL encryption leaks already out there and many of which are either slow to be patched or the hosting companies does not care enough to patch on time the libssl Linux libraries / webserver level. Taking that in consideration many websites hosted on some unmaintained one-time run not-frequently updated Linux servers are still vulneable and it might happen that, if you paid for some shared hosting in the past and someone else besides you hosted the website and forget you even your wordpress installation is still living on one of this SSL vulnerable hosts. In situations like that malicious hackers could break up the SSL security up to some level or even if the SSL is secured use MITM (MAN IN THE MIDDLE) attack to simulate your well secured and trusted SSID Name WIFi network to  redirects the network traffic you use (via an SSL transparent Proxy) to connect to WordPress Administrator Dashbiard via https://your-domain.com/wp-admin. Once your traffic is going through the malicious hax0r even if you haven't used the password to authenticate every time, e.g. you have saved the password in browser and WordPress Admin Panel authentication is achieved via a Cookie the cookies generated and used one time by Woddpress site could be easily stealed one time and later from the vicious 1337 h4x0r and reverse the hash with an interceptor Tool and login to your wordpress …

Therefore to improve the wordpress site security it very important to have configured WordPress Unique Authentication Keys and Salts (known also as the WordPress security keys).

They're used by WordPress installation to have a uniquely generated different key and Salt from the default one to the opened WordPress Blog / Site Admin session every time.

So what are the Authentication Unique Keys and Salts and why they are Used?

Like with almost any other web application, when PHP session is opened to WordPress, the code creates a number of Cookies stored locally on your computer.

Two of the cookies created are called:

 wordpress_[hash]
wordpress_logged_in_[hash]

First  cookie is used only in the admin pages (WordPress dashboard), while the second cookie is used throughout WordPress to determine if you are logged in to WordPress or not. Note: [hash] is a random hashed value typically assigned to your session, therefore in reality the cookies name would be named something like wordpress_ffc02f68bc9926448e9222893b6c29a9.

WordPress session stores your authentication details (i.e. WordPress username and password) in both of the above mentioned cookies.

The authentication details are hashed, hence it is almost impossible for anyone to reverse the hash and guess your password through a cookie should it be stolen. By almost impossible it also means that with today’s computers it is practically unfeasible to do so.

WordPress security keys are made up of four authentication keys and four hashing salts (random generated data) that when used together they add an extra layer to your cookies and passwords. 

The authentication details in these cookies are hashed using the random pattern specified in the WordPress security keys. I will not get into too much details but as you might have heard in Cryptography Salts and Keys are important – an indepth explanation on Salts Cryptography (here). A good reading for those who want to know more on how does the authentication based and salts work is on stackexchange.

How to Set up Salt and Key Authentication on WordPress
 

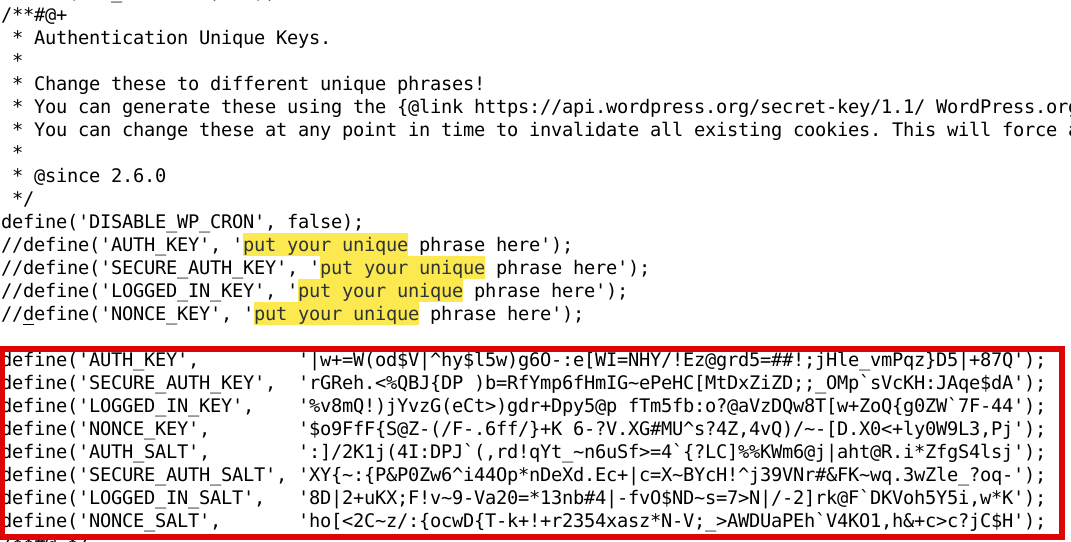
To be used by WP Salts and Key should be configured under wp-config.php usually they look like so:

wordpress-website-blog-salts-keys-wp-config-screenshot-linux

!!! Note !!!  that generating (manually or generated via a random generator program), the definition strings you have to use a random string value of more than 60 characters to prevent predictability 

The default on any newly installed WordPress Website is to have the 4 definitions with _KEY and the four _SALTs to be unconfigured strings looks something like:

default-WordPress-security-keys-and-salts-entries-in-wordPress-wp-config-php-file

Most people never ever take a look at wp-config.php as only the Web GUI Is used for any maintainance, tasks so there is a great chance that if you never heard specifically by some WordPress Security Expert forum or some Security plugin (such as WP Titan Anti Spam & Security) installed to report the WP KEY / SALT you might have never noticed it in the config.

There are 8 WordPress security keys in current WP Installs, but not all of them have been introduced at the same time.
Historically they were introduced in WP versions in below order:

WordPress 2.6: AUTH_KEY, SECURE_AUTH_KEY, LOGGED_IN_KEY
WordPress 2.7: NONCE_KEY
WordPress 3.0: AUTH_SALT, SECURE_AUTH_SALT, LOGGED_IN_SALT, NONCE_SALT

Setting a custom random generated values is an easy task as there is already online Wordpress Security key Random generator.
You can visit above address and you will get an automatic randomly generated values which could be straight copy / pasted to your wp-config.php.

Howeever if you're a paranoic on the guessability of the random generator algorithm, I would advice you use the generator and change some random values yourself on each of the 8 line, the end result in the configuration should be something similar to:


define('AUTH_KEY',         '|w+=W(od$V|^hy$F5w)g6O-:e[WI=NHY/!Ez@grd5=##!;jHle_vFPqz}D5|+87Q');
define('SECURE_AUTH_KEY',  'rGReh.<%QBJ{DP )p=BfYmp6fHmIG~ePeHC[MtDxZiZD;;_OMp`sVcKH:JAqe$dA');
define('LOGGED_IN_KEY',    '%v8mQ!)jYvzG(eCt>)bdr+Rpy5@t fTm5fb:o?@aVzDQw8T[w+aoQ{g0ZW`7F-44');
define('NONCE_KEY',        '$o9FfF{S@Z-(/F-.6fC/}+K 6-?V.XG#MU^s?4Z,4vQ)/~-[D.X0<+ly0W9L3,Pj');
define('AUTH_SALT',        ':]/2K1j(4I:DPJ`(,rK!qYt_~n8uSf>=4`{?LC]%%KWm6@j|aht@R.i*ZfgS4lsj');
define('SECURE_AUTH_SALT', 'XY{~:{P&P0Vw6^i44Op*nDeXd.Ec+|c=S~BYcH!^j39VNr#&FK~wq.3wZle_?oq-');
define('LOGGED_IN_SALT',   '8D|2+uKX;F!v~8-Va20=*d3nb#4|-fv0$ND~s=7>N|/-2]rk@F`DKVoh5Y5i,w*K');
define('NONCE_SALT',       'ho[<2C~z/:{ocwD{T-w+!+r2394xasz*N-V;_>AWDUaPEh`V4KO1,h&+c>c?jC$H');


Wordpress-auth-key-secure-auth-salt-Linux-wordpress-admin-security-hardening

Once above defines are set, do not forget to comment or remove old AUTH_KEY / SECURE_AUTH_KEY / LOGGED_IN_KEY / AUTH_SALT / SECURE_AUTH_SALT / LOGGED_IN_SALT /NONCE_SALT keys.

The values are configured one time and never have to be changed, WordPress installation automatic updates or Installed WP Plugins will not tamper the value with time.
You should never expand or show your private generated keys to anyone otherwise this could be used to hack your website site.
It is also a good security practice to change this keys, especially if you have some suspects someone has somehow stolen your wp-onfig keys. 
 

Closure

Having AUTH KEYs and Properly configured is essential step to improve your WordPress site security. Anytime having any doubt for a browser hijacked session (or if you have logged in) to your /wp-admin via unsecured public Computer with a chance of a stolen site cookies you should reset keys / salts to a new random values. Setting the auth keys is not a panacea and frequent WP site core updates and plugins should be made to secure your install. Always do frequent audits to WP owned websites with a tool such as WPScan is essential to keep your WP Website unhacked.


Deny DHCP Address by MAC on Linux


October 8th, 2020

Deny DHCP addresses by MAC ignore MAC to not be DHCPD leased on GNU / Linux howto

I have not blogged for a long time due to being on a few weeks vacation and being in home with a small cute baby. However as a hardcore and a bit of dumb System administrator, I have spend some of my vacation and   worked on bringing up the the www.pc-freak.net and the other Websites hosted as a high availvailability ones living on a 2 Webservers running on a Master to Master MySQL Replication backend database, this is oll hosted on  servers, set to run as a round robin DNS hosts on 2 servers one old Lenove ThinkCentre Edge71 as well as a brand new real Lenovo server Lenovo ThinkServer SD350 with 24 CPUs and a 32 GB of RAM
To assure Internet Connectivity is having a good degree of connectivity and ensure websites hosted on both machines is not going to die if one of the 2 pair configured Fiber Optics Internet Providers Bergon.NET has some Issues, I've rented another Internet Provider Line is set bought from the VIVACOM Mobile Fiber Internet provider – that is a 1 Gigabit Fiber Optics Line.
Next to that to guarantee there is no Database, Webserver, MailServer, Memcached and other running services did not hit downtimes due to Electricity power outage, two Powerful Uninterruptable Power Supplies (UPS)  FPS Fortron devices are connected to the servers each of which that could keep the machine and the connected switches and Servers for up to 1 Hour.

The machines are configured to use dhcpd to distributed IP addresses and the Main Node is set to distribute IPs, however as there is a local LAN network with more of a personal Work PCs, Wireless Devices and Testing Computers and few Virtual machines in the Network and the IPs are being distributed in a consequential manner via a ISC DHCP server.

As always to make everything work properly hence, I had again some a bit weird non-standard requirement to make some of the computers within the Network with Static IP addresses and the others to have their IPs received via the DHCP (Dynamic Host Configuration Protocol) and add some filter for some of the Machine MAC Addresses which are configured to have a static IP addresses to prevent the DHCP (daemon) server to automatically reassign IPs to this machines.

After a bit of googling and pondering I've done it and some of the machines, therefore to save others the efforts to look around How to set Certain Computers / Servers Network Card MAC (Interfaces) MAC Addresses  configured on the LAN network to use Static IPs and instruct the DHCP server to ingnore any broadcast IP addresses leases – if they're to be destined to a set of IGNORED MAcs, I came up with this small article.

Here is the DHCP server /etc/dhcpd/dhcpd.conf from my Debian GNU / Linux (Buster) 10.4


option domain-name "pcfreak.lan";
option domain-name-servers 8.8.8.8, 8.8.4.4, 208.67.222.222, 208.67.220.220;
max-lease-time 891200;
authoritative;
class "black-hole" {
    match substring (hardware, 1, 6);
    ignore booting;
}
subclass "black-hole" 18:45:91:c3:d9:00;
subclass "black-hole" 70:e2:81:13:44:11;
subclass "black-hole" 70:e2:81:13:44:12;
subclass "black-hole" 00:16:3f:53:5d:11;
subclass "black-hole" 18:45:9b:c6:d9:00;
subclass "black-hole" 16:45:93:c3:d9:09;
subclass "black-hole" 16:45:94:c3:d9:0d;/etc/dhcpd/dhcpd.conf
subclass "black-hole" 60:67:21:3c:20:ec;
subclass "black-hole" 60:67:20:5c:20:ed;
subclass "black-hole" 00:16:3e:0f:48:04;
subclass "black-hole" 00:16:3e:3a:f4:fc;
subclass "black-hole" 50:d4:f5:13:e8:ba;
subclass "black-hole" 50:d4:f5:13:e8:bb;
subnet 192.168.0.0 netmask 255.255.255.0 {
        option routers                  192.168.0.1;
        option subnet-mask              255.255.255.0;
}
host think-server {
        hardware ethernet 70:e2:85:13:44:12;
        fixed-address 192.168.0.200;
}
default-lease-time 691200;
max-lease-time 891200;
log-facility local7;

To spend you copy paste efforts a file with Deny DHCP Address by Mac Linux configuration is here
/home/hipo/info
Of course I have dumped the MAC Addresses to omit a data leaking but I guess the idea behind the MAC ADDR ignore is quite clear

The main configuration doing the trick to ignore a certain MAC ALenovo ThinkServer SD350ddresses that are reachable on the Connected hardware switch on the device is like so:

class "black-hole" {
    match substring (hardware, 1, 6);
    ignore booting;
}
subclass "black-hole" 18:45:91:c3:d9:00;


The Deny DHCP Address by MAC is described on isc.org distribution lists here but it seems the documentation on the topic on how to Deny / IGNORE DHCP Addresses by MAC Address on Linux has been quite obscure and limited online.

As you can see in above config the time via which an IP is freed up and a new IP lease is done from the server is severely maximized as often DHCP servers do use a max-lease-time like 1 hour (3600) seconds:, the reason for increasing the lease time to be to like 10 days time is that the IPs in my network change very rarely so it is a waste of CPU cycles to do a frequent lease.

default-lease-time 691200;
max-lease-time 891200;


As you see to Guarantee resolving works always as expected I have configured – Google Public DNS and OpenDNS IPs

option domain-name-servers 8.8.8.8, 8.8.4.4, 208.67.222.222, 208.67.220.220;


One hint to make is, after setting up all my desired config in the standard config location /etc/dhcp/dhcpd.conf it is always good idea to test configuration before reloading the running dhcpd process.


root@pcfreak: ~# /usr/sbin/dhcpd -t
Internet Systems Consortium DHCP Server 4.4.1
Copyright 2004-2018 Internet Systems Consortium.
All rights reserved.
For info, please visit https://www.isc.org/software/dhcp/
Config file: /etc/dhcp/dhcpd.conf
Database file: /va/home/hipo/infor/lib/dhcp/dhcpd.leases
PID file: /var/run/dhcpd.pid
 

That's all folks with this sample config the IPs under subclass "black-hole", which are a local LAN Static IP Addresses will never be offered leasess anymore from the ISC DHCP.
Hope this stuff helps someone, enjoy and in case if you need a colocation of a server or a website hosting for a really cheap price on this new set High Availlability up described machines open an inquiry on https://web.www.pc-freak.net.


Set all logs to log to to physical console /dev/tty12 (tty12) on Linux


August 12th, 2020

tty linux-logo how to log everything to last console terminal tty12

Those who administer servers from the days of birth of Linux and who used actively GNU / Linux over the years or any other UNIX knows how practical could be to configure logging of all running services / kernel messages / errors and warnings on a physical console.

Traditionally from the days I was learning Linux basics I was shown how to do this on an old Debian Sarge 3.0 Linux without systemd and on all Linux distributions Redhat 9.0 / Calderas and Mandrakes I've used either as a home systems or for servers. I've always configured output of all messages to go to the last easy to access console /dev/tty12 (for those who never use it console switching under Linux plain text console mode is done with key combination of CTRL + ALT + F1 .. F12.

In recent times however with the introduction of systemd pretty much things changed as messages to console are not handled by /etc/inittab which was used to add and refresh physical consoles tty1, tty2 … tty7 (the default added one on Linux were usually 7), but I had to manually include more respawn lines for each console in /etc/inittab.
Nowadays as of year 2020 Linux distros /etc/inittab is no longer there being obsoleted and console print out of INPUT / OUTPUT messages are handled by systemd.
 

1. Enable Physical TTYs from TTY8 till TTY12 etc.


The number of default consoles existing in most Linux distributions I've seen is still from tty1 to tty7. Hence to add more tty consoles and be ready to be able to switch out  not only towards tty7 but towards tty12 once you're connected to the server via a remote ILO (Integrated Lights Out) / IdRAC (Dell Remote Access Controller) / IPMI / IMM (Imtegrated Management Module), you have to do it by telling systemd issuing below systemctl commands:


 # systemctl enable getty@tty8.service Created symlink /etc/systemd/system/getty.target.wants/getty@tty8.service -> /lib/systemd/system/getty@.service.

systemctl enable getty@tty9.service

Created symlink /etc/systemd/system/getty.target.wants/getty@tty9.service -> /lib/systemd/system/getty@.service.

systemctl enable getty@tty10.service

Created symlink /etc/systemd/system/getty.target.wants/getty@tty10.service -> /lib/systemd/system/getty@.service.

systemctl enable getty@tty11.service

Created symlink /etc/systemd/system/getty.target.wants/getty@tty11.service -> /lib/systemd/system/getty@.service.

systemctl enable getty@tty12.service

Created symlink /etc/systemd/system/getty.target.wants/getty@tty12.service -> /lib/systemd/system/getty@.service.


Once the TTYS tty7 to tty12 are enabled you will be able to switch to this consoles either if you have a physical LCD / CRT monitor or KVM switch connected to the machine mounted on the Rack shelf once you're in the Data Center or will be able to see it once connected remotely via the Management IP Interface (ILO) remote console.
 

2. Taking screenshot of the physical console TTY with fbcat


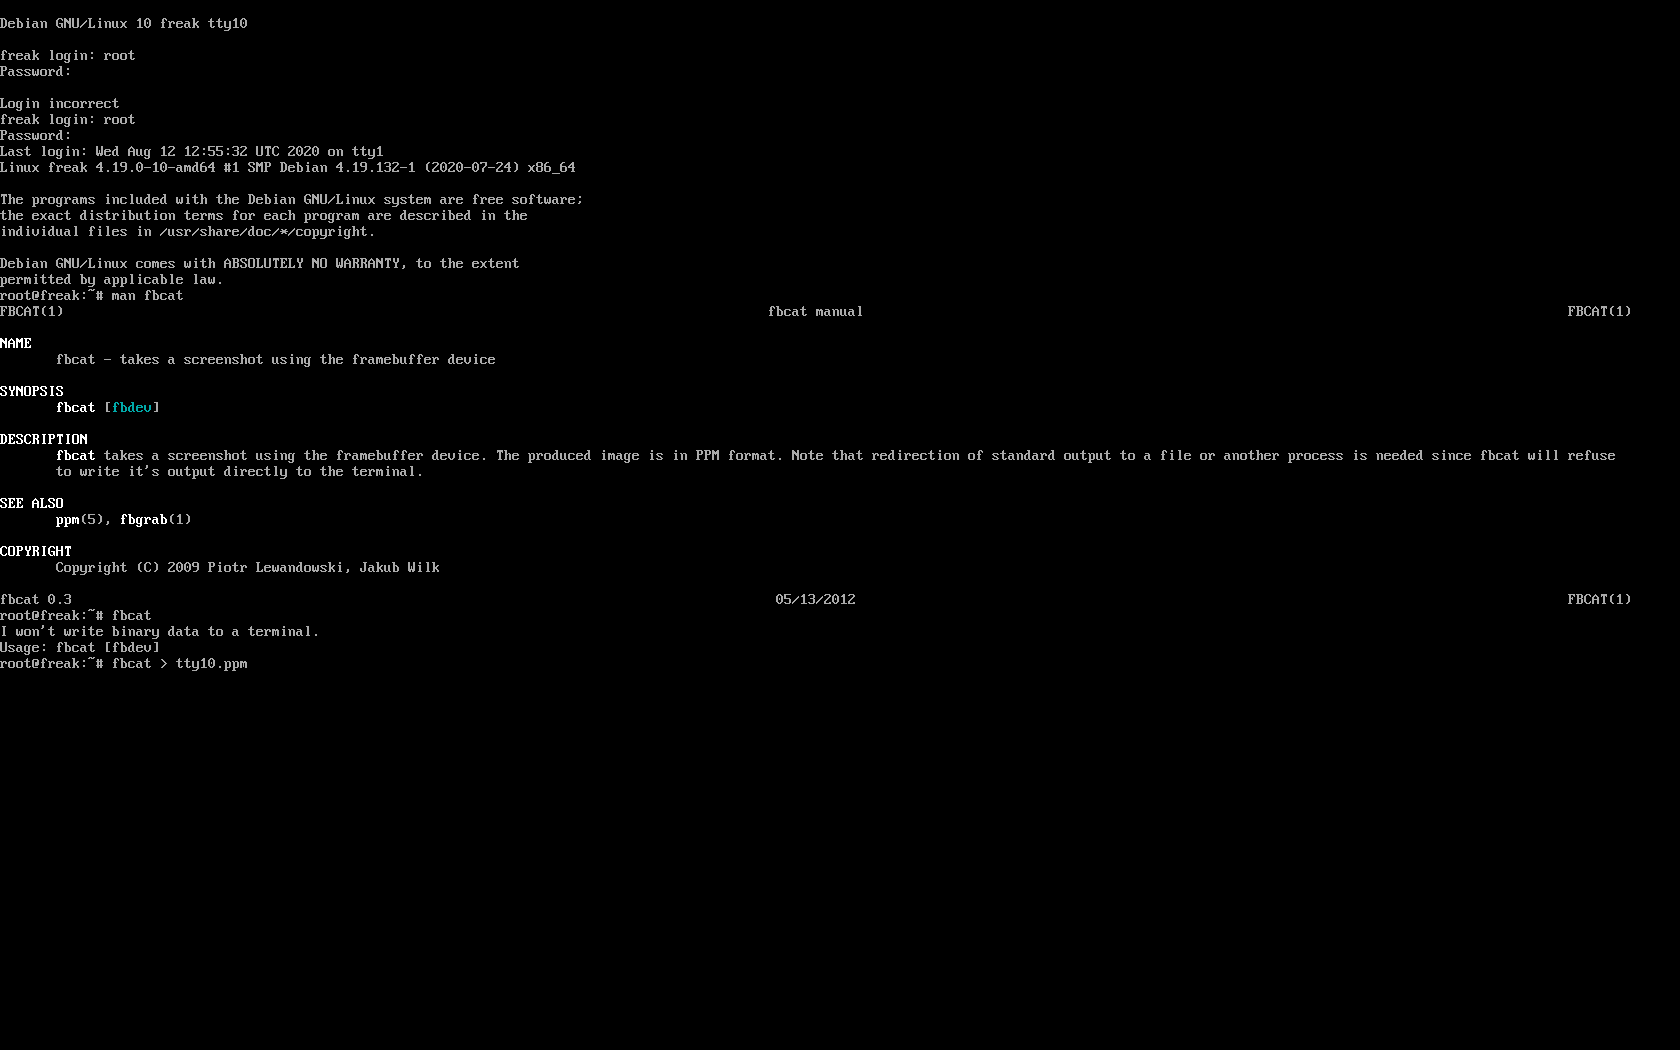
For example below is a screenshot of the 10th enabled tty10:

tty10-linux-screenshot-fbcat-how-to-screenshot-console

As you can in the screenshot I've used the nice tool fbcat that can be used to make a screenshot of remote console. This is very useful especially if remote access via a SSH client such as PuTTY / MobaXterm is not there but you have only a physical attached monitor access on a DCs that are under a heavy firewall that is preventing anyone to get to the system remotely. For example screenshotting the physical console in case if there is a major hardware failure occurs and you need to dump a hardware error message to a flash drive that will be used to later be handled to technicians to analyize it and exchange the broken server hardware part.

Screenshots of the CLI with fbcat is possible across most Linux distributions where as usual.

In Debian you have to first instal the tool via :
 

# apt install –yes fbcat


and on RedHats / CentOS / Fedoras

# yum install -y fbcat


Taking screenshot once tool is on the server of whatever you have printed on console is as easy as

# fbcat > tty_name.ppm


Note that you might want to convert the .ppm created picture to png with any converter such as imagemagick's convert command or if you have a GUI perhaps with GNU Image Manipulation Tool (GIMP).

3. Enabling every rsyslog handled message to log to Physical TTY12


To make everything such as errors, notices, debug, warning messages  become instantly logging towards above added new /dev/tty12.

Open /etc/rsyslog.conf and to the end of the file append below line :
 

daemon,mail.*;\
   news.=crit;news.=err;news.=notice;\
   *.=debug;*.=info;\
   *.=notice;*.=warn   /dev/tty12


To make rsyslog load its new config restart it:


# systemctl status rsyslog


rsyslog.service – System Logging Service
   Loaded: loaded (/lib/systemd/system/rsyslog.service; enabled; vendor preset: enabled)
   Active: active (running) since Mon 2020-08-10 04:09:36 EEST; 2 days ago
     Docs: man:rsyslogd(8)
           https://www.rsyslog.com/doc/
 Main PID: 671 (rsyslogd)
    Tasks: 4 (limit: 4915)
   Memory: 12.5M
   CGroup: /system.slice/rsyslog.service
           └─671 /usr/sbin/rsyslogd -n -iNONE


авг 12 00:00:05 pcfreak rsyslogd[671]:  [origin software="rsyslogd" swVersion="8.1901.0" x-pid="671" x-info="https://www.rsyslo
Warning: Journal has been rotated since unit was started. Log output is incomplete or unavailable.


systemctl restart rsyslog


That's all folks navigate by pressing simultaneously CTRL + ALT + F12 to get to TTY12 or use ALT + LEFT / ALT + RIGHT ARROW (console switch commands) till you get to the console where everything should be now logged.

Enjoy and if you like this article share to tell your sysadmin friends about this nice hack  ! 🙂


Check server Internet connectivity Speedtest from Linux terminal CLI


August 7th, 2020

check-server-console-speedtest

If you are a system administrator of a dedicated server and you have no access to Xserver Graphical GNOME / KDE etc. environment and you wonder how you can track the bandwidth connectivity speed of remote system to the internet and you happen to have a modern Linux distribution, here is few ways to do a speedtest.
 

1. Use speedtest-cli command line tool to test connectivity


speedtest-cli is a tiny tool written in python, to use it hence you need to have python installed on the server.
It is available both for Redhat Linux distros and Debians / Ubuntus etc. in the list of standard installable packages.

a) Install speedtest-cli on Fedora / CentOS / RHEL
 

On CentOS / RHEL / Scientific Linux lower than ver 8:


$ sudo yum install python

On CentOS 8 / RHEL 8 user type the following command to install Python 3 or 2:


$sudo yum install python3
$ sudo yum install python2


On Fedora Linux version 22+


$ sudo dnf install python
$ sudo dnf install pytho3


Once python is at place download speedtest.py or in case if link is not reachable download mirrored version of speedtest.py on www.pc-freak.net here


$ wget -O speedtest-cli https://raw.githubusercontent.com/sivel/speedtest-cli/master/speedtest.py
$ chmod +x speedtest-cli


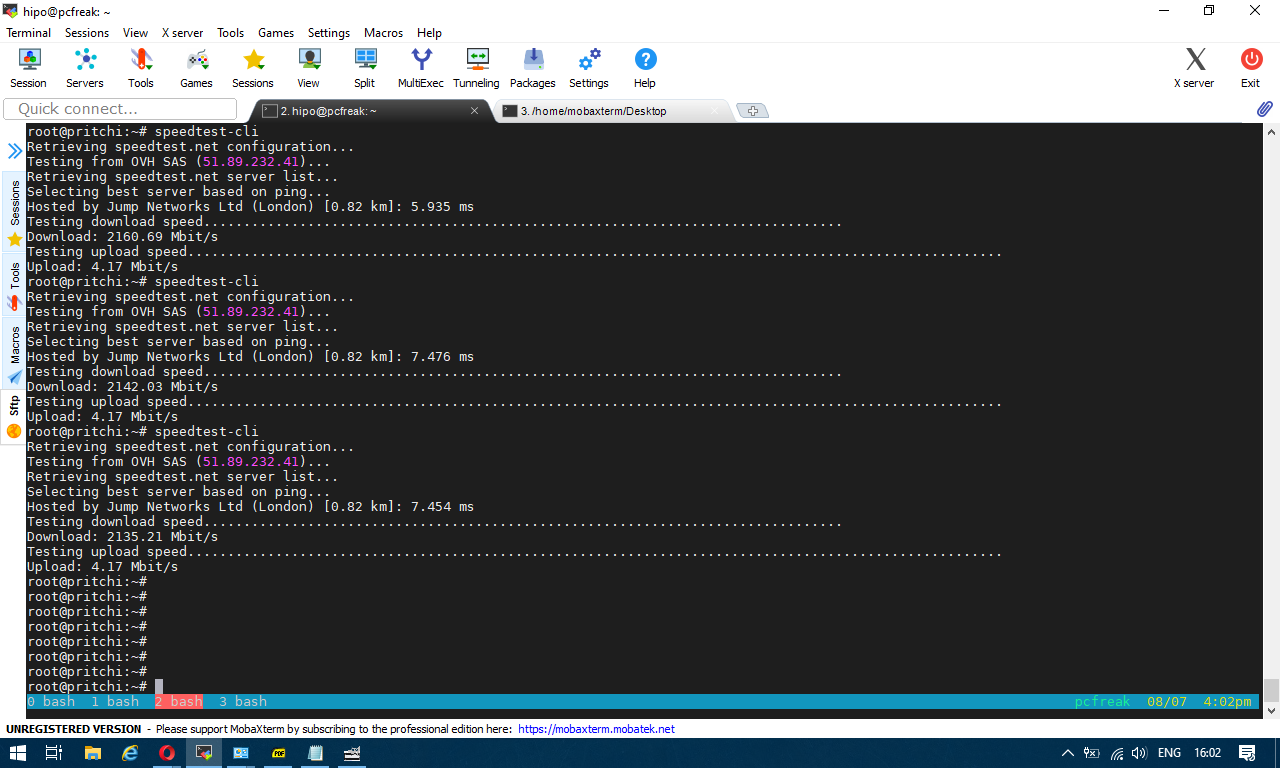
Then it is time to run script speedtest-screenshot-linux-terminal-console-cli-cmd
To test enabled Bandwidth on the server


$ python speedtest-cli


b) Install speedtest-cli on Debian

On Latest Debian 10 Buster speedtest is available out of the box in regular .deb repositories, so fetch it with apt


# apt install –yes speedtest-cli


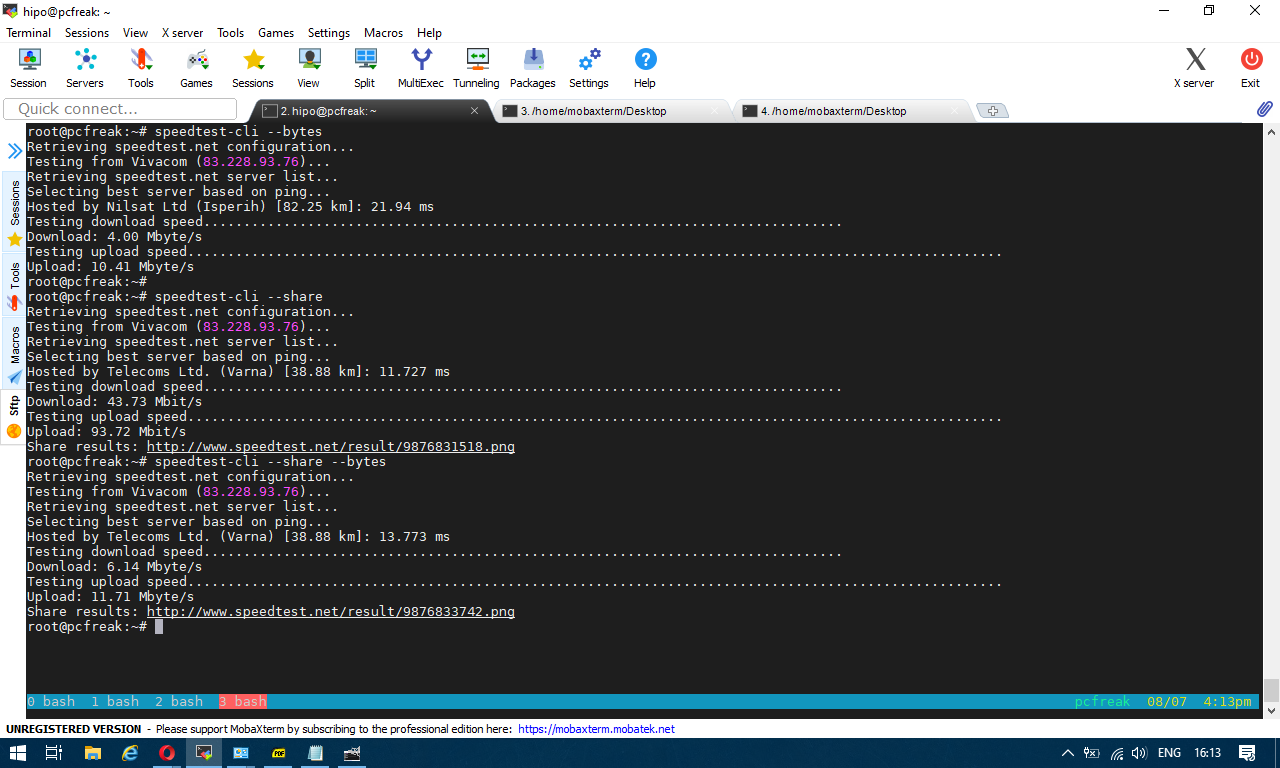
You can give now speedtest-cli a try with –bytes arguments to get speed values in bytes instead of bits or if you want to generate an image with test results in picture just like it will appear if you use speedtest.net inside a gui browser, use the –share option

speedtest-screenshot-linux-terminal-console-cli-cmd-options


2. Getting connectivity results of all defined speedtest test City Locations


Speedtest has a list of servers through which a Upload and Download speed is tested, to run speedtest-cli to test with each and every server and get a better picture on what kind of connectivity to expect from your server towards the closest region capital cities, fetch speedtest-servers.php list and use a small shell loop below is how:


root@pcfreak:~#  wget http://www.speedtest.net/speedtest-servers.php
–2020-08-07 16:31:34–  http://www.speedtest.net/speedtest-servers.php
Преобразувам www.speedtest.net (www.speedtest.net)… 151.101.2.219, 151.101.66.219, 151.101.130.219, …
Connecting to www.speedtest.net (www.speedtest.net)|151.101.2.219|:80… успешно свързване.
HTTP изпратено искане, чакам отговор… 301 Moved Permanently
Адрес: https://www.speedtest.net/speedtest-servers.php [следва]
–2020-08-07 16:31:34–  https://www.speedtest.net/speedtest-servers.php
Connecting to www.speedtest.net (www.speedtest.net)|151.101.2.219|:443… успешно свързване.
HTTP изпратено искане, чакам отговор… 307 Temporary Redirect
Адрес: https://c.speedtest.net/speedtest-servers-static.php [следва]
–2020-08-07 16:31:35–  https://c.speedtest.net/speedtest-servers-static.php
Преобразувам c.speedtest.net (c.speedtest.net)… 151.101.242.219
Connecting to c.speedtest.net (c.speedtest.net)|151.101.242.219|:443… успешно свързване.
HTTP изпратено искане, чакам отговор… 200 OK
Дължина: 211695 (207K) [text/xml]
Saving to: ‘speedtest-servers.php’
speedtest-servers.php                  100%[==========================================================================>] 206,73K  –.-KB/s    in 0,1s
2020-08-07 16:31:35 (1,75 MB/s) – ‘speedtest-servers.php’ saved [211695/211695]

Once file is there with below loop we extract all file defined servers id="" 's 
 

root@pcfreak:~# for i in $(cat speedtest-servers.php | egrep -Eo 'id="[0-9]{4}"' |sed -e 's#id="##' -e 's#"##g'); do speedtest-cli  –server $i; done
Retrieving speedtest.net configuration…
Testing from Vivacom (83.228.93.76)…
Retrieving speedtest.net server list…
Retrieving information for the selected server…
Hosted by Telecoms Ltd. (Varna) [38.88 km]: 25.947 ms
Testing download speed……………………………………………………………………..
Download: 57.71 Mbit/s
Testing upload speed…………………………………………………………………………………………
Upload: 93.85 Mbit/s
Retrieving speedtest.net configuration…
Testing from Vivacom (83.228.93.76)…
Retrieving speedtest.net server list…
Retrieving information for the selected server…
Hosted by GMB Computers (Constanta) [94.03 km]: 80.247 ms
Testing download speed……………………………………………………………………..
Download: 35.86 Mbit/s
Testing upload speed…………………………………………………………………………………………
Upload: 80.15 Mbit/s
Retrieving speedtest.net configuration…
Testing from Vivacom (83.228.93.76)…

…..


etc.

For better readability you might want to add the ouput to a file or even put it to run periodically on a cron if you have some suspcion that your server Internet dedicated lines dies out to some general locations sometimes.
 

3. Testing UPlink speed with Download some big file from source location


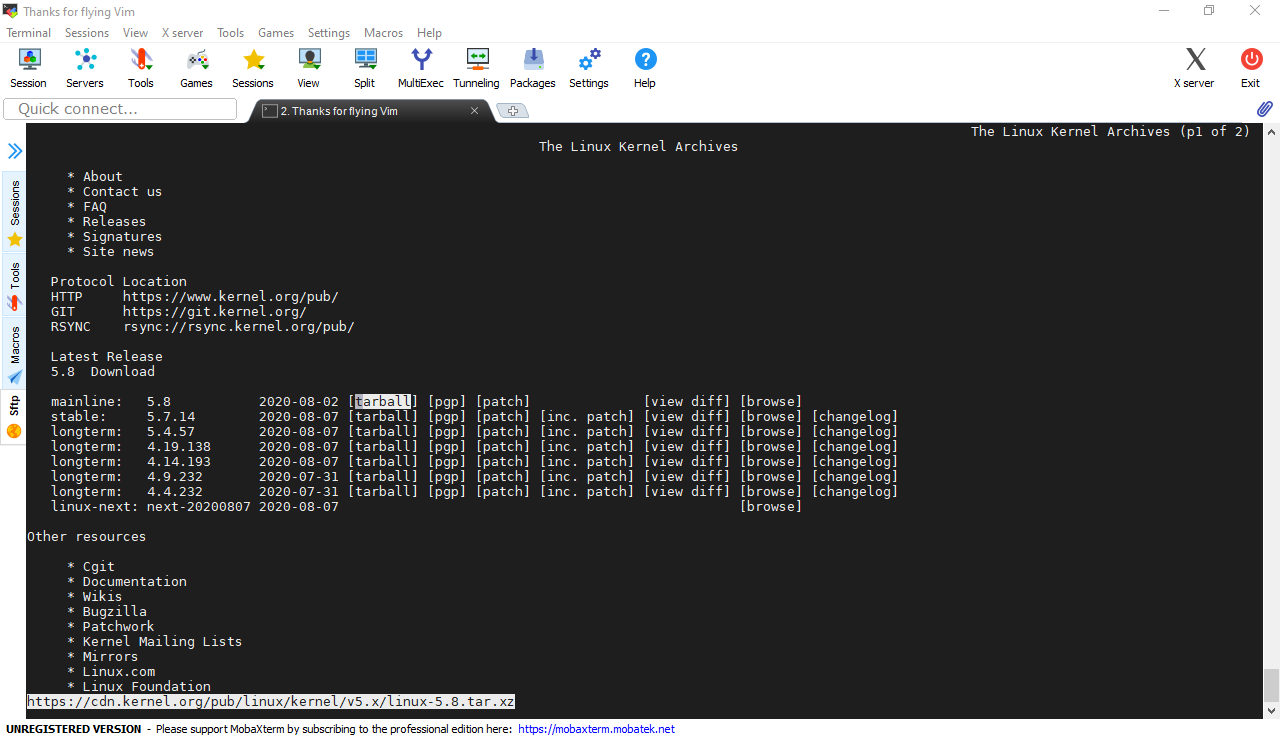
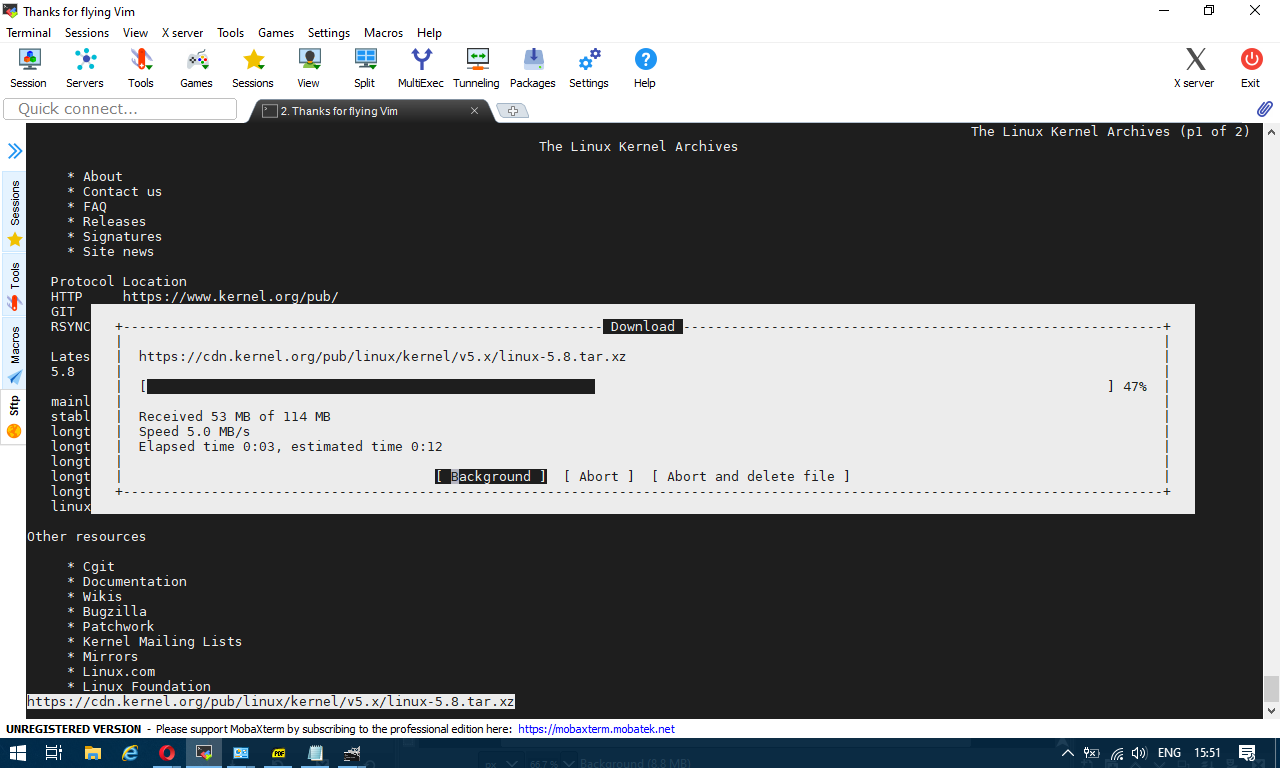
In the past a classical way to test the bandwidth connectivity of your Internet Service Provider was to fetch some big file, Linux guys should remember it was almost a standard to roll a download of Linux kernel source .tar file with some test browser as elinks / lynx / w3c.
speedtest-screenshot-kernel-org-shot1 speedtest-screenshot-kernel-org-shot2
or if those are not at hand test connectivity on remote free shell servers whatever file downloader as wget or curl was used.
Analogical method is still possible, for example to use wget to get an idea about bandwidtch connectivity, let it roll below 500 mb from speedtest.wdc01.softlayer.com to /dev/null few times:


$ wget –output-document=/dev/null http://speedtest.wdc01.softlayer.com/downloads/test500.zip

$ wget –output-document=/dev/null http://speedtest.wdc01.softlayer.com/downloads/test500.zip

$ wget –output-document=/dev/null http://speedtest.wdc01.softlayer.com/downloads/test500.zip


# wget -O /dev/null –progress=dot:mega http://cachefly.cachefly.net/10mb.test ; date
–2020-08-07 13:56:49–  http://cachefly.cachefly.net/10mb.test
Resolving cachefly.cachefly.net (cachefly.cachefly.net)… 205.234.175.175
Connecting to cachefly.cachefly.net (cachefly.cachefly.net)|205.234.175.175|:80… connected.
HTTP request sent, awaiting response… 200 OK
Length: 10485760 (10M) [application/octet-stream]
Saving to: ‘/dev/null’

     0K …….. …….. …….. …….. …….. …….. 30%  142M 0s
  3072K …….. …….. …….. …….. …….. …….. 60%  179M 0s
  6144K …….. …….. …….. …….. …….. …….. 90%  204M 0s
  9216K …….. ……..                                    100%  197M=0.06s

2020-08-07 13:56:50 (173 MB/s) – ‘/dev/null’ saved [10485760/10485760]

Fri 07 Aug 2020 01:56:50 PM UTC


To be sure you have a real picture on remote machine Internet speed it is always a good idea to run download of random big files on a certain locations that are well known to have a very stable Internet bandwidth to the Internet backbone routers.

4. Using Simple shell script to test Internet speed


Fetch and use speedtest.sh


wget https://raw.github.com/blackdotsh/curl-speedtest/master/speedtest.sh && chmod u+x speedtest.sh && bash speedtest.sh


5. Using iperf to test connectivity between two servers 


iperf is another good tool worthy to mention that can be used to test the speed between client and server.

To use iperf install it with apt and do on the server machine to which bandwidth will be tested:


# iperf -s 


On the client machine do:


# iperf -c 192.168.1.1 


where 192.168.1.1 is the IP of the server where iperf was spawned to listen.

6. Using Netflix fast to determine Internet connection speed on host


Fast

fast is a service provided by Netflix. Its web interface is located at Fast.com and it has a command-line interface available through npm (npm is a package manager for nodejs) so if you don't have it you will have to install it first with:

# apt install –yes npm


Note that if you run on Debian this will install you some 249 new nodejs packages which you might not want to have on the system, so this is useful only for machines that has already use of nodejs.


$ fast


     82 Mbps ↓


The command returns your Internet download speed. To get your upload speed, use the -u flag:


$ fast -u


   ⠧ 80 Mbps ↓ / 8.2 Mbps ↑


7. Use speedometer / iftop to measure incoming and outgoing traffic on interface


If you're measuring connectivity on a live production server system, then you might consider that the measurement output might not be exactly correct especially if you're measuring the Uplink / Downlink on a Heavy loaded webserver / Mail Server / Samba or DNS server.
If this is the case a very useful tools to consider to extract the already taken traffic used on your Incoming and Outgoing ( TX / RX ) Network interfaces
are speedometer and iftop, they're present and installable depending on the OS via yum / apt or the respective package manager.


To install on Debian server:


# apt install –yes iftop speedometer


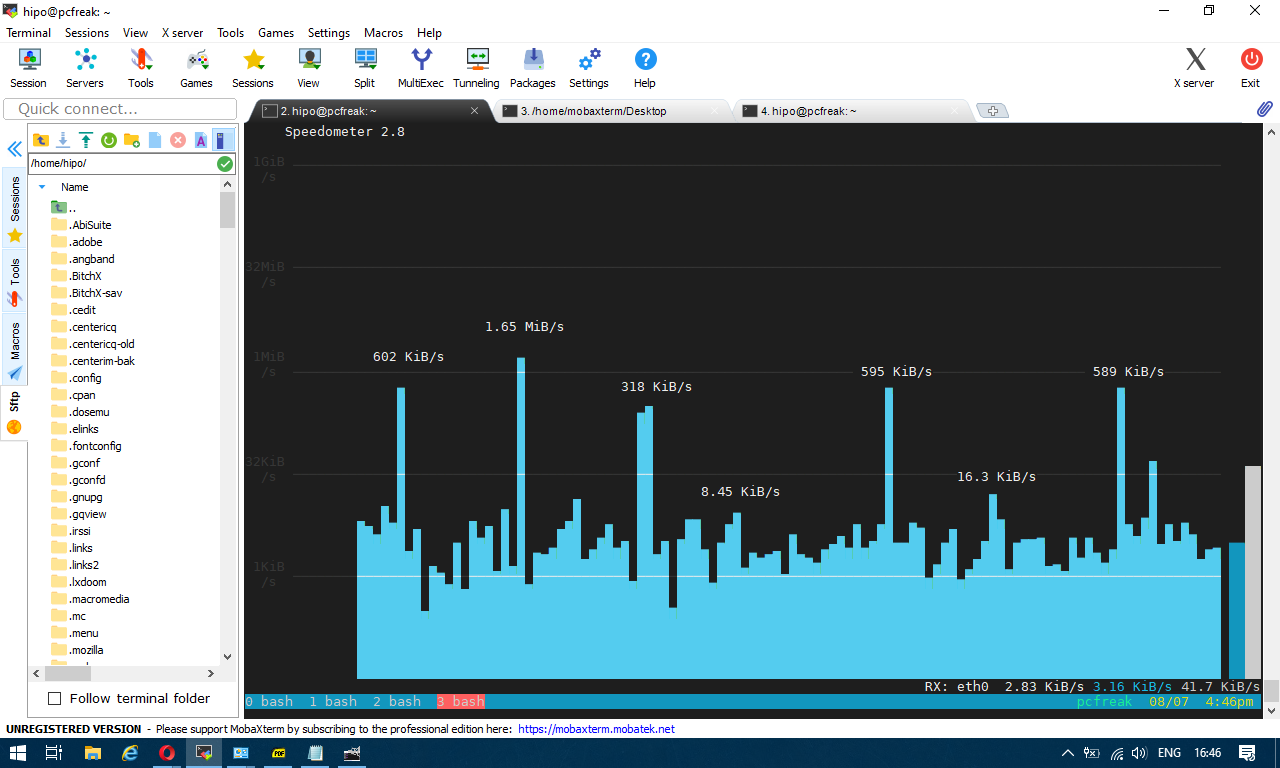
The most basic use to check the live received traffic in a nice Ncurses like text graphic is with: 


# speedometer -r 


speedometer-check-received-transmitted-network-traffic-on-linux1

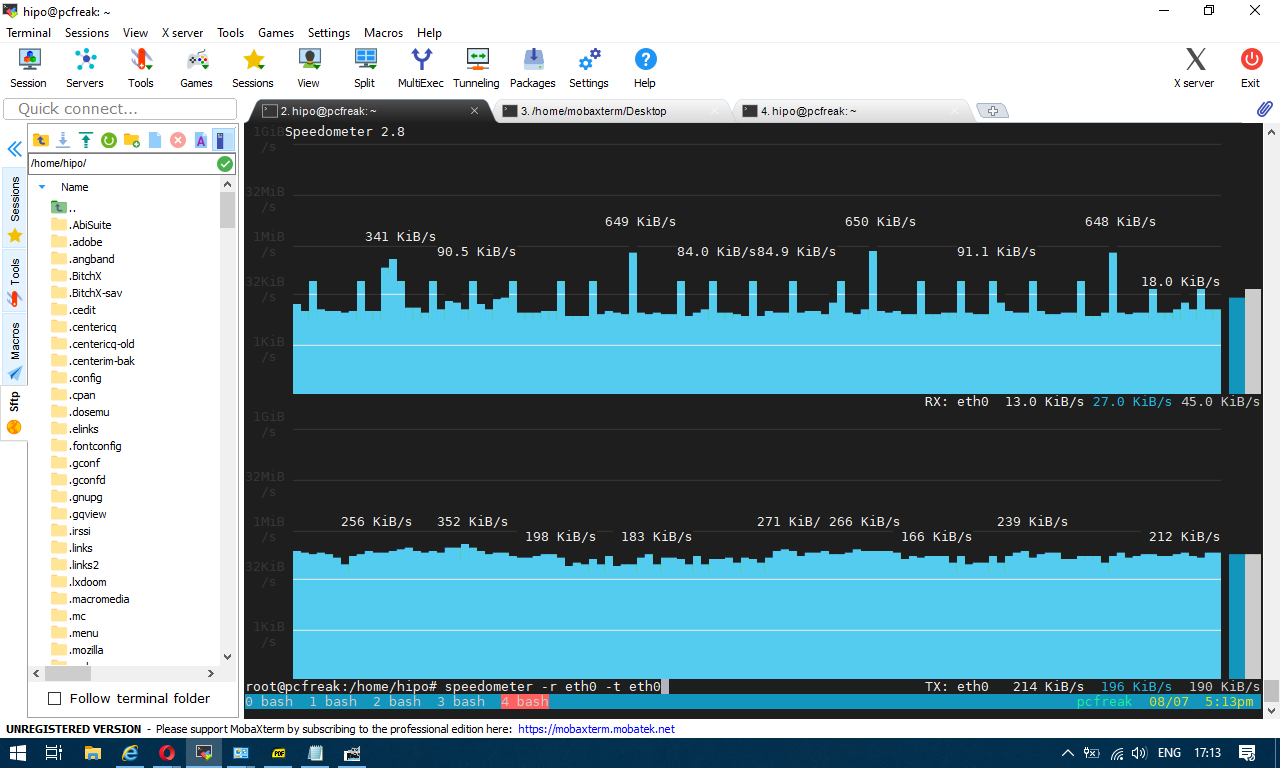
To generate real time ASCII art graph on RX / TX traffic do:


# speedometer -r eth0 -t eth0


speedometer-check-received-transmitted-network-traffic-on-linux


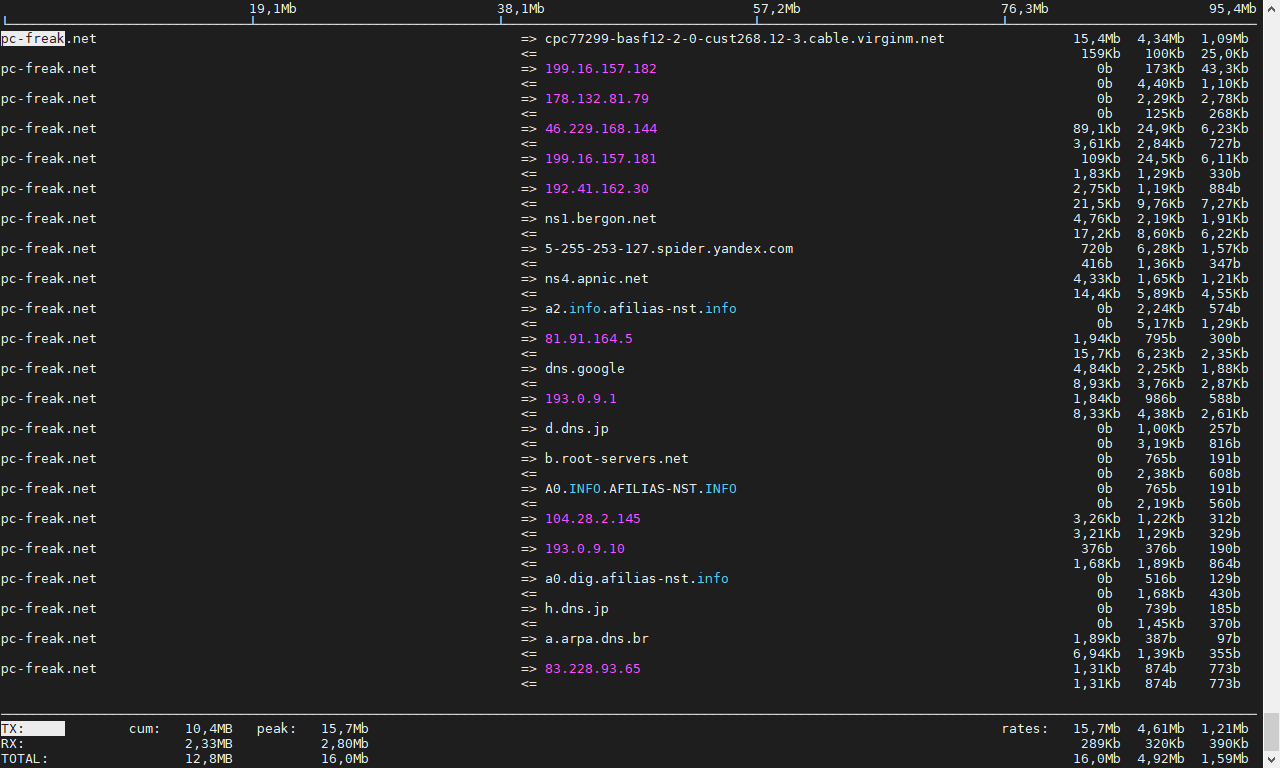
# iftop -P -i eth0


iftop-show-statistics-on-connections-screenshot-pcfreak


Reinstall all Debian packages with a copy of apt deb package list from another working Debian Linux installation


July 29th, 2020

Reinstall-all-Debian-packages-with-copy-of-apt-packages-list-from-another-working-Debian-Linux-installation

Few days ago, in the hurry in the small hours of the night, I've done something extremely stupid. Wanting to move out a .tar.gz binary copy of qmail installation to /var/lib/qmail with all the dependent qmail items instead of extracting to admin user /root directory (/root), I've extracted it to the main Operating system root / directrory.
Not noticing this, I've quickly executed rm -rf var with the idea to delete all directory tree under /root/var just 3 seconds later, I've realized I'm issuing the rm -rf var with the wrong location WITH a root user !!!! Being scared on what I've done, I've quickly pressed CTRL+C to immedately cancel the deletion operation of my /var.
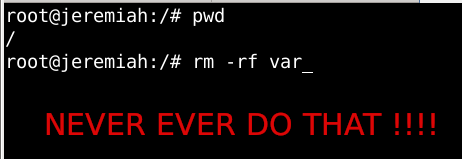
wrong-system-var-rm-linux-dont-do-that-ever-or-your-system-will-end-up-irreversably-damaged

But as you can guess, since the machine has an Slid State Drive drive and SSD memory drive are much more faster in I/O operations than the classical ATA / SATA disks. I was not quick enough to cancel the operation and I've noticed already some part of my /var have been R.I.P-pped in the heaven of directories.

This was ofcourse upsetting so for a while I rethinked the situation to get some ideas on what I can do to recover my system ASAP!!! and I had the idea of course to try to reinstall All my installed .deb debian packages to restore system closest to the normal, before my stupid mistake.

Guess my unpleasent suprise when I have realized dpkg and respectively apt-get apt and aptitude package management tools cannot anymore handle packages as Debian Linux's package dependency database has been damaged due to missing dpkg directory 


/var/lib/dpkg 


Oh man that was unpleasent, especially since I've installed plenty of stuff that is custom on my Mate based desktop and, generally reinstalling it updating the sytem to the latest Debian security updates etc. will be time consuming and painful process I wanted to omit.

So of course the logical thing to do here was to try to somehow recover somehow a database copy of /var/lib/dpkg  if that was possible, that of course led me to the idea to lookup for a way to recover my /var/lib/dpkg from backup but since I did not maintained any backup copy of my OS anywhere that was not really possible, so anyways I wondered whether dpkg does not keep some kind of database backups somewhere in case if something goes wrong with its database.
This led me to this nice Ubuntu thred which has pointed me to the part of my root rm -rf dpkg db disaster recovery solution.
Luckily .deb package management creators has thought about situation similar to mine and to give the user a restore point for /var/lib/dpkg damaged database

/var/lib/dpkg is periodically backed up in /var/backups

A typical /var/lib/dpkg on Ubuntu and Debian Linux looks like so:
 

hipo@jeremiah:/var/backups$ ls -l /var/lib/dpkg
total 12572
drwxr-xr-x 2 root root    4096 Jul 26 03:22 alternatives
-rw-r–r– 1 root root      11 Oct 14  2017 arch
-rw-r–r– 1 root root 2199402 Jul 25 20:04 available
-rw-r–r– 1 root root 2199402 Oct 19  2017 available-old
-rw-r–r– 1 root root       8 Sep  6  2012 cmethopt
-rw-r–r– 1 root root    1337 Jul 26 01:39 diversions
-rw-r–r– 1 root root    1223 Jul 26 01:39 diversions-old
drwxr-xr-x 2 root root  679936 Jul 28 14:17 info
-rw-r—– 1 root root       0 Jul 28 14:17 lock
-rw-r—– 1 root root       0 Jul 26 03:00 lock-frontend
drwxr-xr-x 2 root root    4096 Sep 17  2012 parts
-rw-r–r– 1 root root    1011 Jul 25 23:59 statoverride
-rw-r–r– 1 root root     965 Jul 25 23:59 statoverride-old
-rw-r–r– 1 root root 3873710 Jul 28 14:17 status
-rw-r–r– 1 root root 3873712 Jul 28 14:17 status-old
drwxr-xr-x 2 root root    4096 Jul 26 03:22 triggers
drwxr-xr-x 2 root root    4096 Jul 28 14:17 updates

Before proceeding with this radical stuff to move out /var/lib/dpkg/info from another machine to /var mistakenyl removed oned. I have tried to recover with the well known:

  • extundelete
  • foremost
  • recover
  • ext4magic
  • ext3grep
  • gddrescue
  • ddrescue
  • myrescue
  • testdisk
  • photorec

Linux file deletion recovery tools from a USB stick loaded with a Number of LiveCD distributions, i.e. tested recovery with:

  • Debian LiveCD
  • Ubuntu LiveCD
  • KNOPPIX
  • SystemRescueCD
  • Trinity Rescue Kit
  • Ultimate Boot CD


but unfortunately none of them couldn't recover the deleted files … 

The reason why the standard file recovery tools could not recover ?

My assumptions is after I've done by rm -rf var; from sysroot,  issued the sync (- if you haven't used it check out man sync) command – that synchronizes cached writes to persistent storage and did a restart from the poweroff PC button, this should have worked, as I've recovered like that in the past) in a normal Sys V System with a normal old fashioned blocks filesystem as EXT2 . or any other of the filesystems without a journal, however as the machine run a EXT4 filesystem with a journald and journald, this did not work perhaps because something was not updated properly in /lib/systemd/systemd-journal, that led to the situation all recently deleted files were totally unrecoverable.

1. First step was to restore the directory skele of /var/lib/dpkg

# mkdir -p /var/lib/dpkg/{alternatives,info,parts,triggers,updates}


2. Recover missing /var/lib/dpkg/status  file

The main file that gives information to dpkg of the existing packages and their statuses on a Debian based systems is /var/lib/dpkg/status

# cp /var/backups/dpkg.status.0 /var/lib/dpkg/status


3. Reinstall dpkg package manager to make package management working again

Say a warm prayer to the Merciful God ! and do:

# apt-get download dpkg
# dpkg -i dpkg*.deb


4. Reinstall base-files .deb package which provides basis of a Debian system

Hopefully everything will be okay and your dpkg / apt pair will be in normal working state, next step is to:

# apt-get download base-files
# dpkg -i base-files*.deb


5. Do a package sanity and consistency check and try to update OS package list

Check whether packages have been installed only partially on your system or that have missing, wrong or obsolete control  data  or  files.  dpkg  should suggest what to do with them to get them fixed.

# dpkg –audit

Then resynchronize (fetch) the package index files from their sources described in /etc/apt/sources.list

# apt-get update


Do apt db constistency check:

#  apt-get check


check is a diagnostic tool; it updates the package cache and checks for broken dependencies.
 

Take a deep breath ! …

Do :

ls -l /var/lib/dpkg
and compare with the above list. If some -old file is not present don't worry it will be there tomorrow.

Next time don't forget to do a regular backup with simple rsync backup script or something like Bacula / Amanda / Time Vault or Clonezilla.
 

6. Copy dpkg database from another Linux system that has a working dpkg / apt Database

Well this was however not the end of the story … There were still many things missing from my /var/ and luckily I had another Debian 10 Buster install on another properly working machine with a similar set of .deb packages installed. Therefore to make most of my programs still working again I have copied over /var from the other similar set of package installed machine to my messed up machine with the missing deleted /var.

To do so …
On Functioning Debian 10 Machine (Working Host in a local network with IP 192.168.0.50), I've archived content of /var:

linux:~# tar -czvf var_backup_debian10.tar.gz /var

Then sftped from Working Host towards the /var deleted broken one in my case this machine's hostname is jericho and luckily still had SSHD and SFTP running processes loaded in memory:

jericho:~# sftp root@192.168.0.50
sftp> get var_backup_debian10.tar.gz

Now Before extracting the archive it is a good idea to make backup of old /var remains somewhere for example somewhere in /root 
just in case if we need to have a copy of the dpkg backup dir /var/backups

jericho:~# cp -rpfv /var /root/var_backup_damaged

 
jericho:~# tar -zxvf /root/var_backup_debian10.tar.gz 
jericho:/# mv /root/var/ /

Then to make my /var/lib/dpkg contain the list of packages from my my broken Linux install I have ovewritten /var/lib/dpkg with the files earlier backupped before  .tar.gz was extracted.

jericho:~# cp -rpfv /var /root/var_backup_damaged/lib/dpkg/ /var/lib/


7. Reinstall All Debian  Packages completely scripts


I then tried to reinstall each and every package first using aptitude with aptitude this is done with

# aptitude reinstall '~i'

However as this failed, tried using a simple shell loop like below:

for i in $(dpkg -l |awk '{ print $2 }'); do echo apt-get install –reinstall –yes $i; done

Alternatively, all .deb package reninstall is also possible with dpkg –get-selections and with awk with below cmds:

dpkg –get-selections | grep -v deinstall | awk '{print $1}' > list.log;
awk '$1=$1' ORS=' ' list.log > newlist.log
;
apt-get install –reinstall $(cat newlist.log)

It can also be run as one liner for simplicity:

dpkg –get-selections | grep -v deinstall | awk '{print $1}' > list.log; awk '$1=$1' ORS=' ' list.log > newlist.log; apt-get install –reinstall $(cat newlist.log)

This produced a lot of warning messages, reporting "package has no files currently installed" (virtually for all installed packages), indicating a severe packages problem below is sample output produced after each and every package reinstall … :

dpkg: warning: files list file for package 'iproute' missing; assuming package has no files currently installed
dpkg: warning: files list file for package 'brscan-skey' missing; assuming package has no files currently installed
dpkg: warning: files list file for package 'libapache2-mod-php7.4' missing; assuming package has no files currently installed
dpkg: warning: files list file for package 'libexpat1:amd64' missing; assuming package has no files currently installed
dpkg: warning: files list file for package 'libexpat1:i386' missing; assuming package has no files currently installed
dpkg: warning: files list file for package 'php5.6-readline' missing; assuming package has no files currently installed
dpkg: warning: files list file for package 'linux-headers-4.19.0-5-amd64' missing; assuming package has no files currently installed
dpkg: warning: files list file for package 'libgraphite2-3:amd64' missing; assuming package has no files currently installed
dpkg: warning: files list file for package 'libgraphite2-3:i386' missing; assuming package has no files currently installed
dpkg: warning: files list file for package 'libbonoboui2-0:amd64' missing; assuming package has no files currently installed
dpkg: warning: files list file for package 'libxcb-dri3-0:amd64' missing; assuming package has no files currently installed
dpkg: warning: files list file for package 'libxcb-dri3-0:i386' missing; assuming package has no files currently installed
dpkg: warning: files list file for package 'liblcms2-2:amd64' missing; assuming package has no files currently installed
dpkg: warning: files list file for package 'liblcms2-2:i386' missing; assuming package has no files currently installed
dpkg: warning: files list file for package 'libpixman-1-0:amd64' missing; assuming package has no files currently installed
dpkg: warning: files list file for package 'libpixman-1-0:i386' missing; assuming package has no files currently installed
dpkg: warning: files list file for package 'gksu' missing; assuming package has no files currently installed
dpkg: warning: files list file for package 'liblogging-stdlog0:amd64' missing; assuming package has no files currently installed
dpkg: warning: files list file for package 'mesa-vdpau-drivers:amd64' missing; assuming package has no files currently installed
dpkg: warning: files list file for package 'mesa-vdpau-drivers:i386' missing; assuming package has no files currently installed
dpkg: warning: files list file for package 'libzvbi0:amd64' missing; assuming package has no files currently installed
dpkg: warning: files list file for package 'libzvbi0:i386' missing; assuming package has no files currently installed
dpkg: warning: files list file for package 'libcdparanoia0:amd64' missing; assuming package has no files currently installed
dpkg: warning: files list file for package 'libcdparanoia0:i386' missing; assuming package has no files currently installed
dpkg: warning: files list file for package 'python-gconf' missing; assuming package has no files currently installed
dpkg: warning: files list file for package 'php5.6-cli' missing; assuming package has no files currently installed
dpkg: warning: files list file for package 'libpaper1:amd64' missing; assuming package has no files currently installed
dpkg: warning: files list file for package 'mixer.app' missing; assuming package has no files currently installed

After some attempts I found a way to be able to work around the warning message, for each package by simply reinstalling the package reporting the issue with

apt –reinstall $package_name


Though reinstallation started well and many packages got reinstalled, unfortunately some packages such as apache2-mod-php5.6 and other php related ones  started failing during reinstall ending up in unfixable states right after installation of binaries from packages was successfully placed in its expected locations on disk. The failures occured during the package setup stage ( dpkg –configure $packagename) …

The logical thing to do is a recovery attempt with something like the usual well known by any Debian admin:

apt-get install –fix-missing

As well as Manual requesting to reconfigure (issue re-setup) of all installed packages also did not produced a positive result

dpkg –configure -a

But many packages were still failing due to dpkg inability to execute some post installation scripts from respective .deb files.
To work around that and continue installing the rest of packages I had to manually delete all files related to the failing package located under directory 

/var/lib/dpkg/info#

For example to omit the post installation failure of libapache2-mod-php5.6 and have a succesful install of the package next time I tried reinstall, I had to delete all /var/lib/dpkg/info/libapache2-mod-php5.6.postrm, /var/lib/dpkg/info/libapache2-mod-php5.6.postinst scripts and even sometimes everything like libapache2-mod-php5.6* that were present in /var/lib/dpkg/info dir.

The problem with this solution, however was the package reporting to install properly, but the post install script hooks were still not in placed and important things as setting permissions of binaries after install or applying some configuration changes right after install was missing leading to programs failing to  fully behave properly or even breaking up even though showing as finely installed …

The final solution to this problem was radical.
I've used /var/lib/dpkg database (directory) from ther other working Linux machine with dpkg DB OK found in var_backup_debian10.tar.gz (linux:~# host with a working dpkg database) and then based on the dpkg package list correct database responding on jericho:~# to reinstall each and every package on the system using Debian System Reinstaller script taken from the internet.
Debian System Reinstaller works but to reinstall many packages, I've been prompted again and again whether to overwrite configuration or keep the present one of packages.
To Omit the annoying [Y / N ] text prompts I had made a slight modification to the script so it finally looked like this:
 

#!/bin/bash
# Debian System Reinstaller
# Copyright (C) 2015 Albert Huang
# Copyright (C) 2018 Andreas Fendt

# This program is free software: you can redistribute it and/or modify
# it under the terms of the GNU General Public License as published by
# the Free Software Foundation, either version 3 of the License, or
# (at your option) any later version.

# This program is distributed in the hope that it will be useful,
# but WITHOUT ANY WARRANTY; without even the implied warranty of
# MERCHANTABILITY or FITNESS FOR A PARTICULAR PURPOSE.  See the
# GNU General Public License for more details.

# You should have received a copy of the GNU General Public License
# along with this program.  If not, see <http://www.gnu.org/licenses/>.

# —
# This script assumes you are using a Debian based system
# (Debian, Mint, Ubuntu, #!), and have sudo installed. If you don't
# have sudo installed, replace "sudo" with "su -c" instead.

pkgs=`dpkg –get-selections | grep -w 'install$' | cut -f 1 |  egrep -v '(dpkg|apt)'`

for pkg in $pkgs; do
    echo -e "\033[1m   * Reinstalling:\033[0m $pkg"    

    apt-get –reinstall -o Dpkg::Options::="–force-confdef" -o Dpkg::Options::="–force-confold" -y install $pkg || {
        echo "ERROR: Reinstallation failed. See reinstall.log for details."
        exit 1
    }
done


 debian-all-packages-reinstall.sh working modified version of Albert Huang and Andreas Fendt script  can be also downloaded here.

Note ! Omitting the text confirmation prompts to install newest config or keep maintainer configuration is handled by the argument:


-o Dpkg::Options::="–force-confold


I however still got few NCurses Console selection prompts during the reinstall of about 3200+ .deb packages, so even with this mod the reinstall was not completely automatic.

Note !  During the reinstall few of the packages from the list failed due to being some old unsupported packages this was ejabberd, ircd-hybrid and a 2 / 3 more.
This failure was easily solved by completely purging those packages with the usual

# dpkg –purge $packagename

and reruninng  debian-all-packages-reinstall.sh on each of the failing packages.

Note ! The failing packages were just old ones left over from Debian 8 and Debian 9 before the apt-get dist-upgrade towards 10 Duster.
Eventually I got a success by God's grance, after few hours of pains and trials, ending up in a working state package database and a complete set of freshly reinstalled packages.

The only thing I had to do finally is 2 hours of tampering why GNOME did not automatically booted after the system reboot due to failing gdm
until I fixed that I've temprary used ligthdm (x-display-manager), to do I've

dpkg –reconfigure gdm3
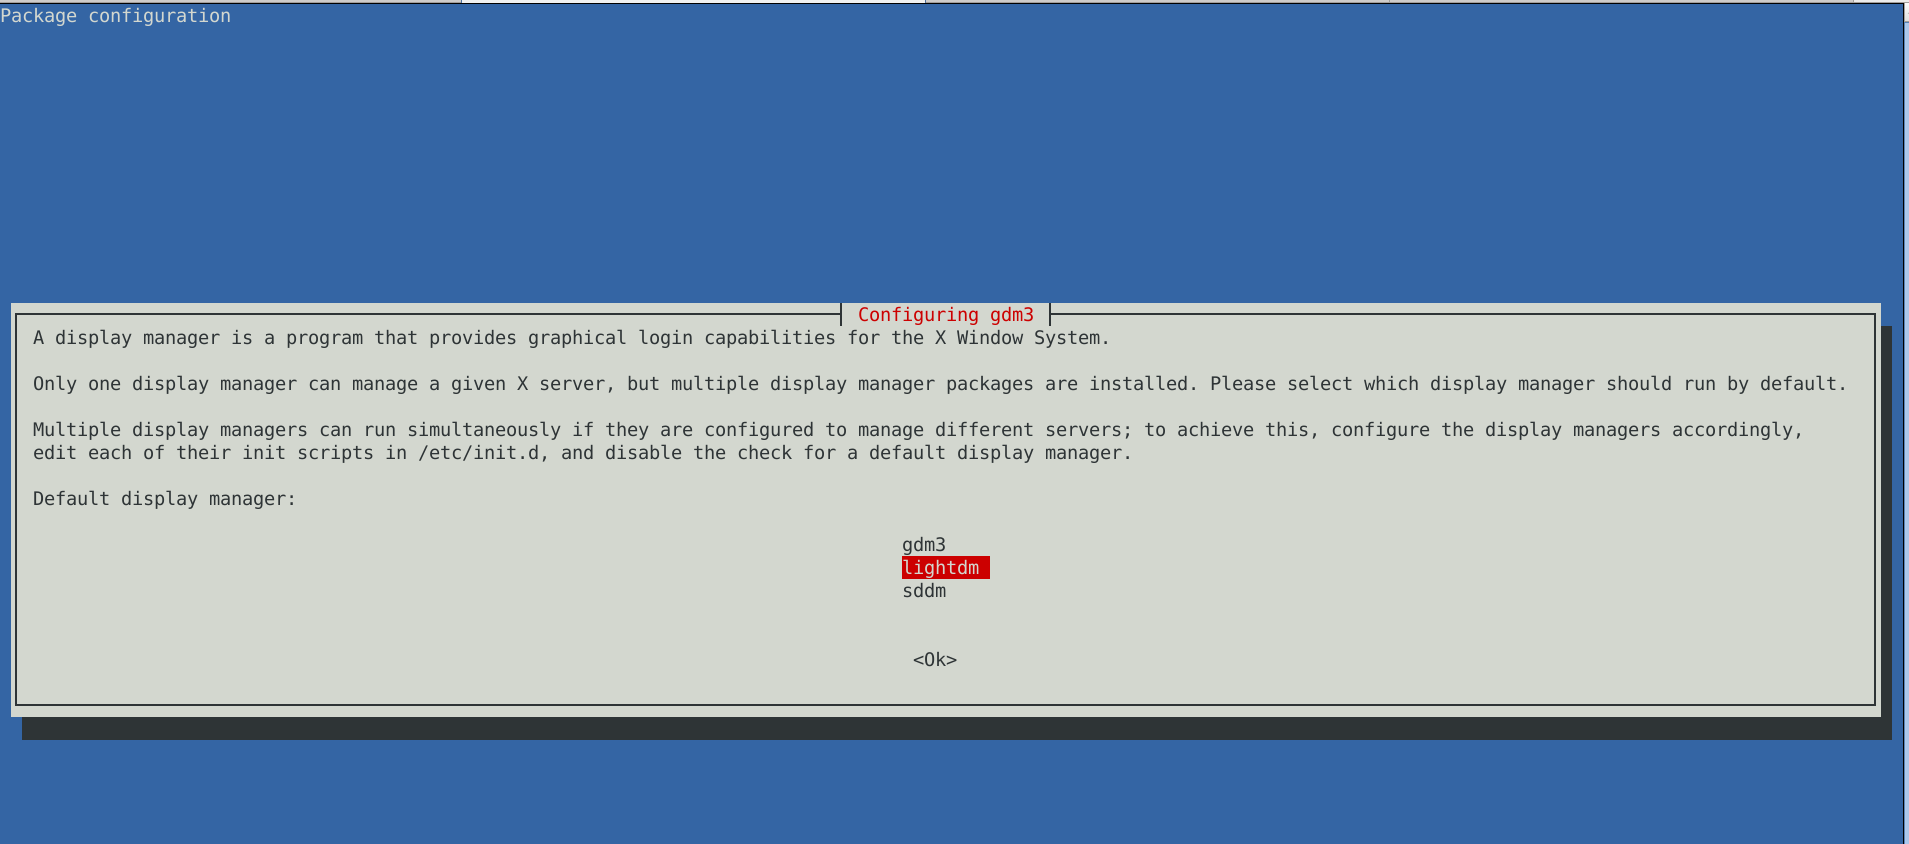
lightdm-x-display-manager-screenshot-gdm3-reconfige

 to work around this I had to also reinstall few libraries, reinstall the xorg-server, reinstall gdm and reinstall the meta package for GNOME, using below set of commands:
 

apt-get install –reinstall libglw1-mesa libglx-mesa0
apt-get install –reinstall libglu1-mesa-dev
apt install –reinstallgsettings-desktop-schemas
apt-get install –reinstall xserver-xorg-video-intel
apt-get install –reinstall xserver-xorg
apt-get install –reinstall xserver-xorg-core
apt-get install –reinstall task-desktop
apt-get install –reinstall task-gnome-desktop


As some packages did not ended re-instaled on system because on the original host from where /var/lib/dpkg db was copied did not have it I had to eventually manually trigger reinstall for those too:


apt-get install –reinstall –yes vlc
apt-get install –reinstall –yes thunderbird
apt-get install –reinstall –yes audacity
apt-get install –reinstall –yes gajim
apt-get install –reinstall –yes slack remmina
apt-get install –yes k3b
pt-get install –yes gbgoffice
pt-get install –reinstall –yes skypeforlinux
apt-get install –reinstall –yes vlc
apt-get install –reinstall –yes libcurl3-gnutls libcurl3-nss
apt-get install –yes virtualbox-5.2
apt-get install –reinstall –yes vlc
apt-get install –reinstall –yes alsa-tools-gui
apt-get install –reinstall –yes gftp
apt install ./teamviewer_15.3.2682_amd64.deb –yes


Note that some of above packages requires a properly configured third party repositories, other people might have other packages that are missing from the dpkg list and needs to be reinstalled so just decide according to your own case of left aside working system present binaries that doesn't belong to any dpkg installed package.

After a bit of struggle everything is back to normal Thanks God! 🙂 !