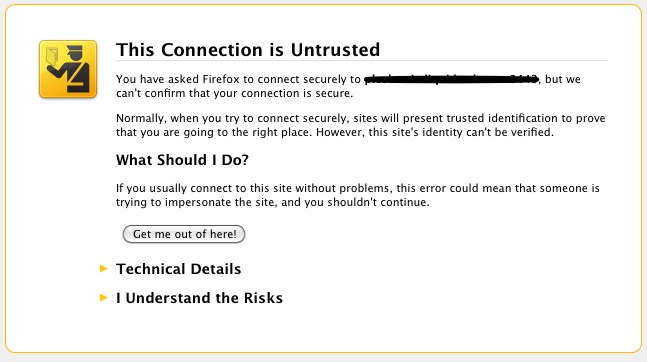
It is common solution for personal use to generate SSL certificates which are self-signed. Self-signed certificates are dangerous as no authority or company guarantees that remote site is trustable. However for private use having encrypted connection whether you need to transfer personal data is better than not having such. There are plenty of tutorials online pointing how to set-up Apache webserver to provide access via SSL port 443 with self-signed certifacate, but anyways I decided to blog here a one-liner command way, which makes generating self-signed certificate a piece of cake. Self-signed certificates on UNIX are generated with openssl command part of openssl (Secure Socket Layer cryptocgraphic tools).
On Debian Linux to install openssl (if you still don't have it):
apt-get install --yes openssl
On Fedora, RHEL, CentOS etc. same install should be done with:
yum install -y openssl
On FreeBSD to install it use ports;
cd /usr/ports/security/openssl

make install clean
Once openssl is available, here is command to generate self signed SSL certitifacate;
openssl req -x509 -nodes -days 3650 -newkey rsa:2048 -keyout my-sitename.key -out my-sitename.crt
Generating a 2048 bit RSA private key
............................................+++
..............................................................+++
writing new private key to 'key.pem'
Enter PEM pass phrase:
Verifying - Enter PEM pass phrase:
-----
You are about to be asked to enter information that will be incorporated
into your certificate request.
What you are about to enter is what is called a Distinguished Name or a DN.
There are quite a few fields but you can leave some blank
For some fields there will be a default value,
If you enter '.', the field will be left blank.
-----
Country Name (2 letter code) [AU]:BG
State or Province Name (full name) [Some-State]:Sofia
Locality Name (eg, city) []:Sofia
Organization Name (eg, company) [Internet Widgits Pty Ltd]:Pc Freak
Organizational Unit Name (eg, section) []:Pc Freak
Common Name (eg, YOUR name) []:www.pc-freak.net
Email Address []:testing@www.pc-freak.net
The generated certificate Private Key file is placed in my-sitename.key
, actual certificate is located in my-sitename.crt -days option tells for how long period certificate will be valid. Regenerating certificate every year (360 days) is good security practice but it is pretty annoying to see your certificate has expered thus for private self signed SSL certificate it is more confortable to generate cert for 10 years time.
To use my-sitename.key and my-sitename.crt copy them to /etc/ssl/crt/
cp -rpf my-sitename.crt /etc/ssl/crt/

cp -rpf my-sitename.key /etc/ssl/crt/
Next what's left is to configure Apache to use new generated certs. Quickest way is to add it inside virtual host. Adding to Apache also depends on Linux distribution where SSL has to be added but in general, what should work is something like:
 SSLEngine on

SSLCertificateFile /etc/ssl/crt/my-sitename.crt

SSLCertificateKeyFile /etc/ssl/crt/my-sitename.key
Note that if SSL has to be enabled for specific Virtual Host you will have to place above Apache directives into the Vhost. Though certifiate will only be trusted by your authority RSA 2048 bit encryption in transfer data between your Webserver and Browser should guarantee you extra security of data, not that it is impossible for data to be still sniffed by a skilled hacker but makes data securily transferred in probably 99% of cases 🙂
More helpful Articles

Tags: cert, certificate, command, data, How to, key, openssl, pem, rpf, self, SSL, time, use


Mozilla/5.0 (Windows NT 10.0; Win64; x64) AppleWebKit/537.36 (KHTML, like Gecko) Chrome/77.0.3865.90 Safari/537.36
For a free SSL, you should go for LetsEncrypt. Thank you for sharing!
View CommentView Comment