Archive for the ‘Tomcat’ Category

Install and Run Multiple Tomcat and JAVA server instances on single Windows server Howto

Friday, June 17th, 2016

tomcat-windows-install-multiple-tomcats-on-one-single-windows-logo
I've had a task at my work place to install Multiple Tomcat servers on Windows 2012 Server R2 the task seems trivial however I've faced few minor issues and the few searches in Google returned very few articles discussing the topic and this give me the idea that it might be helpful to others to come up with my own article as this might save time for those Linux guys who need to install Multiple Tomcat instances on the same Windows server without spending too much time to dig into the arcane winblows.

I stumbled on some issues during installation  thus took the time to systemize below shortly how I managed to run 2 Tomcat servers on One Windows 2012 R2 machine.
 

First thing to do is to obtain latest compiled Tomcat server archive from Tomcat's official download page here.

Latest Tomcat stable release as of time of writting this article is 7.0.69, so I've downloaded 64 Bit archive (as the server is running X64 Operating system) and unarchived it twice on the Install server under 2 separate directory locations under:


D:\Tomcat\Tomcat_Instance-1


and


D:\Tomcat\Tomcat_Instance-2


Copy of the 7.0.69 X86 tomcat zip archive is here and X64 bit tomcat 7.0.69 is here

Once the files are properly untarred I also needed to download also Java as the WAR application supposed to run on the Windows machine had as requirement Java JDK 8.

Downloading Java is a trivial task, however in my case the server used to be in DMZ (Demiliterized Zone) / Firewalled network and hence instead of using the default Java installer provided from Oracle website which is trying to download from Internet, I had instead to download and use the Offline current JAVA 8u91 version.
Just for sake of some convenience I've made a mirrored version of X86 JAVA 8 (8u91) is here and JAVA 8u91 X64 version here
 

install-Java-JDK-and-JRE-8-on-Microsoft-Windows-howto

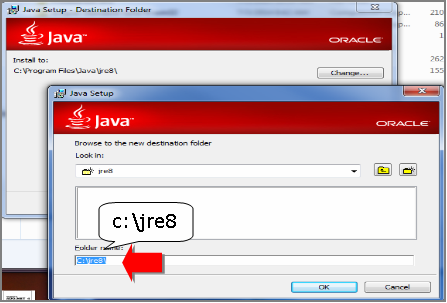
JAVA JDK install is a trivial task just run the isntaller set the proper locations initially for JDK base folder in my case this was:


D:\Java\jdk


and later throughout during install, I was asked also to fill in full path location for JRE, in my case this was


D:\Java\jre


It was a little bit surprising for me that JRE install path had to be entered and because I was not careful enough I had twice entered the same path for both JRE and JDK, i.e. entered on both prompts:


D:\Java


This caused issues and a messed Java install but I realized that after the 3rd re-install of Java when I decided to also read instead of by habit click Next / Next and Complete the install as used to be in the good old days of Windows XP and Windows 98 🙂

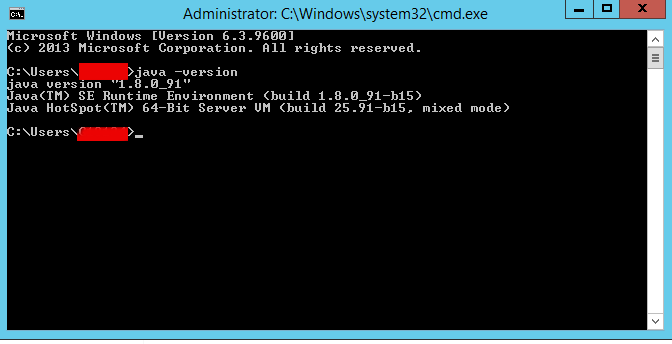
Once Java set up correctly I've tested it with:


C:\Users\georgi> java -version


test-java-version-on-microsoft-windows-command-howto-screenshot


It is also necessery to set properly following 2 JAVA command line environment variables:
 

JAVA_HOME
JRE_HOME


On the logged in user Environment Variables with which Tomcat will be running on how to do that check my previous article how to add Environment Variables on Windows


Make sure you have the following 2 environment variables set upped:


JAVA_HOME=D:\Java\jdk


JRE_HOME=D:\Java\jre


For one time set (assuming Java is installed) under D:Javajre and D:Javajdk, you will need to type in command prompt:

set JAVA_HOME=D:\Java\jdk

set JRE_HOME=D:\Java\jre

Once assured Java is running fine I proceeded to run the Tomcat serevrs, in order to make them working it was necessery to change all coinciding Port names under:


conf/server.xml


because if there are coinciding ports (assuming that like me you're trying to run both Tomcat under the same IP address), the servers will fail to run because they're trying to bind under the same Port TCP addresses.

Assuming that the tomcat archive files are copied from .zip into D:TomcatTomcat_Instance-1 and D:TomcatTomcat_Instance-2 folders and you have in each of the 2 the following directory structure:


    /bin : This directory contains the startup and shutdown scripts for both Windows and Linux.
    /conf : This directory contains the main configuration files for Tomcat. The two most important are the server.xml and the global web.xml .
    /server : This directory contains the Tomcat Java Archive files.
    /lib : This directory contains Java Archive files that Tomcat is dependent upon.
    /logs : This directory contains Tomcat’s log files.
    /src : This directory contains the source code used by the Tomcat server. Once Tomcat is released, it will probably contain interfaces and abstract classes only.
    /webapps : All web applications are deployed in this directory; it contains the WAR file.
    /work : This is the directory in which Tomcat will place all servlets that are generated from JSPs. If you want to see exactly how a particular JSP is interpreted, look in this directory.


You will need to edit server.xml in both of the Tomcats and make sure the configuration for ports is not coinciding, i.e., I've changed the following configurations for Tomcat_Instance-2 installation:


    Connector Port : This is the port where Apache Tomcat listen for the HTTP requests. Default port is 8080, I've changed this to 8089 for second Tomcat server
    Shutdown Port : This port is used when we try to shutdown the Apache Tomcat Server. Default port is 8005 so changed that to 8006 in Tomcat_Instance-2
    AJP (Apache JServ Protocol) Connector Port : The Apache JServ Protocol (AJP) is a binary protocol that can conduct inbound requests from a web server through to an application server that sits behind the web server.
I've commented out the configuration for AJP completely and used for my custom needs the following server.xml configuration:

<Connector port="11111" address="10.251.27.24" protocol="AJP/1.3" enableLookups="false"/>

    Redirect Port : Any redirection happening inside Apache Tomcat will happen through this port. In Apache TOMCAT there are two instance where redirect Port is mentioned. First one is for the Apache TOMCAT server and other one is for the AJP port. Default here is port 8443 so changed that one to to listen to 8444 instead.


Another thing necessery to do is to create setenv.bat file under both D:\TomcatTomcat_Instance-1\bin and D:\Tomcat\Tomcat_Instance-2\bin with following content:
 

set JRE_HOME=D:\java\jre
set JAVA_HOME=d:\java\jdk
exit /b 0


The quickest way to do it without bothering with Notepad text editor is by issuing:


cd tomcat\Tomcat_Instance1\bin
echo set JRE_HOME=D:\java\jre > setenv.bat
echo set JAVA_HOME=D:javajdk >> setenv.bat


cd tomcat\Tomcat_Instance2\bin
echo set JRE_HOME=D:\java\jre > setenv.bat
echo set JAVA_HOME=D:\java\jdk >> setenv.bat


The setenv.sh is a standard variables file read by Tomcat on Instance start up time
 

Next part of Tomcat installation is to install each of the 2 instances after defining CATALINA_BASE to point to first and second Tomcat instance directories, e.g open a Command Prompt (cmd.exe) and run there:


set CATALINA_BASE=D:\Tomcat\Tomcat_Instance-1

C:|> d:

D:|> cd Tomcat\Tomcat_Instance-1\bin


D:Tomcat\Tomcat_Instance-1\bin> service install Tomcat_Instance-1


You will get output like:


Using CATALINA_BASE:   " D:\Tomcat\Tomcat_Instance-1"
Using CATALINA_HOME:   " D:\Tomcat\Tomcat_Instance-1"
Using CATALINA_TMPDIR: " D:\TomcatTomcat_Instance-1\temp"
Using JRE_HOME:        "D:\java\jre"
Using CLASSPATH:       "D:\Tomcat\Tomcat_Instance-1\bin\bootstrap.jar; D:\Tomcat\Tomcat_Instance-1\bin\tomcat-juli.jar"


Then for the second Tomcat server instance run in command prompt:


set CATALINA_BASE=D:\Tomcat\Tomcat_Instance-2

d:

cd Tomcat\Tomcat_Instance-2\bin
service install Tomcat_Instance-2

Using CATALINA_BASE:   " D:\Tomcat\Tomcat_Instance-2"
Using CATALINA_HOME:   " D:\Tomcat\Tomcat_Instance-2"
Using CATALINA_TMPDIR: " D:\Tomcat\Tomcat_Instance-2\temp"
Using JRE_HOME:        "D:\java\jre"
Using CLASSPATH:       "D:\Tomcat\Tomcat_Instance-1\bin\bootstrap.jar; D:\TomcatTomcat_Instance-2\bin\tomcat-juli.jar"
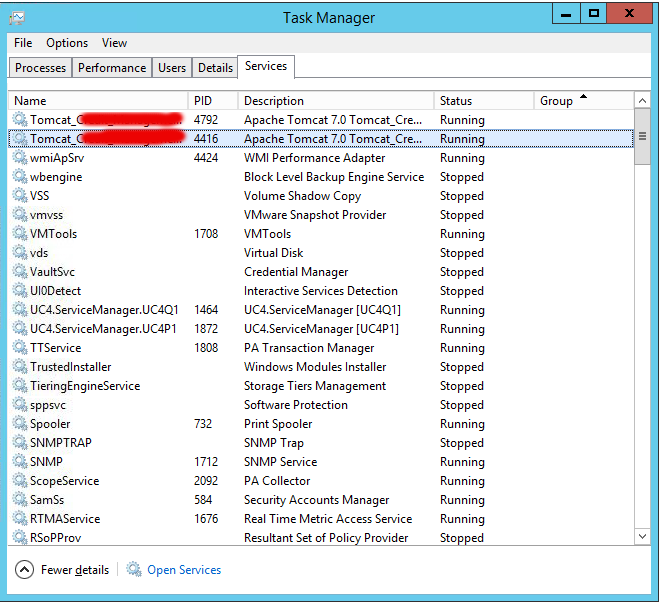
windows-running-two-tomcat-instances-on-the-same-single-server-screenshot


Here is all the service.bat batch file parameters:


D:\Tomcat\Tomcat_Instance-11\bin>service.bat /
?
Unknown parameter "/?"


Usage: service.bat install/remove [service_name] [/user username]


To test both Tomcat servers where they run simultaneously without issues, I run in 2 separate command prompts – opened (cmd.exe) two times and run in each of them:

What this little command does is uses Tomcat7.exe command to Add / Remove / Modify the Tomcat instance into Windows Services, the same can be happily done also with the good old
sc (service configure) windows command.


D:

cd Tomcat\Tomcat_Instance-1\bin\startup.bat

D:

cd Tomcat\Tomcat_Instance-2\bin\startup.bat
 

Both executed without errors in command line and to stop them I've pressed the usual CTRL+C.
To make sure once again both server instances ran wihtout errors, I've checked in D:TomcatTomcat_Instance-{1,2}logs/catalina*.log and in both of them all looked fine.
Another good check if you want to be 10000% sure Tomcat is running is to look up for Tomcat listening on above configured ports, for example run below in cmd:


D:Tomcat> netstat -a|findstr "8080"


I've also used the 2 following command to set up proper Services description for both of services:


D:\Tomcat\Tomcat_Instance-1\tomcat7 //US//Tomcat_Instance1 –Description="Apache Tomcat Server – Tomcat-Instance1.my-site.com"

D:\Tomcat\Instance_Instance-2\tomcat7 //US//Tomcat_Instance2 –Description="Apache Tomcat Server – Tomcat-Instance2.my-site.com "


A very helpful resource during the Apache (Windows Service) instance install / setup /modification that helped me is on Tomcat's official site here
 

N! B! Very important note to make here for anyone experiencing strange issues when trying to add multiple issues is below:

I've experienced some issues while trying to add the 2 Tomcat servers into Windows services initially with tomcat7.exe command like so:

Trying installing Tomcat71 service with cmd:
 

 tomcat7 //IS//Tomcat71 –DisplayName="Apache Tomcat 7" ^
     –Install="D:\Tomcat\Tomcat_Instance-1\bin\tomcat7.exe" –Jvm=auto ^
     –StartMode=jvm –StopMode=jvm ^
     –StartClass=org.apache.catalina.startup.Bootstrap –StartParams=start ^
     –StopClass=org.apache.catalina.startup.Bootstrap –StopParams=stop


And Tomcat72 instance with cmd:
 

 tomcat7 //IS//Tomcat71 –DisplayName="Apache Tomcat 7" ^
     –Install="D:\Tomcat\Tomcat_Instance-2\bin\tomcat7.exe" –Jvm=auto ^
     –StartMode=jvm –StopMode=jvm ^
     –StartClass=org.apache.catalina.startup.Bootstrap –StartParams=start ^
     –StopClass=org.apache.catalina.startup.Bootstrap –StopParams=stop


I've tried multiplet imes to Add and remove the Tomcat71 and Tomcat72 Windows service names (with) Tomcat DS (Delete Service)
 

tomcat7 //DS/Tomcat71
tomcat7 //DS/Tomcat72


And strangely the two instances were continuously crashing when I tried to start them (with Properties button and Start instruction) from Windows Task Manager (taskmgr.exe) -> Services

Finally I realized the issue is caused by some problems that somehow occured with Windows Service Names Tomcat71 and Tomcat72 by simply readding the two instances under another name the instances stopped crashing and all worked thanks to help of colleague Anatoliy who pointed me tot he problem by trying to install his own instances under a different service name).

Thanks God finally the 2 instances run fine !


Improve Apache Load Balancing with mod_cluster – Apaches to Tomcats Application servers Get Better Load Balancing

Thursday, March 31st, 2016

improve-apache-load-balancing-with-mod_cluster-apaches-to-tomcats-application-servers-get-better-load-balancing-mod_cluster-logo


Earlier I've blogged on How to set up Apache to to serve as a Load Balancer for 2, 3, 4  etc. Tomcat / other backend application servers with mod_proxy and mod_proxy_balancer, however though default Apache provided mod_proxy_balancer works fine most of the time, If you want a more precise and sophisticated balancing with better load distribuion you will probably want to install and use mod_cluster instead.


So what is Mod_Cluster and why use it instead of Apache proxy_balancer ?
 

Mod_cluster is an innovative Apache module for HTTP load balancing and proxying. It implements a communication channel between the load balancer and back-end nodes to make better load-balancing decisions and redistribute loads more evenly.

Why use mod_cluster instead of a traditional load balancer such as Apache's mod_balancer and mod_proxy or even a high-performance hardware balancer?

Thanks to its unique back-end communication channel, mod_cluster takes into account back-end servers' loads, and thus provides better and more precise load balancing tailored for JBoss and Tomcat servers. Mod_cluster also knows when an application is undeployed, and does not forward requests for its context (URL path) until its redeployment. And mod_cluster is easy to implement, use, and configure, requiring minimal configuration on the front-end Apache server and on the back-end servers.


So what is the advantage of mod_cluster vs mod proxy_balancer ?

Well here is few things that turns the scales  in favour for mod_cluster:


  •     advertises its presence via multicast so as workers can join without any configuration
     
  •     workers will report their available contexts
     
  •     mod_cluster will create proxies for these contexts automatically
     
  •     if you want to, you can still fine-tune this behaviour, e.g. so as .gif images are served from httpd and not from workers…
     
  •     most importantly: unlike pure mod_proxy or mod_jk, mod_cluster knows exactly how much load there is on each node because nodes are reporting their load back to the balancer via special messages
     
  •     default communication goes over AJP, you can use HTTP and HTTPS


1. How to install mod_cluster on Linux ?


You can use mod_cluster either with JBoss or Tomcat back-end servers. We'll install and configure mod_cluster with Tomcat under CentOS; using it with JBoss or on other Linux distributions is a similar process. I'll assume you already have at least one front-end Apache server and a few back-end Tomcat servers installed.

To install mod_cluster, first download the latest mod_cluster httpd binaries. Make sure to select the correct package for your hardware architecture – 32- or 64-bit.
Unpack the archive to create four new Apache module files: mod_advertise.so, mod_manager.so, mod_proxy_cluster.so, and mod_slotmem.so. We won't need mod_advertise.so; it advertises the location of the load balancer through multicast packets, but we will use a static address on each back-end server.

Copy the other three .so files to the default Apache modules directory (/etc/httpd/modules/ for CentOS).
Before loading the new modules in Apache you have to remove the default proxy balancer module (mod_proxy_balancer.so) because it is not compatible with mod_cluster.

Edit the Apache configuration file (/etc/httpd/conf/httpd.conf) and remove the line


LoadModule proxy_balancer_module modules/mod_proxy_balancer.so


Create a new configuration file and give it a name such as /etc/httpd/conf.d/mod_cluster.conf. Use it to load mod_cluster's modules:


LoadModule slotmem_module modules/mod_slotmem.so
LoadModule manager_module modules/mod_manager.so
LoadModule proxy_cluster_module modules/mod_proxy_cluster.so

In the same file add the rest of the settings you'll need for mod_cluster something like:

And for permissions and Virtualhost section

Listen 192.168.180.150:9999
<virtualhost  192.168.180.150:9999="">
<directory>
Order deny,allow
Allow from all 192.168
</directory>
ManagerBalancerName mymodcluster
EnableMCPMReceive
</virtualhost>

ProxyPass / balancer://mymodcluster/


The above directives create a new virtual host listening on port 9999 on the Apache server you want to use for load balancing, on which the load balancer will receive information from the back-end application servers. In this example, the virtual host is listening on IP address 192.168.204.203, and for security reasons it allows connections only from the 192.168.0.0/16 network.
The directive ManagerBalancerName defines the name of the cluster – mymodcluster in this example. The directive EnableMCPMReceive allows the back-end servers to send updates to the load balancer. The standard ProxyPass and ProxyPassReverse directives instruct Apache to proxy all requests to the mymodcluster balancer.
That's all you need for a minimal configuration of mod_cluster on the Apache load balancer. At next server restart Apache will automatically load the file mod_cluster.conf from the /etc/httpd/conf.d directory. To learn about more options that might be useful in specific scenarios, check mod_cluster's documentation.

While you're changing Apache configuration, you should probably set the log level in Apache to debug when you're getting started with mod_cluster, so that you can trace the communication between the front- and the back-end servers and troubleshoot problems more easily. To do so, edit Apache's configuration file and add the line LogLevel debug , then restart Apache.
 

2. How to set up Tomcat appserver for mod_cluster ?
 

Mod_cluster works with Tomcat version 6, 7 and 8, to set up the Tomcat back ends you have to deploy a few JAR files and make a change in Tomcat's server.xml configuration file.
The necessary JAR files extend Tomcat's default functionality so that it can communicate with the proxy load balancer. You can download the JAR file archive by clicking on "Java bundles" on the mod_cluster download page. It will be saved under the name mod_cluster-parent-1.2.6.Final-bin.tar.gz.

Create a new directory such as /root/java_bundles and extract the files from mod_cluster-parent-1.2.6.Final-bin.tar.gz there. Inside the directory /root/java_bundlesJBossWeb-Tomcat/lib/*.jar you will find all the necessary JAR files for Tomcat, including two Tomcat version-specific JAR files – mod_cluster-container-tomcat6-1.2.6.Final.jar for Tomcat 6 and mod_cluster-container-tomcat7-1.2.6.Final.jar for Tomcat 7. Delete the one that does not correspond to your Tomcat version.

Copy all the files from /root/java_bundlesJBossWeb-Tomcat/lib/ to your Tomcat lib directory – thus if you have installed Tomcat in

/srv/tomcat

run the command:


cp -rpf /root/java_bundles/JBossWeb-Tomcat/lib/* /srv/tomcat/lib/ .


Then edit your Tomcat's server.xml file

/srv/tomcat/conf/server.xml.


After the default listeners add the following line:


<listener classname="org.jboss.modcluster.container.catalina.standalone.ModClusterListener" proxylist="192.168.204.203:9999"> </listener>


This instructs Tomcat to send its mod_cluster-related information to IP 192.168.180.150 on TCP port 9999, which is what we set up as Apache's dedicated vhost for mod_cluster.
While that's enough for a basic mod_cluster setup, you should also configure a unique, intuitive JVM route value on each Tomcat instance so that you can easily differentiate the nodes later. To do so, edit the server.xml file and extend the Engine property to contain a jvmRoute, like this:
 

.


<engine defaulthost="localhost" jvmroute="node2" name="Catalina"></engine>


Assign a different value, such as node2, to each Tomcat instance. Then restart Tomcat so that these settings take effect.

To confirm that everything is working as expected and that the Tomcat instance connects to the load balancer, grep Tomcat's log for the string "modcluster" (case-insensitive). You should see output similar to:

Mar 29, 2016 10:05:00 AM org.jboss.modcluster.ModClusterService init
INFO: MODCLUSTER000001: Initializing mod_cluster ${project.version}
Mar 29, 2016 10:05:17 AM org.jboss.modcluster.ModClusterService connectionEstablished
INFO: MODCLUSTER000012: Catalina connector will use /192.168.180.150


This shows that mod_cluster has been successfully initialized and that it will use the connector for 192.168.204.204, the configured IP address for the main listener.
Also check Apache's error log. You should see confirmation about the properly working back-end server:

[Tue Mar 29 10:05:00 2013] [debug] proxy_util.c(2026): proxy: ajp: has acquired connection for (192.168.204.204)
[Tue Mar 29 10:05:00 2013] [debug] proxy_util.c(2082): proxy: connecting ajp://192.168.180.150:8009/ to  192.168.180.150:8009
[Tue Mar 29 10:05:00 2013] [debug] proxy_util.c(2209): proxy: connected / to  192.168.180.150:8009
[Tue Mar 29 10:05:00 2013] [debug] mod_proxy_cluster.c(1366): proxy_cluster_try_pingpong: connected to backend
[Tue Mar 29 10:05:00 2013] [debug] mod_proxy_cluster.c(1089): ajp_cping_cpong: Done
[Tue Mar 29 10:05:00 2013] [debug] proxy_util.c(2044): proxy: ajp: has released connection for (192.168.180.150)


This Apache error log shows that an AJP connection with 192.168.204.204 was successfully established and confirms the working state of the node, then shows that the load balancer closed the connection after the successful attempt.

You can start testing by opening in a browser the example servlet SessionExample, which is available in a default installation of Tomcat.
Access this servlet through a browser at the URL http://balancer_address/examples/servlets/servlet/SessionExample. In your browser you should see first a session ID that contains the name of the back-end node that is serving your request – for instance, Session ID: 5D90CB3C0AA05CB5FE13121E4B23E670.node2.

Next, through the servlet's web form, create different session attributes. If you have a properly working load balancer with sticky sessions you should always (that is, until your current browser session expires) access the same node, with the previously created session attributes still available.

To test further to confirm load balancing is in place, at the same time open the same servlet from another browser. You should be redirected to another back-end server where you can conduct a similar session test.
As you can see, mod_cluster is easy to use and configure. Give it a try to address sporadic single-back-end overloads that cause overall application slowdowns.

Increase tomcat MaxThreads values to resolve Tomcat timeout issues and sort

Friday, December 11th, 2015

Increase_Tomcat_MaxThreads_values_to_resolve_Tomcat_timeout-issues-and-sort

Thanks God, we have just completed (6 months) Migration few Tomcat and TomEE application servers for PG / PP and Scorpion instances from old environment to a new one for a customer.

Though the separate instances of the old environment are being migrated, the overall design of the Current Mode of Operations (CMO) as they use to call it in corporate World and the Future Mode of Operations (FMO) has differences.

The each of applications on old environment is configured to run in Tomcat failover cluster (2 tomcats on 2 separate machines with unique IP addresses are running) and Apache Reverse Proxy is being used with BalanceMember apache directive in order to drop requests to Tomcat cluster to Tomcat node1 and node2. On the new environment however by design the Tomcat cluster is removed and the application request has to be served by single Tomcat instance.

The migration completed fine and in the beginning in the first day (day 1) and day 2 since the environment went in Production and went through the so-called "GoLive", as called in Corporate World- which is a meathor for launching the application to be used as a production environment for customer, the customer reported TimeOut issues.

Some of the requests according to their report would took up to 4 minutes to serve, after a bit of investigation we found out, that though the environment was moved to one Tomcat the (number) amount of connections to application of end clients did not change, thus the timeouts were caused by default MaxThreads being reached and, we needed to to obviously raise that number. Here is the old Apache RP config where we had the 2 Tomcats between which the RP was load balancing:
 

BalancerMember ajp://10.10.10.5:11010 route=node1 connectiontimeout=10 ttl=60 retry=60
BalancerMember ajp://10.10.10.5:11010 route=node2 connectiontimeout=10 ttl=60 retry=60

ProxyPass / balancer://pool/ stickysession=JSESSIONID
ProxyPassReverse / balancer://pool/


As we needed a work around, we come to conclusion that we just need to increase Timeout on RP first so on Apache Reverse Proxy we placed following httpd.conf Virtualhost ProxyPass (directive) configs :


ProxyPass / ajp://10.10.10.5:11010/ keepalive=On timeout=30 connectiontimeout=30 retry=20
ProxyPassReverse / ajp://10.10.10.5:11010/

ProxyPass / ajp://10.10.10.5:11010/ keepalive=On timeout=30 connectiontimeout=30 retry=20
ProxyPassReverse / ajp://10.10.10.5:11010/


and following Apache Timeout directives options:


Timeout 300
KeepAlive On
MaxKeepAliveRequests 100
KeepAliveTimeout 15


Even though the developer tried to insist that the problem was in Reverse Proxy timeout config, they were wrong as I checked the RP logs and there was no "maximum connections reached" errors..

As you could guess what left to check was only Tomcat, after quick evaluation of server.xml, it turned out that the MaxThreads directive on old clustered Tomcats was omitted at all, meaning the default MaxThreads Tomcat value of 200 maximum connections were used, however this was not enough as the client was quering the application with about 350 connections / sec.

The solution was of course to raise the Maxthreads to 400 we were pretty lucky that we already had a good dedicated Linux machine where the application was hosted (16GB Ram, 2 CPUs x 2.67 Ghz), thus raising MaxThreads to 400 was not such a big deal.

Here is the final config we used to fix tomcat timeouts:
 

<Connector port="11010" address="10.10.10.80" protocol="AJP/1.3" redirectPort="8443" MaxThreads="400" connectionTimeout="300000" keepAliveTimeout="300000" debug="9" />


One note to make here is the debug="9" options to Connector directive was used to increase debug loglevel of Tomcat, and address="" is the local network IP on which Tomcat instance runs. As you see, we choose to use very high connectionTimeouts (because it is crucial, not to cut requests to applications due to timeouts) in case of application slowness.

We also suspected that there are some Oracle (ORA) database queries slowly served on the SQL backend, that might in future cause more app slowness, but this has to be checked seperately further in time as presently we were checking we did not have our Db person present.


Fix “FAIL – Application at context path /application-name could not be started” deployment error in Tomcat manager

Thursday, October 1st, 2015

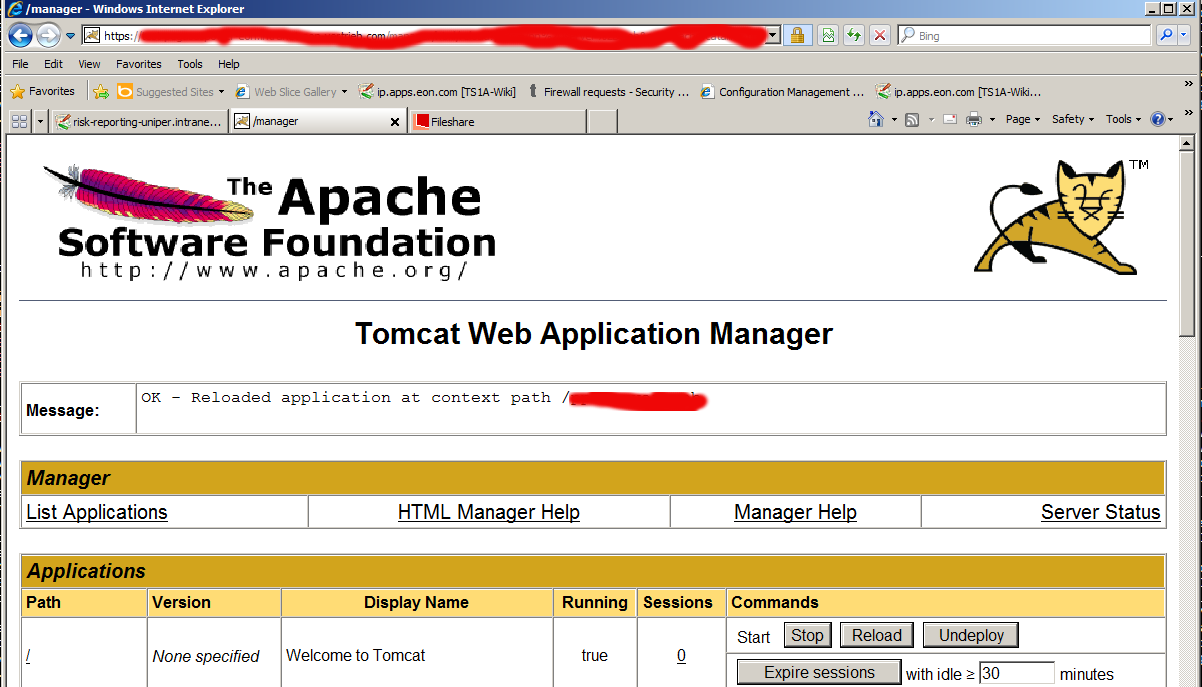
tomcat-manager-FAIL-Application-at-context-path-application-name-could-not-be-started-fix-solution-error

While deploying an environment called "Interim" which is pretty much like a testing Java application deployed from a Java EAR (Enterprise Archive) file from within a Tomcat Manager GUI web interface after stopping the application and trying to start it, the developers come across the error:


FAIL – Application at context path /application-name could not be started


The error puzzled me for a while until I checked the catalina.out I've seen a number of thrown Java Eceptions errors like:

Okt 01, 2015 10:48:46 AM org.springframework.web.context.ContextLoader initWebApplicationContext

Schwerwiegend: Context initialization failed

org.springframework.beans.factory.BeanCreationException: Error creating bean with name 'com.sun.xml.ws.transport.http.servlet.SpringBinding#2' defined in ServletContex

t resource [/WEB-INF/pp-server-beans.xml]: Cannot create inner bean ‘(inner bean)’ of type [org.jvnet.jax_ws_commons.spring.SpringService] while setting bean property

'service'; nested exception is org.springframework.beans.factory.BeanCreationException: Error creating bean with name '(inner bean)#33': FactoryBean threw exception on

 object creation; nested exception is java.lang.OutOfMemoryError: PermGen space

I've googled a bit about the error:

"FAIL – Application at context path /application-name could not be started"

and come across this Stackoverflow thread and followed suggested solution to fix web.xml tag closing error but it seems there was no such error in my case, I then also tried solution suggested by this thread (e.g. adding in logging.properties) file:
 

org.apache.catalina.core.ContainerBase.[Catalina].level = INFO
org.apache.catalina.core.ContainerBase.[Catalina].handlers = java.util.logging.ConsoleHandler

unfortunately this helped neither to solve the error when it is tried to be started from tomcat manager.

After asking for help a colleague Kostadin, he pointed me to take a closer look in the error (which is a clear indication) that the reserved space is not enough (see below err):
 

java.lang.OutOfMemoryError: PermGen space

And he pointed me then to Solution (which is to modify the present tomcat setenv.sh) settings which looked like this:

# Heap size settings

export JAVA_OPTS="-Xms2048M -Xmx2048M"


# SSCO test page parameter

export JAVA_OPTS="$JAVA_OPTS -DTS1A_TESTSEITE_CONFIG_PATH=test-myapplication.com"

# Default garbage collector settings

export JAVA_OPTS="$JAVA_OPTS -XX:MaxPermSize=128M"


# Aggressive garbage collector settings.

# Do not use! For testing purposes only!

#export JAVA_OPTS="$JAVA_OPTS -Xss128k -XX:ParallelGCThreads=20 -XX:+UseConcMarkSweepGC -XX:+UseParNewGC -XX:SurvivorRatio=8 -XX:TargetSurvivorRatio=90 -XX:MaxTenuringThreshold=31 -XX:+AggressiveOpts -XX:MaxPermSize=128M"


####### DO NOT CHANGE BELOW HERE #######

# Disable X11 usage

unset DISPLAY

export JAVA_OPTS="$JAVA_OPTS -Djava.awt.headless=true"


# Garbage collection log settings

export JAVA_OPTS="$JAVA_OPTS -verbose:gc -XX:+PrintGCTimeStamps -XX:+PrintGCDetails -Xloggc:/web/tomcat/current/logs/gc.log -XX:-TraceClassUnloading"


# Enable JMX console

export JAVA_OPTS="$JAVA_OPTS -Dcom.sun.management.jmxremote"


The solution is to to add following two options to export JAVA_OPTS (above options):

-XX:PermSize=512m -XX:MaxPermSize=512m


After modifications, my new line within setenv.sh looked like so:


JAVA_OPTS="-Xms2048M -Xmx2048M -XX:PermSize=512m -XX:MaxPermSize=512m"


Finally to make new JAVA_OPTS settings, I've restarted Tomcat with:


cd /web/tomcat/bin/
./shutdown.sh
sleep 5; ./startup.sh


And hooray it works fine thanks God! 🙂