Archive for the ‘Linux Audio & Video’ Category

How to Optimize Debian Linux on old Computers to Get improved overall Speed, Performance and Stability

Tuesday, December 30th, 2025

tuning-debian-linux-to-work-quickly-and-smooth-on-old-pc-laptop-hardware


How to optimize Debian version 12.12 Linux OS to work responsive on Old ThinkPad laptops like from year 2008 Thinkpad R61 with Window Maker, zram, SSD etc.

Old computers aren’t obsolete but most worthy if you dont want to spend on extra hardware.

With the right setup, Debian Linux can run smoothly on hardware that’s more than a decade old. This article walks through a real-world, proven configuration using a classic ThinkPad R61 (Core 2 Duo, 4 GB RAM, SSD), but the principles apply to many older PCs as well.

Why use Debian Linux on old hardware?

Debian Stable is ideal for old hardware because it offers:

  • Low baseline resource usage
  • Long-term stability
  • Minimal background activity
  • Excellent support for lightweight desktops
  • Flexible and well organized and relatively easy to tune

Paired with a minimal window manager, Debian easily outperforms many “lightweight” distros that still ship heavy defaults.

Hardware Baseline PC setup

Test system:

  • Laptop: ThinkPad R61
  • CPU: Intel Core 2 Duo
  • RAM: 4 GB
  • Storage: SATA SSD
  • Graphics: Intel X3100 / NVIDIA NVS 140M
  • Desktop: Window Maker

This is a common configuration for late-2000s business laptops.

1. Desktop Environment: Keep It Simple

Heavy desktop environments is the main factor to slow down an old PC.
Where possible dont use the Desktop environment at all and stick to console.

Recommended:

  • Window Maker (used by myself)
  • Openbox
  • Fluxbox
  • IceWM

Avoid:

  • GNOME
  • KDE Plasma
  • Cinnamon

Window Maker is especially effective: no compositing, no animations, minimal memory usage.

2. Terminal Choice Matters

For console-based applications (games, tools, system utilities), use a terminal that correctly reports its size. Lets say you use xterm:

$ xterm

You can force a usable terminal size like this:

$ xterm -geometry 80×32 &

This avoids common issues with console applications failing due to incorrect terminal dimensions.

Install urxvt (best choice for terminal productivity)

Open a terminal and run:

apt update
# apt install rxvt-unicode

Optional (if you want tabbed terminal use suckless):

# sudo apt install suckless-tools

  • rxvt-unicode-256color → main terminal (n/a in debian) have to install third party  
  • rxvt-unicode-256color-perl → Perl extensions (tabs, URL click, etc.) (n/a in debian, installable via third party)
  • suckless-tools → includes tabbed, can be used as an alternative for tabs

a. Configure .Xresources

Create or edit ~/.Xresources:

$ vim~/.Xresources

Example for beautiful setup with tabs, transparency, and fonts:

! Basic appearance
! URxvt.font: xft:FiraCode Nerd Font Mono:size=12
 URxvt.background: [90]#1c1c1c
 URxvt.foreground: #c0c0c0
! URxvt.cursorColor: #ff5555
! URxvt.saveLines: 10000
! URxvt.scrollBar: false
! URxvt.borderLess: true

! Enable tabs using built-in tabbed extension
URxvt.perl-ext-common: default,tabbed

! Tab colors
URxvt.tabbed.tabbar-fg: 15
URxvt.tabbed.tabbar-bg: 0
URxvt.tabbed.tab-fg: 2
URxvt.tabbed.tab-bg: 8

! Keybindings for tabs
! Ctrl+Shift+N → new tab
URxvt.keysym.Control-Shift-N: perl:tabbed:new_tab
! Ctrl+Shift+W → close tab
URxvt.keysym.Control-Shift-W: perl:tabbed:close_tab
! Ctrl+Tab → next tab
URxvt.keysym.Control-Tab: perl:tabbed:next_tab
! Ctrl+Shift+Tab → previous tab
URxvt.keysym.Control-Shift-Tab: perl:tabbed:prev_tab
! Tabs keybindings
URxvt.keysym.Control-N: perl:tabbed:new_tab
URxvt.keysym.Control-W: perl:tabbed:close_tab


b. Apply .Xresources changes

Run:

$ xrdb ~/.Xresources

Then launch urxvt:

$ rxvt

  • Ctrl+Shift+T → new tab
  • Ctrl+Shift+W → close tab

c. Optional: Make it even cooler

  1. Install powerline fonts or Nerd Fonts (for fancy prompt icons):

# apt install fonts-firacode

  1. Enable URL clicking and clipboard (already enabled above)

  2. Combine with tmux for extra tabs/panes, session management, and more shortcuts.

3. Retain only last 500MB from journald

Retain only the past 500 MB:

# journalctl –vacuum-size=500M

This is exteremely useful as sometimes failing services might generate ton of unnecessery logs and might flood up the old machine hard disk.

4. Reduce journal memory footprint

# vim /etc/systemd/journald.conf

Set Storage=volatile
Set RuntimeMaxUse=50M

# systemctl restart systemd-journald

5. Trim services boot times

# systemd-analyze blame
# systemd-analyze critical-chain

This tells you which services slow down your boot the most.

6. Disable Unnecessary Services

Old systems benefit massively from disabling unused background services.

Check what’s enabled:

# systemctl list-unit-files –state=enabled

Common candidates to disable (if not needed):

# systemctl disable bluetooth
# systemctl disable cups
#systemctl disable avahi-daemon

#systemctl disable ModemManager

Each disabled service saves RAM and CPU cycles.

7. Dirty Page Tuning (Reduces Freezes)

Defaults favor servers, not laptops.

Edit:

vim /etc/sysctl.conf

Add:

vm.dirty_background_ratio=5
vm.dirty_ratio=10

This forces writeback earlier, preventing sudden stalls.

8. Memory Tuning: zram Done Right

Does zram make sense with 4 GB RAM and an SSD?

Yes it could, but only in moderation.

zram compresses memory in RAM and acts as fast swap. On a Core 2 Duo, compression overhead is small and the benefit is smoother multitasking.

Recommended zram configuration

Install zram-tools deb package:

# apt install zram-tools

Edit:

# vim /etc/default/zramswap

Set:

PERCENT=15

This creates ~600 MB of compressed swap — enough to absorb memory spikes without wasting RAM.

9. Keep Disk Swap (But Small)

Even with zram, disk swap is useful as a fallback.

Recommended:

  • 1–2 GB swap on SSD
  • zram should have higher priority than disk swap

Check:

# swapon –show

10. Swappiness and Cache Pressure

Tune the kernel to prefer RAM and zram first:

# vim /etc/sysctl.conf

Add:

vm.swappiness=10
vm.vfs_cache_pressure=50

Apply:

# sysctl -p

This prevents early swapping and keeps the system responsive.

11. CPU Governor: A Hidden Performance Win

Older ThinkPads often run conservative CPU governors.

Install tools:

# apt install cpufrequtils

Set a balanced governor:

# echo 'GOVERNOR="ondemand"' | sudo tee /etc/default/cpufrequtils

# systemctl restart cpufrequtils

This allows the CPU to ramp up quickly when needed.

12. Power and Thermal Management (ThinkPad-Specific)

Install TLP:

# apt install tlp
# systemctl enable tlp
# systemctl start tlp

TLP improves:

  • Battery life
  • Thermal behavior
  • SSD longevity

Defaults are usually perfect – no heavy tuning required.

13. Disable Watchdogs (If You Don’t Debug Kernels)

Watchdogs waste cycles on old CPUs.

Check:

# lsmod | grep watchdog

Disable:

# vim /etc/modprobe.d/blacklist.conf

Add:

blacklist iTCO_wdt
blacklist iTCO_vendor_support

Reboot.

14. Reduce systemd Noise

systemd logs aggressively by default.

Edit:

#vim/etc/systemd/journald.conf

Set:

Storage=volatile
RuntimeMaxUse=50M

Then:

#systemctl restart systemd-journald

Less disk I/O, faster boots.

15. Use tmpfs for caching and Volatile Junk

Put garbage in RAM, not SSD.

Edit:

# vim /etc/fstab

Add:

tmpfs /tmp tmpfs noatime,nosuid,nodev,mode=1777,size=256M 0 0

Optional:

tmpfs /var/tmp tmpfs noatime,nosuid,nodev,size=128M 0 0
# mount -a

16. IRQ Balance: Disable It (might slow down machine)

On single-socket old laptops, irqbalance can hurt.

Disable:

# systemctl disable irqbalance

Test performance; re-enable if needed.

17. Reduce systemd Timeout Delays

Old laptops often wait forever on dead hardware.

Edit:

# vim /etc/systemd/system.conf

Set:

DefaultTimeoutStartSec=10s
DefaultTimeoutStopSec=10s

18. Strip Kernel Modules You Don’t Use

If you don’t use:

  • FireWire
  • Bluetooth
  • Webcam

Blacklist them:

# vim /etc/modprobe.d/blacklist-extra.conf

Example:

blacklist firewire_ohci
blacklist firewire_core
blacklist uvcvideo
blacklist bluetooth


Faster boot, fewer interrupts.

19. X11 Performance Tweaks (Intel Graphics)

Create:

# vim/etc/X11/xorg.conf.d/20-intel.conf

Add:

Section "Device"
Identifier "Intel Graphics"
Driver "intel"
Option "TearFree" "false"
Option "AccelMethod" "sna"
EndSection

20. Disable IPv6 (if not used)

Saves a little RAM and startup time.

Edit:

# vim/etc/sysctl.conf

Add:

net.ipv6.conf.all.disable_ipv6=1
net.ipv6.conf.default.disable_ipv6=1

21.Lower Kernel Log Level verbosity

Stop kernel spam.

# dmesg -n 3

Make permanent:

# vim/etc/sysctl.conf

Add:

kernel.printk=3 4 1 3

22.Scheduler Latency (Advanced)

For desktop interactivity:

# vim/etc/sysctl.conf

Add:

kernel.sched_autogroup_enabled=1

Helps UI responsiveness under load.

23.Kill Browser Bloat (Biggest Win)

For Firefox ESR:

  • Disable telemetry
  • Enable tab unloading

browser.sessionstore.interval = 300000

No kernel tweak beats this.


a. Enable tab unloading (automatic tab discard)

  1. Open Firefox ESR
    Type

  2. about:config

  3. in the address bar.
  4. Accept the warning: “This might void your warranty.”

  5. Search for the following preference:

browser.tabs.unloadOnLowMemory

  • Default: false
  • Set to: true
     

This enables Firefox to unload inactive tabs automatically when memory is low.

b. Optional tuning

Some other preferences you can tweak:

Preference

Description

Suggested value


browser.tabs.maxSuspendedTabs


Maximum number of tabs that can be suspended

10–20


browser.tabs.autoHide


Auto-hide tabs while suspended (older ESR versions)

true


browser.tabs.loadInBackground


Background tabs load in suspended state

true


browser.sessionstore.interval


How often session is saved (ms)

15000

These may vary slightly depending on ESR version.

24. Graphics Considerations

ThinkPad R61 models typically have:

  • Intel X3100 → works well out of the box
  • NVIDIA NVS 140M → use nouveau driver

Recommendations:

  • Avoid proprietary legacy NVIDIA drivers
  • No compositing
  • Simple themes only

25. Extremely for Geeks, Build a Custom Kernel (Optional)

Only if you have plenty of time and you have a developers background and maniacal tendencies 🙂

Benefits:

  • Smaller kernel
  • Faster boot
  • Fewer interrupts

Cost:

  • Maintenance burden

26. Application Choices Matter More Than Tweaks

Keep in mind the application choices matter more than tweeks.
Even the best-tuned system can be ruined by heavy applications.

Recommended software:

  • Browser: Firefox ESR
  • File manager: PCManFM
  • Terminal: xterm, rxvt
  • Editor: nano, geany

Limit browser tabs and disable unnecessary extensions.

27. Things Not to Do

Avoid:

  • Huge zram sizes (50%+)
  • Do not Disable swap entirely
  • Beware of Aggressive kernel “performance hacks”
  • Disable any Heavy desktop effects if choosing to run MATE or alike GUI environment

Stability beats micro-optimizations.

Final Recommended Configuration

For a ThinkPad R61 with 4 GB RAM and SSD perhaps the best Linux configuration would be:

  • Debian Stable
  • Window Maker
  • zram: 15%
  • SSD swap: 1–2 GB
  • swappiness: 10
  • TLP enabled
  • No compositor
     

This setup would deliver:

  • Smooth multitasking
  • No UI lag
  • Minimal CPU overhead
  • Long-term stability

Conclusion

Old PCs don’t need to be fast necessery, but can be made work slightly faster, though the limits if used in a proper way with the right software and without out the eye candy nonse of today, they be still fully functionally used.

With Debian, a lightweight window manager, and sensible memory tuning, even 15-year-old + old hardware remains useful today for common daily tasks, and makes it not only useful but fun and different especially if you are a sysadmin or a developer who needs mostly console and a browser.

It gives you another perspective on how to do your computing in a simplier and more minimalistic way.

Of course do not expect the Old Hardware PC to be the perfect station for youtube maniacs, heavy gamers or complete newbies, who dont honor the old PC limited resources and don't want to have a bit of experimental approach to the PC.

Anyways by implementing before mentioned tweaks, they will reward you with reliability and simplicity  – something modern over complicated OS and Apps often lack.

Enjoy and Happy Christmas 2025 and Happy New Year 2026 soon ! 🙂

Debugging Jitsi Meet Server Problems: A Practical Guide

Saturday, April 26th, 2025

Jitsi Meet is a powerful open-source video conferencing platform. But like any real-time communication system, it can run into issues—from video/audio glitches to full-blown connection failures. Debugging Jitsi Meet can be tricky due to its multi-component architecture. This guide walks you through a systematic approach to identify and resolve common server-side issues.

1. Understand the Architecture

Before diving into logs, it's important to understand Jitsi Meet's core components:
 

  • Jitsi Meet (Web UI) – The front-end interface.
  • Jicofo (Focus component) – Manages conference sessions.
  • Prosody (XMPP Server) – Handles user authentication and signaling.
  • JVB (Jitsi Videobridge) – Routes video/audio streams.
  • Nginx or Apache – Web server proxy (often with HTTPS and WebSocket forwarding).


Knowing how these interact helps pinpoint the failing layer.

2. Check Logs in the Right Places

Each component has its own logs. Check them in the following order:

Prosody Logs

Location: /var/log/prosody/prosody.log and prosody.err
​Look for: Authentication issues, connection denials, or component registration problems.
 

Jicofo Logs

Location: /var/log/jitsi/jicofo.log
Look for: Room creation errors, XMPP connection failures, conference creation attempts.
 

JVB Logs

Location: /var/log/jitsi/jvb.log
​Look for: ICE failures, STUN/TURN issues, packet loss, and bridge reachability.
 

Web Server Logs (Nginx/Apache)

Location (Nginx): /var/log/nginx/error.log and access.log
Look for: HTTP errors (404, 502), WebSocket connection problems.
 

Browser Console Logs
 

Tools: Press F12 in browser → Console/Network tabs.
Look for: WebSocket failures, CORS issues, or media permission problems.
 

3. Common Problems & Fixes

"Failed to join conference"

  • Cause: Prosody may not be running or not configured correctly.​

Fix: Restart Prosody and check domain configuration in /etc/prosody/conf.avail/


No Audio or Video
 

Usual Cause: Media not reaching the bridge or blocked by firewall

Fix:

  • Verify JVB is listening on correct ports (UDP 10000).
  • ​Check firewall/NAT settings (especially on cloud VMs).
  • Use tcpdump or ss to check traffic flow.
     

WebSocket Connection Fails


Usual Cause: Web server (Proxy) misconfiguration.

Fix:

Ensure Nginx is forwarding WebSocket requests to /xmpp-websocket/.
Add proper proxy settings in nginx.conf
 

Authentication Not Working


Cause: Misconfigured JWT or internal authentication.

Fix:

  • Check Prosody's config for authentication method.
  • If using JWT, verify token structure and shared secret.
     

4. Use Debugging Tools

  • Jitsi Meet in debug mode:


​Add #config.debug=true to your meeting URL.
 

  • ICE Debugging:


    Check about:webrtc (Firefox) or WebRTC Internals (Chrome).
    Look at ICE candidate gathering and connectivity checks.
    Test TURN/STUN:

    • Use tools like trickle-ice to validate your server's ICE configuration.

5. Networking and Firewall Checks

Make sure these ports are open:
 

  • TCP 443 – HTTPS
  • UDP 10000 – Media (JVB)
  • TCP 4443 – (Optional, fallback media)
  • TCP 5222 – XMPP (if not using BOSH/WebSocket)
     

# ss -tuln ufw status


6. Component Health Checks

Do 
# systemctl status for each main jitsi component services:

# systemctl status prosody
# systemctl status jicofo
# systemctl status jitsi-videobridge2

Check uptime, errors, or failure restarts.

7. Enable More Verbose Logs

Increase logging levels for deeper debugging:
 

  • Prosody: Edit /etc/prosody/prosody.cfg.lua → set log = { ... debug = "*" }.
  • Jicofo/JVB: Edit /etc/jitsi/jicofo/logging.properties and /etc/jitsi/videobridge/logging.properties
    → change log level to FINE or ALL.


8. Update & Restart Services

Sometimes updates or configs don’t apply until services are restarted:
 

# apt update && apt upgrade systemctl restart prosody jicofo jitsi-videobridge2 nginx


Final Closure Thoughts

Debugging Jitsi Meet requires a structured approach, start from the user-facing symptoms, trace through each service, and verify network and authentication configurations.
Debug the status of prosody, jicofo and jitsi-videobridge2, check the firewall openings are okay to the jitsi server
With some log analysis and a bit of patience, experimentation and the help of forums or Artificial Intelligence tool like ChatGPT, the Jitsi server errors will get solved.

How to Install Jitsi Meet on Debian Linux to have your own free software video conferencing secure server

Thursday, April 24th, 2025


jitsi-meet-create-new-room-for-video-meetings-linux


Jitsi Meet is a free, open-source video conferencing platform that allows you to host secure and scalable video calls both using a Mobile Phone / Tablet / PC or any other electronic device for which jitsi client has available port. Jitsi meet is the best free alternative one can get to Rakuten Viber / Facebook (Meta) / Zoom / Apples' Facetime etc.
What makes Jitsi really worthy is it can make your Video streaming communication give you flexibility to keep your communication a little bit private and harder to be captured than if you use the general Video streaming platforms. 
Jitsi is also a very simple to use and can be used either with a Desktop Client on Windows / Linux and Mac OS or Smart Phone running Android (Samsung / Huawei etc.) or iOS (iPhones) you can configure to use the Jitsi server or directly via a SSL encryption secured web URL address. The only thing i really don't like about Jitsi is it uses Java and its way of work is cryptic just like it is pretty hard to debug or understand exactly how the software works, as when errors came the usual crazzy Java exceptions are filling the jitsi logs.

In below short guide, I'll try provides a simple step-by-step instructions for installing Jitsi Meet on a Debian-based systems, hoping that anyone can benefit from Jitsi by building his own server.


jitsi-meet-conference-free-open-source-video-streaming-viber-and-facebook-alternative


What you should have before you start buillding your new Jitsi meet server

Before you begin, ensure that your system meets the following requirements:

  • A fresh installation of Debian 10 (Buster) or newer.

  • A non-root user with sudo privileges.

  • A fully updated system.

  • A domain name pointing to your server's IP address.

  • OpenJDK 11 installed.​

To get a better understanding on how Jitsi meet works it is worthy to take a quick look on Jitsi Architectural diagram:

Jitsi-meet-video-conferencing-software-linux-windows-mac-Architectural-diagram
 

1. Update Your System

Start by updating your system's package list and upgrading existing packages:​

# apt update sudo apt upgrade -y

2. Install Required Dependencies

Install the necessary packages for adding repositories and managing keys:​

# apt install apt-transport-https curl gnupg2 -y

3 Add Jitsi Repository

Add the Jitsi repository key to your system:

# curl https://download.jitsi.org/jitsi-key.gpg.key | sudo gpg --dearmor -o /usr/share/keyrings/jitsi-keyring.gpg

Then, add the Jitsi repository:​

# echo "deb [signed-by=/usr/share/keyrings/jitsi-keyring.gpg] https://download.jitsi.org stable/" | sudo tee /etc/apt/sources.list.d/jitsi-stable.list > /dev/null

Update your package list to include the Jitsi repository into apt database:​

 # apt update

4. Install Jitsi Meet

Install the Jitsi Meet package:​  

# apt install jitsi-meet -y

During installation, you'll be prompted to:​

  • Enter the hostname: Provide your domain name (e.g., meet.example.com).

  • Choose SSL certificate: Select "Generate a new self-signed certificate" or "Obtain a Let's Encrypt certificate" if you have a valid domain.​JitsiScaleway

If you opt for Let's Encrypt, ensure that ports 80 and 443 are open on your firewall.​

5. Configure Firewall openings

If you have already a configured firewall to filter out traffic, open the necessary ports to allow traffic to your Jitsi Meet server from your router or entry firewall device as well as on the Linux itself: ​

Allow access to SSH server

# ufw allow 22/tcp


Allow access to HTTP unecrypted to Jitsi meet server

# ufw allow 80/tcp
# ufw allow 443/tcp


Allow access necessery for proper operation of Jitsi VideoBridge (port range 10000 to 20000)
 

# ufw allow 10000:20000/udp
# ufw enable


Verify the firewall status is Okay​ 

# ufw status

6. Access Jitsi Meet in a browser

Open a web browser and navigate to your server's domain or IP address:​

https://meet.your-custom-domain-or-IP.com

Hopefully all is okay and You should see the Jitsi Meet interface, where you can start or join a meeting.​

7. Secure Conference Creation (Optional extra)

By default, anyone can create a conference. To restrict this:​

  1. Install and configure Prosody for authentication.
    For those who don't know Prosody is a modern XMPP communication server

  2. Set up secure domains and configure authentication settings.​

For detailed instructions, refer to the Jitsi DevOps Guide. ​
 

Conclusion

Now You should have successfully installed Jitsi Meet on your Debian server.
Installing to Ubuntu and Redhat OSes such as Fedora or Redhat based distros should be not much difrerent from on this guide, except you have to use
the correct RPM repositories.

Now you can further now host secure video conferences using your own infrastructure and have an increased privacy and perhaps be more calm that the CIA or Mussat, MI6 / FSB might be not spying your Video conference talks (except if they don't already do it on an OS level which most likely the case but this doesn't matter. :).

For advanced configurations and features, consult the Jitsi Handbook and the Jitsi DevOps Guide.​Jitsi

That's all folks Enjoy !

Play Audio Music CDs in Linux console / terminal in the 21 Century mission hard but possible

Tuesday, July 30th, 2024


Compact discs (CD's)
ain't dead yet but there easy straigh use on free operating systems Linux / FreeBSD / OpenBSD is starting to deteriorate. That is quite normal I guess, as CDs are no longer officially produced or sold for few years in America and there is no Audio CD bookstores, neither in europe and perhaps there are just few in europe, perhaps CD are used somewhere in Africa and Asia, but most modern world has officially buried them.

However as I love old stuff and I had the opportunity, I bought an old Audio CD (fake copy one 🙂 of Judas Priest Screaming for Vengence and the famous Jimi Hendrix  (Best Complilation) Experience an improvised shelf-book store selling books by a half deaf aging guy who sells books for years in Dobrich in the center.
And to remember the young years of Rock Roll wanted to play it on my very old but still kicking Lenovo Thinkpad R61 notebook (that is now 16 years old but thanksfully it still works and kicks ass with a Debian GNU / Linux 10 Buster.)

The task is very easy and as I have a Window Maker (Wmaker) on it in order to save myself an extra loading of this a kind of "archaic machine" and tried to play my CDs with everything at hand thus I tried first to play the CD in console with the good old but gold cdplay with which I have played a dozens of Audio CDs back in the days … 

# cdplay

just to find out the CD got red and started to roll but I get no sound via the Sound Card 🙁

Next thing, i assumed was the problem might be the pulseaudio process blocking the sound card to be used, preventing cdplay to be able to properly channel the sound to the sound card, that used to be quite of classical problem, if you remember, thus I tried to run the cdplay via the aoss (Wrapper script to facilitate use of alsa oss compatibility library.)

Before using oss of course i've loaded the snd-pcm-oss kernel module, to make the sound blaster be able to use the old obsolete Open Sound System.

# modprobe snd-pcm-oss

# aoss cdplay

Though that aoss trick worked for some programs that used old Open Sound System scheme to output sound, it doesn't unfortunately, at that case.
 

Strange enough my sound card is properly identified by the Debian Linux and I can play MP3 songs, as well browse videos in youtube and other Internet resources in Firefox and even the pulseaudio process that is running in the background is spitting sounds out of the Notebook Speakers.

The laptop doesn't seem to have any sound driver or Sound Card issues, as I can normally play my old .XM and .MOD  sound extension files with the good old mikmod


# mikmod

as well as I can even normally play MIDI audio files by using the timidity tool as well as with playmidi

# timidity HitTheLights.mid

# playmidi HitTheLights.mid


Just to proove the MIDIs can be played normally via the Sound Blaster (for a more on the topic check my previous article talking in depth about Linux and MIDI – Play Midis on Linux / Make Linux MIDI Ready for the Future – Enable embedded MIDI music to play in a Browser, Play MIDIs with VLC and howto enjoy Midis in Text Console.

Next logically to make sure, something is not wrong with audio drivers, I tried to play some music normally with, the standard console players I have played with for years on Linux mpg123 / mpg321 for reference check my Listening music in text mode in Linux console but this was no luck again …

I tried even to install the opencubicplayer ( Linux port) music player and tried to open the CD, but even though the CD can be heard to be rolling in the CD drive no sound was outputed out of the laptop speakers.


open-cubic-player-screenshot-on-linux

Thus to resolve tried everything at power starting from increasing any missing volumes via the aumix command, as often in the past I remember the problem in such situations is the sound volume is decreased to zero percentage or completely muted.

# aumix


aumix-with-linux-htop-screenshot-animated-gif

as well as with 

# alsamixer


Alsamixer-control-sound-volume-linux-screenshot

Nevertheless, every possible volume up volume was raised and everything looked cool as I could play normally music on machine or in a browser, the AUDIO CD Music refused to play out of the Speakers.
 

Playing the Audio CD via success with mplayer

The work around to make it play was up to a one liner with mplayer

# mplayer -cdrom-device /dev/cdrom cdda://

To easify the play of CDs I've created for my self a tiny one liner script to run it.


#!/bin/bash
mplayer -cdrom-device /dev/cdrom cdda://

I've called the script playcd.sh, made it executable and placed it under /usr/local/bin

# vim /usr/local/bin/playcd.sh
#!/bin/bash
mplayer -cdrom-device /dev/cdrom cdda://


# chmod +x /usr/local/bin/playcd.sh


Playing Audio CDs with VLC (VideoLAN Media Player)

I've vlc client installed on my Linux box, if you don't have it, do:

# apt install –yes vlc

Then roll on the CD with vlc with passing it the location to the CD, usually one of the down two pointers should work:

# vlc vcd:///dev/sr0

# vlc vcd:///dev/cdrom

If you want to loop the Tracks to play forever

# vlc –loop vcd:///dev/cdrom

By the way vlc can do much more than you think as you can even play youtube with it, for example you can try it with the Axel Folly classics Mod file, by running it like this.

# vlc https://www.youtube.com/watch?v=SlyK_elUmIw


Cheers and Enjoy CD audio on Linux  ! 🙂

How to RIP audio CD and convert to MP3 format on Linux

Thursday, April 11th, 2024

I've been given a very tedious task to Copy music from Audio CD Drive to MP3 / MP4 file format and then copy the content to external Flash drive.
Doing so is pretty trivial, you just need to have a CD / DVD rom on your computer something that becomes rare nowadays and then you need to have installed a bunch of software, if you don't already have it as i've pointed in my previous article Howto craete Music Audio CD from MP3 files, create playable WAV format audio CD Albums from MP3s.

Creating a Audio CD from an MP3 collection is exactly the opposite to what is aim't now (to copy the content of a CD to a computer and prepare it for A Car MP3 player).

1. RIPing audio CDs to WAV and Conver to MP3 from terminal
 

On Linux there is  many ways to do it and many tools that can do it for your both graphical and command line.
But as I prefer command line to do stuff, in this article I'll mention the quickest and most elementary one which is done in 2 steps.

1. Use a tool to dump the CD Audio music to Tracks in WAV format
2. Convert the WAV to MP3 format

We'll need cdparanoia tool installed as well as ffmpeg.

If you don't have them installed do:

# apt-get install –yes cdparanoia dvd+rw-tools cdw cdrdao audiotools cdlabelgen dvd+rw-tools wodim ffmpeg lame normalize-audio libavcodec58

Next create the directory where you want to dump the .wav files.

# mkdir /home/hipo/audiorip/cd1
# cd /home/hipo/audiorip/cd1

Next assumng the Audio CD is plugged in the CD reader, dump its full content into track*.WAV files with cmd:

# paranoia -B

This will produce you the dumped songs into .wav files.

hipo@noah:~/audiorip/cd1$ ls -al *.wav
-rw-r–r– 1 root root  10278284 мар 25 22:49 track01.cdda.wav
-rw-r–r– 1 root root  21666668 мар 25 22:50 track02.cdda.wav
-rw-r–r– 1 root root  88334108 мар 25 22:53 track03.cdda.wav
-rw-r–r– 1 root root  53453948 мар 25 22:55 track04.cdda.wav
-rw-r–r– 1 root root 100846748 мар 25 22:58 track05.cdda.wav
-rw-r–r– 1 root root  41058908 мар 25 22:59 track06.cdda.wav
-rw-r–r– 1 root root 105952940 мар 25 23:02 track07.cdda.wav
-rw-r–r– 1 root root  50074124 мар 25 23:03 track08.cdda.wav
-rw-r–r– 1 root root  92555948 мар 25 23:06 track09.cdda.wav
-rw-r–r– 1 root root  61939964 мар 25 23:07 track10.cdda.wav
-rw-r–r– 1 root root   8521340 мар 25 23:07 track11.cdda.wav

Then you can use a simple for loop with ffmpeg command to conver the .wav files to .mp3s.

hipo@noah:~/audiorip/cd1$  for i in $( ls -1 *); do ffmpeg -i $i $i.wav.mp3; done
 

ffmpeg version 1.2.12 Copyright (c) 2000-2015 the FFmpeg developers
  built on Feb 12 2015 18:03:16 with gcc 4.7 (Debian 4.7.2-5)
  configuration: –prefix=/usr –extra-cflags='-g -O2 -fstack-protector –param=ssp-buffer-size=4 -Wformat -Werror=format-security ' –extra-ldflags='-Wl,-z,relro' –cc='ccache cc' –enable-shared –enable-libmp3lame –enable-gpl –enable-nonfree –enable-libvorbis –enable-pthreads –enable-libfaac –enable-libxvid –enable-postproc –enable-x11grab –enable-libgsm –enable-libtheora –enable-libopencore-amrnb –enable-libopencore-amrwb –enable-libx264 –enable-libspeex –enable-nonfree –disable-stripping –enable-libvpx –enable-libschroedinger –disable-encoder=libschroedinger –enable-version3 –enable-libopenjpeg –enable-librtmp –enable-avfilter –enable-libfreetype –enable-libvo-aacenc –disable-decoder=amrnb –enable-libvo-amrwbenc –enable-libaacplus –libdir=/usr/lib/x86_64-linux-gnu –disable-vda –enable-libbluray –enable-libcdio –enable-gnutls –enable-frei0r –enable-openssl –enable-libass –enable-libopus –enable-fontconfig –enable-libpulse –disable-mips32r2 –disable-mipsdspr1 –dis  libavutil      52. 18.100 / 52. 18.100
  libavcodec     54. 92.100 / 54. 92.100
  libavformat    54. 63.104 / 54. 63.104
  libavdevice    54.  3.103 / 54.  3.103
  libavfilter     3. 42.103 /  3. 42.103
  libswscale      2.  2.100 /  2.  2.100
  libswresample   0. 17.102 /  0. 17.102
  libpostproc    52.  2.100 / 52.  2.100
[wav @ 0x66c900] max_analyze_duration 5000000 reached at 5015510 microseconds
Guessed Channel Layout for  Input Stream #0.0 : stereo
Input #0, wav, from 'track01.cdda.wav':
  Duration: 00:00:23.19, bitrate: 1411 kb/s
    Stream #0:0: Audio: pcm_s16le ([1][0][0][0] / 0x0001), 44100 Hz, stereo, s16, 1411 kb/s
Output #0, mp3, to 'track01.cdda.wav.wav.mp3':
  Metadata:
    TSSE            : Lavf54.63.104
    Stream #0:0: Audio: mp3, 44100 Hz, stereo, s16p
Stream mapping:
  Stream #0:0 -> #0:0 (pcm_s16le -> libmp3lame)
Press [q] to stop, [?] for help
size=     363kB time=00:00:23.19 bitrate= 128.2kbits/s    
video:0kB audio:363kB subtitle:0 global headers:0kB muxing overhead 0.058402%
ffmpeg version 1.2.12 Copyright (c) 2000-2015 the FFmpeg developers
  built on Feb 12 2015 18:03:16 with gcc 4.7 (Debian 4.7.2-5)
  configuration: –prefix=/usr –extra-cflags='-g -O2 -fstack-protector –param=ssp-buffer-size=4 -Wformat -Werror=format-security ' –extra-ldflags='-Wl,-z,relro' –cc='ccache cc' –enable-shared –enable-libmp3lame –enable-gpl –enable-nonfree –enable-libvorbis –enable-pthreads –enable-libfaac –enable-libxvid –enable-postproc –enable-x11grab –enable-libgsm –enable-libtheora –enable-libopencore-amrnb –enable-libopencore-amrwb –enable-libx264 –enable-libspeex –enable-nonfree –disable-stripping –enable-libvpx –enable-libschroedinger –disable-encoder=libschroedinger –enable-version3 –enable-libopenjpeg –enable-librtmp –enable-avfilter –enable-libfreetype –enable-libvo-aacenc –disable-decoder=amrnb –enable-libvo-amrwbenc –enable-libaacplus –libdir=/usr/lib/x86_64-linux-gnu –disable-vda –enable-libbluray –enable-libcdio –enable-gnutls –enable-frei0r –enable-openssl –enable-libass –enable-libopus –enable-fontconfig –enable-libpulse –disable-mips32r2 –disable-mipsdspr1 –dis  libavutil      52. 18.100 / 52. 18.100
  libavcodec     54. 92.100 / 54. 92.100
  libavformat    54. 63.104 / 54. 63.104
  libavdevice    54.  3.103 / 54.  3.103
  libavfilter     3. 42.103 /  3. 42.103
  libswscale      2.  2.100 /  2.  2.100
  libswresample   0. 17.102 /  0. 17.102
  libpostproc    52.  2.100 / 52.  2.100
[mp3 @ 0x66c900] max_analyze_duration 5000000 reached at 5015510 microseconds
Input #0, mp3, from 'track01.cdda.wav.mp3':
  Metadata:
    encoder         : Lavf54.63.104
  Duration: 00:00:23.22, start: 0.000000, bitrate: 128 kb/s
    Stream #0:0: Audio: mp3, 44100 Hz, stereo, s16p, 128 kb/s
File 'track01.cdda.wav.mp3.wav.mp3' already exists. Overwrite ? [y/N] y
Output #0, mp3, to 'track01.cdda.wav.mp3.wav.mp3':
  Metadata:
    TSSE            : Lavf54.63.104
    Stream #0:0: Audio: mp3, 44100 Hz, stereo, s16p
Stream mapping:
  Stream #0:0 -> #0:0 (mp3 -> libmp3lame)
Press [q] to stop, [?] for help
Trying to remove 1152 samples, but the queue is emptys    
size=     363kB time=00:00:23.24 bitrate= 128.1kbits/s    
video:0kB audio:363kB subtitle:0 global headers:0kB muxing overhead 0.058336%
ffmpeg version 1.2.12 Copyright (c) 2000-2015 the FFmpeg developers
  built on Feb 12 2015 18:03:16 with gcc 4.7 (Debian 4.7.2-5)
  configuration: –prefix=/usr –extra-cflags='-g -O2 -fstack-protector –param=ssp-buffer-size=4 -Wformat -Werror=format-security ' –extra-ldflags='-Wl,-z,relro' –cc='ccache cc' –enable-shared –enable-libmp3lame –enable-gpl –enable-nonfree –enable-libvorbis –enable-pthreads –enable-libfaac –enable-libxvid –enable-postproc –enable-x11grab –enable-libgsm –enable-libtheora –enable-libopencore-amrnb –enable-libopencore-amrwb –enable-libx264 –enable-libspeex –enable-nonfree –disable-stripping –enable-libvpx –enable-libschroedinger –disable-encoder=libschroedinger –enable-version3 –enable-libopenjpeg –enable-librtmp –enable-avfilter –enable-libfreetype –enable-libvo-aacenc –disable-decoder=amrnb –enable-libvo-amrwbenc –enable-libaacplus –libdir=/usr/lib/x86_64-linux-gnu –disable-vda –enable-libbluray –enable-libcdio –enable-gnutls –enable-frei0r –enable-openssl –enable-libass –enable-libopus –enable-fontconfig –enable-libpulse –disable-mips32r2 –disable-mipsdspr1 –dis  libavutil      52. 18.100 / 52. 18.100
  libavcodec     54. 92.100 / 54. 92.100
  libavformat    54. 63.104 / 54. 63.104
  libavdevice    54.  3.103 / 54.  3.103
  libavfilter     3. 42.103 /  3. 42.103
  libswscale      2.  2.100 /  2.  2.100
  libswresample   0. 17.102 /  0. 17.102
  libpostproc    52.  2.100 / 52.  2.100
[mp3 @ 0x66c900] max_analyze_duration 5000000 reached at 5015510 microseconds
Input #0, mp3, from 'track01.cdda.wav.mp3.wav.mp3':
  Metadata:
    encoder         : Lavf54.63.104
  Duration: 00:00:23.25, start: 0.000000, bitrate: 128 kb/s
    Stream #0:0: Audio: mp3, 44100 Hz, stereo, s16p, 128 kb/s
Output #0, mp3, to 'track01.cdda.wav.mp3.wav.mp3.wav.mp3':
  Metadata:
    TSSE            : Lavf54.63.104
    Stream #0:0: Audio: mp3, 44100 Hz, stereo, s16p
Stream mapping:
  Stream #0:0 -> #0:0 (mp3 -> libmp3lame)
Press [q] to stop, [?] for help
Trying to remove 1152 samples, but the queue is emptys    
size=     364kB time=00:00:23.27 bitrate= 128.1kbits/s    
video:0kB audio:364kB subtitle:0 global headers:0kB muxing overhead 0.058271%
ffmpeg version 1.2.12 Copyright (c) 2000-2015 the FFmpeg developers
  built on Feb 12 2015 18:03:16 with gcc 4.7 (Debian 4.7.2-5)
  configuration: –prefix=/usr –extra-cflags='-g -O2 -fstack-protector –param=ssp-buffer-size=4 -Wformat -Werror=format-security ' –extra-ldflags='-Wl,-z,relro' –cc='ccache cc' –enable-shared –enable-libmp3lame –enable-gpl –enable-nonfree –enable-libvorbis –enable-pthreads –enable-libfaac –enable-libxvid –enable-postproc –enable-x11grab –enable-libgsm –enable-libtheora –enable-libopencore-amrnb –enable-libopencore-amrwb –enable-libx264 –enable-libspeex –enable-nonfree –disable-stripping –enable-libvpx –enable-libschroedinger –disable-encoder=libschroedinger –enable-version3 –enable-libopenjpeg –enable-librtmp –enable-avfilter –enable-libfreetype –enable-libvo-aacenc –disable-decoder=amrnb –enable-libvo-amrwbenc –enable-libaacplus –libdir=/usr/lib/x86_64-linux-gnu –disable-vda –enable-libbluray –enable-libcdio –enable-gnutls –enable-frei0r –enable-openssl –enable-libass –enable-libopus –enable-fontconfig –enable-libpulse –disable-mips32r2 –disable-mipsdspr1 –dis  libavutil      52. 18.100 / 52. 18.100
  libavcodec     54. 92.100 / 54. 92.100
  libavformat    54. 63.104 / 54. 63.104
  libavdevice    54.  3.103 / 54.  3.103
  libavfilter     3. 42.103 /  3. 42.103
  libswscale      2.  2.100 /  2.  2.100
  libswresample   0. 17.102 /  0. 17.102
  libpostproc    52.  2.100 / 52.  2.100
[wav @ 0x66c900] max_analyze_duration 5000000 reached at 5015510 microseconds
Guessed Channel Layout for  Input Stream #0.0 : stereo
Input #0, wav, from 'track02.cdda.wav':
  Duration: 00:02:21.28, bitrate: 1411 kb/s
    Stream #0:0: Audio: pcm_s16le ([1][0][0][0] / 0x0001), 44100 Hz, stereo, s16, 1411 kb/s
Output #0, mp3, to 'track02.cdda.wav.wav.mp3':
  Metadata:
    TSSE            : Lavf54.63.104
    Stream #0:0: Audio: mp3, 44100 Hz, stereo, s16p
Stream mapping:
  Stream #0:0 -> #0:0 (pcm_s16le -> libmp3lame)
Press [q] to stop, [?] for help


Finally remove the old unneded .wav files and enjoy the mp3s with vlc / mplayer / mpg123 or whatever player you like.

hipo@noah:~/audiorip/cd1$  rm -f *.wav


Now mount the flash drive and copy th files into it.

# mkdir /media/usb-drive
# mount /dev/sdc1 /media/usb-drive/
# mkdir -p /media/usb-drive/cd1
# fdisk -l |grep -i sdc1

/dev/sdc1 on /media/usb-drive type vfat (rw,relatime,fmask=0022,dmask=0022,codepage=437,iocharset=utf8,shortname=mixed,errors=remount-ro

# cp -rpf ~/audiorip/cd1*.mp3 /mnt/usb-drive/cd1
# umount /dev/sdc1


2. RIPping audio CD on Linux with rip-audio-cds-linux.sh  script
 

#!/bin/bash
# A simple shell script to rip audio cd and create mp3 using lame
# and cdparanoia utilities.
# —————————————————————————-
# Written by Vivek Gite <http://www.cyberciti.biz/>
# (c) 2006 nixCraft under GNU GPL v2.0+
# —————————————————————————-
read -p "Starting in 5 seconds ( to abort press CTRL + C ) " -t 5
cdparanoia -B
for i in *.wav
do
    lame –vbr-new -b 360 "$i" "${i%%.cdda.wav}.mp3"
    rm -f "$i"
done


If you need to automate the task of dumping the audio CDs to WAV and convert them to MP3s you can do it via a small shell script like the one provided by cyberciti.biz that uses paranoia and lame commands in a shell script loop. Script rip-audio-cds-linux.sh is here

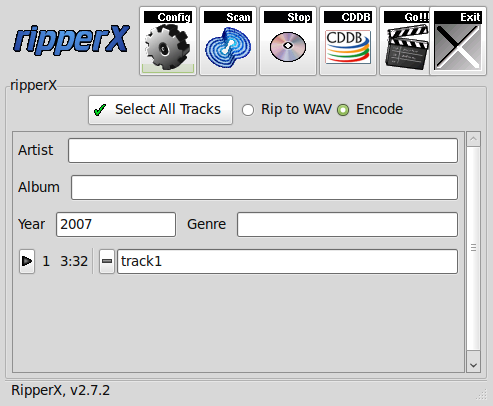
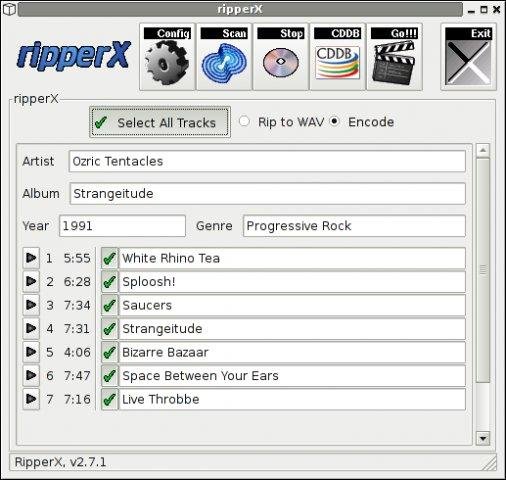
3. Dump Audio CD to MP3 with Graphical program ( ripperx ) 

By default most modern Linux distributions including the Debian GNU / Linux based ones has the ripperx in the default repositories, as well as the tool is downloadable and compilable from source from sourceforge.net 
ripping-audio-cds-linux-graphical-program-ripperx-tool

# apt-cache show ripperx|grep -i descript -A3 -B3
Architecture: amd64
Depends: cdparanoia, vorbis-tools (>= 1.0beta3), libatk1.0-0 (>= 1.12.4), libc6 (>= 2.14), libcairo2 (>= 1.2.4), libfontconfig1 (>= 2.12.6), libfreetype6 (>= 2.2.1), libgcc1 (>= 1:3.0), libgdk-pixbuf2.0-0 (>= 2.22.0), libglib2.0-0 (>= 2.16.0), libgtk2.0-0 (>= 2.8.0), libpango-1.0-0 (>= 1.14.0), libpangocairo-1.0-0 (>= 1.14.0), libpangoft2-1.0-0 (>= 1.14.0), libstdc++6 (>= 5.2), libtag1v5 (>= 1.9.1-2.2~)
Suggests: sox, cdtool, mpg321, flac, toolame
Description-en: GTK-based audio CD ripper/encoder
 ripperX is a graphical interface for ripping CD audio tracks (using
 cdparanoia) and then encoding them into the Ogg, FLAC, or MP2/3
 formats using the vorbis tools, FLAC, toolame or other available
 MP3 encoders.
 .
 It includes support for CDDB lookups and ID3v2 tags.
Description-md5: cdeabf4ef72c33d57aecc4b4e2fd5952
Homepage: http://sourceforge.net/projects/ripperx/
Tag: hardware::storage, hardware::storage:cd, interface::graphical,
 interface::x11, role::program, scope::application, uitoolkit::gtk,

# apt install –yes ripperx

https://www.pc-freak.net/images/ripperx-linux-gui-rip-audio-cds-tool

That's all folks.
Enjoy !
How to install Viber client on Debian GNU / Linux / Ubuntu / Mint in 2022 and enable Bulgarian language cyrillic phonetic keyboard

Tuesday, October 4th, 2022

How to install Viber client on Debian GNU / Linux / Ubuntu / Mint in 2022 and enable Bulgarian language cyrillic phonetic keyboard

how-to-install-and-use-viber-on-gnu-linux-desktop-viber-logo-tux-for-audio-video-communication-with-nonfree-world

So far I've always used Viber on my mobile phone earlier on my Blu H1 HD and now after my dear friend Nomen give me his old iPhone X, i have switched to the iOS version which i find still a bit strangely looking.
Using Viber on the phone and stretching for the Phone all day long is really annoying especially if you work in the field of Information technology like me as System Administrator programmer. Thus having a copy of Viber on your Linux desktop that is next to you is a must.
Viber is proprietary software on M$ Windows its installation is a piece of cake, you install confirm that you want to use it on a secondary device by scanning the QR and opening the URL with your phone and you're ready to Chat and Viber Call with your friends or colleagues

As often on Linux, it is a bit more complicated as the developers of Viber, perhaps did not put too much effort to port it to Linux or did not have much knowledge of how Linux is organized or they simply did not have the time to put for enough testing, and hence installing the Viber on Linux does not straight supported the Bulgarian traditional cyrillic. I've done some small experimentation and installed Viber on Linux both as inidividual package from their official Linux .deb package as well as of a custom build flatpak. In this small article, i'll put it down how i completed that as well as how managed to workaround the language layout problems with a simple setxkbmap cmd.

How to install Viber client on Debian GNU / Linux / Ubuntu / Mint in 2022 and enable Bulgarian language cyrillic phonetic

1.Install and use Viber as a standard Desktop user Linux application

Download latest Debian AMD64 .deb binary from official Viber website inside some dir with Opera / Chrome / Firefox browser and store it in:

hipo@jericho: ~$ cd /usr/local/src

Alternatively you can run the above wget command, but this is not the recommended way since you might end up with Viber Linux version that is older.

hipo@jericho: ~$ sudo wget http://download.cdn.viber.com/cdn/desktop/Linux/viber.deb
hipo@jericho: ~$ su – root

1.2. Resolve the required Viber .deb package dependecies

To resolve the required dependencies of viber.deb package, easiest way is to use gdebi-core # apt-cache show gdebi-core|grep Description-en -A4 Description-en: simple tool to install deb files  gdebi lets you install local deb packages resolving and installing  its dependencies. apt does the same, but only for remote (http, ftp)  located packages. # apt-get install gdebi-core … # apt-get install -f ./viber

1.3. Setting the default language for Viber to support non-latin languages like Cyrillic

I'm Bulgarian and I use the Phonetic Traidional BG keyboard that is UTF8 compatible but cyrillic and non latin. However Viber developers seems to not put much effort and resolve that the Bulgarian Phonetic Traditional keyboard added in my Mate Desktop Environment to work out of the box with Viber on Linux. So as usual in Linux you need a hack ! The hack consists of using setxkbmap to set supported keyboard layouts for Viber US,BG and Traditional Phonetic. This can be done with above command:

setxkbmap -layout 'us,bg' -variant ' ,phonetic' -option 'grp:lalt_lshift_toggle'

To run it everytime together with the Viber binary executable that is stored in location /opt/viber/Viber as prepared by the package developer by install and post-install scripts in the viber.deb, prepared also a 3 liner tine script:

# cat start_viber.sh
#!/bin/bash
cd /opt/viber; setxkbmap -layout 'us,bg' -variant ' ,phonetic' -option 'grp:lalt_lshift_toggle'
./Viber


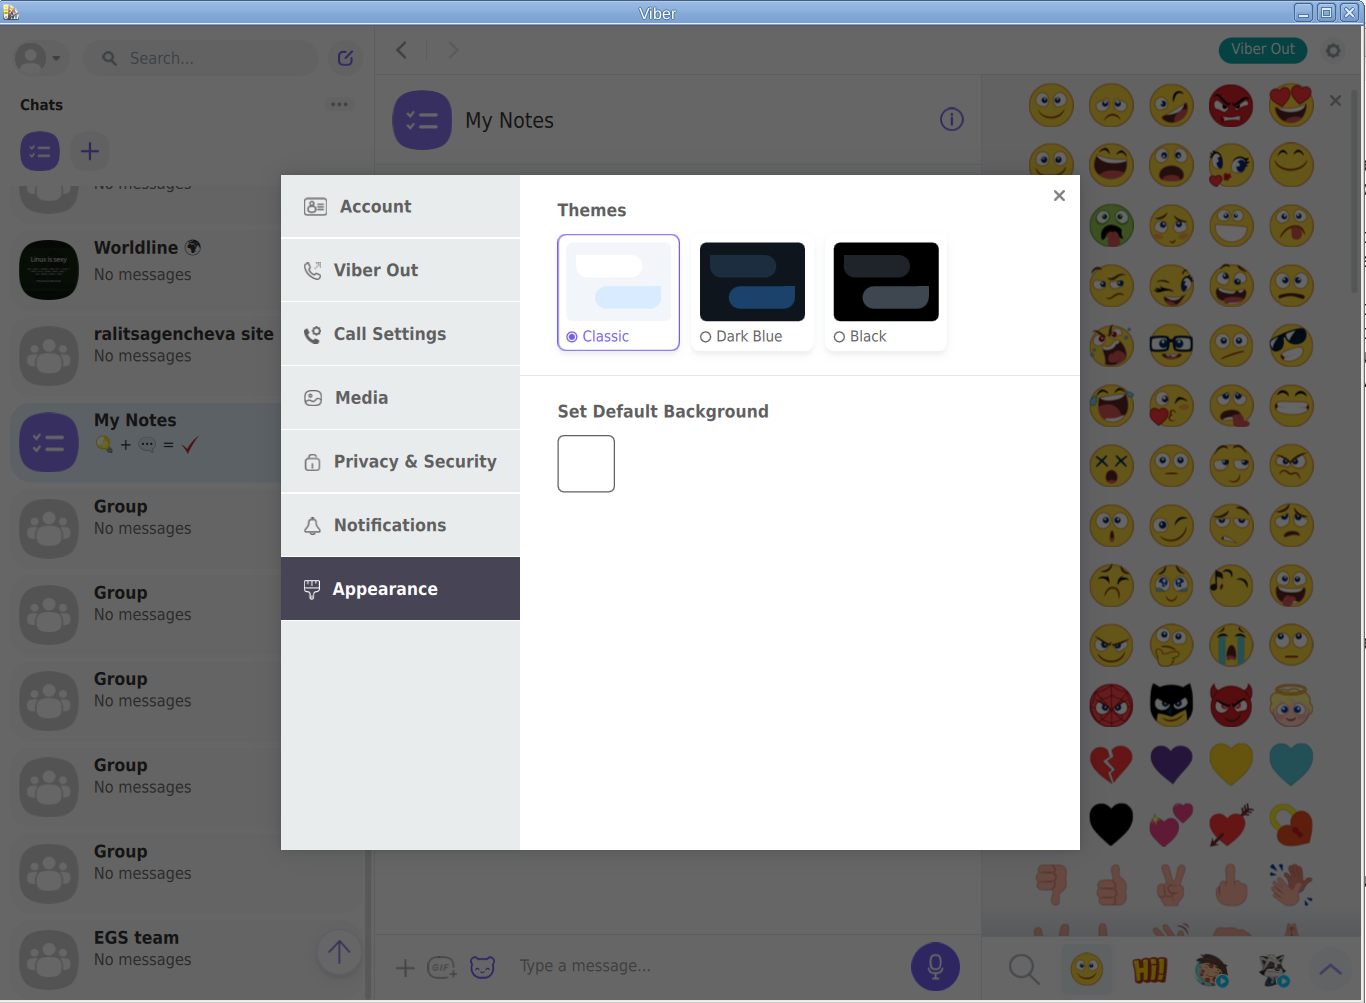
viber-appearance-menu-screenshot-linux


2. Install Viber in separated isolated sandbox from wider system

Second way if you don't trust a priorietary third party binary of Viber (and don't want for Viber to be able to possibly read data of your login GNOME / KDE user, e.g. not be spied by KGB 🙂

For those curious why i'm saying that Viber is mostly used mainly in the ex Soviet Union and in the countries that used to be Soviet satellite ones for one or another reason and though being developed in Israel some of its development in the past was done in Belarus as far as I remember one of the main 3 members (Ukraine, Belarus and Russia) that took the decision to dissolve the USSR 🙂

Talking about privacy if you're really concerned about privacy the best practice is not to use neither WhatApp nor Viber at all on any OS, but this is hard as usually most people are already "educated" to use one of the two. 
For the enthusiasts however I do recommend just to use the Viber / WhatsApp free GPLed software alternative for Vital communication that you don't want to have been listened to by the China / USA / Russia etc. 
Such a good free software alternative is Jitsy and it has both a Web interface that can be used very easily straight inside a browser or you could install a desktop version for PC / iOS and Android and more.
An interesting and proud fact to mention about Jitsy is that its main development that led the project to the state it is now is being done by a buddy Bulgarian ! Good Job man ! 🙂

If you want to give jitsy a try in web with a friend just clik over my pc-freak home lab machine has installed usable version on meet.pc-freak.net

In the same way people in most countries with American and English free world use the WhatsApp which is a another free spy and self analysis software offered by America most likely collecting your chat data and info about you in the (US Central Intelligence Agency) CIA databases. But enough blant so to minimize a bit the security risks of having the binary run directly as a process you can use a containerization like docker to run it inside and isolate from the rest of your Linux desktop. flatpak is a tool developed exactly for that.


hipo@jeremiah:/opt/viber$ apt-cache show flatpak|grep -i Description-en -A 13

Description-en: Application deployment framework for desktop apps
 Flatpak installs, manages and runs sandboxed desktop application bundles.
 Application bundles run partially isolated from the wider system, using
 containerization techniques such as namespaces to prevent direct access
 to system resources. Resources from outside the sandbox can be accessed
 via "portal" services, which are responsible for access control; for
 example, the Documents portal displays an "Open" dialog outside the
 sandbox, then allows the application to access only the selected file.
 .
 Each application uses a specified "runtime", or set of libraries, which is
 available as /usr inside its sandbox. This can be used to run application
 bundles with multiple, potentially incompatible sets of dependencies within
 the same desktop environment.

Having Viber installed on Linux inside a container with flatpak is as simple as to adding, repository and installing the flatpak package
already bundled and stored inside flathub repository, e.g.:
 

2.1. Install flatpak 

# sudo apt install flatpak


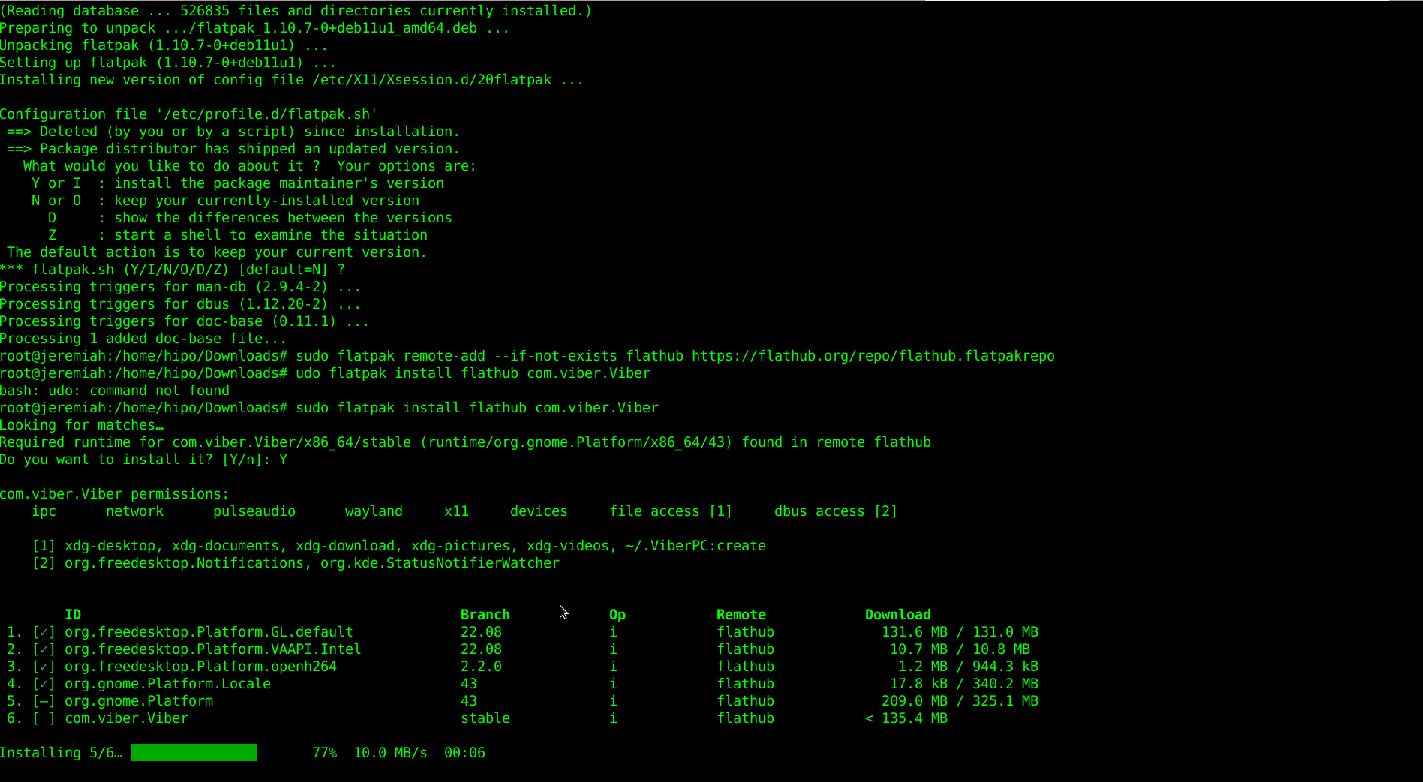
flatpak-viber-installation-linux-screenshot
 

2.2. Add flathub install repository

flatpak is pretty much like dockerhub, it contains images of containered sandbox copies of software, the main advantage of flatpak is its portability, scalability and security.
Of course if you're a complete security freak you can prepare yourself an own set of Viber and add it to flathub and use instead of the original one 🙂
 

# sudo flatpak remote-add –if-not-exists flathub https://flathub.org/repo/flathub.flatpakrepo

2.3. Install Flatpak-ed Viber 

#sudo flatpak install flathub com.viber.Viber


Reboot the PC and to test Viber will run containerized normally issue below flapak start command:

# /usr/bin/flatpak run –branch=stable –arch=x86_64 –command=viber com.viber.Viber


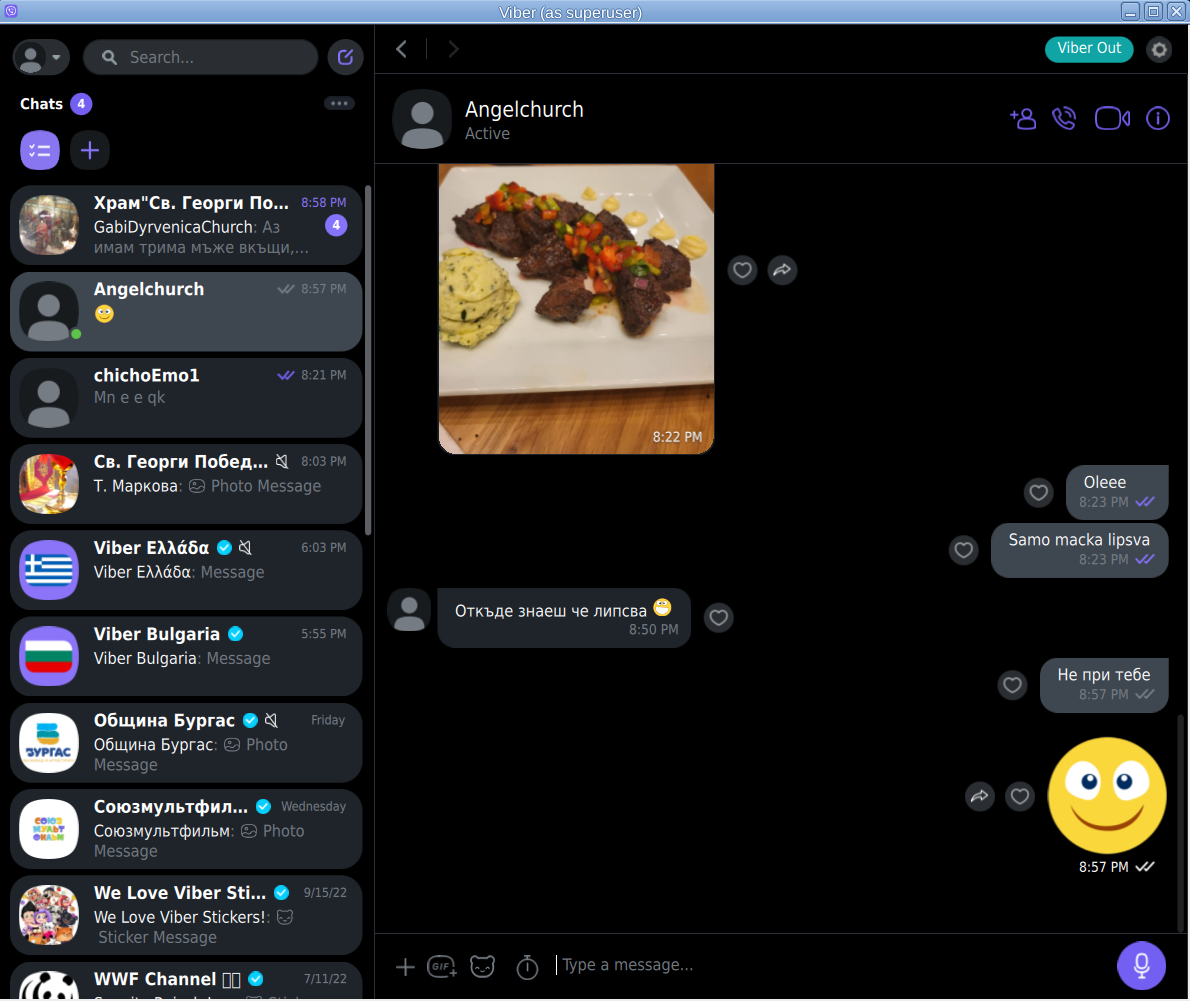
Viber-inside-flatpak-sandbox-on-debian-linux-screenshot-running

! NOTE !  The Linux version of Viber is missing Backups options, exclusively the Settings -> Account -> Viber backup menus is missing, but the good news is that if you're using the Viber client
as a secondary device message client, on first login you'll be offered to Synchronize your Viber data with your 1st Active device (usually your Smart Phone). Just click on it and allow the synchronization from your phone and in a while the Contacts and message history should be on the Linux Viber client.

That's it Enjoy your Viber Sound and Video on Linux ! 🙂

How to enable Gravis UltraSound in DOSBox for enhanced music experience in DOS programs and Games

Tuesday, October 31st, 2017

DOSBox

Gravis UltraSound Classic


Gravis UltraSound

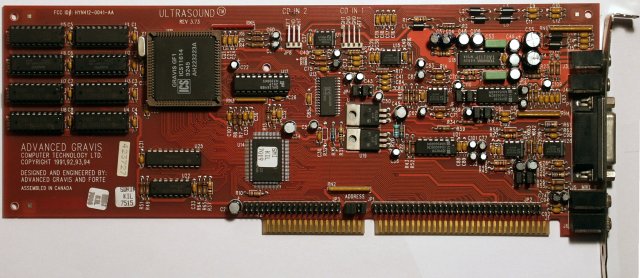
Gravis UltraSound or GUS is a sound card for the IBM PC compatible systems.
It was lunched in 1992 and is notable for it's ability to use real-world sound recordings (wavetable) of a musical instruments rather than artificial computer-generated waveforms.
As one of my friends used to say back then: "it sounds like a CD".

To enable GUS in DOSBox all you need to do is:

1. Download the archive with the GUS files from https://alex.www.pc-freak.net/files/GUS/ULTRASND.zip. Extract the archive (there is already a directory in it so you don't have to create one) preferably where you keep your DOSBox stuff (like Games).

2. Find your DOSBox config file. Depending on the version or host OS, the dosbox conf file is located either inside the user profile folder or inside the same folder as dosbox.exe. In Windows 7 the config file is located at

"C:\Users\Fred\AppData\Local\VirtualStore\Program Files (x86)\dosbox.conf"

where "Fred" is your username.

In GNU/Linux it's in "/home/Fred/.dosbox/dosbox.conf" where "Fred" is your username.

The name of the conf file may also have dosbox version (for example –

"dosbox-0.74.conf").

Open it with a text editor like notepad (Windows) or equvalent for GNU/Linux (vi, Kate, gedit…). Locate "[gus]" section (without the quotes) and edit it so it looks like this:

[gus]
#      gus: Enable the Gravis Ultrasound emulation.
#  gusrate: Sample rate of Ultrasound emulation.
#           Possible values: 44100, 48000, 32000, 22050, 16000, 11025, 8000, 49716.
#  gusbase: The IO base address of the Gravis Ultrasound.
#           Possible values: 240, 220, 260, 280, 2a0, 2c0, 2e0, 300.
#   gusirq: The IRQ number of the Gravis Ultrasound.
#           Possible values: 5, 3, 7, 9, 10, 11, 12.
#   gusdma: The DMA channel of the Gravis Ultrasound.
#           Possible values: 3, 0, 1, 5, 6, 7.
# ultradir: Path to Ultrasound directory. In this directory
#           there should be a MIDI directory that contains
#           the patch files for GUS playback. Patch sets used
#           with Timidity should work fine.

gus=true
gusrate=44100
gusbase=240
gusirq=5
gusdma=3
ultradir=C:\ULTRASND

Then save the dosbox conf file.

3. Start DOSBox and mount "ULTRASND" directory to "C:".

You can do that with

mount c (directory to ULTRASND)

For example if you have extracted the archive in "C:\Games" it has created "C:\Games\ULTRASND" and the command you will have to write in DOSBox is

mount c c:\Games

(example: if your game is in "C:\Games\Heroes2" and your GUS directory is "C:\Games\ULTRSND" (if you have extracted the archive "C:\Games\") then you "mount c c:\Games" and you are set)

or for GNU/Linux if you have extracted the archive in "/home/Fred/Games" it has created "/home/Fred/Games/ULTRASND" and the command you will have to write in DOSBox is

mount c /home/Fred/Games (where "Fred" is your user name).

(example: if your game is in "/home/Fred/Games/Heroes2" and your GUS directory is "/home/Fred/Games/ULTRSND" (if you have extracted the archive" /home/Fred/Games/") in  then you "mount c /home/Fred/Games" and you are set)

You can make this automatic so you don't have to write it everytime by adding this command in the end (bottom) part of your dosbox conf file and save it.

You're practicly ready. All you need to do now is set Gravis UltraSound in your game or application setup (for example with the file "setup.exe") with IO: 240, IRQ 5 and DMA 3. If you prefer you previous sound card you can do that by selecting it again from the setup without disabling GUS from the dosbox conf file.

Happy listening!

Gravis Ultrasound


Article written by Alex

How to turn keyboard backlight on GNU / Linux, keyboard no backlight solution

Friday, October 20th, 2017

how-to-make-CM_Storm_Devastator-keyboard_backlight-work-on-linux-enabled-disable-keyboard-glowing-gnu-linux

If you're a GNU / Linux user and you happen to buy a backlighted keyboard, some nice new laptop whose keyboard supports the more and more modern keyboard growing or if you happen to install a GNU / Linux for a Gamer friend no matter the Linux distribution, you might encounter sometimes  problem even in major Linux distributions Debian / Ubuntu / Mint / Fedora with keyboard backlight not working.

Lets say you buy a Devastator II backlighted keyboard or any other modern keyboard you plug it into the Linux machine and there is no nice blinking light coming out of the keyboard, all the joy is gone yes I know. The free software coolness would have been even more grandiose if your keyboard was shiny and glowing in color / colors 🙂

But wait, there is hope for your joy to be made complete.

To make the keyboard backlight switch on Just issue commands:


xmodmap -e 'add mod3 = Screen_Lock'


# Turn on the keyboard bright lamps
xset led on

# Turns off the keyboard bright lamps
xset led off


If you want to make the keyboard backlight be enabled permanent the easiest solution is to

– add the 3 command lines to /etc/rc.local

E.g. to do so open /etc/rc.local and before exit 0 command just add the lines:


vim /etc/rc.local


xmodmap -e 'add mod3 = Screen_Lock'

# Turn on the keyboard bright lamps
xset led on

# Turns off the keyboard bright lamps
xset led off


If you prefer to have the keyboard colorful backlight enable and disabled from X environment on lets say GNOME , here is how to make yourself an icon that enabled and disables the colors.

That's handy because at day time it is a kind of meaningless for the keyboard to glow.

Here is the shell script:

#!/bin/bash
sleep 1
xset led 3
xmodmap -e 'add mod3 = Scroll_Lock'


I saved it as /home/hipo/scripts/backlight.sh

(don't forget to make it executable!, to do so run):


chmod +x /home/hipo/scripts/backlight.sh


Then create  the .desktop file at /etc/xdg/autostart/backlight.desktop so that it runs the new shell script, like so:

[Desktop Entry]
Type=Application
Name=Devastator Backlight
Exec=/home/hipo/scripts/backlight.sh
Icon=system-run
X-GNOME-Autostart-enabled=true

Play Midis on Linux / Make Linux MIDI Ready for the Future – Enable embedded MIDI music to play in a Browser, Play MIDIs with VLC and howto enjoy Midis in Text Console

Wednesday, October 4th, 2017

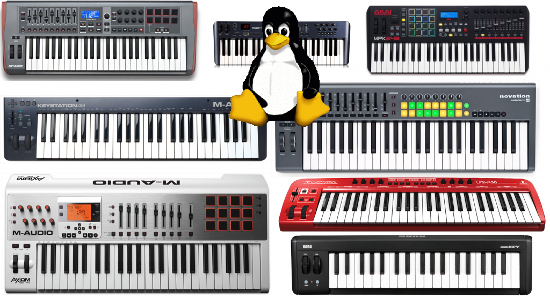
how-to-play-midi-on-gnu-linux-in-graphic-environment-console-and-browser-midi-synthesizer-and-linux-tux-together


Play Midis on Linux or Make Linux MIDI Ready for the Future – Enable embedded MIDI music to play in a Browser, Play MIDIs with VLC and howto enjoy Midis in Text Console HOWTO


Playing MIDI has been quite a lot of fun historically,

if you grow up in the days when personal computers were still young and the Sound Blaster was a luxury, before the raise of Mp3 music format, you have certainly enjoyed the beeping of PC Speaker and later on during 386 and 486 / 586 computers the enjoyment of playing tracked music such as S3M and MOD,

in that good days playing MIDI music was the only alternative for PC maniacs who doesn't own a CD Drive (which itself) was another luxury and even thouse who had a CD ROM device, were mainly playing music in CD audio format (.CDA).
Anyhow MIDI was a cheap and a CPU unintensive way to listen to equivalent of favourite popular Audio Songs and for those who still remember many of the songs were recreated in MIDI format, just with a number of synthesized instruments without any voice (as MIDI is usually).

The same was true also for the good old days of raise of Mobile Phones, when polyphonic was a standard as CPU power was low MIDI was a perfect substitute for the CPU heavy Encoded MP3s / OGG and other formats that required a modern for that time Intel CPU running in 50+ Mhz usually 100 / 166Mhz was perfect for the days to play Mp3 but still even on that PCs we listened to Midi songs.

Therefore if you're one of those people like me who still enjoy to play some Midi Music in the year 2017 and feel a bit like Back into the Future movie and a Free Software fan and user, especially if you're a novice GNU  / Linux Free Software user, you will be unpleasently surprised that most today's default Linux distributions doesn't have an easy way to play Midi music format out of the box right after install.

Hence below article aims to give you an understanding on

How you can play Midi Music on GNU / Linux Operating System

First, lets Prepare to load necessery Linux kernel modules to make sure MIDI can be played by soundcard:

In /etc/modules make sure you have the following list of modules loaded:
 

linux-desktop:~# cat /etc/modules
3c59x
snd-emu10k1
snd-pcm-oss
snd-mixer-oss
snd-seq-oss

!Note the modules are working as of time of writting and in time can change to some other modules, depending on how the development of ALSA (Advanced Linux Sound Architecture) goes, and if the developers decide to rename the upmentioned modules

If you just have added the modules to /etc/modules with vim / nano to reload modules into the Linux kernel run:


linux-desktop:~# modprobe -a


Secondly, Installing a whole bunch of MIDI music related program tools can be achieved in Debian by installing the multimedia-midi package, e.g.:


linux-desktop:~# apt-get install –yes multimedia-midi


1. Playing Midi in Graphical environment with a double click using VLC


How to make MIDI easy listanable in Linux graphical environment like GNOME / KDE / XFCE desktop ?


If you want to make Midi music execution sa easy as  just clicking on the .MIDI file format on Linux you can do that with a midi extension available for VLC (Video Lan Client) Universal Multi Platform Media Player player

To install it on Debian Ubuntu GNU / Linux
 

# apt-get install –yes vlc-plugin-fluidsynth


Необходимо е да се изтеглят 6754 B архиви.
След тази операция ще бъде използвано 35,8 kB допълнително дисково пространство.
Изт:1 http://deb.debian.org/debian stretch/main amd64 vlc-plugin-fluidsynth amd64 2.2.6-1~deb9u1 [6754 B]
Изтеглени 6754 B за 0с (33,6 kB/сек)           
Selecting previously unselected package vlc-plugin-fluidsynth:amd64.
(Reading database … 382976 files and directories currently installed.)
Preparing to unpack …/vlc-plugin-fluidsynth_2.2.6-1~deb9u1_amd64.deb …
Unpacking vlc-plugin-fluidsynth:amd64 (2.2.6-1~deb9u1) …
Setting up vlc-plugin-fluidsynth:amd64 (2.2.6-1~deb9u1) …
Processing triggers for libvlc-bin:amd64 (2.2.6-1~deb9u1) …


Besides making your MIDI play on the GUI environment easy as a a point and click VLC will also be able to play MIDIs on GNU / Linux from your favourite browser (nomatter Firefox / Chrome or Opera), even though the player would play in a new PopUP Window it is easy to select once MIDI file from a random website for example – here is a directory listing of Webserver with Doom II Soundtrack in MIDI format , click over any file from list and Choose option for VLC to always remember that MIDI files has to be opened with VLC player.


2. Enable Firefox / IceWeasel browser to Support Website embedded MIDI files


So VLC could make you listen the downloadable MIDIs from Web pages but,
 

What if you have stumbled on an old website which was configured with very OLD HTML Code to play some nice music (or even different MIDI songs) for each part of the website (for each webpage) and you want to have the Websites created with embedded MIDIs to automatically play on Linux oncce you visit the site?


Sadly default support in Browser for MIDI across all GNU / Linux, I've used so far never worked out of the box, not that still anyone is developing modern websites with MIDIs, but still for the sake of backward compitability and for sake of interactivity it is worthy to enable embedded MIDI support in Linux

But with a couple of tunings as usual GNU / Linux can do almost everything, so here is how to enable embedded browser support for Midi on Linux (That should work with minor modifications not only on Debian / Ubuntu / ArchLinux but also on Fedoras, CentOS etc.
If you try it on any of this distributions, please drop a short comment and tell me in few lines how you made embedded midi worked on that distros.


apt-get install –yes timidity mozplugger

Next do restart firefox

Sometimes in order to work you might need to delete /home/[YOUR_USERNAME]/.mozilla/pluginreg.dat and restart firefox again, e.g. make a backup and give it a try:


cp -rpf /home/hipo/.mozilla/pluginreg.dat /home/hipo/.mozilla/pluginreg.dat.bak
rm -f /home/hipo/.mozilla/pluginreg.dat


Another good tip as talking for embedding MIDI support is to embed XPDF to render PDF pages inside the Browser, by default this is done by GNOME's Evince PDF reader but as it is sometimes buggy and might crash it is generally a good idea to switch to xpdf instead, if for some reason PDF is not directly displaying in browser or suddenly stopped working after some distro uipgrade, you might want to do below as well:
 

apt-get install xpdf

vim /etc/mozpluggerrc

Fin d and Comment out the line starting with:

It should look like this afterwards:

 Repeat Swallow ….
 

text/x-pdf: pdf: PDF file
#      repeat swallow(documentShell) fill: acroread -geometry +9000+9000 +useFrontEndProgram "$file"
        repeat noisy swallow(Xpdf) fill: xpdf -g +9000+9000 "$file"
        repeat noisy swallow(gv) fill: gv –safer –quiet –antialias -geometry +9000+9000 "$file"


3. Play Midi music in Linux text console / terminal


There is a console tool that historically has been like the Linux standard for playing midis over the years as I remember, its called timidity


To install timidity on .Deb based Linux:
 

linux-desktop:~$ su root
Password:
linux-desktop:~# apt-get install –yes timidity

Необходимо е да се изтеглят 0 B/580 kB архиви.
След тази операция ще бъде използвано 0 B допълнително дисково пространство.
(Reading database … 382981 files and directories currently installed.)
Preparing to unpack …/timidity_2.13.2-40.5_amd64.deb …
Unpacking timidity (2.13.2-40.5) over (2.13.2-40.5) …
Processing triggers for menu (2.1.47+b1) …
Processing triggers for man-db (2.7.6.1-2) …
Setting up timidity (2.13.2-40.5) …
Processing triggers for menu (2.1.47+b1) …


To test your new MIDI Synthesizer tool and make the enjoyment full you can download Doom 2 extracted MIDI Soundtrack from here
 

Once you have downloaded above Metal MIDI DOOM old school arcade soundtrack and untarred it into your home directory be it ~/doom-midis

A remark to make here is timidity is quite CPU intensive, but on modern Dual and Quad-Core PC Notebooks, the CPU load is not of a big concern.

To test and play with timidity:
 

linux-desktop~$ timidity ~/mp3/midis/*


timidity-playing-doom-midi-bunny-song-on-debian-stretch-gnome-terminal-screenshot
 

hipo@jericho:~/mp3/midis$ aplaymidi -l
 Port    Client name                      Port name
 14:0    Midi Through                     Midi Through Port-0
128:0    TiMidity                         TiMidity port 0
128:1    TiMidity                         TiMidity port 1
128:2    TiMidity                         TiMidity port 2
128:3    TiMidity                         TiMidity port 3


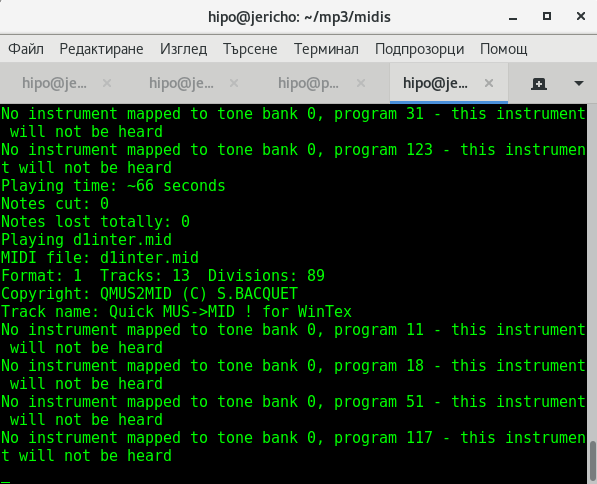
We have also the playmidi  (simple midi text console terminal player), which historically was working quite decent and I use it to in the past on my RedHat 6.0 and RedHat 7.0 to listen to my .MID format files but unfortunately as of time of writting something is wrong with it, so when I try to play MIDIs with it instead of timidity I get this erro:


$ playmidi *.mid
Playmidi 2.4 Copyright (C) 1994-1997 Nathan I. Laredo, AWE32 by Takashi Iwai
This is free software with ABSOLUTELY NO WARRANTY.
For details please see the file COPYING.
open /dev/sequencer: No such file or directory

Even though I tried hard to resolve that error by loading various midi related MIDI modules and following a lot of the suggestions online on how to  make /dev/sequencer work again it was all no luck.
 

Some people back in the distant year 2005, reported the problem was solved by simply loading snd-seq

But as of time of writting:


# modprobe snd-seq


Some people said in archlinux's Forum

/dev/sequencer sequencer: No such file or directory


is solved by loading snd-seq-oss kernel module, but on my Debian Linux 9.1 Stretch, this ain't work as well :


root@jericho:/home/hipo/mp3/midis# modprobe snd-seq-oss
modprobe: FATAL: Module snd-seq-oss not found in directory /lib/modules/4.9.0-3-amd64
root@jericho:/home/hipo/mp3/midis# uname -a;
Linux jericho 4.9.0-3-amd64 #1 SMP Debian 4.9.30-2+deb9u5 (2017-09-19) x86_64 GNU/Linux


Another invention of mine was to try to also link /dev/snd/seq to /dev/sequencer but this produced no positive result either:


# ln -sf /dev/snd/seq /dev/sequencer
# ls -al /dev/sequencer
lrwxrwxrwx 1 root root 12 окт  4 16:48 /dev/sequencer -> /dev/snd/seq


Note that after lining in that way I got following error with my attempt to play MIDIs with playmidi

# playmidi *.mid
Playmidi 2.4 Copyright (C) 1994-1997 Nathan I. Laredo, AWE32 by Takashi Iwai
This is free software with ABSOLUTELY NO WARRANTY.
For details please see the file COPYING.
there is no soundcard


Anyhow on some other Linux distributions (especially with Older Kernel versions), some of the above 3 suggested Fix might work perfectly fine so if you have some time give it a try please and drop me  a comment on how it went, you will help the GNU / Linux community out there that way.

Well never mind the bollocks, so

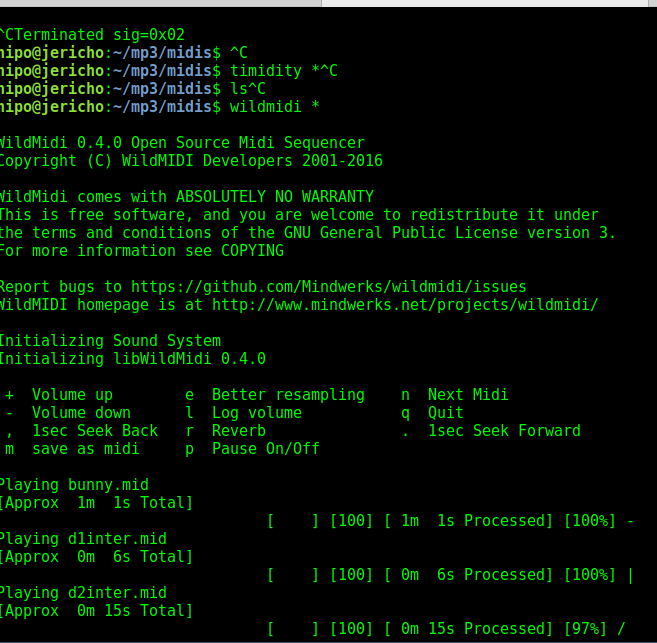
Now back to where I started timidity even though it will play fine it will not give any indication on the lenght of the midi song (precious information such as how much time is left until the end is over).

Hence if you prefer a player that gives you an indicator on how much is left towards the end length of each of the played MIDI file you can give a try to wildmidi:


linux-desktop:~$ apt-cache show wildmidi|grep -i description -A 2

Description-en: software MIDI player
 Minimal MIDI player implementation based on the wildmidi library that
 can either dump to WAV or playback over ALSA. It is intended to

Description-md5: b4b34070ae88e73e3289b751230cfc89
Homepage: http://www.mindwerks.net/projects/wildmidi/
Tag: implemented-in::c, role::program, sound::midi, sound::player,

Description: software MIDI player
Description-md5: 4673a7051f104675c73eb344bb045607
Homepage: http://wildmidi.sourceforge.net/
Bugs: https://bugs.launchpad.net/ubuntu/+filebug


If yet not installed install it after becoming admin user:


linux-desktop:~$ su root
Password:

linux-desktop:~# apt-get install –yes wildmidi


wildmidi is much less CPU intensive (it uses gstreamer to play (Gstreamer – open source multimedia framework)

And next give it a try by running:


linux-desktop:~$ wildmidi ~/mp3/midis/*


wildmidi-midi-lenght-status-text-console-player-for-linux-ubuntu-debian-fedora-suse


4. Editting MIDI files with Free Software and Proprietary MIDI Editor Programs


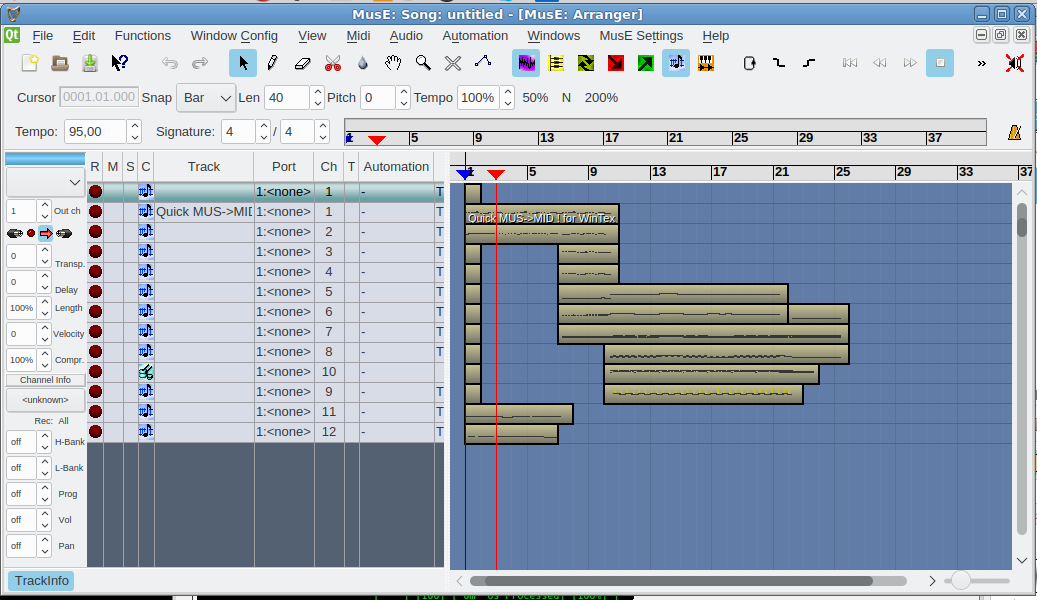
If you want a professional software that can play Midi in a fuzzy interactive GUI way and have some extra possibilities to edit MIDIs and other format give a try to Muse Sequencer:


linux-desktop:~$ sudo apt-get install –yes muse

The following NEW packages will be installed:
  muse
0 upgraded, 1 newly installed, 0 to remove and 38 not upgraded.
Need to get 5814 kB of archives.
After this operation, 21.0 MB of additional disk space will be used.
Get:1 http://deb.debian.org/debian stretch/main amd64 muse amd64 2.1.2-3+b1 [5814 kB]
Fetched 5814 kB in 2s (2205 kB/s)                             
    are supported and installed on your system.
Preconfiguring packages …
Selecting previously unselected package muse.
(Reading database … 382981 files and directories currently installed.)
Preparing to unpack …/muse_2.1.2-3+b1_amd64.deb …
Unpacking muse (2.1.2-3+b1) …
Processing triggers for mime-support (3.60) …
Processing triggers for desktop-file-utils (0.23-1) …
Processing triggers for doc-base (0.10.7) …
Processing 1 added doc-base file…
Registering documents with scrollkeeper…
Processing triggers for man-db (2.7.6.1-2) …
Processing triggers for shared-mime-info (1.8-1) …
Unknown media type in type 'all/all'
Unknown media type in type 'all/allfiles'
Processing triggers for gnome-menus (3.13.3-9) …
Setting up muse (2.1.2-3+b1) …
Processing triggers for hicolor-icon-theme (0.15-1) …


Below is short description what Muse can do for you:


MusE is a MIDI/audio sequencer with recording and editing capabilities.
 Some Highlights:
 

  * Standard midifile (smf) import-/export.
  * Organizes songs in tracks and parts which you can arrange with
    the part editor.
  * MIDI editors: pianoroll, drum, list, controller.
  * Score editor with high quality postscript printer output.
  * Realtime: editing while playing.
  * Unlimited number of open editors.
  * Unlimited undo/redo.
  * Realtime and step-recording.
  * Multiple MIDI devices.
  * Unlimited number of tracks.
  * Sync to external devices: MTC/MMC, Midi Clock, Master/Slave.
  * Audio tracks, LADSPA host for master effects.
  * Multithreaded.
  * Uses raw MIDI devices.
  * XML project file.
  * Project file contains complete app state (session data).
  * Application spanning Cut/Paste Drag/Drop.


linux-desktop~:$ muse

muse-advanced-midi-editor-free-software-for-linux


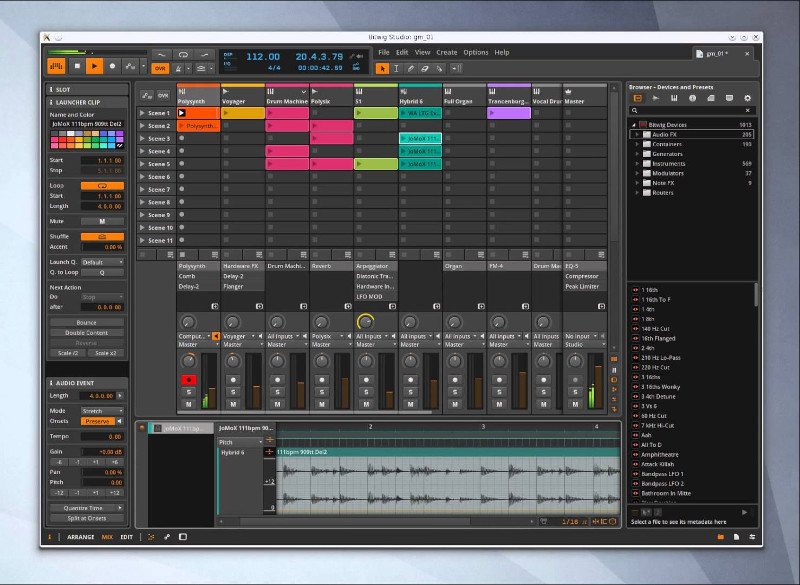
Below is another non-free program that you might, try if MusE doesn't fit your needs (is not rich enough for editting capabilities is bitwig (though I don't recommend since it is not free software)

bitwig – Bitwig Studio is a multi-platform music-creation system for production, performance and DJing, with a focus on flexible editing tools and a super-fast workflow.


bitwig-midi-and-audio-non-free-software-advanced-useful-sound-editor-for-linx


5. Some examples for Text editing and MIDI Conversion to CSV and ABC file formats There is pretty much more

For the MIDI Extremists who or people that create MIDIs and want to learn how a MIDI is made (the content of it etc.), I suggest you take a look at these 3 command line MIDI editing / conversion tools
 

  • midi2abc – A little tool to create MIDI formats to ABC format
  • midi2csv – Conver tour Favourite MIDI files to CSV for educational purposes so see what Channels, Tracks and Time Intervals is a MIDI song mad
  • midicopy – Copy selected, track, channel, time interval of MIDI file to another MIDI file3


Well, that's all folks now enjoy your MIDIs and don't forget to donate, as I'm jobless at the moment and the only profit I make is just a few bucks out of advertisement on this blog.
 

How to boost Linux sound volume over 100% – Maximum Volume Audio Boost in GNOME and KDE

Friday, September 29th, 2017

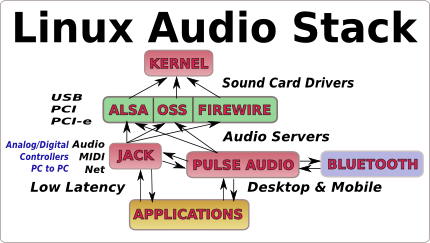
how-to-boost-increase-sound-in-linux-audio-stack-illustrated
 

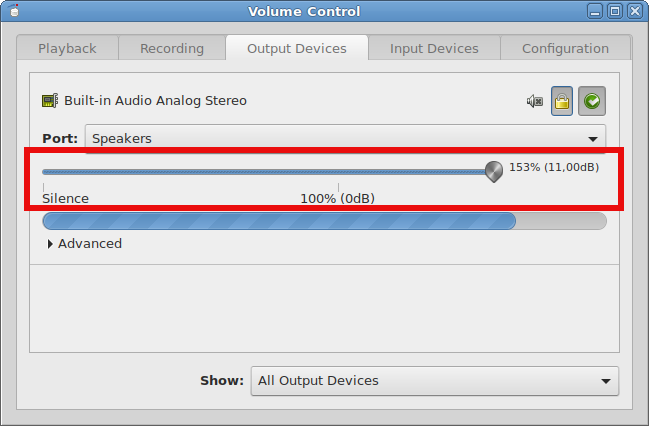
How to boost Linux sound volume over 100% to 150% or 200% ?


If you have recently migrated to Free Software Operating System Fedora,  Ubuntu or Debian GNU / Linux, OpenSuSE with GNOME / Mate / KDE / Xfce graphical environment, you might encounter that sometimes when using your computer for Multimedia the audio sound produced and streamed to the Sound Card is very low, so low that it prevents you from comprehending what the video, music etc. played says or you have to strain hardly your ears to hear what is to be said.

Let me illustrate what I mean, say  you watch an educational video  within Firefox / Opera (browser) in Youtube or listen some songs playlist in Vimeo.COM and the Sound on the follow up video suddenly becomes so low that you can't understand what the Coach or Instructor on the video is saying, or it could be a low sound within a Video downloaded on the PC and watched with Mplayer or VLC (Movie Players),
or lets say you listen MP3 / MP4 / OGG Song, S3M with mpg123 (in console) or with Qmmp (a graphical mp3 Windows WinAmp like player for Linux similar to good old XMMS Player).

So what is to be done to increase the audio volume from your Linux powered Notebook over 100% ??

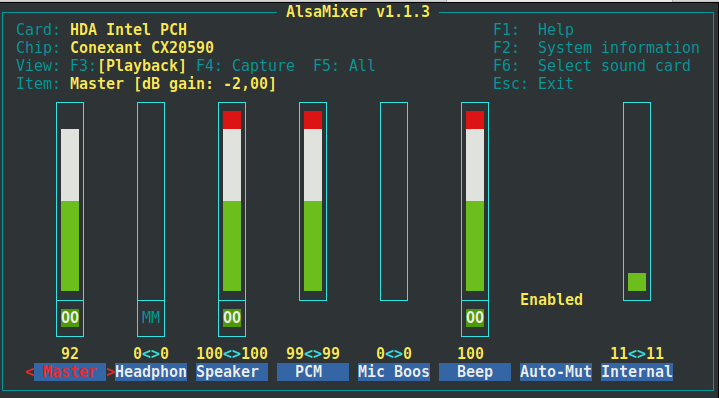
I assume you already tried everything possible such as using aumix (Console / Terminal based tool) to boost your Sound Output to maximum and you also checked Gnome Alsa Mixer to make sure the Volume status is set to maximum but nothing helped as the sound produced is way lower behind you wish too.

By the using alsamixer command might help sometimes to increase the Linux sound volume a little bit but still you can't boost over 100% with it.

alsamixer-linux-screenshot

Apple Mac OS X users have surely experienced similar issues and are probably aware of the existence of a Trial (paid) application Boom 2 – A Mac OS Sound Volume Booster with Advanced Audio Equalizers and Effects but is there some similar Sound Increaseing software over the standard maximum 100% Volume for Linux?

Well yes, there is its called PavuControl (PulseAudio Volume Control)


linux-desktop:~# apt-cache show pavucontrol|grep -i description -A 3
Description-en: PulseAudio Volume Control
 PulseAudio Volume Control (pavucontrol) is a simple GTK+ based volume
 control tool (mixer) for the PulseAudio sound server. In contrast to
 classic mixer tools this one allows you to control both the volume of

Description-md5: c43956d9d08801fbaa1a405d7b6a9e6b
Homepage: http://freedesktop.org/software/pulseaudio/pavucontrol/
Tag: admin::configuring, implemented-in::c++, interface::graphical,
 interface::x11, role::program, scope::utility, sound::mixer,
root@jericho:/home/hipo# apt-cache show pavucontrol|grep -i description -A 2
Description-en: PulseAudio Volume Control
 PulseAudio Volume Control (pavucontrol) is a simple GTK+ based volume
 control tool (mixer) for the PulseAudio sound server. In contrast to

Description-md5: c43956d9d08801fbaa1a405d7b6a9e6b
Homepage: http://freedesktop.org/software/pulseaudio/pavucontrol/


To run it run pavucontrol from terminal program:

linux-desktop:~$ pavucontrol

how-to-boost-linux-sound-in-gnu-linux-fedora-debian-ubuntu-program-application-to-increase-sound-over-hundred-percents

If pavucontrol command is not present on your Linux install it with apt as usual:
 

linux-desktop:~# apt-get install –yes pavucontrol


Note that PavuControl is using PulseAudio Linux Sound Streaming server to boost the Audio and not the ALSA (Advanced Linux Sound Server – which receives sounds from various applications and paralyzes them in different sound channels). 


If you want to prevent the Volume Boost audio increase over 100% to lets say either the 150% percentages, the maximum pavucontrol gives you can do that by including the /usr/bin/pactl command (which is a part of pulseaudio-utils package) to /etc/rc.local (be sure you include the command in rc.local before exit 0 command)

To give it a test you can manually run from terminal:

linux-desktop:~$ pactl — set-sink-volume 0 150%


You will notice the audio output sound increased immediately Note that the Sound boosting in Linux can be done over 150% to lets say 200% or 250 out of the normal maximum, and you can test 200% if you have a nice big speakers connected to your Computer to piss off your wife :), e.g. run:

# !!!!!!! RUN BELOW COMMAND AT YOUR OWN RISK AS THIS MIGHT DAMAGE YOUR COMPUTER OR EXTERNAL SOUND SPEAKERS !!!!!!


linux-desktop:~$ pactl — set-sink-volume 0 250%