Archive for September, 2018

Install Java on Debian 9 Linux howto

Saturday, September 29th, 2018

java_on-debian-gnu-linux-oracle-virtual-machine-logo

As most system administrators and perhaps most people :), I dislike Java Virtual Machine. However because of its multi-platform support it is largely adopted and so many things are already written in java, even though I hate it I need it to run things every now and then on my personal desktop machine with Debian Linux 9 (Stretch).

From a programmer point of view Java applications are scalable and flexible and from a point of view a person who had to support computers and servers iwth Java it sucks.
To have a running Java Virtual Machine and run Java applications on your Linux PC you could use JRE (the Java Runtime Environment) and JDK (Java Development Kit) which is a set of Java tools and compilers to translate Java code to a .JAR .WAR and the rest of the Java Machine running formats.

openjdk-free-software-java-implementation-for-linux-bsd

OpenJDK (Open JDK) is free (open source) implementation of Oracle Sun Microsystems of Java SE 7 mostly licensed under GPLv2 (but with some linking to a Java class library that is not truly free. OpenJDK includes as components the backend Virtual Machine (HotSpot), the Java Class Library, javac (the java compiler) and IcedTea (which is Redhat's free implementation of Java Web Start plugin.

Install OpenJDK 8 JDK and JRE

OpenJDK is installable by default on Debian and most other distros, to install it on Debian:


linux:~# apt-get install –yes -qq default-jdk
linux:~# apt-get install –yes -qq default-jre


That would provide your system with support for  java-sdk, java2-sdk, java5-sdk, java6-sdk, java7-sdk, java8-sdk's free implementation.


linux:~#  java -version


linux:~# java version "1.8.0_181"
Java(TM) SE Runtime Environment (build 1.8.0_181-b13)
Java HotSpot(TM) 64-Bit Server VM (build 25.181-b13, mixed mode)


I have used openjdk but as there are issues with some Java programs because of Java compitability issues. Nowadays most of the timeI choose to usually install the Official Latest Oracle Java 8. The reason is I often have to install on servers application servers such as:

  •  Tomcat
  • JBoss
  • WildFly
  • Jetty
  • Glassfish
  • WebLogic
  • Cassandra
  • Jenkins
     

Install Latest Official Oracle Java 8

java_oracle-virtual-machine-logo

1. Download Oracle Java installable binary

To download latest official release check out Oracle's download page and copy the link to latest Java archive and select the appropriate architecture x64 / 32 bit / arm etc., as of time of writting this article latest Stable Java version is JDK-8U181.


linux:~# curl -L -b "oraclelicense=a" -O http://download.oracle.com/otn-pub/java/jdk/8u181-b13/96a7b8442fe848ef90c96a2fad6ed6d1/jdk-8u181-linux-x64.tar.gz


Notice the -b "oraclelicense=a" which will pass on to the remote web server accept Oracle's license which is a prerequirement to continue to download.

2. Create directory for Java


linux:~# mkdir -p /usr/local/oracle-java-8


3. Extract the Java .tar.gz to /usr/local/oracle/java-8 or another directory
where java will live


linux:~# tar -zxf jdk-8u181-linux-x64.tar.gz -C /usr/local/oracle-java-8


If you have used Java OpenJDK beforehand and installed Oracle Java according to the instructions above you might end up with multiple Javas installed by default, however Debian Linux will have a symlinks to java javac (java compiler), javaws (Java web start).
Thus just executed java will return


linux:~# java -version


java version "1.8.0_181"
Java(TM) SE Runtime Environment (build 1.8.0_181-b13)
Java HotSpot(TM) 64-Bit Server VM (build 25.181-b13, mixed mode)


4. Set Oracle Java to be default for the Debian system


linux:~# update-alternatives –install "/usr/bin/java" "java" "/usr/local/oracle-java-8/jdk1.8.0_181/bin/java" 1500
linux:~# update-alternatives –install "/usr/bin/javac" "javac" "/usr/local/oracle-java-8/jdk1.8.0_181/bin/javac" 1500
linux:~# update-alternatives –install "/usr/bin/javaws" "javaws" "/usr/local/oracle-java-8/jdk1.8.0_181/bin/javaws" 1500


An alternative way to set Java to point to Oracle Java instead of OpenJDK is


linux:~# update-alternatives –config java


There are 2 choices for the alternative java (providing /usr/bin/java).


  Selection    Path                                            Priority   Status
————————————————————
* 0            /usr/local/oracle-java-8/jdk1.8.0_181/bin/java   1500      auto mode
  1            /usr/lib/jvm/java-8-openjdk-amd64/jre/bin/java   1081      manual mode
  2            /usr/local/oracle-java-8/jdk1.8.0_181/bin/java   1500      manual mode


Press <enter> to keep the current choice[*], or type selection number:

Install Latest Official Oracle Java 10

To install Oracle Java the process is the same:
 

linux:~# wget –header "Cookie: oraclelicense=accept-securebackup-cookie" <paste the download link here> linux:~# mkdir /usr/local/oracle-java-10/ linux:~# tar xvzf jdk-10.0.1_linux-x64_bin.tar.gz -C/usr/local/oracle-java-10 linux:~# update-alternatives –install "/usr/bin/java" "java" "/usr/local/oracle-java-10/jdk-10.0.1/bin/java" 1500 linux:~# update-alternatives –install "/usr/bin/javac" "javac" "/usr/local/oracle-java-10/jdk-10.0.1/bin/javac" 1500 linux:~# update-alternatives –install "/usr/bin/javaws" "javaws" "/usr/local/oracle-java-10/jdk-10.0.1/bin/javaws" 1500


Uninstall OpenJDK previous installation

If you choose to use Oracle Java in favor of OpenJDK you might want to also remove the openjdk not to take space on your Hard disk, to so so:
 

linux:~# apt-get remove default-jre
How to reset lost OwnCloud admin password credentials with Linux command

Friday, September 28th, 2018

owncloud-change-password-on-owncloud-7-8-linux-howto

Some time ago I've explained how to set-up a personal Cloud via OwnCloud on Linux to be able to access and share your data across all your Phone / Notebook / PCs / Tablet devices and be free from Amazon Cloud slavery.

Now as I haven't used a setup of OwnCloud it seems I forgot my OwnCloud password and besides that I am not sure which email address I filled as a recovery email and was lazy to go through all the OwnCloud MySQL database tables, thus I looked for
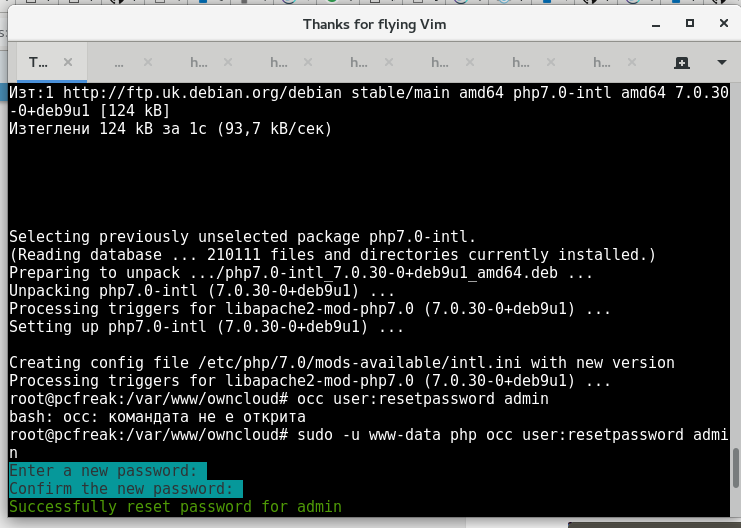
other ways to recover the forgotten password. Finally I ended up using the command line, below is how OwnCloud 7 admin password can be easily reset (recovered) with occ php command:


root@pcfreak:/var/www/owncloud# sudo -u www-data php occ user:resetpassword admin
PHP module intl not installed.
Please ask your server administrator to install the module.


An unhandled exception has been thrown:
Exception: Environment not properly prepared. in /var/www/owncloud/lib/private/Console/Application.php:135
Stack trace:
#0 /var/www/owncloud/console.php(105): OC\Console\Application->loadCommands(Object(Symfony\Component\Console\Input\ArgvInput), Object(Symfony\Component\Console\Output\ConsoleOutput))
#1 /var/www/owncloud/occ(11): require_once('/var/www/ownclo…')
#2 {main}root@pcfreak:/var/www/owncloud# apt-cache search php|grep -i intl
php-intl – Internationalisation module for PHP [default]
php-symfony-polyfill-intl-grapheme – Symfony polyfill for intl's grapheme_* functions
php-symfony-polyfill-intl-icu – Symfony polyfill for intl's ICU-related data and classes
php-symfony-polyfill-intl-normalizer – Symfony polyfill for intl's Normalizer class and related functions
php7.0-intl – Internationalisation module for PHP
php-symfony-intl – limited replacement layer for the PHP extension intl
php-symfony-locale – deprecated replacement layer for the PHP extension intl
php5-intl – internationalisation module for php5
root@pcfreak:/var/www/owncloud# apt-get install php7.0-intl
Четене на списъците с пакети… Готово
Изграждане на дървото със зависимости       
Четене на информацията за състоянието… Готово
Следните пакети са били инсталирани автоматично и вече не са необходими:
  docutils-common docutils-doc gcj-4.9-jre-lib gnat-4.9-base libasn1-8-heimdal libavcodec56 libavformat56 libavresample2 libavutil54 libbind9-90 libboost-program-options1.55.0 libboost-python1.55.0 libcompress-raw-bzip2-perl libcompress-raw-zlib-perl libcrypt-openssl-random-perl
  libdnet libdns-export100 libdns100 libegl1-mesa-drivers libexiv2-13 libgcj15 libglew1.10 libgnat-4.9 libgnutls-openssl27 libgphoto2-port10 libgphoto2-port10:i386 libhcrypto4-heimdal libhdb9-heimdal libheimbase1-heimdal libhx509-5-heimdal libimobiledevice4 libinput5 libintl-perl
  libintl-xs-perl libirs-export91 libisc-export95 libisc95 libisccc90 libisccfg-export90 libisccfg90 libjson-c3 libkrb5-26-heimdal libllvm3.5:i386 libllvm3.8 liblognorm1 liblwres90 libntdb1 libopenvg1-mesa libplist2 libprocps3 libpsl0 libroken18-heimdal librrd4 libtfm1
  libusbmuxd2 libvpx1:i386 libwebpdemux1 libwebpdemux2 libwebpmux1 libwind0-heimdal libwings2 libwraster3 libwutil3 libx264-142 libxtables10 linux-image-3.16.0-4-amd64 python-characteristic python-docutils python-ndg-httpsclient python-ntdb python-pil python-pygments
  python-pyinotify python-roman python-twisted-lore python-twisted-mail python-twisted-names python-twisted-news python-twisted-runner python-twisted-words
Използвайте „apt autoremove“ за да ги премахнете.
Следните НОВИ пакети ще бъдат инсталирани:
  php7.0-intl
0 актуализирани, 1 нови инсталирани, 0 за премахване и 1 без промяна.
Необходимо е да се изтеглят 124 kB архиви.
След тази операция ще бъде използвано 523 kB допълнително дисково пространство.
Изт:1 http://ftp.uk.debian.org/debian stable/main amd64 php7.0-intl amd64 7.0.30-0+deb9u1 [124 kB]
Изтеглени 124 kB за 1с (93,7 kB/сек)        


Selecting previously unselected package php7.0-intl.
(Reading database … 210111 files and directories currently installed.)
Preparing to unpack …/php7.0-intl_7.0.30-0+deb9u1_amd64.deb …
Unpacking php7.0-intl (7.0.30-0+deb9u1) …
Processing triggers for libapache2-mod-php7.0 (7.0.30-0+deb9u1) …
Setting up php7.0-intl (7.0.30-0+deb9u1) …

Creating config file /etc/php/7.0/mods-available/intl.ini with new version
Processing triggers for libapache2-mod-php7.0 (7.0.30-0+deb9u1) …
root@pcfreak:/var/www/owncloud# occ user:resetpassword admin
bash: occ: командата не е открита
root@pcfreak:/var/www/owncloud# sudo -u www-data php occ user:resetpassword admin
Enter a new password: 
Confirm the new password: 
Successfully reset password for admin
root@pcfreak:/var/www/owncloud# 


root@pcfreak:/var/www/owncloud# sudo -u www-data php occ user:resetpassword admin
Enter a new password: 
Confirm the new password: 
Successfully reset password for admin


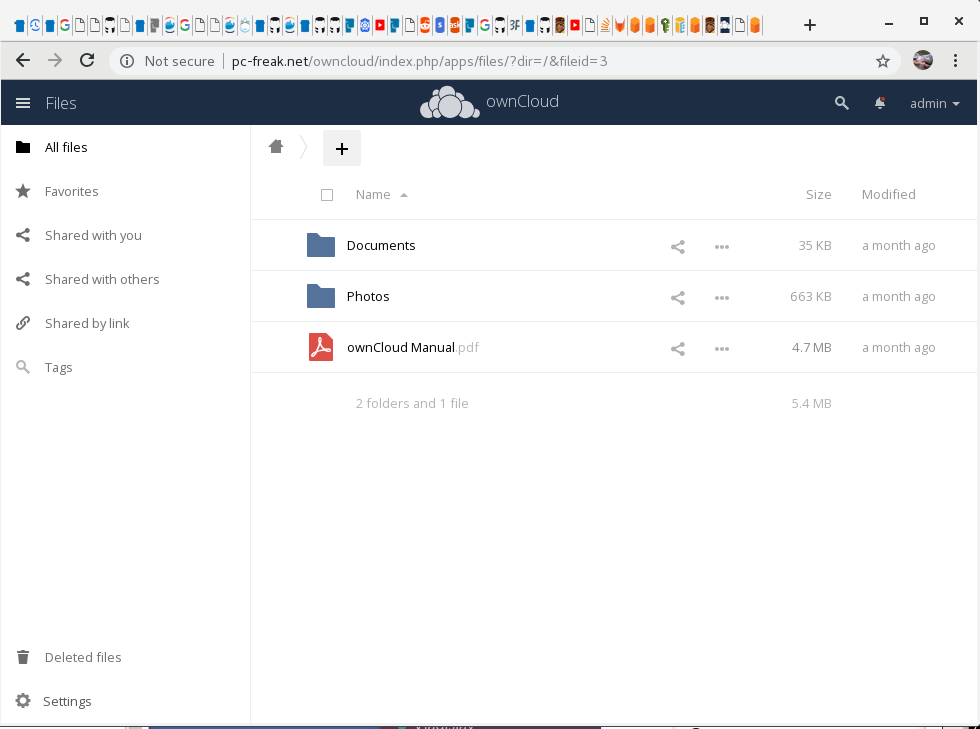
owncloud-screenshot-on-my-debian-gnu-linux-in-chrome-browser

That's all now I can login again to WEB UI interface and use my owncloud-client to synchronize content from my notebook to OwnCloud


This method should work work on resetting password of OwnCloud version 7, 8 and 9 on Linux (Fedora, Ubuntu, CentOS and RHEL) if OwnCoud was installed using rpm / deb packages. 
 

How to change hostname in Ubuntu, Debian and Redhat based Linux machine

Thursday, September 27th, 2018

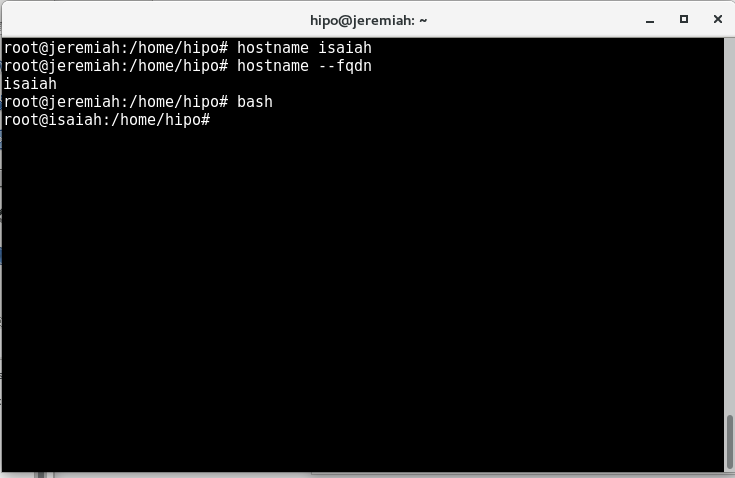
change-hostname-on-any-linux-distributions-universal-way-to-change-linux-hostname-howto

The hostname is set at the time when a Linux OS is installed by the respective installer (set-up scripts) on a bare-metal server or  virtual machine. 

Historically to change the hostname in most GNU / Lonux distributions (Debian / Ubuntu / Fedora / CentOS etc.) it was as easy as:

1. Getting your current setting for hostname with hostname command
 

hipo@jeremiah:~$ hostname –fqdn
jeremiah


Logging to the remote machine via ssh.


ssh user@whetever-host.com


3. Editting /etc/hosts and substituting with the new desired hostname


vim /etc/hosts
127.0.0.1   localhost
127.0.0.1   jeremiah

# The following lines are desirable for IPv6 capable hosts
::1     localhost ip6-localhost ip6-loopback
ff02::1 ip6-allnodes
ff02::2 ip6-allrouters

4. Run 

/etc/init.d/hostname.sh start


5. Run command
 

hostname your-new-desired-hostname


and logout and login again to the host to make the new hostname active for the ssh session

Since around 2015 a new way was introduced to change hostname in Ubuntu 13.04 onwards and Fedora 21 and Debian 8 / 9 the way to set a new hostname comes again up to editting
/etc/hosts

and running command:
 

hostnamectl set-hostname your-new-desired-hostname


On Redhat based Linux distributions and Red Hat Enterprise Linux to change the hostname you will also need to edit:
 

vim /etc/sysconfig/network

NETWORKING=yes
HOSTNAME="domain.com"
GATEWAY="192.168.0.1"
GATEWAYDEV="eth0"
FORWARD_IPV4="yes"


Another universal way to edit hostname on any Linux distribution is to use sysctl cmd like so:
 

sysctl kernel.hostname

sysctl kernel.hostname=your-desired-hostname


Change GNOME lock time settings in Linux

Wednesday, September 26th, 2018

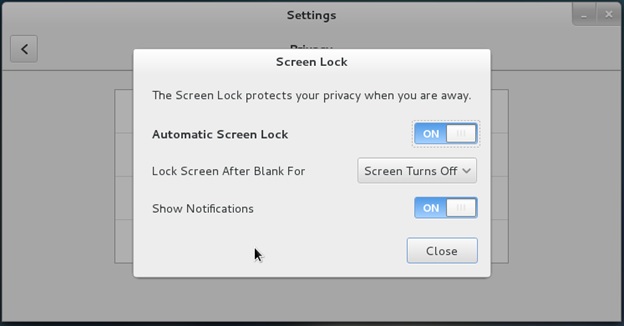
https://www.pc-freak.net/images/change-gnome-lock-time-settings-debian-linux-screenshot

In GNOME 3.X The screen lock time setting is set either to 1 minute 15 minutes or NEVER
So what if you would like to,

Set the gnome screen lock settings value to 30 minutes or one Hour

Here is how:

For 30 minutes lock screen setting:


linux:~$ gsettings set org.gnome.desktop.session idle-delay 1800


Set GNOME lock time to 1 hour


linux:~$ gsettings set org.gnome.desktop.session idle-delay 3600


The setting is set in seconds so quickest way to calculate is to divide by 60 (seconds), you can calculate easily the time you like with BC (arbitrary precision calculation language) like so:


linux:~$ echo '3600/60' | bc
60


Lets say you would like to set your screen to lock every 3 hours, the delay value to set in org.gnome.desktop.session would be:


linux:~$ echo '3600*3' | bc
10800


Once you set the value to a different than the 3 recognized ones would show in GNOME Control Center as Never (depending on the distro).
 

Reset gnome forgotten keyring password – Fix annoying reoccuring keyring password prompt

Wednesday, September 26th, 2018

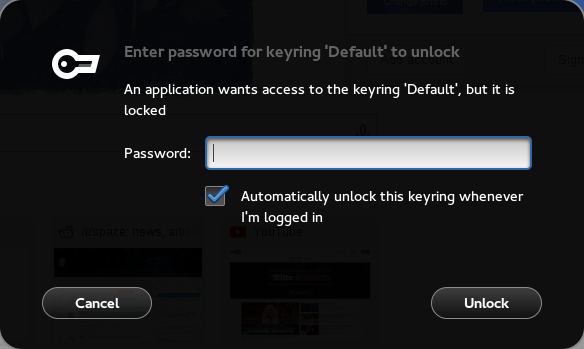
gnome-keyring-password-error-fix-solution-howto-gnupg-error-after-changing-user-password-linux-desktop-user

If you're on Debian Linux and have a user account and you changed the password you might be unpleasantly surprised by a constantly occuring prompt to reinput the keyring stored old password.
You might be wondering how to reset the gnome keyring password to stop that annoying pop-up prompt from bittering your days.
The simplest fix is to delete all stored passwords and reset the keyring stored values. That's in case if you don't have other important passwords saved.

This is done by simply creating a backup of the old keyring just in case if you have something important stored you can do that with:


cd ~/.local/share/keyrings/
cp login.keyring login.keyring.backup


Then delete the keyring store file:


rm  -f ~/.local/share/keyrings/login.keyring


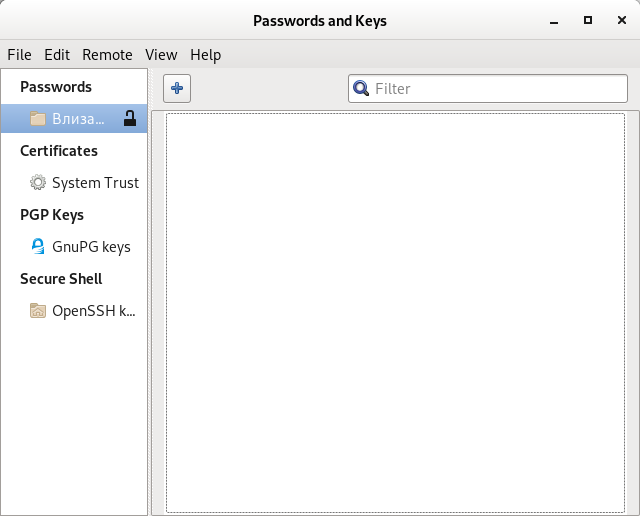
Under some GNU / Linux distrubutions such as Linux Mint deleting the keyring file will not work on such an alternative method is to use seahorse (a frontend program to GnuPG (GNU Privacy Guard), that is doing key management  for GNOME desktop users.


hipo@jericho:~$ seahorse


seahorse-gnu-gpg-and-password-management-gui-tool-gnome-desktop-environment-debian-linux-screenshot
 

For older Linux distributions like Ubuntu 12.10 e.g. in GNOME 2, the correct path to keyring file is ~/.gnome2/keyrings/
 

rm -f ~/.gnome2/keyrings/*


Linux: GNOME Flashback missing Desktop Icons fix – Hack to add desktop icons via gnome-shell in GNOME 3.28 onwards

Monday, September 24th, 2018

how-to-fix-workaround-gnome-3.30-missing-desktop-icons-on-linux

I just upgraded my notebook fom Debian Stretch 9.5 Linux to Buster (current Testing Debian release). All went fine except I got a lot of headaches because it seems in Buster the GNOME Flashback 3.30 which I use has removed the support for Show Desktop Icons in Nautilus because of some migration reasons of Nautilus to a newer version 4, (hopefully that would be temporary) from gnome-tweak-tool whose package now contains no binary for gnome-tweak-tool, instead an equivalent tool now is called gnome-tweaks and this tool is no longer working under Gnome Flashback but only with GNOME Classic 3.30 and the regular GNOME 3.30 launcher available from gdm3 (the Gnome Display manager).
 

1. Displaying Missing Desktop icons on GNOME version 3.30


The way to display Desktop icons in GNOME 3.28 onwards at the moment of writting this post and the whole issue with the removed handling of Desktop icons in Nautilus is explained well by Carlos Soriano a gnome shell extension developer in his blog post Desktop icons goes beta.

The good guy C. S. wrote  the his desktop icons gnome shell extension which is on github.com
To use it you have to fetch it and enable it by fetching the repo source code to gnome-shell extensions directory:
 

hipo@linux:~$ cd ~/.local/share/gnome-shell/extensions
hipo@linux:~$ git clone https://gitlab.gnome.org/World/ShellExtensions/desktop-icons
hipo@linux:~$ mkdir 'desktop-icons@csoriano'
hipo@linux:~$ mv desktop-icons/* 'desktop-icons@csoriano'/
hipo@linux:~$ rm -rf desktop-icons/


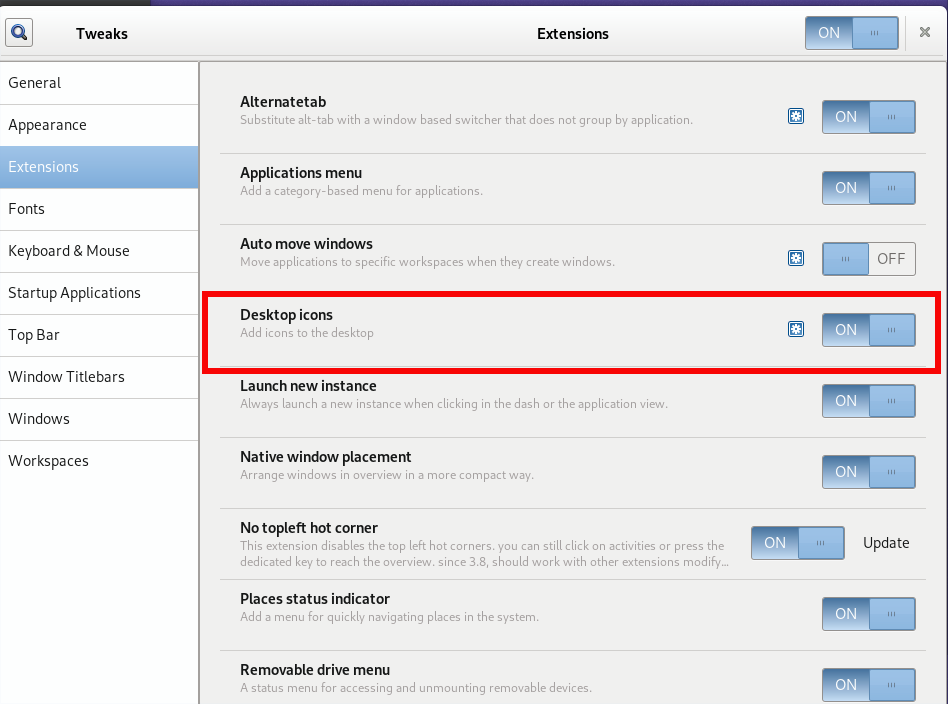
Now you should use the gnome-tweaks command tool to enable the new added gnome-shell extension.


hipo@linux:~$ gnome-tweaks


gnome-tweak-on-debian-testing-linux-screenshot

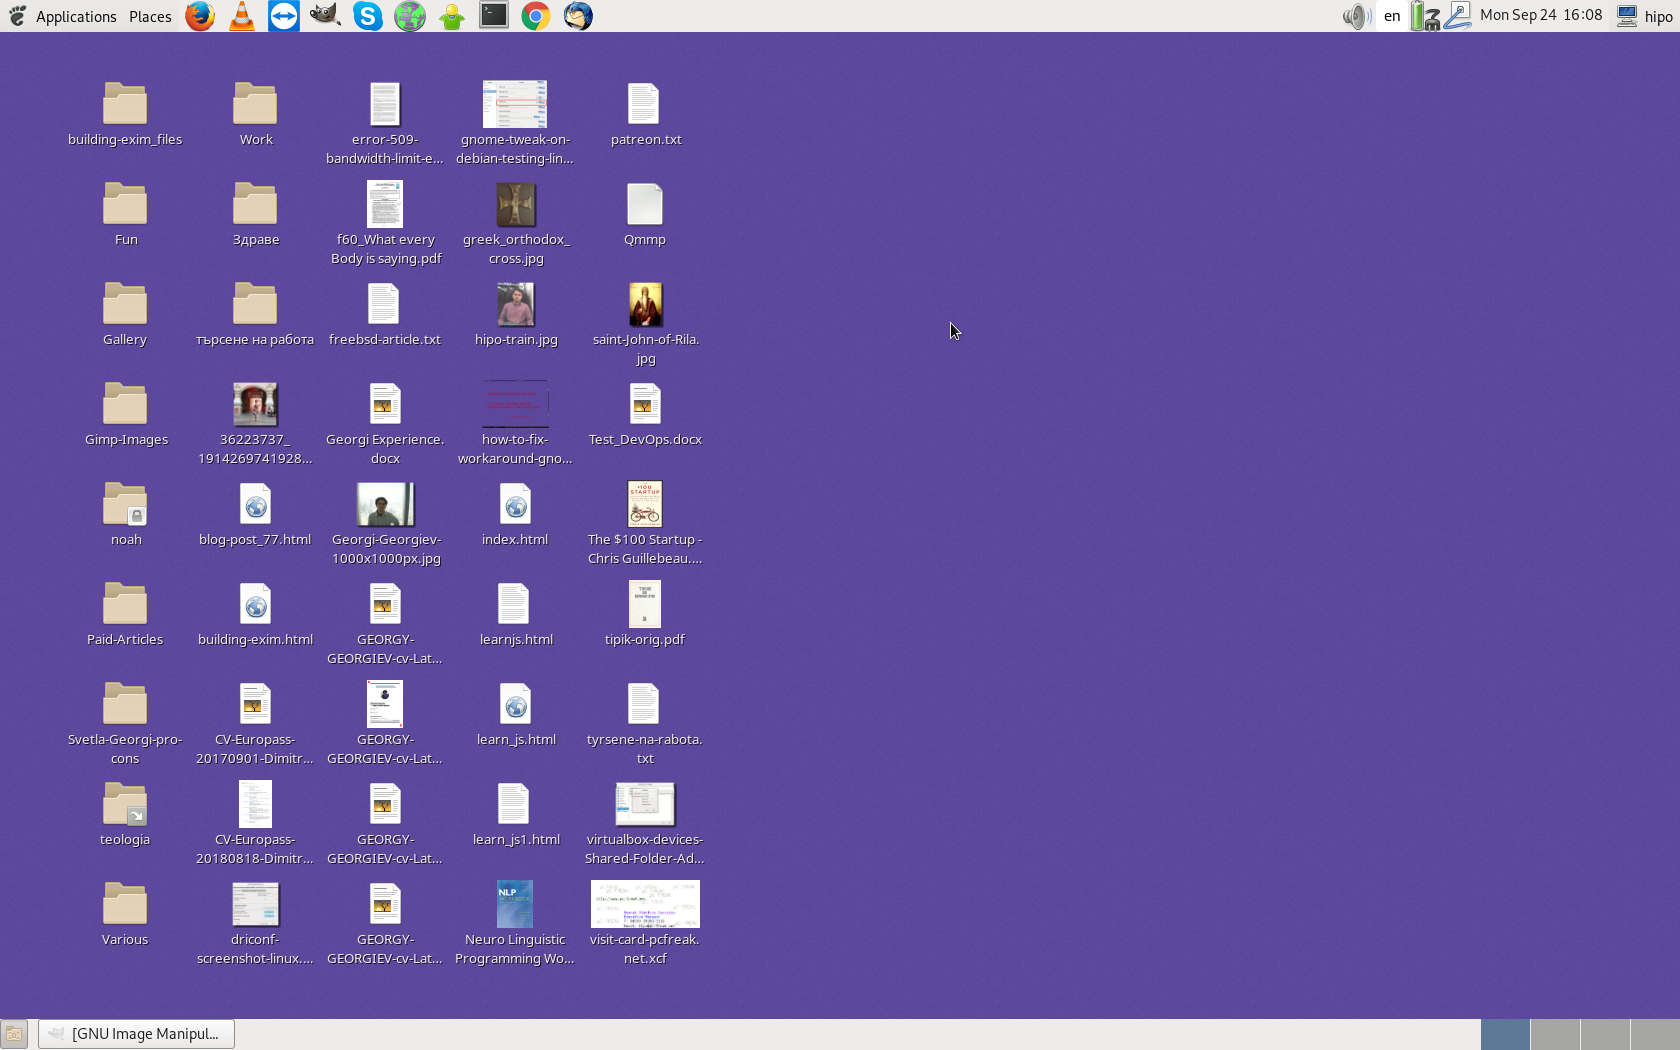
Once enabled your Desktop icons will appear as usual as seen in below shot, the downside this solutions is icons as seen in below screenshot is that pictures doesn't have Thumbnail pictures generated … and icons when kept on with mouse over can move only in a selected square like perimeter (when moved left / right / up down side). That "woody" icon movement sucks a bit but much better than no icons at all.

gnome-3.30-general-desktop-solved-missing-icons-desktop-screenshot-on-debian-linux


2. Displaying Missing Desktop icons in GNOME Flashback 3.30


I really love GNOME Flashback as it used to be a good replacement for Linux MATE (which is the fork of GNOME2 and not bad but lacks Metacity Window Manager and some of the Eye Candy that GNOME 3 and beside that even MATE had to be slightly hacked to make look more like Classical GNOME 2 – for more on that check my previous article Fixing Mate Adwaita Theme problems on Debian and Ubuntu). 

At the moment when I tried to run gnome-tweaks under a GNOME Flashback session I got the following error:


hipo@jericho:~/.local/share/gnome-shell/extensions$ gnome-tweaks 
WARNING : Shell not installed or running
Traceback (most recent call last):
  File "/usr/lib/python3/dist-packages/gtweak/app.py", line 30, in do_activate
    self.win = Window(self, model)
  File "/usr/lib/python3/dist-packages/gtweak/tweakview.py", line 38, in __init__
    self._model.load_tweaks(self)
  File "/usr/lib/python3/dist-packages/gtweak/tweakmodel.py", line 104, in load_tweaks
    mods = __import__("gtweak.tweaks", globals(), locals(), tweak_files, 0)
  File "/usr/lib/python3/dist-packages/gtweak/tweaks/tweak_group_general.py", line 14, in <module>
    _shell_not_ubuntu = _shell.mode != 'ubuntu'
AttributeError: 'NoneType' object has no attribute 'mode'


In regular GNOME session gnome-tweaks works fine and with the help of an GNOME Shell Extension addon it is possible to add the Missing Desktop icons however the only working fix for GNOME FlashBack 3.30 is to substitute nautilus (the default GNOME file manager) with NEMO (which is The Official file manager for Cinnamon Desktop Environment).
Thanksfully this is done relatively easy and all I had to do is to use a little "hack", e.g. install nemo.


root@linux:~# apt-get install –yes -qq nemo


And add a new auto-launcher for gnome that launches nemo file manager instead of nautilus.

To add the auto-launcher in GNOME I had to add a file with following content:


[Desktop Entry]
Type=Application
Name=Nemo
Comment=Start Nemo desktop at log in
Exec=nemo-desktop
OnlyShowIn=GNOME;
AutostartCondition=GSettings org.nemo.desktop show-desktop-icons
X-GNOME-AutoRestart=true
NoDisplay=true


to ~/.config/autostart/

For those who don't know GNOME has this handy way to set an autostart programs by using the specific .desktop extension files that have to be placed under $HOME/.config/autostart (where $HOME = the logged in user home directory).

The one liner to do so is:


echo '[Desktop Entry]
Type=Application
Name=Nemo
Comment=Start Nemo desktop at log in
Exec=nemo-desktop
OnlyShowIn=GNOME;
AutostartCondition=GSettings org.nemo.desktop show-desktop-icons
X-GNOME-AutoRestart=true
NoDisplay=true' >> ~/.config/autostart/nemo.desktop


Then I had to restart my GNOME FlashBack session (e.g. Log Out and Login with a new session) and the icons appeared.

classic-gnome-flashback-debian-gnu-linux-hipos-desktop-screenshot

The downside of this dirty workaround is that desktop icons even though showing up couldn't be moved (rearranged) freely on any location of desktop (are pretty much static) and the even worser  fact about this hack is you can't actually copy paste easily copy files from your Desktop within another desktop folder … 
 I know that's shitty but at the moment there is no better solution and this is better than nothing at all.


P.S. I tried downgrading my Debian Testing to Stable Stretch Linux again with the idea to use the old GNOME 3.22 that the Stable Debian distro provides but, ended up with a lot of mess after experimenting to downgrade using /etc/apt/preferences file records and substitution in /etc/apt/sources.list to include the stable .deb repository and apt dselect and aptitude package management tools. Officially downgrades are not encouraged and supported by Debian, but I hoped I could relatively easily do it by manually fixing the broken dependencies after removing debian packages manually combined with short for bash loops like I did in the past, but it seems this time I broke the system worse, so I could hardly return it back to normal operation in upgrading packages with a lot of manual hacking with apt-get and few one liner scripts. Thus I abandoned as a fix the possiiblity to downgrade Testing Debian to stable, I even considered switching from GNOME desktop environment to something more light as OpenBoxCinnamon / XFCE and gave them one more try but the results weren't nice, I reconsidered again to go back to using the Good Old GNU Step Window Maker as a GNOME alternative which in my opinion is still a great GUI environment for security crackers / sysadmins /hackers (programmers) and eventually perhaps I will switch back to using it, because GNOME is becoming more and more bloated with the years and I can hardly stand it … I mean I did not expected GNOME to be developed in the shitty Mobile Interface  (Unity) way, I have been a loyal user to GNOME for so many years and have lived trhough  all its mess over the years, its painful to see how the good and efficient GNOME 2 went the bad broken road of changing completely concepts and interface in GNOME 3.x
 

3. Closure

GNOME Desktop icons has been with GNOME users already for about 15+ years so IMHO the missing ability to add them easily through gnome tweak tool or Gnome Control Center is a absurd stupidity and killed at least 5 times out of my time to solve and the solution is far from good … I understand that in future the GNOME developers want to make GNOME as modular as possible through GNOME Shell Extensions however if you're removing such an important functionality that's for ages in most mainstream operating systems such as M$ Windows / Mac OS is an insanity. Through my quick research online I found the Missing Desktop Icons is experienced by other people on other Linux distros besides Debian I saw complains by Ubuntu / Fedora and Arch Linux users in forums and mailing lists.
What puzzles me why the reaction of such a major complained are not seriously considered by GNOME developers, especially after all the problems with transition from GNOME 2 -> GNOME 3 which already pushed a lot of GNOME users to move from GNOME to KDE / MATE  (like in Linux Mint whose GUI is based on Linux Mint). Definitely such a general issues would drive further enthusiasts from GNU / Linux and makes a great harm to the Free Software software community.
Hopefully the missing desktop icons hell will be solved in upcoming GNOME releases.

Lenovo ThinkCentre Edge as an External monitor with Debian Linux on Thinkpad T420 / How to use ThinkCentre Edge as external display on Linux

Saturday, September 22nd, 2018

thinkcentre-use-as-external-monitor-on-debian-gnu-linux-ubuntu

Here is a case I bring my Thinkpad T420 notebook to office place and there was plenty of monitors free but all were quite modern and had support only for Display Port / DVI and HDMI (High Definition Multimedia Interface), e.g. there was no Monitor to support regular VGA port …

 I've conntected my Debian 9 Stretch Linux with a DisplayPort cable to one of the LG monitors but the external monitor video screen did not raised the screen kept  black just like nothing is connected to it.

So i did a quick research online to see whether and how I can make the display port on Lenovo thinkpad t420 work with Linux after consulting few resources online e.g. Hacksr Display Port on Thinkpad T420 and Nvidia Optimus  this post in Ubuntu Forums as well as the official documentation about DisplayPort and Linux on Thinkpad's official documentation ThinkWiki it turned out the T420 Thinkpads have issues with Displayport and Linux and the only solution proposed was to use the second Nvidia Optimus card instead of the integrated display adapter, I however am not sure whether my notebook have this Nvidia at all and did not have time for too much hacking to make it work.

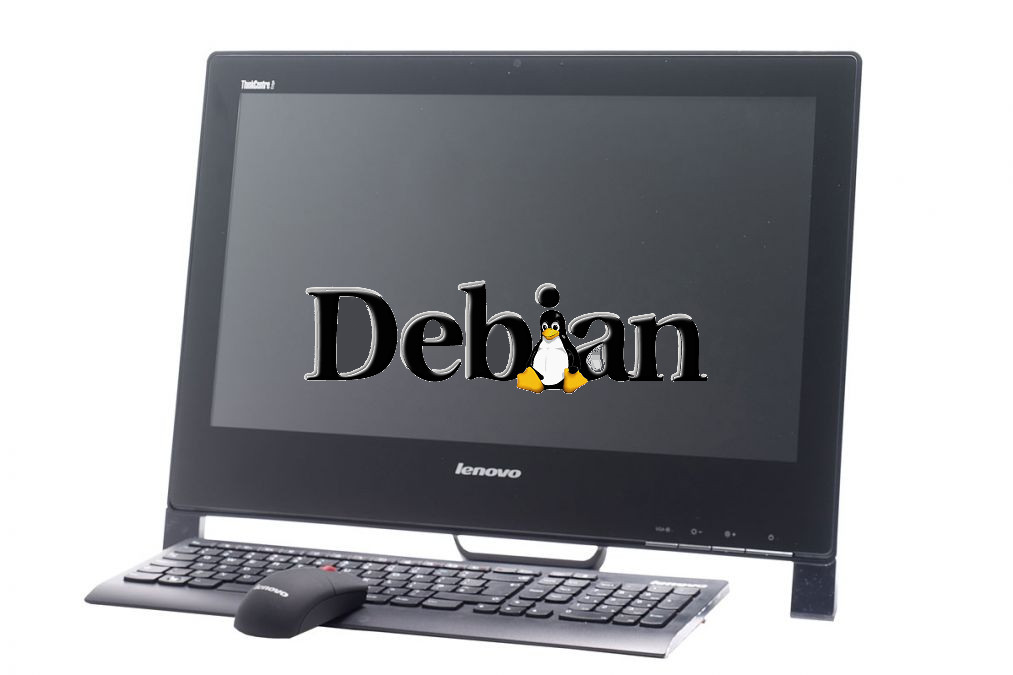
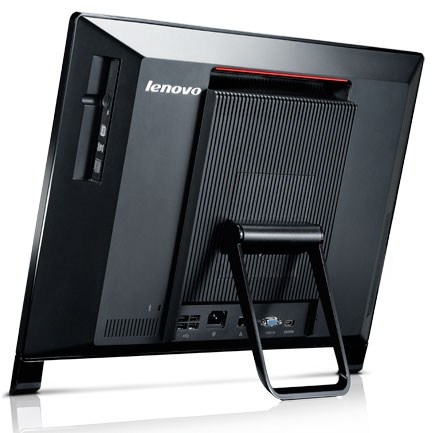
I decided to take a more simple approach and try to use the good old school VGA port protocol with one of the 2 ThinkCentre Edge  m93z stations that were hanging around in the office, in case you never heard of ThinkCentre Edge this is (an integrated computer and monitor in a thin display a kind of cheap PC alternative from Lenovo to iMacs (all in one Macintosh Desktop computer) .

ThinkCentre_Edge_computer-in-monitor-desktop-like-iMac-from_Lenovo

I saw some skeptical looks from colleagues but I with my usual stubborness gave it a try and after a bit of quick research I got it working on Linux ! 🙂
 

If you're wondering whether THINKCENTRE Edge can be used with VGA port as External Display to a Linux powered Laptop the Answer is YES  !!! 🙂


To make it working, 
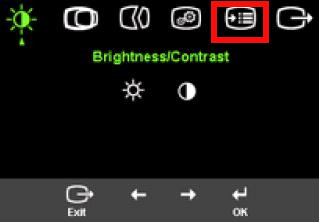
All you have to do it is configure it as External display from ThinkCentre (OSD) display menu. 

thinkcentre-menus-osd-menu-screenshot

But wait the joy was not so full, even though the ThinkCentre displayed my GNOME FlashBack background picture on its screen it did not show my actual GNOME Menus (Application, Places and Desktop) just like shown in below screenshot ..

Debian-9-1-Stretch-Linux-background-default-picture

I could see fine the ThinkCentre monitor showing normally in xrandr command which is the tool to always check first if you're new on Linux and want to check settings regarding your Notebook display settings / Desktop PC exnternal display settings on Linux , the output of  xrandr is below.
 

hipo@jericho:~$ xrandr


Screen 0: minimum 320 x 200, current 1024 x 768, maximum 4096 x 4096 LVDS1 connected 1024x768+0+0 (normal left inverted right x axis y axis) 0mm x 0mm 1920x1200 60.0 +   1600x1200 60.0   1680x1050 60.0   1280x1024 76.0 75.0 72.0 60.0   1440x900 75.0 59.9   1152x864 75.0 1024x768 60.0*+ 800x600 60.3 56.2 640x480 59.9 VGA1 connected 1024x768+0+0 (normal left inverted right x axis y axis) 519mm x 324mm 1920x1200 60.0 + 1600x1200 60.0 1680x1050 60.0 1280x1024 76.0 75.0 72.0 60.0 1440x900 75.0 59.9 1152x864 75.0 1024x768 75.1 70.1 60.0* 832x624 74.6 800x600 72.2 75.0 60.3 640x480 72.8 75.0 66.7 60.0 720x400 70.1

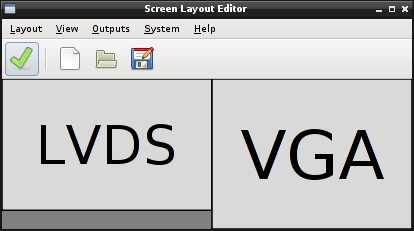
I also gave a try to arandr which is a simple GUI interface to xrandr, i.e.:
 

root@jericho:~# apt-get install –yes -qq arandr
root@jericho:~# exit
hipo@jericho:~$  arandr


arandr-debian-gnu-linux-screenshot

Unfortunately trying to turn on / off the VGA monitor shown in above screenshot using arandr and saving did not produced any positive results, as the ThinkCentre Edge used as external monitor kept being showing only my Debian Linux background.

During my attempts to make it working I stumbled upon driconf a configuration applet program for Direct Rendering Infrastructure (DRI).

driconf-screenshot-linux


I also gave a try to default gnome-control-center Monitor settings tool but I couldn't turn off the notebook display in order to make the ThinkCentre Edge my primary display.

Finally after some more investigation online, I found how to switch on my Notebook display by running below xrandr command
 

xrandr –output LVDS-1 –off


Just in case if you need to re-enable (on) the LVDS-1 use 


xrandr -d :0 –output LVDS –auto​

Run custom user script after reboot with a cronjob on Linux

Friday, September 21st, 2018

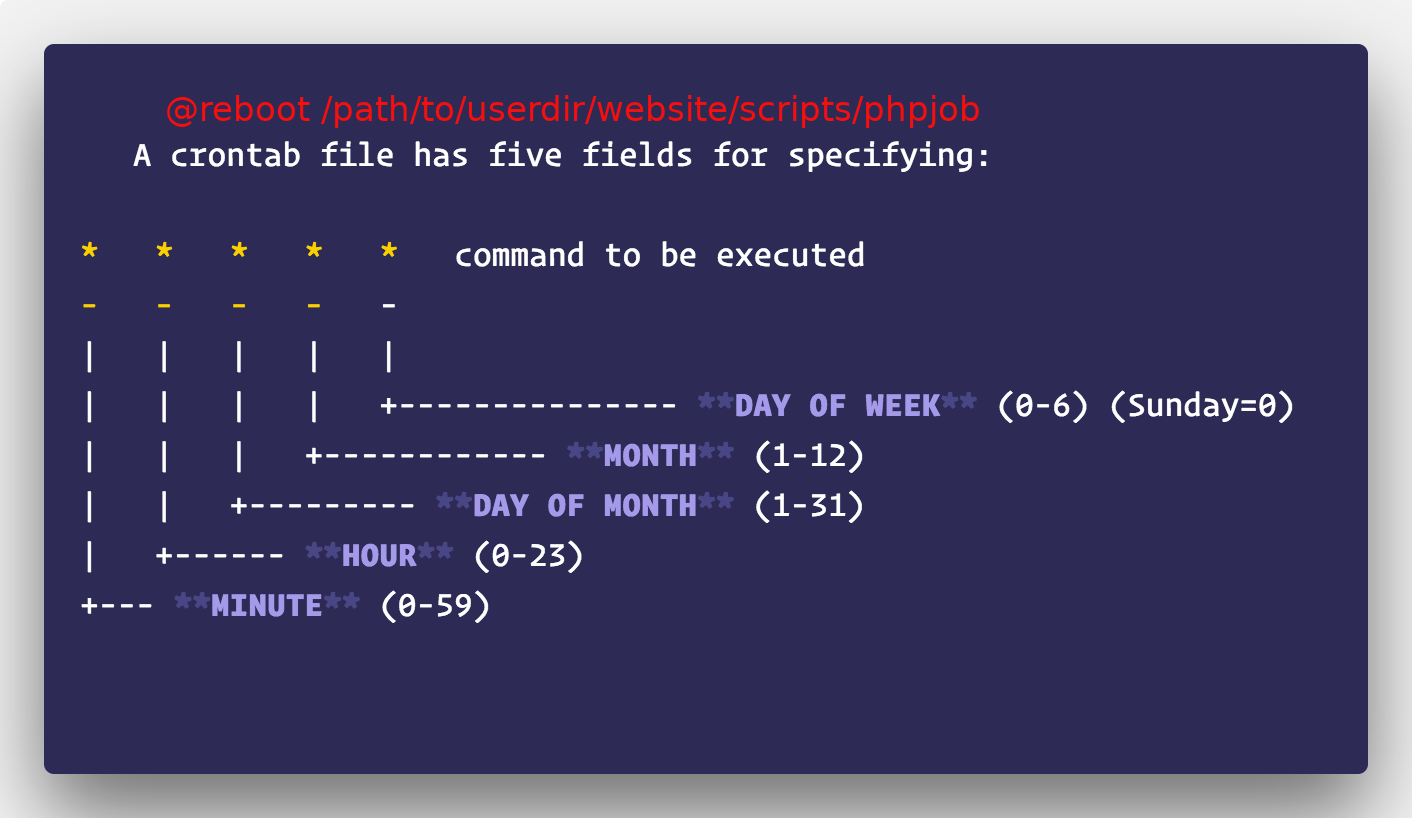
howto-add-custom-script-on-reboot-with-non-administrative-root-user-on-gnu-linux

Perhaps you have a websites on a server on some Linux distro / FreeBSD / AIX / HP-UX / Sun OS that uses Vixie-cron cron jobs to run / respawn dead php / python perl scripts etc.  that do stuff on the server every lets say 30 minutes an hour or even every 12 / 24 hours in the background.
But sometimes due to server or Linux kernel upgrades you need to reboot the server with reboot command or shutdown -r now right in the minutes the scripts were supposed to run and do a database backup / synchronize some data with a remote MySQL with replication configured or do some site maintenance job such as clearing old Messages / Spam / data log file records.

Of course one possible workaround to that is to add the non-root user scripts in question  to /etc/rc.local to run on every server boot, but that fix requires a root access and very often developers did not have that, neither sysadmins are willing to bother  add a user sudo-ed scripts e.g. add  (sudo -u whateveruser "/path/to/script") to /etc/rc.local.

Run custom user  script after reboot the cron way

Happily there is ctually a better cron way to do that by telling crond to execute a cronjob during boot and assuming the non-admin user on the Linux has access to shell and access to using cron jobs by using @reboot cron direcive.

Here is few examples on how to run a re-run cron job on start up:
 

linux:~$ crontab -e


Some editor as nano or vim will open listing all your previous set system jobs to add scripts phpjob.php

@reboot  /user/dir/path/to/phpjob
@reboot  /path/to/shell_script
@reboot  /path/to/linux-command

That's pretty shitty situation but thanksfully remote access of website username with SSH will be enough to set the right cron activity (of course this can't be made for servers that are missing crond service running.

The scripts set in cron job that way will respawn right after the OS system had booted and there will be no need for them to wait the next hour to execute configured data synch.
For more on how to run a tiny script respawn every second using a single cron job check out my previous article How to set a crontab to execute commands on a seconds time interval on GNU / Linux and FreeBSD.

Historically it is interestingly to mention that in times before systemd appeared in modern Linux distributions,
a cool thack to run a script that had to be respawned every second after boot for a privileged user was to use /etc/inittab (no longer available in most all non System V Linux distrubutions in 2018), to do so
if you happen to still administer some old Linux servers CentOS 7 etc. you and you need to add a custom script to run and respawn all the time by including a line in /etc/inittab (again assuming a System V Linux is on remote machine):
 

mysvc:235:respawn:/home/me/bin/my_service_starter_script

Putting a service to respawn in that way via inittab uses init (process) and the kernel and keeps re-running it.

Note: 

If a command fails when it starts, and init is configured to restart it, it will use a lot of system resources: init starts it, it fails, init starts it, it fails, init starts it, it fails, and so on, ad infinitum. To prevent this, init will keep track of how often it restarts a command, and if the frequency grows to high, it will delay for five minutes before restarting again.If the kernel 
Using inittab should always be tested on a testbed before adding to remote server, note that if the script is using a lot of memory and keeps crashing it can easily leave out the kernel without memory and the system is about to get errors like:
 

process respawning too fast 


Another useful thing if you have doubts that the script might be crashing is to use something like monit to monitor the script (assuming the script does provide some kind of tcp / udp connection on port) and report you via email / sms about issues with crashing script.
If you hear monit the first time I recommend you read my previous article Monitoring and restart server services (Apache, Mysql, Bind) with Monit to prevent server downtimes.

Prepare (Burn) USB drive on Linux – Install Linux USB drive instead of CD / DVD

Thursday, September 20th, 2018

prepare-burn-usb-drive-on-linux-install-linux-usb-drive-instead-of-cd

If you have a new Laptop and you planned to install a Linux any distribution OS on it but the laptop is a new hardware model and doesn't have a CD / DVD drive as most of notebook nowadays you might be wondering how to setup USB Linux bootable image, well you can simply use your favorite distro provided ISO (Debian / Ubuntu / Fedora) whatever burn it to a USB flash drive and boot from USB the Linux installer program. of course assuming ou have it configured in your UEFI BIOS.
For the task you need to Burn the respecive distribution ISO to the USB using simple command line.

To do so simply download your Linux distribution latest ISO file and issue with root in physical terminal / gnome-terminal or konsole.
 

cat debian-linux-iso-name.iso > /dev/sdb; sync


WARNING DATA DANGEROUS!!!
If you happen to keep any data on the USB flash drive, above command would wipe it out from USB drive so be sure to prepare your existing data a backup somewhere before proceeding.

Also beware to not provide the wrong /dev/sdb device to the command as you might end up wiping out your Hard Drive ( SDD ) drives or other attached external hard drives under /dev/sdb.
Thus in advance be sure to check the exact USB /dev/ name using commands such as:
 

linux:~# fdisk -l

Disk /dev/sdb: 3.8 GiB, 4007657472 bytes, 7827456 sectors
Units: sectors of 1 * 512 = 512 bytes
Sector size (logical/physical): 512 bytes / 512 bytes
I/O size (minimum/optimal): 512 bytes / 512 bytes
Disklabel type: dos
Disk identifier: 0x04030201


Device     Boot Start     End Sectors  Size Id Type
/dev/sdb1        1080 7827455 7826376  3.7G  c W95 FAT32 (LBA)


linux:~# dmesg|grep -i sdb


dmesg – output is pretty verbose so I'm skipping completely its output.


linux:~# lsusb 
Bus 002 Device 004: ID 04b3:3107 IBM Corp. ThinkPad 800dpi Optical Travel Mouse
Bus 002 Device 002: ID 8087:0024 Intel Corp. Integrated Rate Matching Hub
Bus 002 Device 001: ID 1d6b:0002 Linux Foundation 2.0 root hub
Bus 001 Device 003: ID 04f2:b221 Chicony Electronics Co., Ltd integrated camera
Bus 001 Device 014: ID 0951:1607 Kingston Technology DataTraveler 100
Bus 001 Device 002: ID 8087:0024 Intel Corp. Integrated Rate Matching Hub
Bus 001 Device 001: ID 1d6b:0002 Linux Foundation 2.0 root hub


linux:~# lsblk |grep -i /media
└─sdb1                   8:17   1   3.7G  0 part /media/hipod/KINGSTON


An alternative way is to use the good old dd tool.


linux:~# dd if=/your/path/debian-7.5.0-amd64-netinst.iso of=/dev/sdb bs=4M
sync


Its even possible to create the bootable Linux image to USB with a simple cp command instead of catting like:


linux:~# cp Fedora-Workstation-Live-x86_64-28-1.1.iso /dev/sdX
sync


Finally unmount the USB drive (if it was mounted during the command operations):

linux:~# umount /media/hipod/KINGSTON

For Windows users to burn the ISO files you can use anything starting from Nero / CDBurnerXP or if you prefer free software use
Win32DiskImager or use Rufus to create it.

Enjoy booting and installing your Linux via USB 🙂

Create user and password on Linux non interactive and add it to sudo a tiny Dev Ops script

Thursday, September 20th, 2018

Bash-Final-the-Bourne-again-shell-logo
A common task for SysAdmins who managed a multitude of servers remotely via Secure Shell was to add a user and assign password by using a script, this was sometimes necessery to set-up some system users and create access for university users on 10 / 20 testing Linux servers.

Nowadays this task of adding user to a list of remote servers and granting the new user superuser permissions through /etc/sudoers is practiced heavily by the so called Dev Ops (Just another Buziness Word for Senior System Admiistrators with good scripting skills and a little bit of development experience – same game different name.

The Dev Ops System Integration Engineers use this useful add non-interactive user via SSH in Cloud environments in order to prepare superuser (root permissioned through /etc/sudoers) user, that is later be used for lets say deployment on a few hundred of servers of lets say LAMP (Linux + Apache + MySQL + PHP) or LEMP (Linux NGINX MySQL PHP) or Software Load Balancer HAProxy  balacing for MySQL clusters / Nginx Application servers / JIRAs etc, through a Playbook script with some deployment automation tool such as Ansible.

Well enough talk here is the few lines of code which does create a user locally:
 

linux:~# apt-get install –yes sudo
linux:~# useradd devops –home /home/devops -s /bin/bash
linux:~# mkdir /home/devops
linux:~# chown -R devops:devops /home/devops
linux:~# echo 'username:testpass' | chpasswd


Though this lines could be invoked easily by passing it as arguments via ssh it is often unhandy to run them on remote host, because some of the remote hosts against executed, might have already the user existent with granted permissions for sudo

Thus a much better way to do things is use below script and first upload it to remote servers by running the scp command in a loop:

while read line; do
scp  root@$i:/root/
ssh "
create_user_noninteractive_and_add_to_sudoers.sh"
done < servers_list.txt


Where servers_list.txt contains a list of remote IPs:

#!/bin/bash
# Create new user/group and add nopasswd login to sudoers
# Author: Georgi Georgiev
# has to be run sa root – sudo devops
# hipo@www.pc-freak.net


u_id='devops';
g_id='devops';
pass='testpass';
sudoers_f='/etc/sudoers';

check_install_sudo ()  {
if [ $(dpkg –get-selections | cut -f1|grep -E ‘^sudo’) ]; then
apt-get install –yes sudo
else
        printf "Nothing to do sudo installed";
fi
}

check_install_user () {

if [ “$(sed -n “/$u_id/p” /etc/passwd|wc -l)” -eq 0 ]; then
apt-get install –yes sudo
useradd $u_id –home /home/$u_id
mkdir /home/$u_id
chown -R $u_id:$g_id /home/$u_id
echo "$u_id:$pass" | chpasswd
cp -rpf /etc/bash.bashrc /home/$u_id
if [ “$(sed -n “/$u_id/p” $sudoers_f|wc -l)” -eq “0” ]; then
echo "$u_id ALL=(ALL) NOPASSWD: ALL" >> $sudoers_f
else
        echo "$u_id existing. Exiting ..";
        exit 1;
fi

else
        echo "Will do nothing because $u_id exists";
fi

}

check_install_sudo;
check_install_user;


By the way this task was the simplest task given by a Company where I applied for a Dev Ops System Engineer, so I hope this will help someone else too.

P.S. If you prefer Shell scripts (even though much harder, time consuming etc.) as a mean of automation as an alternative to Ansible / Chef I suggest you check out and perhaps try to do the task with http://fuckingshellscripts.org 🙂