Archive for September, 2012

How to enable UserDir /home/*/public_html on Debian GNU / Linux 6.0.5 (Squeeze)

Saturday, September 22nd, 2012

Enabling mod userdir on Apache server in Debian GNU Linux Squeeze

By default UserDir module is not enabled on Debian. The original documentation related to UserDir is found on Apache’s main website here
On Debain by default the module userdir is installed in directory /usr/lib/apache2/modules/, e.g.:


debian:~# ls -al /usr/lib/apache2/modules/*userdir*
-rw-r--r-- 1 root root 9696 Apr 1 09:40 /usr/lib/apache2/modules/mod_userdir.so

It is installed as external module (not compiled in Apache) – btw something interesting for many might be to see which modules are copmiled as static modules default in Apache by issuing:


debian:~# /usr/sbin/apache2 -l
Compiled in modules:
core.c
mod_log_config.c
mod_logio.c
prefork.c
http_core.c
mod_so.c

In Debian Apache is configured to use Debian’s standard directory locations and use Debian’s config, structure and how to generally manage it, hence in order to add (load) mod_userdir to Apache it is necessery to exec a2enmod perl script:


debian:~# a2enmod userdir
Enabling module userdir.
Run '/etc/init.d/apache2 restart' to activate new configuration!

Another way, which I personally prefer is to create directly symlinks loading the module:


debian:~# ln -sf /etc/apache2/mods-available/userdir.load /etc/apache2/mods-enabled/userdir.load
debian:~# ln -sf /etc/apache2/mods-available/userdir.conf /etc/apache2/mods-enabled/userdir.conf

Next restart Apache server to load the it as suggested by a2enmod:


debian:~# /etc/init.d/apache2 restart
Restarting web server: apache2 ... waiting .

If you want to Allow /home/*users* to be able to use .htaccess, php or simply install CMS systems or alike it is good idea to also change default AllowOverride settings for public_html for that edit /etc/apache2/mods-enabled/userdir.conf and change:


AllowOverride FileInfo AuthConfig Limit Indexes
....

to:


# AllowOverride FileInfo AuthConfig Limit Indexes
AllowOverride all
...

If you do so don’t forget to once again restart apache with /etc/init.d/apache2 restart.

One more thing is to enable PHP for /home/*/public_html, to do so edit /etc/apache2/mods-enabled/php5.conf and comment out:


php_admin_value engine Off


#
#
# php_admin_value engine Off
#

#

#

Thanks to Activating userdir on Debian server blog for pointing out how to enable php for userdirs 🙂

Another alternative way to enable userdirs is to directly create symlinks for each user public_html directory but I guess this is not a best practice, anyways if you prefer to use this instead of using mod_userdir do it with:


ln -sf '/var/www/~username' /home/username/public_html
ln -sf '/var/www/~username1' /home/username1/public_html
...

If you prefer to do symbolic links to public_html for all user homes, you can do it directly in a quick for bash loop by issuing:


for i in /home/*; do
f=$(echo $i | sed -e "s#/home/##g");
ln -sf "/var/www/~$f" /home/"$f"/public_html;
done
How to change order of network cards eth0 and eth0 (swap lan cards) on Debian GNU / Linux

Friday, September 21st, 2012

Swap eth0 and eth1 lan card / how to change network card order on Debian Gnu / linux

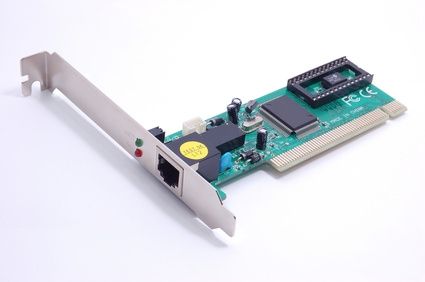
I have a Debian server with 2 network adapter cards – (eth0 and eth1). The first lan card eth0 is Mainboard embedded (integrated) one.

The hardware of the Lenovo ThinkCentre host was purchased with one LAN Card but a second one was added in order to make the machine capable of doing NAT routing with iptables.

The machine is to be configured as a router in 1st lan card eth0, an internet UTP cable should influx and the 2nd lan card is to be connected to a Network Switch and will be used to NAT network traffic from the internal network of number of hosts with assigned local IP addresses like (192.168.0.1 – 255) etc.

Everyone knows that integrated Network cards, are usually inferior to the normal non-integrated ones and besides that if a high voltage (during Weather Storm) enters through UTP cable attached to the integrated LAN Card it is quite likely the whole Mainboard to burn out …

With saying this back to my case I had to make the Internet to connect on eth0 on a Debian Linux host which was supposed to run as a Network router. As eth0 was the one where I had to configure the Internet real IP address to be assigned, I preferred eth0 to be attached to the non-integrated Ethernet Card which was automatically recognized and assigned to be eth1 by kernel.

Therefore I needed to swap interfaces eth0 and eth1, here is how this is done on Debian GNU / Linux Squeeze (6.0.5):

1. Edit /etc/udev/rules.d/70-persistent-net.rules


# vim /etc/udev/rules.d/70-persistent-net.rules

The file content should look something similar to:


# This file was automatically generated by the
/lib/udev/write_net_rules
# program, run by the persistent-net-generator.rules rules file.
#
# You can modify it, as long as you keep each rule on a single
# line, and change only the value of the NAME= key.
# PCI device 0x10ec:0x8168 (r8169)
SUBSYSTEM=="net", ACTION=="add", DRIVERS=="?*",
ATTR{address}=="90:f6:C2:3d:76:f5", ATTR{dev_id}=="0x0",
ATTR{type}=="1", KERNEL=="eth*", NAME="eth0"
# PCI device 0x10ec:0x8168 (r8169)
SUBSYSTEM=="net", ACTION=="add", DRIVERS=="?*",

ATTR{address}=="8d:89:a5:c2:e8:f8", ATTR{dev_id}=="0x0",

ATTR{type}=="1", KERNEL=="eth*", NAME="eth1"

Swap eth0 and eth1 definitions so eth0 becomes eth1 and vice versa, e.g.:


SUBSYSTEM=="net", ACTION=="add", DRIVERS=="?*",

ATTR{address}=="8d:89:a5:c2:e8:f8", ATTR{dev_id}=="0x0",

ATTR{type}=="1", KERNEL=="eth*", NAME="eth0"
SUBSYSTEM=="net", ACTION=="add", DRIVERS=="?*",
ATTR{address}=="90:f6:C2:3d:76:f5", ATTR{dev_id}=="0x0",
ATTR{type}=="1", KERNEL=="eth*", NAME="eth1"

ATTR{type}=="1", KERNEL=="eth*", NAME="eth0"

To make udevd, reassign eth0 / eth1 cards orders restart udev daemon:


# /etc/init.d/udev restart
...

or restart the system, i.e.


# restart

That should swap the Lan card order as recognized by Linux. Cheers 😉

Fixing Qmail 451 qq temporary problem (#4.3.0) / @4000000050587780174c60dc status: qmail-todo stop processing asap / status: exiting

Wednesday, September 19th, 2012

I’m in process of installing plain new Qmail mail (SMTP) server following QmailRocks updated: Thibs QmailRocks install guide for Debian 6.0 Squeeze
The install went smoothly so far and I’m already doing this installation for about 5 hours or so. I’m done with the minor install and following Thibs instructions to Implement validrcptto feature to Qmail.

Anyone who works with Qmail, should already know the lack of validrcptto tons of SPAM problems and useless Qmail load, because of QMAIL attempts to delivery to the local mail server unexisting mail boxes ….


Fixing this whole mess is implemented with the validrcptto. I myself has installed numerous times validrcptto and almost ever I ended up in some kind of mess before fixing it once and for all, this time of course (quite traditionally) the “story” repeated to piss me off for a while 🙂

After following steps literally as described on Thibs great Qmail install tutorial!, I ended up with a Qmail mail server unable to deliver properly e-mails.

To debug why mails are not properly delivered by the mail server I used telnet:


root@qmail-host:/var/qmail/control# telnet localhost 25
Trying 127.0.0.1...
Connected to localhost.
Escape character is '^]'.
220 This is Mail Pc-Freak.NET ESMTP
HELO localhost
250 This is Mail Pc-Freak.NET
MAIL FROM:<hipo@www.pc-freak.net>
250 ok
RCPT TO:<hipo@www.pc-freak.net>
250 ok
DATA
354 go ahead
asdfdsfafsd
.
451 qq temporary problem (#4.3.0)

Some time, back while configuring another Qmail fresh install, I ended up with exactly same delivery error – I’ve take time to document how I fixed this weird qq temporary issue here

As I thought one error in “normal” Software can correspondent to one cause, I red my previous post and checked closely all that was in past wrong whether I encountered the err; guess what this time it wasn’t due to non-running (missing) clamav-daemon. Still though this was not the issue, it partially pointed me to the cause (problem with qmail-scanner.pl / spamd /pyzor / razor / dcc or whatever of this overall complexity ..).

First logical think was to check in logs. In /var/log/qmail/qmail-smtpd/current everything was looking good; my log looked like so:


root@qmail-host:/# tail -n 10 /var/log/qmail/qmail-smtpd/current
@40000000505877b91ab3aba4 tcpserver: end 23727 status 0
@40000000505877b91ab3af8c tcpserver: status: 0/30
@40000000505877f6273acefc tcpserver: status: 1/30
@40000000505877f6273ba9bc tcpserver: pid 23882 from 127.0.0.1
@40000000505877f6273f8dd4 tcpserver: ok 23882 mail.www.pc-freak.net:127.0.0.1:25 localhost:127.0.0.1::46769
@40000000505877fd1a3c647c qmail-smtpd[23882]: MFCHECK pass [127.0.0.1] www.pc-freak.net
@40000000505877fd1a3c935c qmail-smtpd[23882]: MAIL FROM:
@400000005058780123ba5eb4 qmail-smtpd[23882]: RCPT TO:

@4000000050587ccd179210b4 tcpserver: end 23882 status 256
@4000000050587ccd1792149c tcpserver: status: 0/30
root@qmail-host:/# tail -n 5 /var/log/qmail/qmail-smtpd/current
@40000000505877fd1a3c647c qmail-smtpd[23882]: MFCHECK pass [127.0.0.1] www.pc-freak.net

Second guess was to check in /var/log/qmail/qmail-send/current, there found errors like:


root@qmail-host:/# tail -n 10 /var/log/qmail/qmail-send/current
@4000000050584f8e0b799194 status: local 0/10 remote 0/120
@4000000050584f8e0b79957c end msg 9610091
@4000000050584fde2f5ebf44 status: qmail-todo stop processing asap
@4000000050584fde2f5ec32c status: exiting
@4000000050584fde32d2a884 status: local 0/10 remote 0/120
@4000000050584fe8136a44ac status: qmail-todo stop processing asap
@4000000050584fe8136a4894 status: exiting
@4000000050584fe8138b884c status: local 0/10 remote 0/120
@4000000050585014232903c4 status: qmail-todo stop processing asap
@4000000050585014232907ac status: exiting
@40000000505850142363e5fc status: local 0/10 remote 0/120
@40000000505851030773efa4 status: qmail-todo stop processing asap
@40000000505851030774320c status: exiting
@400000005058510307b5f214 status: local 0/10 remote 0/120

s you can see yourself, the errors are not giving any insight on what could be the reason, so I checked in /var/log/mail.log, just to find more errors there:


Sep 18 16:22:04 qmail-host qmail-scanner-queue.pl: X-Qmail-Scanner-2.10st:[pcfreak134797452279623171]

d_m: output spotted from /usr/bin/reformime -x/var/spool/qscan/tmp/qmail-host/I134797452279623171/ (sh: /usr/bin/reformime: not found#012) - that shouldn't happen!

As the error points out, the whole issues are caused by missing binary – /usr/bin/reformime. Logically I had to install reformime, so did a quick apt-cache search reformime and saw reformime is part of maildrop deb package. I thought it is installed but after checking with:


dpkg -a |grep -i maildrop

Realized it is missing and install it:


qmail-host:/# apt-get --yes install maildrop
....

That’s all after a qmail restart, i.e.:


qmail-host:/# qmailctl restart
* Stopping qmail-smtpdssl.
* Stopping qmail-smtpd.
* Sending qmail-send SIGTERM and restarting.
* Restarting qmail-smtpd.
* Restarting qmail-smtpdssl.
* Restarting qmail-pop3d.

qq temporary error got solved and from there on qmail received and sent mails normally with validrcptto enabled. Cheers 😉

Installing Usual PHP Apache needed modules for new Debian GNU / Linux servers

Tuesday, September 18th, 2012

Almost evertime whether install a new Debian Linux server to host some websites, use the popular small and mid-sized hosting solution combination:
 

  • Apache webserver
  • PHP module to interpret the PHP programming code
  • MySQL to store the DB Backend

Installing the basis for on Debian is easy:


# apt-get install --yes apache2 apache2-mpm-prefork libapache2-mod-php \
mysql-server php5 php5-mysql mysql-client mysql-common phpmyadmin
....

This of course is in case, if necessery to run websites which are written to usephp code which is not thread safety (Use Apache child prefork technology to manage processes); For websites writen to be thread safety (not use some forking php functions like: php – exec(); fork(); etc. – I install apache2-mpm-prefork for better Webserver performance and speed.

This minimum collection of packages is good only for basic, websites and most Joomla, WordPress, Drupal or whatever custom PHP websites has to be hosted usually require much more PHP functions which are not part of this basic bundle. Hence as I said prior on almost all new Linux debian / ubuntu deb package based servers need to install following list of extra PHP deb packages:


# apt-get install --yes php-apc php-auth-ssl php-mail \
php-http php-net-smtp php-net-socket php-pear php5-cli php5-curl \
php5-gd php5-imagick php5-mapscript php5-mcrypt php5-odbc php5-sybase \
php5-xsl
...,

After installing this standard bundle of modules PHP is extended to support somenice functionalities like Image editting / convertion / resizing … various graphic editting functions as supported by infamous ImageMagick and GDlib, PEAR support (PHP Extension and Application Repository) bundle providing number of useful PHP classes.
php5-xInstalling Usual PHP Apache needed modules for new Debian GNU / Linux serverssl is usually necessery for websites which pass data in XSL format (a specific formatted XML data). php5-xsl is usually necessery for websites containing flash animationsPresentation, videos, games etc.

That is mostly it, hope this helps some sys admin like me who need configure new Debian based hosting server 🙂

Change default new created Debian users insecure (all users read) permissons to secure

Tuesday, September 11th, 2012

In older versions of Debian, the directory permnissions of /home/ directory used to be secure. As of time of writing this post in Debian GNU / Linux Squeeze (6.0.5), default permissions are set to such, that all permissions are set readable for all users. e.g.:

debian:~$ ls -al /home/test
drwxr-xr-x 3 test test 4096 Jul 24 10:51 test

This kind of permissions are probably set like this because of Apache configuration to display every user custom file content in web via /home/[users]/public_html through http://website-url.com/~test … (whatever) ~username.

This is great for machines which are supposed to be used for hosting, but for mail server or SQL Database host such permissions of new created users is quite insecure practice. Also such a /home directory settings are not good even for Webserver hosting servers, which did not display any web content via /home/ users directories.

Therefore on each new configured Debian server it is a wonderful practice to change default new created user to only readable, writable and executable by the user itself ….

To do so;

1. Edit /etc/adduser.conf

Change the variable:

DIR_MODE=755

to

DIR_MODE=700

This will not affect the permissions of current existing directories in /home/, i.e. /home/user1 , /home/user2 etc. but any new created one with adduser or useradd cmd will get permissions of 700

Here are permissions of recent created user syrma:

debian:~# useradd syrma
debian:~# ls -ld /home/syrma
drwxr-xr-x 98 syrma syrma 12288 7 ceâ—ˆ 13,56 hipo/

In /etc/adduserconf, there are plenty of other useful options, you might want to tune (depending on the type of new configured server). Few worthy to change sometimes are:

FIRST_UID=1000, LAST_UID=29999
FIRST_GID=1000, LAST_GID=29999

This two controls how the USER IDSs (UID) and GROUP IDs (GID)s will get assigned. In some cases it might be useful to assign new users from 1000 onwards.

Another helpful variable to tune for creating new users from there is DSHELL, on Linux defaulting to DSHELL=bash shell.

If there is a necessity to set a GLOBAL new created user quota, this is easily done also via adduser.conf. The file allows you to disable certain strings in username from present in new user logins, configure if new users will have their separate directory or belong to a system wide (user group – like in Slackware) and few others. I suggest anyone new to Linux who hears it for a first time check it.

It is maybe worthy to mention in present moment on Ubuntu Linux, by default /etc/adduser.conf, DIR_HOME=700 (is restrictive).
For some new users, who try to configure Apache read /home/[user_dir]/public_html. This could lead to unexplainable errors like:

[Tue Sep 11 10:20:17 2012] [crit] [client 127.0.0.1] (13) Permission denied:/home/syrma/.htaccess pcfg_openfile: unable to check htaccess file, ensure it is readable

This error is due to /home/syrma, improper permissions (Apache) server user (www-data) fails to read /home/syrma directory content and the Apache forked child exits with the respective error.log critical err.

If you get some errors like this, the fix is to just make the directory with readable and executable flag for all users:

# chmod -R 0755 /home/syrma

Adding multiple VirtualHosts hosting on fresh installed Debian GNU / Linux

Monday, September 10th, 2012

Nowdays most of my new (fresh) Linux server configurations are installed with Debian Linux.

Through the years I worked with most major GNU / Linux distributions. Though intalling Apache for multiple domain VirtualHost-ing is almost equally easier to set up on all distros I tried, (Slackware, Redhat, Fedora) etc., I found Debian to be most convenient in terms of freqeuent easy updates and general security.

Every time I configure a new host which is supposed to host a dozen of websites with Apache webserver and a DB backend, it is of course necessery to enable the server to have support multiple domain VirtualHosts.

I thought there are people out who look to configure Multiple domains on fresh installed Apache webserver and this how this short post get born.

I will explain hereby in short how I configure VirtualHosts on new Debian Linux servers with fresh installed Apache.

All required to have a working many domains hosted VirtualHosts on Debian is:

1. Have installed Apache serve package

# apt-get --yes install apache2

This would install all packages necessery for VirtualHost-ing.
After apache2 installed the system should have at least this packages present.

# dpkg -l |grep -i apache2
ii apache2-mpm-prefork 2.2.16-6+squeeze7 Apache HTTPServer - traditional non-threaded model
ii apache2-utils 2.2.16-6+squeeze7 utility programs for webservers
ii apache2.2-bin 2.2.16-6+squeeze7 Apache HTTPServer common binary files
ii apache2.2-common 2.2.16-6+squeeze7 Apache HTTPServer common files
ii libapache2-mod-php5 5.3.3-7+squeeze14 server-side, HTML-embedded scripting language (Apache 2 module)

Nowadays, having enabled mod_rewrite is necessery in almost any website, so the next thing I usually do is enable mod_rewrite webserver module.

# ln -sf /etc/apache2/mods-available/rewrite.load /etc/apache2/mods-enabled/rewrite.load
# apache2ctl -k restart

By default there is an index.html page containing the annoying phrase It Works!

I really dislike this default page and many times I start configuring a server, I wonder how to remove it; if you’re like me before doing anything other I advice you edit /var/www/index.html to change it to Coming Soon or just substitute the file with some nice looking Coming Soon page (custom page) …

Once this is done, I proceed adding as many Virtualhosts as I need with the respective Virtualhost names. To Do so on Debian, just create new Vhost config files in files /etc/apache2/sites-available/yoursite.com, /etc/apache2/sites-available/yoursite1.com etc.br />
Before creating any other VHosts, I usually edit the main webserver VirtualHost which is located in /etc/apache2/sites-available/000-default, there in the VirtualHost section normally need to add proper:

ServerName and ServerAlias variables as well as change DocumentRoot to whatever the default server host Virtualhost directory will be.

An example of 000-default Vhost config I do looks like so:

<VirtualHost *>ServerName server-main-host-name.com
ServerAlias www.server-main-host-name.com server-main-host-name.com
DocumentRoot /var/www
....
</Virtualhost>

Onwards add the same ServerName server-main-host-name.com as a new line in /etc/apache2/apache2.conf config

Now for those not too unfamiliar with VirtualHost types, it is useful to say there are two ways of VirtualHosts:

  • IP Based VirtualHost
  • and

  • Host Based VirtualHosts

IP Based VirtualHosts are added by using Apache directive syntax:

<VirtualHost 192.168.0.2:80>
ServerName ....
ServerAlias ....
</VirtualHost>

whether Host Based VirutalHosts are added by using in config file, the IP address on which the respective Vhost will reside:

<VirtualHost *>
ServerName ....
ServerAlias ....
</VirtualHost>

Host Based VirtualHosts directive syntax can be either in form:

a)Virtualhost *
or
b) Virtualhost port_number (Virtualhost 80, VirtualHost 90) etc.

If a host is configured with directive <VirtualHost *>, this means it will listen for incoming connections on any port Apache is configured to listen on, whether if used with a concrete port number it will only enable VirtualHosts for whole Apache server on the concrete port.

Based on the configuration, VirtualHost 80 or Virtualhost *, the variable which will enable globally on the Apache server multiple VirtualHosts has to be modified e.g.:
Whether VirtualHost with port number is configured <VirtualHost 80>, NameVirtualHost 80 should be used or otherwise NameVirtualHost *

Once you choose the type of Virtualhost-ing, just continue on adding the VirtualHosts …
In the first created VirtualHost config file, let’s say /etc/apache2/sites-available/first-virtualhost.com

NameVirtualHost * has to be added as first line in file; in other words the file content should look similar to:

NameVirtualHost *
<VirtualHost*>
ServerAdmin hipo_aT_www.pc-freak.net AddDefaultCharset UTF-8 DocumentRoot /var/www/ ServerName www.pc-freak.net ServerAlias www.pc-freak.net....
</VirtualHost>

The same steps has to go for all domain names in separate files except the variable NameVirtualHost * should not be added in the rest of new created Vhosts.

Many of the new configured Debian + Apache servers does not require support for SSL, therefore where SSL support is not necessery I prefer disabling it.
To do so it is necessery to comment out everything dealing with Secure Socket Layer in /etc/apache2/ports.conf, as of time of writting lines to comment are:

<IfModule mod_ssl.c>
# If you add NameVirtualHost *:443 here, you will also have to change
# the VirtualHost statement in /etc/apache2/sites-available/default-ssl
# to <VirtualHost *:443>
# Server Name Indication for SSL named virtual hosts is currently not
# supported by MSIE on Windows XP.
Listen 443
</IfModule>
<IfModule mod_gnutls.c>
Listen 443
</IfModule>

Why and how to fix when Debian Linux detects and shows only 3GB of memory even though 4 or more are present

Saturday, September 8th, 2012

I was quite shocked to find out free -m was showing 3GB of memory on a brand new purchased Lenovo ThinkCentre Edge71 (according to guarantee paper with 4GB). I got angry seeing this, I paid 350 EUR for a Desktop host and suddenly, there is one giga less …

Since I was not sure if by mistake someome shipped the system with 1 Gigabyte or there is something wrong with Linux unable to detect the whole amount of memory I entered BIOS (on Lenovo ThinkCentre Edge series – to enter BIOS press F1.

Interestingly in BIOS, I can see 4 GigaBytes of memory are present, well this was puzzling … :

Lenovo ThinkCentre Edge71 esktop PC BIOS picture

Still free -m show me 3GB:

# free -m
total used free shared buffers cached
Mem: 2989 186 2803 0 4 76

-/+ buffers/cache: 105 2884
Swap: 5651 0 5651

I checked also in top and htop, hoping maybe there 4 Gigas will show up but nope there also the whole amount of system memory was identified as 2989 MB.

I thought for a while and my first thought was probably, the memory is not detected because there might be integrated Videocard configured to use 1 GB of RAM. So next logical thing to do was check in BIOS, what kind of settings are set for the Video adapter.

possible settings for Video Setup menu are:

IGD,
PEG,
or AUTO

PEG stands for (PCI-e Graphics Device
– IDG is abbreviaton from (Internal Graphics Device)
I give a try to all of them, but I didn’t see any change in amount of detected memory. Debian Squeeze Linux 6.0.5 was always detecting 2989 max memory. I also tried also changing the amount of IGD Pre-allocated Memory Size from 128M to 32MB as well as decreasing the amount of Total Graphics Memory to 128MB. Unfortunately doing all kind of changes didn’t influenced the amount of detected memory by Linux kernel …

To make sure the 3GB detected memory is not because of some Debian Squeeze GNU / Linux bug I tried using a PuppyLinux 4.2.1 LiveCD just to see PuppyLinux was also detecting with 1 GIGA less…

Onwards after a quick research online I red people are experiencing similar problems on Linux, whether a 32 Bit kernel is used on 64 bit machines.
Weirdly it seems 32 Bit Linux kernels (even the new ones) are having troubles detecting more than 3GB of memory, but there is a need for some kind of bigmem supporting kernel .
Here is the exact Linux kernel version making the troubles:

# uname -a;Linux pcfreak 2.6.32-5-686 #1 SMP Sun May 6 04:01:19 UTC 2012 i686 GNU/Linux

Until checking the kernel release, I didn’t realized in the hurry installed a 32 bit version of Debian on the 64 bit machine so to fix up the situation installed 64 bit version kernel;

# apt-get install --yes linux-image-2.6.32-5-amd64

And Hooray! After restarting and booting with the new 64 bit (amd64) kernel, the missing 1 Gigabyte of memory started being detected:

# uname -a;
Linux pcfreak 2.6.32-5-amd64 #1 SMP Sun May 6 05:12:07 UTC 2012 x86_64 GNU/Linux
# free -m
total used free shared buffers cached
Mem: 3913 261 3651 0 4 71
-/+ buffers/cache: 186 3727
Swap: 5651 0 5651

Seeing system boot up fine with the amd64 bit kernel, I removed the old 32 bit kernel, e.g.:

# apt-get --yes remove linux-image-2.6.32-5-686

Well that’s all folks 🙂

Fixing MySQL server start up “ERROR 1045 (28000): Access denied for user ‘debian-sys-maint’@’localhost’ (using password: YES)”

Friday, September 7th, 2012

I'm still busy configuring the new Lenovo (Le-novo) 🙂 ThinkCenter server necessery for migration of old machines. I've done a lot yesterday but really moving all this stuff takes time …

I moved the SQL databases from the old MySQL server host to the new Debian Linux host.

In order to move databsaes, I did the usual SQL dump from current working host with:

mysql:~# mysqldump --opt --allow-keywords --add-drop-table --all-databases -u root > dump.sql

After that did the standard move of dump.sql to the new host with sftp

mysql-new:~# sftp root@mysql-host
Connected to mysql-host.
sftp> get dump.sql
....
sftp> exit

and imported dump:

mysql-new:~# mysql -u root -p < dump.sql
Enter password:

Databases dump grow really a lot (7GB)!, so I had to wait for dump.sql to import about 20 minutes – (the host configuration is Dual core 6Ghz 3MB Cache CPU, 4GB DDR3 RAM, 7200 500 GB Hitachi ExcelStor Techno V32O HDD).

The dumps migration was between identical release Debian Linux – (Squeeze 6.0.5) servers running identical versions of MySQL.

mysql-new:~# mysql --version
mysql Ver 14.14 Distrib 5.1.63, for debian-linux-gnu (i486) using readline 6.1

Because of that the whole db import worked like a charm.

Once moved the SQL started re-started normally but there was an on screen warning:

ERROR 1045 (28000): Access denied for user
'debian-sys-maint'@'localhost' (using password: YES)"

The cause of this warning error is because of way /etc/init.d/mysql script is written and in particular the custom MySQL (Debian specific start-up philosophy).

/etc/init.d/mysql is written in a way that on every restart a check of Database consistency is done. There in the script the user debian-sys-maint (a user with mysql administrator root privileges) is used to do the quick consistency check. The debian-sys-maint password which is used on start-up is stored in /etc/mysql/debian.cnf:

mysql-new:~# less /etc/mysql/debian.cnf
# Automatically generated for Debian scripts. DO NOT TOUCH!
[client]
host = localhost
user = debian-sys-maint
password = pQFM9RetOHFjewwn
socket = /var/run/mysqld/mysqld.sock
[mysql_upgrade]
host = localhost
user = debian-sys-maint
password = pQFM9RetOHFjewwn
socket = /var/run/mysqld/mysqld.sock
basedir = /usr

The whole problem is that during, the old SQL import the password set for user debian-sys-maint is different and once SQL starts the init script reads this pass and fails to login to SQL server.

The warning (error):

ERROR 1045 (28000): Access denied for user
'debian-sys-maint'@'localhost' (using password: YES)
hence appears on every SQL start (including on every system boot). The err is generally harmless and SQL seems to work fine with or without it. However since the consistency check is not done at start up, if there are some CORRUPT tables not initiating the start up check is not a good idea.

There are two options to get rid of the warning one and better one is to check in /etc/mysql/debian.cnf for password string and change the pwd with mysql cli e.g.:

new-mysql:~# grep -i pass /etc/mysql/debian.cnf | uniq
password = pQFM9RetOHFjewwn

GRANT SELECT on `mysql`.`user` to 'debian-sys-maint'@'localhost' identified by 'pQFM9RetOHFjewwn';
Query OK, 1 row affected (0.01 sec)
GRANT SELECT ON mysql.user TO 'debian-sys-main'@'localhost';Query OK, 0 rows affected (0.00 sec)
mysql> flush privileges;
Query OK, 0 rows affected (0.00 sec)

Second option (not recommended in terms of security) is to set user/pass to root values in /etc/mysql/debian.cnf.

That's all. N-joy 🙂

Finding nearest package software repository in Debian GNU / Linux

Thursday, September 6th, 2012

finding debian Ubuntu package repository icon

I’m about to chage the good old computeres until this very moment this blog and few other website were running on. Right now, I’m installing the brand new machine Lenovo ThinkCentre Edge great and hopefully powerful enough machine to take care for the periodic occuring high traffic loads which break up webserver or SQL server. Well anyways, I just installed latest Debian GNU / Linux on this brand new piece of iron. During install I couldn’t connect the PC to network so Debian install was unable to determine, the nearest Debian package repository, hence after completing install and anually configuring Debian network . Because during install the system had no connection with the Internet, no proper package repository definitions were present in /etc/apt/sources.list, hence I had to find the nearest package software repository. Normally one can check in Debian official WorldWide Mirror sites full address list and determine by some rationalization with ping or / and a manual package download which repo is quickest. There is thanksfully a better automated way one can determine the closest deb Debian / Ubuntu located repository with netselect-apt.

Here is apt-cache description:

debian:~# apt-cache search netselect-apt
netselect-apt - speed tester for choosing a fast Debian mirror

Using the tool is trivial, just install, run it and it does all 4 u 🙂

1. Install netselect-apt

debian:~# apt-get install --yes netselect-apt

2. Run it

debian:~# netselect-apt
....
130/debian/); keeping only under first name.
netselect: 2 (2 active) nameserver request(s)...

Duplicate address 200.236.31.3 (http://debian.c3sl.ufpr.br/debian/, http://ftp.br.debian.org/debian/); keeping only under first name.
netselect: 1 (1 active) nameserver request(s)...
Running netselect to choose 1 out of 383 addresses.
.............................................
The fastest server seems to be:
http://debian.telecoms.bg/debian/

Writing sources.list.
sources.list exists, moving to sources.list.1346964774
Done.

As you can see from output, the tool finds the quickest download deb repository and generate /etc/apt/sources.list file in current directory, where it is run in, in this exact case it creates it in root user home dir – e.g. in /root/ directory. Once the repo address is found you can copy paste it with some text editor to /etc/apt/sources.list or move it over /etc/apt/sources.list;

debian:~# cp -rpf /etc/apt/sources.list /etc/apt/sources.list.$(date +%d_%m_%Y|sed -e 's/^ *//')
debian:~# mv /root/sources.list /etc/apt/sources.list

Just in case as I always make first copy of original sources.list, this is not necessery but IMHO a generally good sysadmin habit 🙂

Besides netselect-apt, which automatically choose between all available list of software repo servers, there is also netselect tool. netselect does basically the same the only difference is one has to manually pass by as arguments deb package repositories and the tool then does tests and returns which is the overall quickest deb download source.

netselect is definitely useful if you have started few own mirror of repositories and want to determine which is the best among them.

Here is how netselect is used:

# netselect -vv ftp.fceia.unr.edu.ar ftp.kulnet.kuleuven.ac.be \
ftp.cdrom.com ftp.debian.org ftp.de.debian.org
ftp.fceia.unr.edu.ar 2792 ms 23 hops 100% ok ( 1/ 1) [ 9213]
ftp.kulnet.kuleuven.ac.be 9999 ms 30 hops 0% ok
ftp.cdrom.com 94 ms 8 hops 100% ok (10/10) [ 169]
ftp.debian.org 46 ms 15 hops 100% ok (10/10) [ 115]
ftp.de.debian.org 9999 ms 30 hops 0% ok

According to above output, the “best reachable” (quickest) repository is the one to which are the least miliseconds – ftp.debian.org

Thanks to- https://www.wzdftpd.net/blog/index.php? -for the nice Debian package box picture – all copyrights belong to respective authors and licensing.
Cheers ! 🙂

How to install new fonts (system wide) in Microsoft Windows XP / Vista / 7

Saturday, September 1st, 2012

If you have to do it on a PC with 3 Windows existing directories on C drive for instance (Windows, Windows, Windows3) it is good idea to first find out which is the exact directory from whom present working reads fonts.

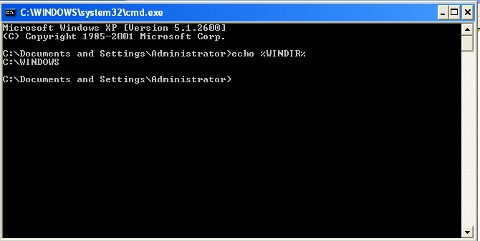
To check %WINDIR% in Command Prompt (Start -> Run -> cmd.exe) type:

echo %WINDIR%

Check real windows directory location %WINDIR% screenshot

Next open Windows Explorer and copy all files to wherever %WINPATH%\fontsis located. During copying Windows will automatically invoke some font installer program and show tiny progress dialog like in down screenshot:

Windows XP install new fonts in Windows\fonts progress dialog

Afterwards fonts load system wide and appear in MS Windows Word and others installed programs with no need of PC restart 🙂