![]()
Most of Linux / BSD user have probably used screen to detach processes to keep running interactive programs in the background.
If you're new to Linux and you haven't heard of or used SCREEN. This is a good time to learn about it, screen is – virtual terminal emulator (manager) with VT100/ANSI terminal emulation support.
I will not enter into details of screen use as this is not the accent of this little article, however if you haven't tried screen yet, give it a try. For more info on screen, check the man; man screen
Sometimes, its necessery to run screen after a change of user identity with su command, for the sake of doing some kind of routing administration, task or for putting screen in use through a simple, admin shell script; for instance:
server:~# su - hipo

hipo@server:~$ screen 'mc'

Cannot open your terminal '/dev/pts/0' - please check.
You see screen is unable to detach Midnight Commander (Interactive Virtual Shell program)
But instead, errs and exits with:
Cannot open your terminal '/dev/pts/0' – please check.
The error is quite explanatory, screen is unable to background mc due to inability to read /dev/pts/0
Checking /dev/pts/0 (virtual memory) located file, permissions shows:
hipo@server:~$ ls -al /dev/pts/0

crw--w---- 1 root tty 136, 0 2012-03-21 05:21 /dev/pts/0
Reviewing the permissions, shows /dev/pts/0 is owned by user (root) and belongs to group (tty).
For my user hipo I have no permissions to read or write into the file – (The file is not readable to any user except root and users who belong to the group tty).
To work around the error, its obvious my user needs to be granted permissions to be able to at least read /dev/pts/0 file, because screen needs to read my user /dev/pts/x tty login file.
hipo@server:~$ exit

server:~# chmod a+rw /dev/pts/0

server:~# su hipo -

hipo@server:~$ screen mc
This would give read/write permissions for my specific /dev/pts/0, however, if you don't know your exact /dev/pts/, better use the tty command:
hipo@server:~$ exit

server:~# chmod a+rw $(tty)

server:~# su hipo -c 'screen mc'
All tty command does is to return the current logged in user physical or virtual tty file.
/dev/pts/0 file is re-created dynamicly on each physical console tty or remote ssh user login and is calculated on the system in accordance with the number of logged in users. On Linux, different users gets assigned different ttys while a new interactive shell login is initiated.
If for instance on the server, there are 3 users logged in via
Based on the logged in tty, the error above screen produces could vary according to the user tty, for exmpl.:
Cannot open your terminal '/dev/pts/0' - please check.

Cannot open your terminal '/dev/pts/1' - please check.

Cannot open your terminal '/dev/pts/2' - please check.
etcetera, etcetera …
There are at least, two ways to get around the unreadable /dev/pts/0 file screen problem:
1. Add the user that will be issuing screen, after a su in /etc/group to the tty group:
To do so, open /etc/group and find the line:
tty:x:5:
in the end of the line add the username to be included in the tty group. For instance to add my user hipo, I have to modify the file like so:
tty:x:5:hipo
N. B.!!! Be sure, that the user that is added in tty group is really trusted and secured well! Being added to the tty group, the user has access to read all the logging in virtual and physical users on the system. He can even forward messages on each of the users ttys with simple echo command. If the user added to tty group is not trusted and (preferrably used only by the system administrator), he might flood other logged in users shell with junk messages, or any unwanted text with simply:
hipo@server:~$ echo -e 'Annoying messsage\n bla bla \n etc.' >> /dev/pts/0
Like in my case if I'm still logged in as root on /dev/pts/0 and my hipo user is issuing this commands, the messages will appear on my root shell prompt, like so:
server:~# Annoying messsage

bla bla

etc.
2. Change the permissions of /dev/pts/0 with chmod
This method, I've already earlier explained, just make all users to read/write the tty …
server:~# chmod a+rw $(tty)

server:~# su hipo

hipo@server:~$ screen 'mc'
Onwards press ctrl+A+D to detach the screen and consequently be sure to revert back the /dev/tty/0 permissions to be only readable for root:tty
hipo@server:~$ exit

server:~# chmod 0720 $(tty)
Bear in mind, that playing with the /dev/tty/x file permissions imposes a serious security risk, doing stuff like this should only be done as a last resort.
3. Solving Cannot open your terminal '/dev/pts/0' – please check to run scripts in SCREEN on server boot
A very classical situation, you might encounter:
Cannot open your terminal '/dev/pts/0' – please check is if you have a requirement to detach a script which needs some interactivity with screen.
Lets say for instance, you have a php, perl or bash which is written to require being run in interactive shell session. Then screen comes at play. The normal way one would do it, is to put:
# screen /path/to/script.pl; screen /path/to/php_script.php
/etc/rc.local, before the file exit 0 command.
This works fine, if the script is intended to run as root, but most of the scripts are intended to run through a su-ed user, like for example, lets say you have a PHP script which is supposed to run on a Debian, with Apache's default user, group permissions www-data:www-data
You might think of putting in /etr/rc.local a record like:
su - www-data -c "cd /path/to; screen '/path/to/script.sh"
This will not work, however cause of the su. To work around this you have two options:
a. Use a tiny "hack"
tty=$(tty); chmod a+rw $tty; su www-data -c 'cd /path/to; screen script.sh'; chmod 0720 $tty;
This one-liner will detach script.sh so it continues its interactive stuff in a screen and then revert back the permissions to /dev/tty*
so this doesn't later pose a security issue.
In order to connect to the detached screen, do again:
server:~# su www-data -

$ screen -r

Cannot open your terminal '/dev/pts/1' - please check.

$ exit

server:~# chmod a+rw /dev/pts/1; su - www-data

$ screen -r
Don't forget to:
# chmod 07200 /dev/pts/1
after the screen session is deteached 🙂
b. Using screen -d -m
su - www-data -c "screen -d -m 'screen.sh'"
Talking about screen all the way, I have to say the default screen view in Debian is not too much interactive. If you want to beautify, how screen will appear and add some colors use this nice screenrc . To use it with screen take it and put it in your user home to which it should apply.
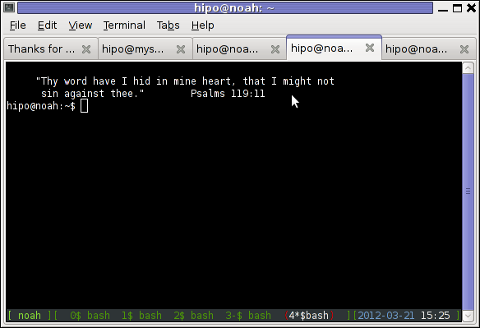
The screenrc was taken was taken from an article, I've red on Redhat Magazine.
Onether beatifying screen behaviour .screenrc file which makes screen be in blue and red is here
By the way, just few months ago, I've found for another great program that is a virtual terminal emulator, like screen but it appears to be way more advanced. The screen alternative program is called byobu, you can check byobu official site here
byobu is available as a deb package and installable from default Debian latest stable repositories, so you can check it by a quick:
# apt-get --yes install byobu
Here is a screenshot of running byobu virtual manage:
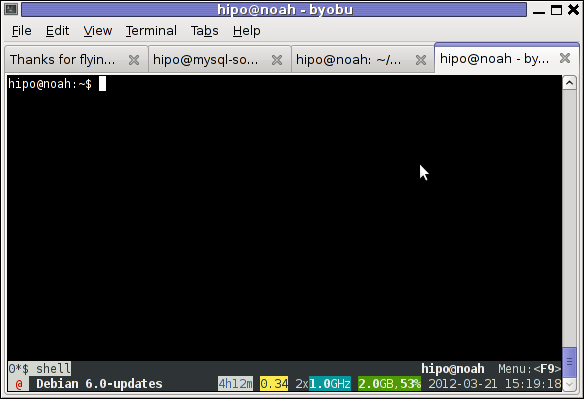
Note that, before you run byobu, make sure you don't have ~/.screenrc (laying in your home directory), otherwise byobu appearance will be exactly like screen.
Hope this helps someone, i will be happy to hear if there are better way to work around the "screen on start-up issue."?