Archive for April 29th, 2010

Nessus 2.2.10 “scan stops incomplete with remote host is dead message” on Debian Sid / How to resolve the Nessus not scanning issues on Debian Sid(Testing/unstable)

Thursday, April 29th, 2010

I haven’t used my nessus installation which seemed to be hanging around since more than a year.
I have no memory which exactly was the last case I used Nessus in order to conduct some automated generalSecurity testing of Linux and Windows servers. However when I launched the nessus client and logged in to the Nessusd server and attempted to scan a host,I experienced an issue, whether scan was terminated in just about 3 seconds time.
I checked nessusd’s log file /var/log/nessus/nessusd.messages and found messages claiming,some file nessus plugin rules file dependencies were missing. The whole list of the file dependencieswhich caused my nessusd misbehaving you can read in nessusd.messages
In order to check this issues I had to select the tick Enable Dependencies at runtime in my Nessus Plugins tab

This solved the dependencies issues, however the nessus scanner was completing it’s scan in just a few seconds once again.
This time checking the nessus log file doesn’t provided me with any meaningful information on what could be causing Nessusrefusals to scan the node’s security.

A search in Google pointed me to the following forum which suggested a solution to the problems with nessus misbehaves.

The solution is really simple, somehow the whole scanning issues are caused by two Ticks in Nessus client program interface:
To solve the issues go to Nessus Client in Prefs. tab and uncheck the Do a TCP ping and Do an ICMP ping that will solve the issue for you.

Anyways before I can proceed to that firstIt was necessery for me to add a new user to it and start the nessus service.
Here is how I achieved that:

root@noah:~# nessus-adduser Now you will have to answer to a few questions:

Add a new nessusd user
----------------------

Login : baklava
Authentication (pass/cert) [pass] :
Login password :
Login password (again) :

User rules
———-nessusd has a rules system which allows you to restrict the hosts
that baklava has the right to test. For instance, you may want
him to be able to scan his own host only.

Please see the nessus-adduser(8) man page for the rules syntax
.
Enter the rules for this user, and hit ctrl-D once you are done :
(the user can have an empty rules set)

Login : baklava
Password : ***********
DN :
Rules :

Is that ok ? (y/n) [y]

All you need to fill from the above fill in fields is is the Login and Login Password
After you have filled that you have to press ctrl-D as the text instructs you.
On the “Is that ok field” just answer y and continue to bringing up the Nessus Network server.
Before you bring up the nessus daemon listening for connections from the nessus client, you’ll have to provide the serverwith a well configured nessusd.conf
I decided to share with you my nessusd.conf file in order to make your file a bit easier on that.
Download the copy of nessusd.conf here and place it in:
/etc/nessusd/ directory on your Linux system.
root@noah:~# /etc/init.d/nessusd start

Now I simply launched the nessus client program and started the scan. Thanksfully now Nessus worked like a charm ! 🙂
Opening DICOM File Format images in Debian Testing/Unstable with MRICRON

Thursday, April 29th, 2010

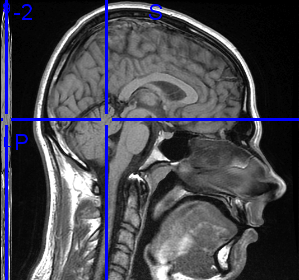
RMI scan of hip0 brain

Digital Imaging and Communications in Medicine is a well established standard for handling storing, printing and transmitting information in medical imaging.
I’ve recently been through a RMI Scan

The image in the beginning of the blog post is actually the RMI scan of my brain :)!

The Doctors which took participation in the Magnetic Resonance Examination gave me a whole CD with pictures of my brain in the DICOM file format. Though the CD I was provided with included a Windows version of a program called Dicom Viewer I didn’t have a way to open the DICOM file format on my Debian Linux

A quick research in Google indicated that happily the DICOM file format is able to be opened also in GNU/Linux

There are few options if you’d like to open the file format on Linux.

The easiest one seemed through the KDE’s Kradview DICOM opening application. Kradview is quite simple, it is created for just one purpose opening DICOM file format on Linux, nothing more or less. So don’t expect too much!
Kradview didn’t have a precompiled package for the Debian Linux distrubution, that’s why if you indend to use this software on Debian Linux you’ll have to compile it from source as explained on Kradview’s website Install instructions

I am naturally a Gnome user and therefore Kradview was not something that fits my Gnome taste. Trying to compile it on my gnome ended with the nasty compile time error:

checking for Qt... configure: error: Qt (>= Qt 3.0) (headers and libraries) not found. Please check your installation!For more details about this problem, look at the end of config.log. Definitely not cool, thefore I was forced to look for some alternatives to Kradview which will either be easily compiled and installed from source on Debian or even better will be prepackaged in the debian’s deb file format.

A quick search led me to the Debian’s Neuro Science Repository!

Debian Neuro Science Repository Logo

Truly I never suspected Debian is SO BIG! This guys even have a separate repository for neuro science, that’s wild seriously!

Quick look through Debia’s neuro science repository led me to a nifty software called MRICron

Mricron Logo

MRICron is a package which includes few gui based executables which are capable of:
magnetic resonance image conversion, viewing and analysis quite cool!
There was even a package for sid which good suited me since my Desktop is running on top of Debian Testing Unstable.

I used the Following repository link to download the Debian Sid testing/unstable MRICron package

I’m running a 64 bit debian (amd64) therefore I needed to download and install the 64 bit release of MRICron.
Here is how I did it:

hipo@noah:~# wget http://neuro.debian.net/debian/pool/main/m/mricron/mricron-data_0.20100422.1~dfsg.1-1~sid.nd1_all.deb
hipo@noah:~# wget http://neuro.debian.net/debian/pool/main/m/mricron/mricron_0.20100422.1~dfsg.1-1~sid.nd1_amd64.deb

Then I used Debian’s dpkg to install the packages, as you can see down:

hipo@noah:~# dpkg -i mricron-data_0.20100422.1~dfsg.1-1~sid.nd1_all.deb
hipo@noah:~# dpkg -i mricron_0.20100422.1~dfsg.1-1~sid.nd1_amd64.deb

I was lucky that I had all the dependcy packages required by mricron-data and the mricron debian sid packages. And the two ones installed “in a blink of an eye without no further issues”.

As I already had the mricron installed I had to invoke from command line the:

hipo@noah:~# /usr/bin/dcm2niigui

I used the dcm2niigui selecting the DICOM medical imaging data files to convert them to the Nifty file format (*.nii)

Next I used the hipoa@noah:~# /usr/bin/mricron

to open the converted DICOM format files to the Nifty Format.I won’t sink into details about how to use the two forementioned problems since their user interface is quite self-explanatory.
The results from the RMI scan examinations prooved my fears that I could be suffering a severe brian damage completely groundless.

Praise the Lord for that!
In another post I’ll sink into details on what kind of thought tortures I’ve been through before the RMI examination showed I don’t have problems with my brian.
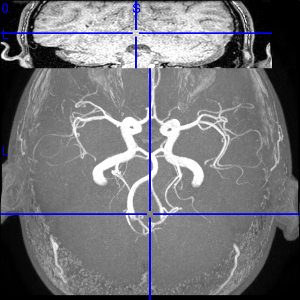
Here is one more wondeful looking picture from above taken by the RMI machine during the RMI examinations.
RMI hip0 Brain from Above

I’m really happy that Linux is developing day by day and that I could see the DICOM pictures of my brain even on a free software platform as Linux is!