3.9 Post-Installation
Configuration of various options follows a successful installation of FreeBSD. An option can be configured by re-entering the configuration options from the final menu before booting into the newly installed FreeBSD system.
3.9.1 Setting the root Password
The root password must be set. Note that while entering the password, the characters being typed are not displayed on the screen. After the password has been entered, it must be entered again. This helps prevent typing errors.
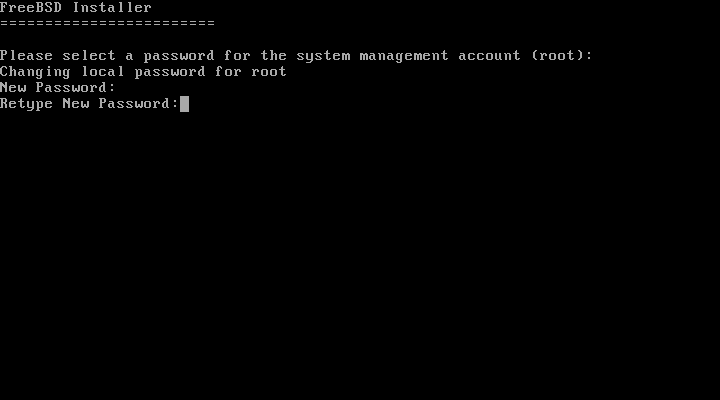
After the password has been successfully entered, the installation will continue.
3.9.2 Configuring Network Interfaces
Note: Network configuration will be skipped if it has already been done as part of a bootonly installation.
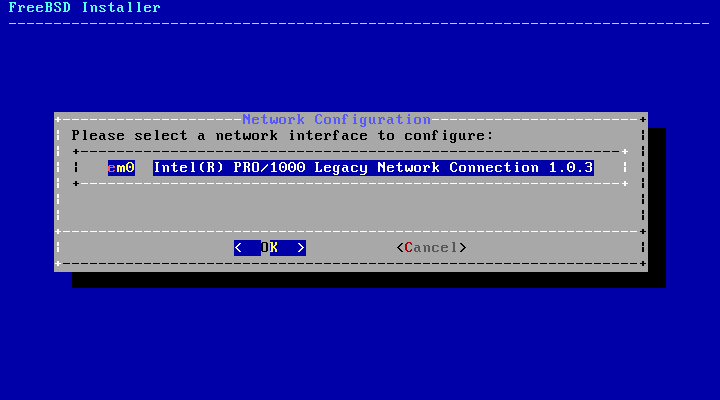
A list of all the network interfaces found on the computer is shown next. Select one to be configured.
3.9.2.1 Configuring a Wireless Network Interface
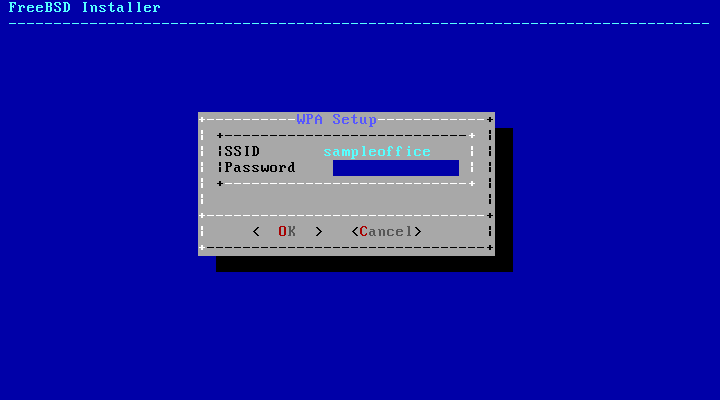
If a wireless network interface is chosen, wireless identification and security parameters must be entered to allow it to connect to the network.
Wireless networks are identified by a Service Set Identifier, or SSID. The SSID is a short, unique name given to each network.
Most wireless networks encrypt transmitted data to protect information from unauthorized viewing. WPA2 encryption is strongly recommended. Older encryption types, like WEP, offer very little security.
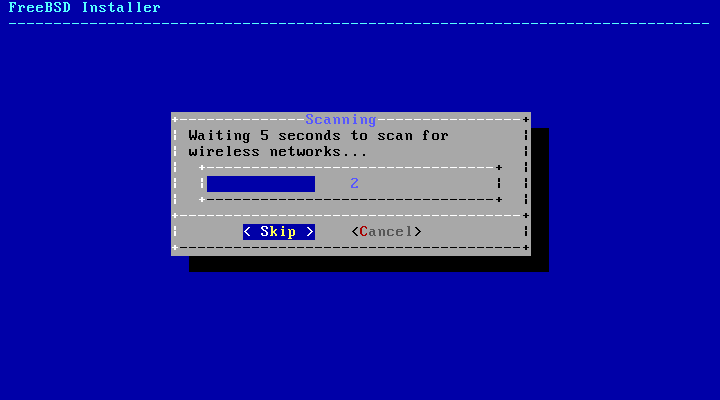
The first step in connecting to a wireless network is to scan for wireless access points.
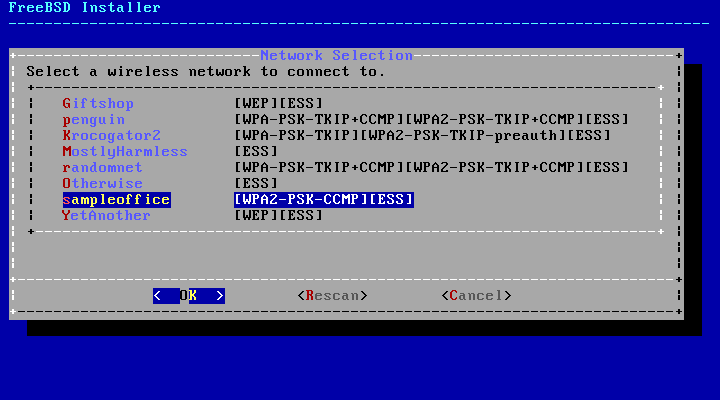
SSIDs found during the scan are listed, followed by a description of the encryption types available for that network. If the desired SSID doesn't appear in the list, select [ Rescan ] to scan again. If the desired network still does not appear, check for problems with antenna connections or try moving the computer closer to the access point. Rescan after each change is made.
The encryption information for connecting to the selected wireless network is entered after selecting the network. With WPA2, only a password (also known as the Pre-Shared Key, or PSK) is needed. Characters typed into the input box are shown as asterisks for security.
Network configuration continues after selection of the wireless network and entry of the connection information.
3.9.2.2 Configuring IPv4 Networking
Choose whether IPv4 networking is to be used. This is the most common type of network connection.

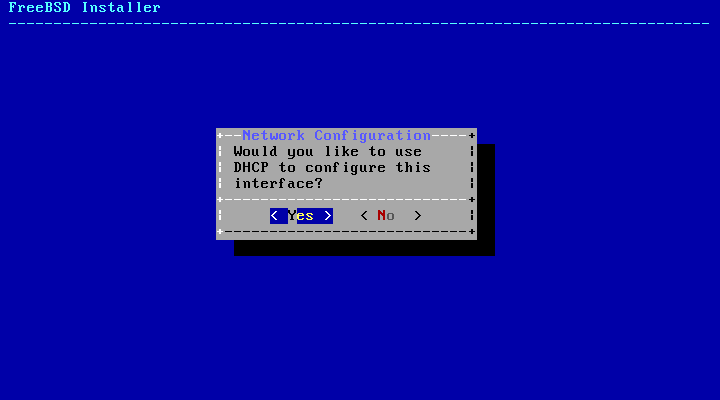
There are two methods of IPv4 configuration. DHCP will automatically configure the network interface correctly, and is the preferred method. Static configuration requires manual entry of network information.
Note: Do not enter random network information, as it will not work. Obtain the information shown in Section 3.3.3 from the network administrator or service provider.
3.9.2.2.1 IPv4 DHCP Network Configuration
If a DHCP server is available, select [ Yes ] to automatically configure the network interface.
3.9.2.2.2 IPv4 Static Network Configuration
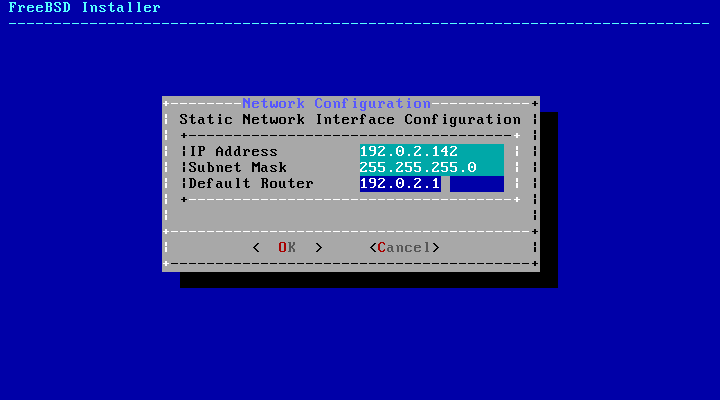
Static configuration of the network interface requires entry of some IPv4 information.
-
IP Address - The manually-assigned IPv4 address to be assigned to this computer. This address must be unique and not already in use by another piece of equipment on the local network.
-
Subnet Mask - The subnet mask used for the local network. Typically, this is 255.255.255.0.
-
Default Router - The IP address of the default router on this network. Usually this is the address of the router or other network equipment that connects the local network to the Internet. Also known as the default gateway.
3.9.2.3 Configuring IPv6 Networking
IPv6 is a newer method of network configuration. If IPv6 is available and desired, choose [ Yes ] to select it.

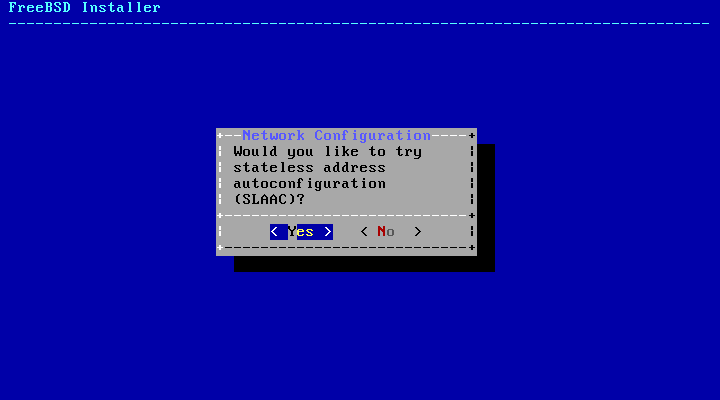
IPv6 also has two methods of configuration. SLAAC , or StateLess Address AutoConfiguration, will automatically configure the network interface correctly. Static configuration requires manual entry of network information.
3.9.2.3.1 IPv6 Stateless Address Autoconfiguration
SLAAC allows an IPv6 network component to request autoconfiguration information from a local router. See RFC4862 for more information.
3.9.2.3.2 IPv6 Static Network Configuration
Static configuration of the network interface requires entry of the IPv6 configuration information.
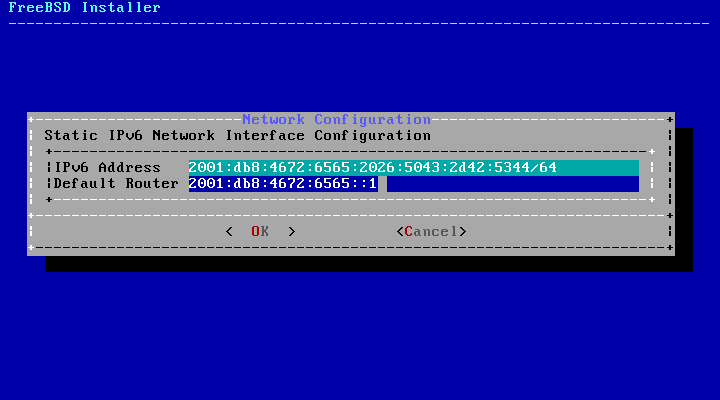
-
IPv6 Address - The manually-assigned IP address to be assigned to this computer. This address must be unique and not already in use by another piece of equipment on the local network.
-
Default Router - The IPv6 address of the default router on this network. Usually this is the address of the router or other network equipment that connects the local network to the Internet. Also known as the default gateway.
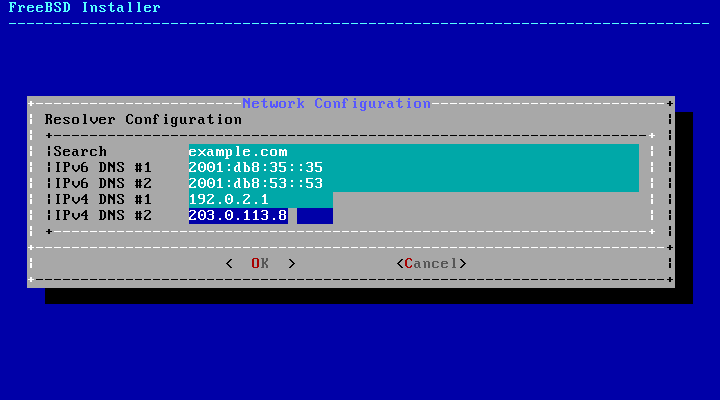
3.9.2.4 Configuring DNS
The Domain Name System (or DNS) Resolver converts hostnames to and from network addresses. If DHCP or SLAAC was used to autoconfigure the network interface, the Resolver Configuration values may already be present. Otherwise, enter the local network's domain name in the Search field. DNS #1 and DNS #2 are the IP addresses for the local DNS servers. At least one DNS server is required.
3.9.3 Setting the Time Zone
Setting the time zone for your machine will allow it to automatically correct for any regional time changes and perform other time zone related functions properly.
The example shown is for a machine located in the Eastern time zone of the United States. Your selections will vary according to your geographical location.

Select [ Yes ] or [ No ] according to how the machine's clock is configured and press Enter. If you don't know whether the system uses UTC or local time, select [ No ] to choose the more commonly-used local time.
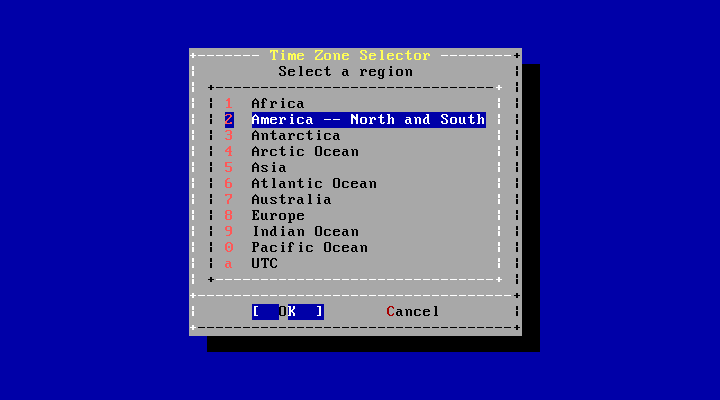
The appropriate region is selected using the arrow keys and then pressing Enter.
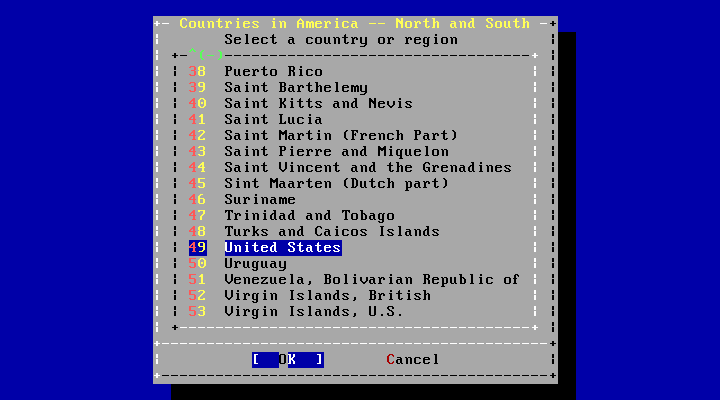
Select the appropriate country using the arrow keys and press Enter.
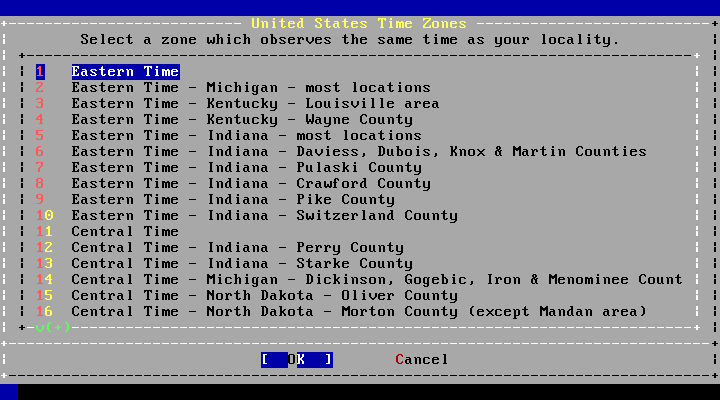
The appropriate time zone is selected using the arrow keys and pressing Enter.
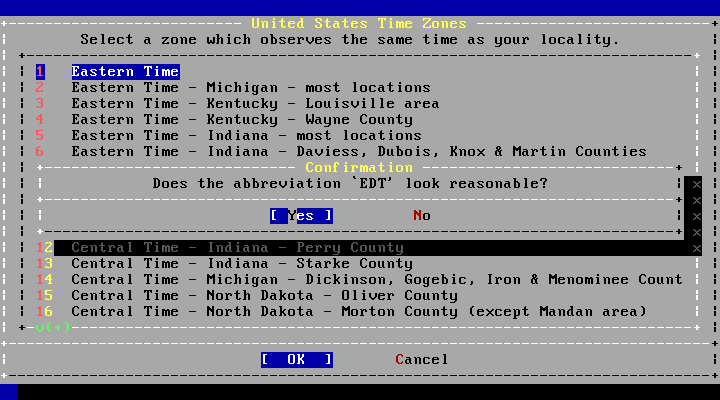
Confirm the abbreviation for the time zone is correct. If it looks okay, press Enter to continue with the post-installation configuration.
3.9.4 Selecting Services to Enable
Additional system services which will be started at boot can be enabled. All of these services are optional.

Additional Services
-
sshd - Secure Shell (SSH) daemon for secure remote access.
-
moused - Provides mouse usage within the system console.
-
ntpd - Network Time Protocol (NTP) daemon for automatic clock synchronization.
-
powerd - System power control utility for power control and energy saving.
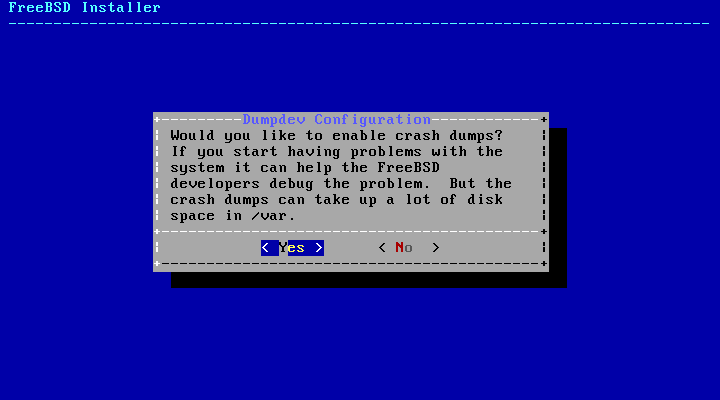
3.9.5 Enabling Crash Dumps
bsdinstall will prompt if crash dumps should be enabled on the target system. Enabling crash dumps can be very useful in debugging issues with the system, so users are encouraged to enable crash dumps whenever possible. Select [ Yes ] to enable crash dumps, or [ No ] to proceed without crash dumps enabled.
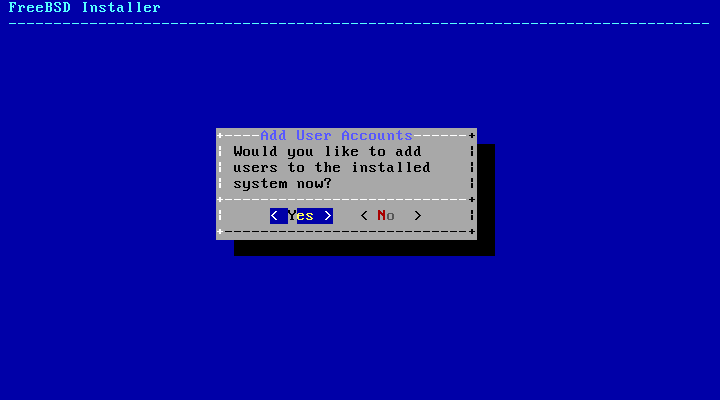
3.9.6 Add Users
Adding at least one user during the installation allows the system to be used without being logged in as root. When logged in as root, there are essentially no limits or protection on what can be done. Logging in as a normal user is safer and more secure.
Select [ Yes ] to add new users.
Enter the information for the user to be added.
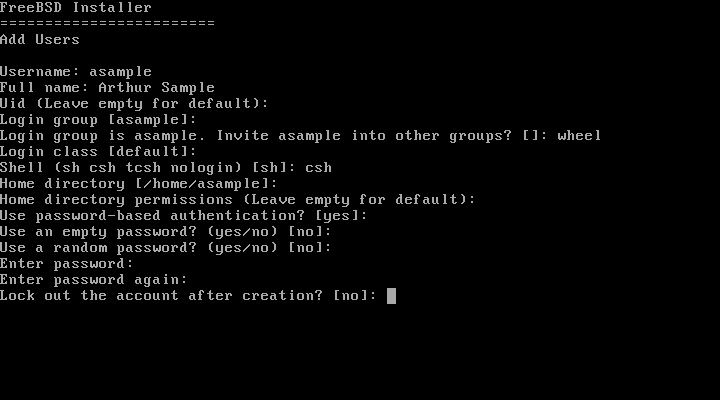
User Information
-
Username - The name the user will enter to log in. Typically the first letter of their first name combined with their last name.
-
Full name - The user's full name.
-
Uid - User ID. Typically, this is left blank so the system will assign a value.
-
Login group - The user's group. Typically left blank to accept the default.
-
Invite user into other groups? - Additional groups to which the user will be added as a member.
-
Login class - Typically left blank for the default.
-
Shell - The interactive shell for this user. In the example, csh(1) has been chosen.
-
Home directory - The user's home directory. The default is usually correct.
-
Home directory permissions - Permissions on the user's home directory. The default is usually correct.
-
Use password-based authentication? - Typically "yes".
-
Use an empty password? - Typically "no".
-
Use a random password? - Typically "no".
-
Enter password - The actual password for this user. Characters typed will not show on the screen.
-
Enter password again - The password must be typed again for verification.
-
Lock out the account after creation? - Typically "no".
After entering everything, a summary is shown, and the system asks if it is correct. If a mistake was made during entry, enter no and try again. If everything is correct, enter yes to create the new user.
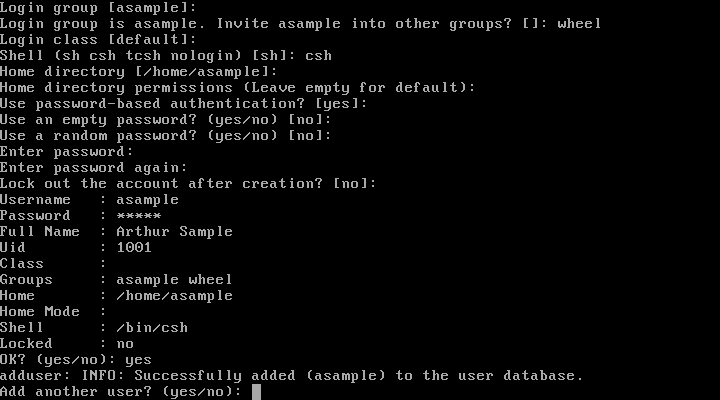
If there are more users to add, answer the "Add another user?" question with yes. Enter no to finish adding users and continue the installation.
For more information on adding users and user management, see Chapter 14.
3.9.7 Final Configuration
After everything has been installed and configured, a final chance is provided to modify settings.

Use this menu to make any changes or do any additional configuration before completing the installation.
Final Configuration Options
-
Add User - Described in Section 3.9.6.
-
Root Password - Described in Section 3.9.1.
-
Hostname - Described in Section 3.5.2.
-
Network - Described in Section 3.9.2.
-
Services - Described in Section 3.9.4.
-
Time Zone - Described in Section 3.9.3.
-
Handbook - Download and install the FreeBSD Handbook (which is what you are reading now).
After any final configuration is complete, select Exit to leave the installation.
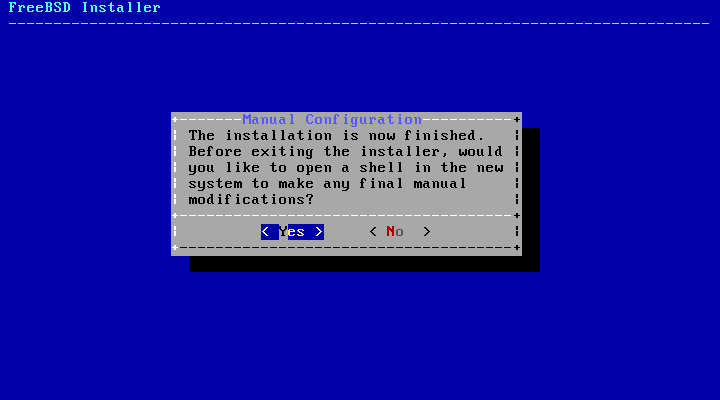
bsdinstall will prompt if there are any additional configuration that needs to be done before rebooting into the new system. Select [ Yes ] to exit to a shell within the new system, or [ No ] to proceed to the last step of the installation.
If further configuration or special setup is needed, selecting [ Live CD ] will boot the install media into Live CD mode.
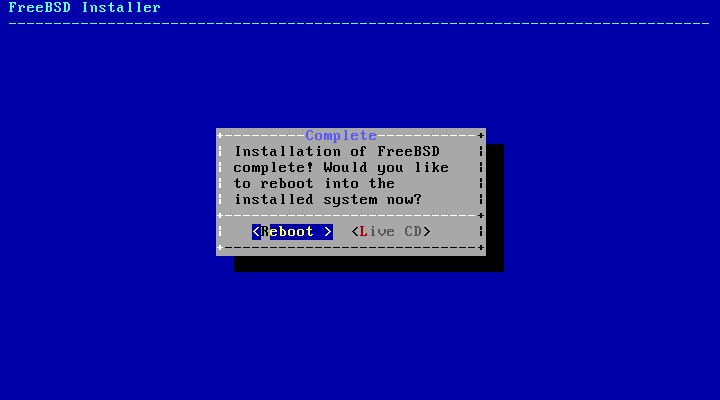
When the installation is complete, select [ Reboot ] to reboot the computer and start the new FreeBSD system. Don't forget to remove the FreeBSD install CD, DVD, or USB memory stick, or the computer may boot from it again.
3.9.8 FreeBSD Booting and Shutdown
3.9.8.1 FreeBSD/i386 Booting
As FreeBSD boots, many informational messages are displayed. Most will scroll off the screen; this is normal. After the system finishes booting, a login prompt is displayed. Messages that scrolled off the screen can be reviewed by pressing Scroll-Lock to turn on the scroll-back buffer. The PgUp, PgDn, and arrow keys can be used to scroll back through the messages. Pressing Scroll-Lock again unlocks the display and returns to the normal screen.
At the login: prompt, enter the username added during the installation, asample in the example. Avoid logging in as root except when necessary.
The scroll-back buffer examined above is limited in size, so not all of the messages may have been visible. After logging in, most of them can be seen from the command line by typing dmesg | less at the prompt. Press q to return to the command line after viewing.
Typical boot messages (version information omitted):
Copyright (c) 1992-2011 The FreeBSD Project.
Copyright (c) 1979, 1980, 1983, 1986, 1988, 1989, 1991, 1992, 1993, 1994
        The Regents of the University of California. All rights reserved.
FreeBSD is a registered trademark of The FreeBSD Foundation.

    root@farrell.cse.buffalo.edu:/usr/obj/usr/src/sys/GENERIC amd64
CPU: Intel(R) Core(TM)2 Duo CPU     E8400  @ 3.00GHz (3007.77-MHz K8-class CPU)
  Origin = "GenuineIntel"  Id = 0x10676  Family = 6  Model = 17  Stepping = 6
  Features=0x783fbff<FPU,VME,DE,PSE,TSC,MSR,PAE,MCE,CX8,APIC,SEP,MTRR,PGE,MCA,CMOV,PAT,PSE36,MMX,FXSR,SSE,SSE2>
  Features2=0x209<SSE3,MON,SSSE3>
  AMD Features=0x20100800<SYSCALL,NX,LM>
  AMD Features2=0x1<LAHF>
real memory  = 536805376 (511 MB)
avail memory = 491819008 (469 MB)
Event timer "LAPIC" quality 400
ACPI APIC Table: <VBOX   VBOXAPIC>
ioapic0: Changing APIC ID to 1
ioapic0 <Version 1.1> irqs 0-23 on motherboard
kbd1 at kbdmux0
acpi0: <VBOX VBOXXSDT> on motherboard
acpi0: Power Button (fixed)
acpi0: Sleep Button (fixed)
Timecounter "ACPI-fast" frequency 3579545 Hz quality 900
acpi_timer0: <32-bit timer at 3.579545MHz> port 0x4008-0x400b on acpi0
cpu0: <ACPI CPU> on acpi0
pcib0: <ACPI Host-PCI bridge> port 0xcf8-0xcff on acpi0
pci0: <ACPI PCI bus> on pcib0
isab0: <PCI-ISA bridge> at device 1.0 on pci0
isa0: <ISA bus> on isab0
atapci0: <Intel PIIX4 UDMA33 controller> port 0x1f0-0x1f7,0x3f6,0x170-0x177,0x376,0xd000-0xd00f at device 1.1 on pci0
ata0: <ATA channel 0> on atapci0
ata1: <ATA channel 1> on atapci0
vgapci0: <VGA-compatible display> mem 0xe0000000-0xe0ffffff irq 18 at device 2.0 on pci0
em0: <Intel(R) PRO/1000 Legacy Network Connection 1.0.3> port 0xd010-0xd017 mem 0xf0000000-0xf001ffff irq 19 at device 3.0 on pci0
em0: Ethernet address: 08:00:27:9f:e0:92
pci0: <base peripheral> at device 4.0 (no driver attached)
pcm0: <Intel ICH (82801AA)> port 0xd100-0xd1ff,0xd200-0xd23f irq 21 at device 5.0 on pci0
pcm0: <SigmaTel STAC9700/83/84 AC97 Codec>
ohci0: <OHCI (generic) USB controller> mem 0xf0804000-0xf0804fff irq 22 at device 6.0 on pci0
usbus0: <OHCI (generic) USB controller> on ohci0
pci0: <bridge> at device 7.0 (no driver attached)
acpi_acad0: <AC Adapter> on acpi0
atkbdc0: <Keyboard controller (i8042)> port 0x60,0x64 irq 1 on acpi0
atkbd0: <AT Keyboard> irq 1 on atkbdc0
kbd0 at atkbd0
atkbd0: [GIANT-LOCKED]
psm0: <PS/2 Mouse> irq 12 on atkbdc0
psm0: [GIANT-LOCKED]
psm0: model IntelliMouse Explorer, device ID 4
attimer0: <AT timer> port 0x40-0x43,0x50-0x53 on acpi0
Timecounter "i8254" frequency 1193182 Hz quality 0
Event timer "i8254" frequency 1193182 Hz quality 100
sc0: <System console> at flags 0x100 on isa0
sc0: VGA <16 virtual consoles, flags=0x300>
vga0: <Generic ISA VGA> at port 0x3c0-0x3df iomem 0xa0000-0xbffff on isa0
atrtc0: <AT realtime clock> at port 0x70 irq 8 on isa0
Event timer "RTC" frequency 32768 Hz quality 0
ppc0: cannot reserve I/O port range
Timecounters tick every 10.000 msec
pcm0: measured ac97 link rate at 485193 Hz
em0: link state changed to UP
usbus0: 12Mbps Full Speed USB v1.0
ugen0.1: <Apple> at usbus0
uhub0: <Apple OHCI root HUB, class 9/0, rev 1.00/1.00, addr 1> on usbus0
cd0 at ata1 bus 0 scbus1 target 0 lun 0
cd0: <VBOX CD-ROM 1.0> Removable CD-ROM SCSI-0 device
cd0: 33.300MB/s transfers (UDMA2, ATAPI 12bytes, PIO 65534bytes)
cd0: Attempt to query device size failed: NOT READY, Medium not present
ada0 at ata0 bus 0 scbus0 target 0 lun 0
ada0: <VBOX HARDDISK 1.0> ATA-6 device
ada0: 33.300MB/s transfers (UDMA2, PIO 65536bytes)
ada0: 12546MB (25694208 512 byte sectors: 16H 63S/T 16383C)
ada0: Previously was known as ad0
Timecounter "TSC" frequency 3007772192 Hz quality 800
Root mount waiting for: usbus0
uhub0: 8 ports with 8 removable, self powered
Trying to mount root from ufs:/dev/ada0p2 [rw]...
Setting hostuuid: 1848d7bf-e6a4-4ed4-b782-bd3f1685d551.
Setting hostid: 0xa03479b2.
Entropy harvesting: interrupts ethernet point_to_point kickstart.
Starting file system checks:
/dev/ada0p2: FILE SYSTEM CLEAN; SKIPPING CHECKS
/dev/ada0p2: clean, 2620402 free (714 frags, 327461 blocks, 0.0% fragmentation)
Mounting local file systems:.
vboxguest0 port 0xd020-0xd03f mem 0xf0400000-0xf07fffff,0xf0800000-0xf0803fff irq 20 at device 4.0 on pci0
vboxguest: loaded successfully
Setting hostname: machine3.example.com.
Starting Network: lo0 em0.
lo0: flags=8049<UP,LOOPBACK,RUNNING,MULTICAST> metric 0 mtu 16384
        options=3<RXCSUM,TXCSUM>
        inet6 ::1 prefixlen 128
        inet6 fe80::1%lo0 prefixlen 64 scopeid 0x3
        inet 127.0.0.1 netmask 0xff000000
        nd6 options=21<PERFORMNUD,AUTO_LINKLOCAL>
em0: flags=8843<UP,BROADCAST,RUNNING,SIMPLEX,MULTICAST> metric 0 mtu 1500
        options=9b<RXCSUM,TXCSUM,VLAN_MTU,VLAN_HWTAGGING,VLAN_HWCSUM>
        ether 08:00:27:9f:e0:92
        nd6 options=29<PERFORMNUD,IFDISABLED,AUTO_LINKLOCAL>
        media: Ethernet autoselect (1000baseT <full-duplex>)
        status: active
Starting devd.
Starting Network: usbus0.
DHCPREQUEST on em0 to 255.255.255.255 port 67
DHCPACK from 10.0.2.2
bound to 192.168.1.142 -- renewal in 43200 seconds.
add net ::ffff:0.0.0.0: gateway ::1
add net ::0.0.0.0: gateway ::1
add net fe80::: gateway ::1
add net ff02::: gateway ::1
ELF ldconfig path: /lib /usr/lib /usr/lib/compat /usr/local/lib
32-bit compatibility ldconfig path: /usr/lib32
Creating and/or trimming log files.
Starting syslogd.
No core dumps found.
Clearing /tmp (X related).
Updating motd:.
Configuring syscons: blanktime.
Generating public/private rsa1 key pair.
Your identification has been saved in /etc/ssh/ssh_host_key.
Your public key has been saved in /etc/ssh/ssh_host_key.pub.
The key fingerprint is:
10:a0:f5:af:93:ae:a3:1a:b2:bb:3c:35:d9:5a:b3:f3 root@machine3.example.com
The key's randomart image is:
+--[RSA1 1024]----+
|    o..          |
|   o . .         |
|  .   o          |
|       o         |
|    o   S        |
|   + + o         |
|o . + *          |
|o+ ..+ .         |
|==o..o+E         |
+-----------------+
Generating public/private dsa key pair.
Your identification has been saved in /etc/ssh/ssh_host_dsa_key.
Your public key has been saved in /etc/ssh/ssh_host_dsa_key.pub.
The key fingerprint is:
7e:1c:ce:dc:8a:3a:18:13:5b:34:b5:cf:d9:d1:47:b2 root@machine3.example.com
The key's randomart image is:
+--[ DSA 1024]----+
|       ..     . .|
|      o  .   . + |
|     . ..   . E .|
|    . .  o o . . |
|     +  S = .    |
|    +  . = o     |
|     +  . * .    |
|    . .  o .     |
|      .o. .      |
+-----------------+
Starting sshd.
Starting cron.
Starting background file system checks in 60 seconds.

Thu Oct  6 19:15:31 MDT 2011

FreeBSD/amd64 (machine3.example.com) (ttyv0)

login:
Generating the RSA and DSA keys may take some time on slower machines. This happens only on the initial boot-up of a new installation, and only if sshd is set to start automatically. Subsequent boots will be faster.
FreeBSD does not install graphical environments by default, but many are available. See Chapter 6 for more information.
3.9.9 FreeBSD Shutdown
Proper shutdown of a FreeBSD computer helps protect data and even hardware from damage. Do not just turn off the power. If the user is a member of the wheel group, become the superuser by typing su at the command line and entering the root password. Otherwise, log in as root and use shutdown -p now. The system will close down cleanly and turn itself off.
The Ctrl+Alt+Del key combination can be used to reboot the system, but is not recommended during normal operation.