Posts Tagged ‘slack’

How to fix clock on Slackware / Slackware and this old incorrect BIOS time troubles

Friday, February 24th, 2012

There two main reasons which cause incorrect clock settings on Slackware Linux.
One common reason for incorrectly set time is improper clock and timezone settings during Slackware install.

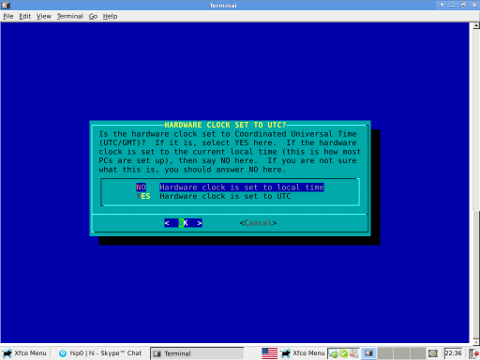
On install, one of the ncruses install menus asks an ambigious dialog question reading

HARDWARE CLOCK SET TO UTC?
Is the hardware clock set to Coordinated Universal Time (UTC/GMT)?

Some newbie Slackware users make the mistake to choose YES here, resulting in incorrectly set clock.

Second possibility for improper time is incorrect time on BIOS level. This is not so common among laptop and modern desktop PCs. However in the past impoper system BIOS hardware clock was usual.
In any case it is a good practice to check the system PC BIOS clock settings.

To check BIOS battery hardware clock from command line use:

bash-4.1# hwclock --show
Fri 24 Feb 2012 01:24:18 AM EET -0.469279 seconds

The system clock on Slackware is set via a script called timeconfig. To fix slack's incorrect host time run:

bash-4.1# timeconfig

Slackware Linux timeconfig set to UTC ncurses dialog clock setting

Slackware Linux timeConfig Country Selection dialog

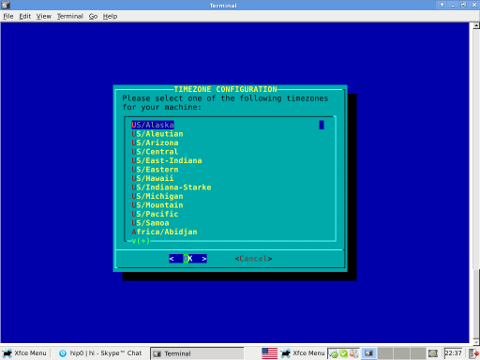
Running timeconfig once should configure a proper timezone to be set on next system reboot, however the system time will probably still be not ok.
To manually set time to right time, use date command. To set manually the system wide time to 12:00:00 with date:

bash-4.1# date -s "12:00:00"

Anyways for time accuracy the ntpdate should be used to feth time from NTP internet time server:

bash-4.1# ntpdate time.nist.gov
...

Finally to make the new set right time permanent also for the BIOS battery clock issue:

bash-4.1# hwclock --systohc

By the way its curious fact Slackware Linux is the oldest still existent GNU / Linux based distribution. Its up and running since the very day GNU and Linux came to merge at one Free OS 😉

How to make screenshots on Slackware Linux with XFCE graphical environment

Thursday, February 23rd, 2012

1. Install the slackware binary package xfce4-screenshooter.

For the latest Slackware Linux release which as of time of writting is 13.37 xfce4-screenshooter-1.7.9-i486-3sl.txz can be download from here

Install of xfce4-screenshooter-1.7.9-i486-3sl.txz is done with slackware's usual installpkg package manager command:

bash-4.1# /sbin/installpkg xfce4-screenshooter-1.7.9-i486-3sl.txz

By the way, I haven't used slackware for a long time so in the mean time since Slackware 13, the default slackware packages format .tgz is now substituted with the newer .txz (better compressed .txz). The old .tgz was simply a tar archive with DEFLATE gzip. The newer .txz packages bundled with newer slackware releases are using the LZMA2 (XZ) chain algorithm for compression. LZMA implies higher compression than even bzip2 and this is the reason why Patrick Volkerding – the one man army man behind Slackware decided to use it.
The reason Vollerding choose using .txz is slackware network distribution will load up less the networks and will take less time for downloading extra slackware packages via the internet. The .txz also reduces slackware main CD size so more packages can be contained in the same 700MB sized slack install CD.

Anyways now back to the installation of xfce-screenshooter.

Once installed to runit use the Xfce menus:

Xfce Menu -> Accesories -> Screenshot

Next you will see the xfce-screenshooter program to pop-up:

To take a snapshot of the screen use:

Entire Screen -> Save

XFCE screenshooter Slackware Linux take a screenshot dialog

XFCE screenshooter Slackware Linux action Save