Posts Tagged ‘ms windows’

Saving multiple passwords in Linux with Revelation and Keepass2 – Keeping track of multiple passwords

Thursday, October 17th, 2013

System Administrators who use MS Windows to access multiple hosts in big companies like HP or IBM certainly use some kind of multiple password manager like PasswordSafe.

Keep multiple passwords safe in Microsoft Windows 7 passwordsafe with masterpassword

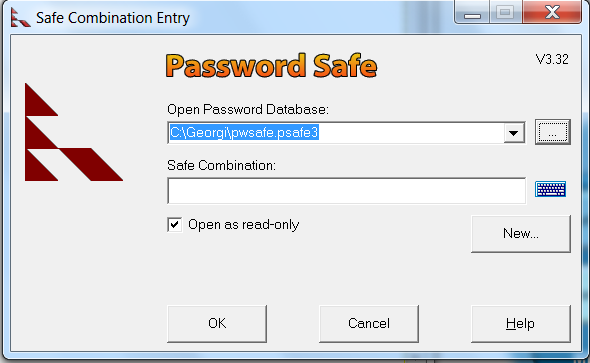
When number of passwords you have to keep in mind grows significantly using something like PasswordSafe becomes mandatory. Same is valid also for valid for system administrators who use GNU / Linux as a Desktop environment to administer thousands or hundreds of servers. I'm one of those admins who for years use Linux and until recently I kept logging all my passwords in separate directory full with text files created with vim (text editor). As the number of passwords and accesses to servers and web interfaces grow up dramatically as well as my requirement for security raised up I wanted to have my passwords secured being kept encrypted on my hard drive. For those who never use PasswordSafe the idea of program is to store all passwords you have in encrypted database which can be only opened through PasswordSafe by providing a master password.

passwordsafe on microsoft windows keep in order multiple passwords manager

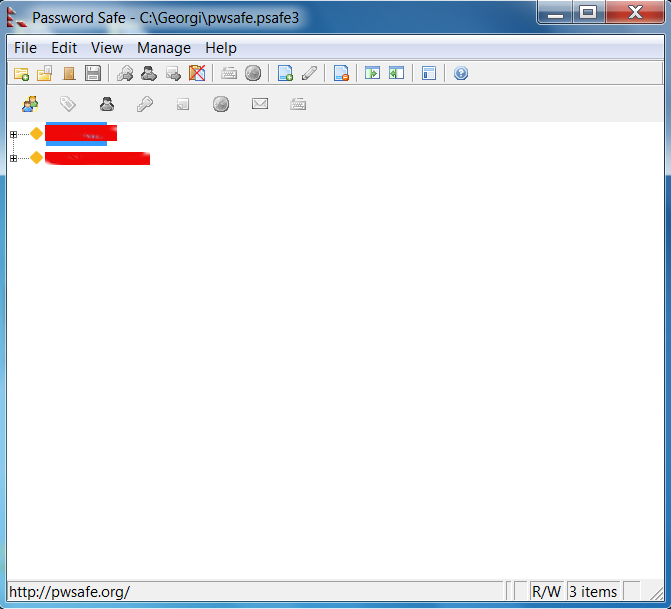
Of course having one master password imposes other security risks as someone who knows the MasterPass can easily access all your passwords anyways for now such level of security perfectly fits my needs.

PasswordSafe is since recently Open Source so there is a Linux port, but the port is still in beta and though I tried hard to install it using provided .deb binaries as well as compile from source, I finally give it up. And decided to review what kind of password managers are available in Debian Wheezy's ports.

Here are those I found with;

apt-cache search password|grep -i manager

cpm – Curses based password manager using PGP-encryption
fpm2 – password manager with GTK+ 2.x GUI
gringotts – secure password and data storage manager
kedpm – KED Password Manager
kedpm-gtk – KED Password Manager
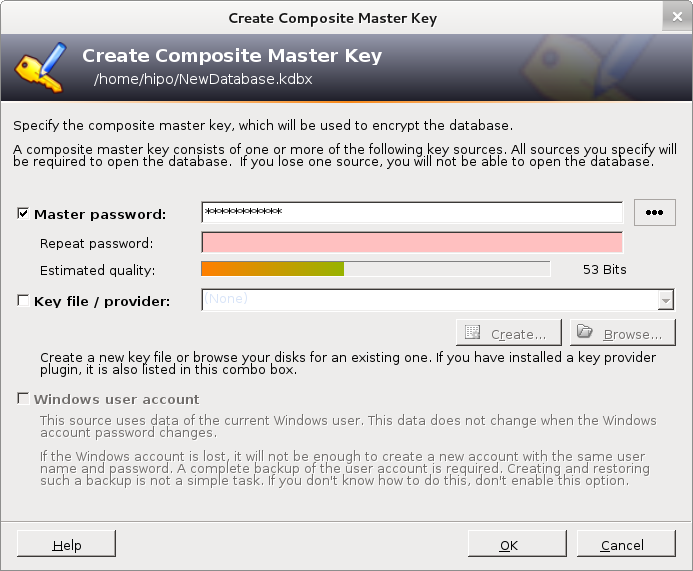
keepass2 – Password manager
keepassx – Cross Platform Password Manager
kwalletmanager – secure password wallet manager
password-gorilla – cross-platform password manager
revelation – GNOME2 Password manager

I didn't have the time to test each one of them, so I installed and checked only those which seemed more reliable, i.e.:
keepass2 and revelation

# apt-get install –yes fpm2 keepass2 revelation

Below is screenshot of each one of managers:

Revelation Linux Gnome graphic password manager program

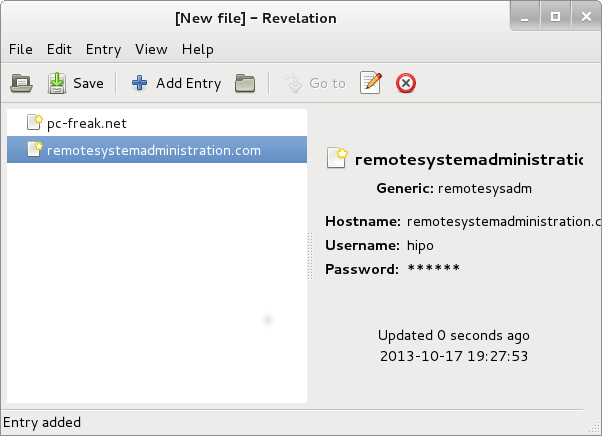
Revelation – GNOME Password Manager

keepass2 Linux gui password manager screenshot Debian - graphic manager for storing passwords

kde password safe gui program Linux Debian screenshot

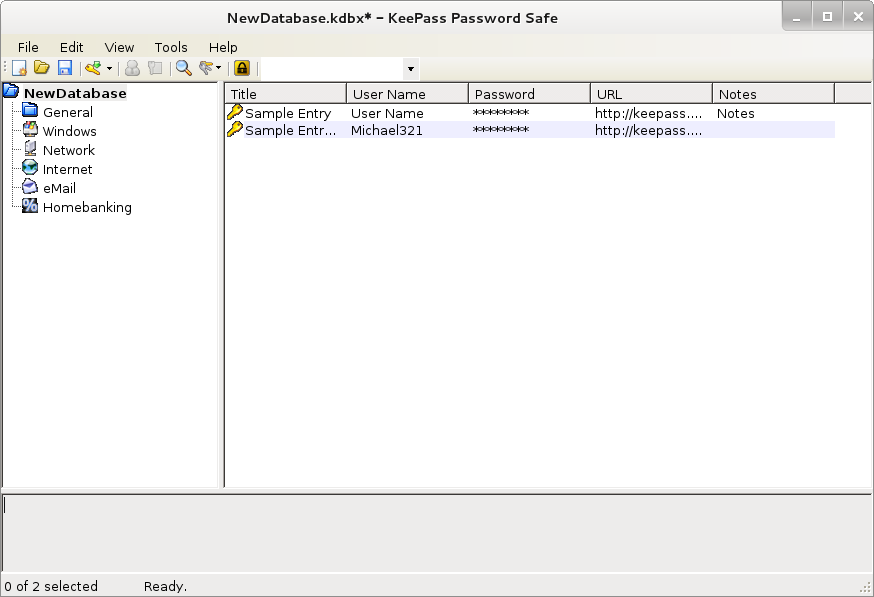
KDE QT Interface Linux GUI Password Manager (KeePass2)

With one of this tools admin's life is much easier as you don't have to get crazy and remember thousands of passwords.
Hope this helps some admin out there! Enjoy ! 🙂
 

How to install VirtualBox Virtual Machine to run Windows XP on Ubuntu Linux (11.10)

Tuesday, January 17th, 2012

Enable_VirtualBox_Windows_XP-fullscreen-with-vboxguest-additions-iso
My beloved sister was complaining games were failing to properly be played with wine emulator , therefore I decided to be kind and help her by installing a Windows XP to run inside a Virtual Machine.My previous install experiments with running MS Windows XP on Linux was on Debian using QEMU virtualmachine emulator.
However as Qemu is a bit less interactive and slower virtualmachine for running Windows (though I prefer it for being completely free software), this time I decided to install the Windows OS with Virtualbox.

My hope was using VirtualBox would be a way easier but I was wrong… I've faced few troubles and I thought many people who initially try to install Virtualbox VM to run Windows on Ubuntu and other Debian based Linux distros will probably experience the same problems as mine, so here is how this article was born.

Here is what I did to have a VirtualBox OS emulator to run Windows XP SP2 on Ubuntu 11.10 Linux

1. Install Virtualbox required packages with apt

root@ubuntu:~# apt-get install virtualbox virtualbox-dkms virtualbox-guest-dkms root@ubuntu:~# apt-get install virtualbox-ose-dkms virtualbox-guest-utils virtualbox-guest-x11
...

If you prefer more GUI or lazy to type commands, the Software Package Manager can also be used to straight install the same packages.
virtualbox-dkms virtualbox-guest-dkms packages are the two which are absolutely necessery in order to enable VirtualBox to support installing Microsoft Windows XP. DKMS modules are also necessery to be able to emulate some other proprietary (non-free) operating systems.
The DKMS packages provide a source for building Vbox guest (OS) additional kernel modules. They also require the kernel source to be install otherwise they fail to compile.

Failing to build the DKMS modules will give you error every time you try to create new VirtualMachine container for installing a fresh Windows XP.
The error happens if the two packages do not properly build the vboxdrv extra Vbox kernel module while the Windows XP installer is loaded from a CD or ISO. The error to pop up is:

Kernel driver not installed (rc=-1908)

The VirtualBox Linux kernel driver (vboxdrv) is either not loaded or there is a permission problem with /dev/vboxdrv. Please reinstall the kernel module by executing

VirtualBox vboxdrv not loaded error Ubuntu Screen

To fix the error:

2. Install latest Kernel source that corresponds to your current kernel version

root@ubuntu:~# apt-get install linux-headers-`uname -r`
...

Next its necessery to rebuild the DKMS modules using dpkg-reconfigure:

3. Rebuild VirtualBox DKMS deb packages

root@ubuntu:~# dpkg-reconfigure virtualbox-dkms
...
root@ubuntu:~# dpkg-reconfigure virtualbox-guest-dkms
...
root@ubuntu:~# dpkg-reconfigure virtualbox-ose-dkms
...

Hopefully the copilation of vboxdrv kernel module should complete succesfully.
To test if all is fine just load the module:

4. Load vboxdrv virtualbox kernel module

root@ubuntu:~# modprobe vboxdrv
root@ubuntu:~#

If you get some error during loading, this means vboxdrv failed to properly compile, try read thoroughfully what the error is and fix it) ;).

As a next step the vboxdrv has to be set to load on every system boot.

5. Set vboxdrv to load on every Ubuntu boot

root@ubuntu:~# echo 'vboxdrv' >> /etc/modules

I am not sure if this step is required, it could be /etc/init.d/virtualbox init script automatically loads the module, anyways putting it to load on boot would do no harm, so better do it.

That's all now, you can launch VirtualBox and use the New button to initiate a new Virtual Machine, I will skip explaining how to do the configurations for a Windows XP as most of the configurations offered by default would simply work without any tampering.

After booting the Windows XP installer I simply followed the usual steps to install Windows and all went smoothly.
Below you see a screenshot showing the installed Windows XP Virtualbox saved VM session. The screenshot letters are in Bulgarian as my sisters default lanaguage for Ubuntu is bulgarian 😉

VirtualBox installed MS Windows VM screenshot

I hope this article helps someone out there. Please drop me a comment if you experience any troubles with it. Cya 🙂

Windows add to startUP / Make MS Windows XP / Vista / 7 and 8 to start program automatically on start-up

Monday, July 22nd, 2013

On Linux, it is quite easy to run programs on OS boot via /etc/rc.local.
For Linux admins like me who are not much into Windows, it is interesting How it is possible to make Application run on Windows boot?

Running Program auto on boot is precious, especially for running small custom written .BAT (batch scripts)
On Windows XP there is a Startup Folder. Anything placed in Startup folder launches whenever Windows start.

Windows XP open startup folder screenshot

  • Click on Start button -> All Programs, right mouse click on Startup folder -> Open.
  • Open Folder location that contains Program want to make start-up on Windows start.
  • Right-click Program and then click Create Shortcut. Newly created shortcut appears in same location as the original item.
  • Drag with Mouse new shortcut into the Startup folder.

Alternative way to reach Windows  Start-Up (on Windows XP) is via C:\Users\Documents and Settings\All Users\Start Menu\Programs

Windows XP Start menu programs start up

To remove already, scheduled program to start, just remove it from Startup Folder or run in command prompt Start -> run (cmd.exe) ->

msconfig

And from StartUp tab, remove tick from Program you'd like to disable:

Alter Remove from Windows XP Startup Programs

On Windows Vista / 7 Add / Remove Program on Start-up is done also from:
Control Panel -> Program -> Change Startup Programs

Control Panel Programs Add / Remove Programs on Windows Vista / 7 Start-up

On Windows 8 to add / remove Programs to Startup (press Ctrl+C) in Run box that appears run:

%APPDATA%\Microsoft\Windows\Start Menu\Programs\Startup

run command for start up program add Remove Microsoft Windows 8

Then just like on XP, create shortcut and Paste Shortcut linked to program to run on Win Start

That's all you have to do on Next Windows Startup-up Program will automatically run.
Following same logic it is possible to make Word DOC / .TXT / PDF / Mp3 / Movie run automatically on Windows boot. Enjoy 🙂

P.S. Dear Windows Admin Gurus, I'm sorry if this article was too boring, please accept my kind apologies if so:)

SumatraPDF Adobe Acrobat Reader free software ( Secure ) Alternative

Friday, July 19th, 2013

Whether you're forced to use MS Windows but still want to use as much as possible Free Software – i.e. Stay away from Non-Free Adobe Acrobat Reader. There is Sumatra PDF – a good alternative that reads well most of PDFs. For rendering PDF Sumatra PDF usees muPDF library. SumatraPDF is minimalistic software it does exactly what it is meant for – reads PDF. Unfortunately from version 0.6 of Sumatra there is DRM implemented (Digital Right Managements) so it is not possible to copy from DRM-ed documents.
Sumatra opens  following formats: Open XML Paper Specification, DjVu, EPUB, XPS, CHM, CBZ and CBR, and MOBI files.
As of  time of writting official Sumatra PDF version is at ver. 2.3.2

sumatra pdfafter install thank you screenshot

I've made mirror of Sumatra PDF 2.3.2 installer here , Sumatra PDF zipped is here

Sumatra pdf reader screenshot ms windows 7
Sumatra PDF works on Windows XP, Vista, Win 7 & 7

  One of key advantages of Sumatra PDF over Adobe Acrobat Reader is you don't need to update it all the time and it is much less likely that Sumatra PDF is hit by security flaw in PDF format. 

For people who use Linux / BSD or some other Unix and want to stay free from proprietary Adobe Acrobat Reader two nice alternatives are default's GNOME PDF reader Evince and KDE's Okular

Teracopy faster Windows copy or Save files from Windows PC with dying hard drive

Wednesday, July 3rd, 2013

TeraCopy logo copy files faster and prevent windows hangs up on broken hard disks
My sysadmin colleague mentioned today about TeraCopy. An application for Microsoft Windows designed to be used to Move or Copy  files. So why would one want to use Teracopy instead of normal Windows Explorer copy integrated soft? Reason is Teracopy is faster than MS Windows Copy / Move and uses dynamically adjusted buffers to reduce seek times. This asynchronous copying speeds up file transfers between physical HDDs.

More precious feature of TeraCopy is whether you have to Save data from hard disks with Bad Sectors, it can skip faulty files (stored on bad sectors) without triggering Windows to hang up or halt with the Blue Screen of Death.TeraCopy even can be setup to replace Windows Explorer (i.e. Shell Integration copy and move functions). Beside that it works well with Unicode encoded file names (Cyrillic, Chineese) etc.

Teracopy copying files on Microsoft windows 7 substitutes default windows copy and move opeartions

As of time of writting article, TeraCopy has support for all Windows NT (Windows XP / 2000) as well as for Windows 7 and 8. Whether a failure to copy file occurs it tries to recopy file several times in order to achieve copy success. After each file is copied a CRC check up value of file is calculated and matched. It also provides a way more verbose information on copied files than Windows default Copy. It is very useful in copying large files from system to system as file transfers complete time is significantly lower

teracopy with more information on copying files screenshot MS Windows

Once TeraCopy is installed it automatically does replace Explorer Copy and Move functions, hence after install every next Move or Copy operation is auto handled by it. In preferences the user could still revert back Copy / Move functions to Explorer original.

TeraCopy copy faster files and save files from broken win hdd preferences screenshot

Unfortunately TeraCopy is not-free software but freeware and can only be used to non-commercial use, for commercial use you have to purchase TeraCopy Pro version.

Remote Desktop client – Remmina, Connect Remote to MS Windows VNC hosts from Linux

Friday, May 31st, 2013

remmina remote connet to windows linux vnc client logo

If you're system administrator, who use Linux as Desktop. You surely want to check out Remmina – The GTK+ Remote Desktop Client.

As far as I tested among all VNC Linux clients I know Remmina is definitely the one of choice in terms of Interface simplicity / stability and remote connection level of responsibility.

Before finding out about Remmina existence, I tried xtightvncviewer, xvnc4viewer, gvncviewer, gtkvncviewer. xtightvncviewer, xvncviewer and gvncviewer are more for console geeks and hence either they lack GUI interface or user interface looks terrible.

GTKVncViewer's interface is also not bad but still not со nice as Remmina's.

gtkvncviewer Debian GNU Linux Wheezy screenshot Linux VNC simple client

As you see in above shot, gtkvncviewer lacks any configuration. The only thing it can do is connect to remote host and you have option to configure nothing related how remote connection will respond, what type of Resolution to use etc.

I know of of no other Linux VNC Clients that has configurability and GUI interface of Remmina.


As of time of writting Remmina is at stable version 1.0 and supports following Remote connection protocols:

  • VNC
  • VNC
  • RDP
  • RDPF
  • RDPS
  • SFTP
  • SSH

Remmina is available across mostly all Linux mainstream distributions:

To install Remmina on Debian / Ubuntu and deb derivatives:

debian:~# apt-get –yes install remmina
….

On Redhats (Fedora, CentOS, RHEL – RPM based Linuxes) install via:

[root@centos ~]# yum –yes install remmina

Below are few screenshots of Remmina:

Remmina Linux remote vnc connect best software gui frontend screenshot

Linux VNC best VNC connect tool Remmina preferences screenshot

One of best Remmina feature is it supports Tabbing just like in Firefox. You can open a number of Remote VNC connects to different Windows hosts and manage them all by switching from tab to tab.

Remmina best vnc linux desktop client screenshot with tabs / What is best VNC client for Linux

Tools for finding files containing a string (recursively) in Graphical Enviroments (GNOME, KDE and XFCE) on GNU linux and FreeBSD

Monday, April 9th, 2012

1. Finding files containing a specific string with GNOME GUI tool gnome-search-tool

Default installation of GNOME version 2.x and 3.x is equipped with a tool called gnome-search-tool. The tool is used by default in the GNOME's file explorer program Nautilus. The quickest way to look for a certain text string across all the files located in a directory and show them is with nautilus's – find manager.

Below is a screenshot showing the gnome-search-tool embedded in nautilus Screenshot Search for pass string in GNOME nautilus File browser

Nautilus find uses gnome-search-tool program for its file search. Below is a screenshot showing the gnome-search-tool embedded in nautilus:

The gnome-search-tool can be also invoked through Gnome Run Application with ALT+F2 or directly run from terminal e.g.:

hipo@noah:~$ gnome-search-tool

gnome-search-tool screenshot find files by content recursively Debian GNU / Linux

As you can see in below screenshot, gnome-search-tool has many available filter file search criterias.

gnome-search-tool available options screenshot Debian Linux

You see I wanted to look for my project passwords so typed in pass in Contains the text: field and pressed enter to simply look for this text in all my files in the look in folder RichtooRich
Screenshot 3 files found gnome search tool Linux screenshot

Actually gnome-search-tool offers plenty of more options than one might look for. With it one can easily make a combination of complex search critea (filters) and hence a very versatile Desktop file saerch tool. From testing it I can say it for sure more powerful program than MS Windows default file searching program called Find It – this is the program with the ( "dumb dog holing a magnifier" 🙂

One can use the Add or Remove to Add single or various combination of filter criterias. For the sake of testing it, I've added a number of file search filters as you see in the shot below:

Linux graphical program for recursive file search gnome-search-tool - file search example screenshot

The search critias are not matched and therefore 0 files were found.
In case if you wonder how gnome-search-tool works? It is actually a GUI wrapper to Linux's Linux find command .

I wasn't complete sure if it uses find for the file search, so to check I run a one search and in in console ran:
 

hipo@noah:~$ ps axuwf|grep -i find
hipo 18213 2.0 0.0 25568 1276 ? S 23:55 0:00 find /home/hipo/Richtoorich ( -iname * -o -iname .* ) ! -type p -exec grep -i -I -c test {} ; -mtime -1 ( -size 102400 -o -size +102400 ) -user root ! -iname *bad\-name\-to\-omit* -print

You can see the filters set in gnome-search-tool are passed as command arguments to find.

2. Finding files containing a string recursively in KDE with kfind

For KDE users there is a handy little tool called Kfind. Kfind is less "search customizable" if it is compared to gnome-search-tool but it has advantage that its search options are way more "user friendly" / human readable 🙂

To use the tool to look in all files for explicit string fill in Look in: or browse to set the main directory where it will look for the string.

Screenshot find content in multiple files and folders recursively kfind kde program
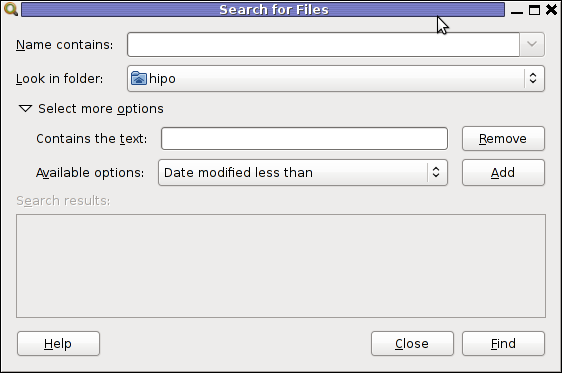
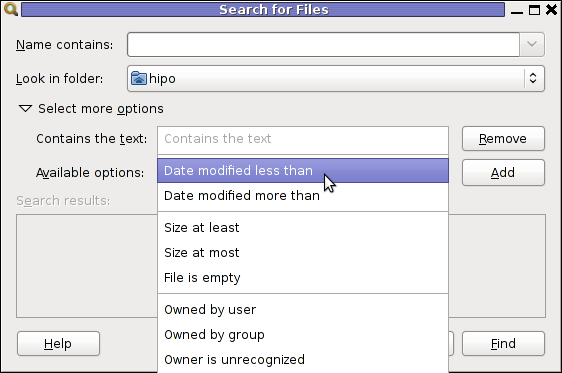
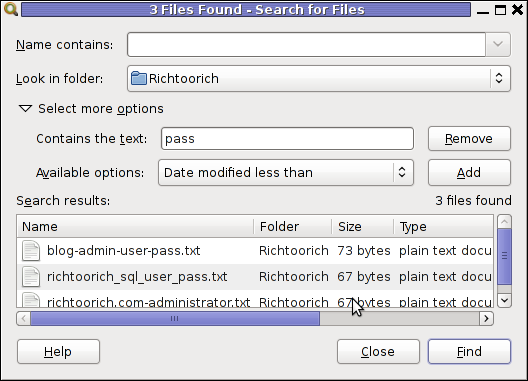
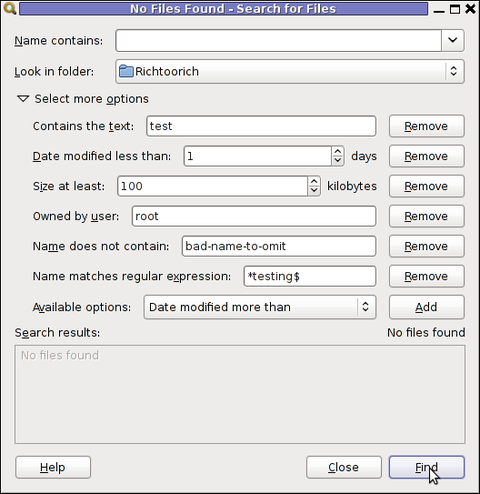
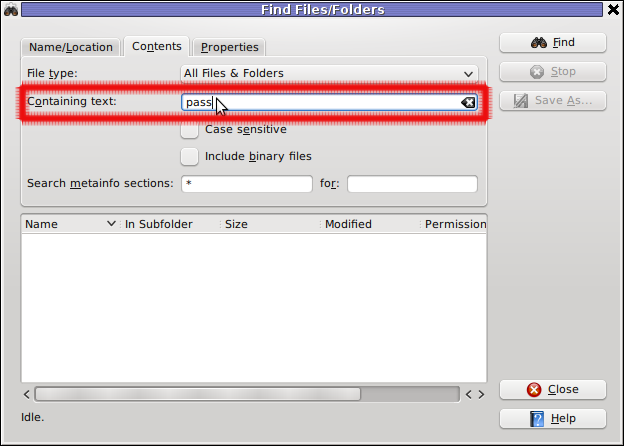
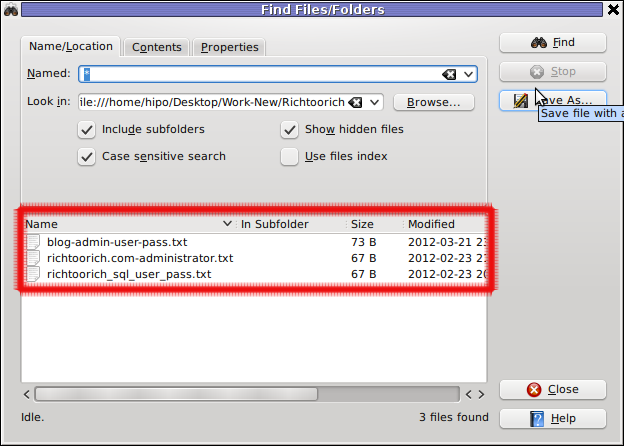
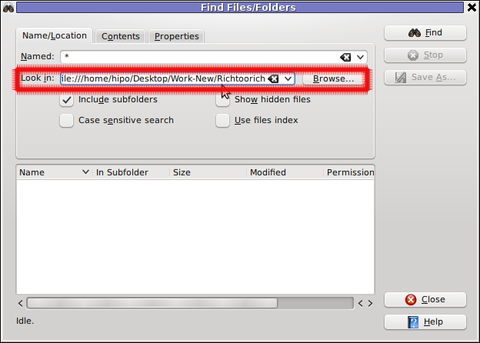
Then in the second Contents (tab) fill in the Containing Text: with the string to be looked for:

Kfind Recursive file search tool for Linux KDE graphic environment, input text field screenshot

Finally in the Names/Location tab, there are two other helpful search options – Show Hidden Files and Case Sensitive Search

Screenshot find content in multiple files and folders recursively kfind kde gui program

I'll be curious to hear if someone knows some other nice software easy and comprehensive to use for Linux / BSD. If you know a better file searcher for Linux than this kfind or gnome-search-tool please drop a comment.

How to make Print SysRQ keyboard key working on Slackware Linux’s XFCE

Saturday, March 17th, 2012

By default Slackware's XFCE, does not allow screenshot taking by simply pressing PrintScreen SysRQ, like is in most of the "more advanced" graphical environments (GNOME, KDE), MS-Windows 🙂 etc.

To have a key binding assinged to PrintScreen SysRQ key in XFCE, you will first need to have xfce4-screenshooter

I've earlier blogged on how to take screenshots on Slackware's XFCE by installing and using xfce4-screenshooter program , so I suggest you take a look at it.

After xfce4-screenshooter is installed start:

bash-4.1$ xfce4-keyboard-settings

XFCE4 keyboard settings window Slackware Linux screenshot

Further on go to:

Application Shortcuts (tab) -> Add

Type in the command prompt to appear xfce4-screenshooter and press the PrintScreen SysRQ keyboard button.
From now onwards pressing it will allow you to take screenshot like with GNOME's gnome-screenshot -i command.
Happy Screenshoting 😉