In system administration often we need to compare files located on a different servers, copying the files from Server A to Server B is easy to do but is time consuming as you have use some console ftp or sftp client scp or sftp to copy the files from server A to server B and then use diff command on one of the both systems.
Thanksfully there are other ways to do so by using simply one liner of diff + ssh or rsync + ssh and even for the vim lovers there is vimdiff.
In this short article I'll give few examples on quick ways to compare files between 2 Servers via SSH Protocol.
1. Compare files for differences on 2 Linux servers via SSH protocol
Assuming you're logged on first server where certain config is located and you want to compare with a remote server via ssh.
diff local-file <(ssh myServer 'cat remote-file')
If you're on a server and you want to compare file configurations between 2 remote servers both running ssh, generally you need something like:
diff <(ssh myServer1 'cat /etc/ssh/sshd_config') <(ssh myServer2 'cat /etc/ssh/sshd_config')
To compare multiple files in directories with diff
diff <(/usr/bin/ssh user1@192.168.122.1 'ls /opt/lib/') <(/usr/bin/ssh user2@192.168.122.1 'ls /tmp/') | grep -i ">" | sed 's/> //g'
2. Interactively check 2 or more config files and show differences in a vim text editor style
vimdiff package is not installed across all Linux distributions so on paranoid Security tightened Linux environments, but on most servers should be either there or could be installed with apt / yum whatever package manager. You will need vimdiff installed only on one of the Nth servers you want to check config.
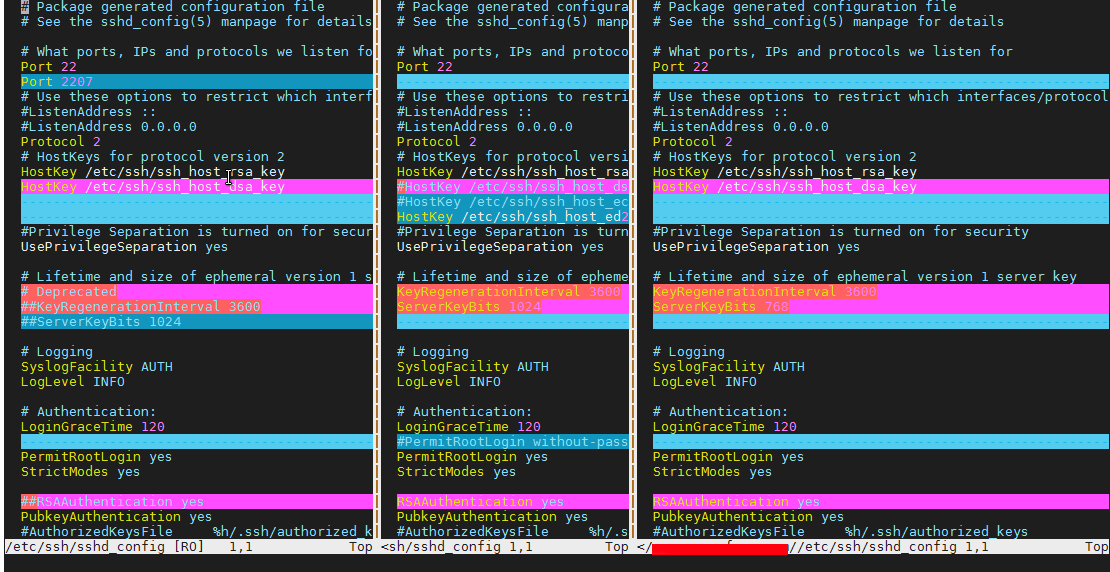
Here is how to compare 3 Linux servers, running OpenSSHD services existing files in vimdiff
vimdiff /path/to/file scp://remotehost//path/to/file scp://remotehost2//path/to/file
Note here that the double slash – // syntax is mandatory without it vimdiff will return files. Also be aware that the files you want to check should be present on each of the server directory locations, otherwise you will end up with weird errors.
vimdiff is the Mercedes of comparison especially for VIM UNIX addicts and due to its nice coloring makes reading, the difference between server files very easy.
3. File comparison with diff or vimdiff via SSHFS mount
mkdir remote_path
sshfs user@hostname:/dir/ remote_path
diff -r local_path/file remote_path/file
4. Comparing files with diff by printing local and remote server files with diff
Most servers doesn't have sshfs by default and for servers following PCI High Security standards, there are other means to compare files on both or more hosts in a minimalistic way, here is idea how:
diff <(ssh remote-host-server find /var/www -printf '"%8s %P\n"') \
<(find /var/www -printf '%8s %P\n')
5. Comparing files content on local and remote server directory with rsync
The best UNIX tool to compare mutliple files and directory across Local remote servers and a mixture of both is our lovely rsync
together wtih SSH, ssh compes with the –-dry-run (-n) – test what rsync will do option.
To compare files over SSH protocol with rsync on local and remote server
rsync -rvnc root@10.10.10.50:/var/www/html/phpcode /var/www/html/phpcode
To compare 2 remote hosts:
rsync -rvnc root@187.50.200.73:/var/www/html/phpcode/ root@192.168.5.50:/var/www/html/phpcode
To compare more hosts even a mixture of local and remote servers do.
rsync -rvnc root@187.50.200.73:/var/www/html/phpcode/ \
root@192.168.5.50:/var/www/html/phpcode \
root@192.168.5.70:/var/www/html/phpcode \
./var/www/html/phpcode
The rsync options given are as so:
r=recursive,
v=verbose,
n= dry-run,
c=checksum